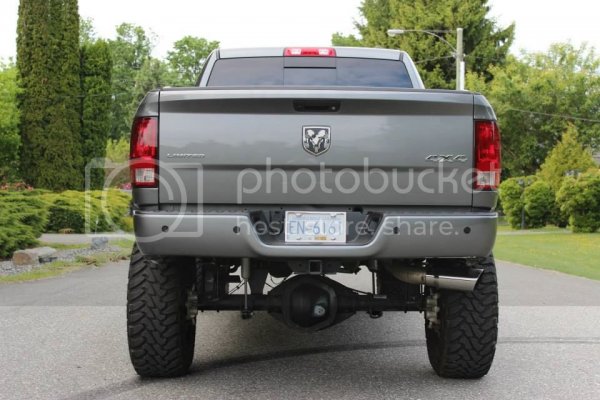
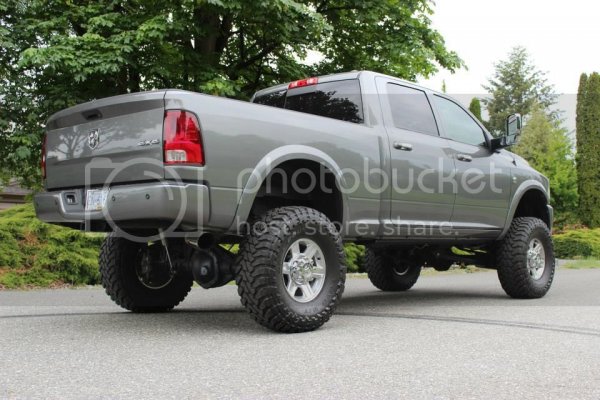
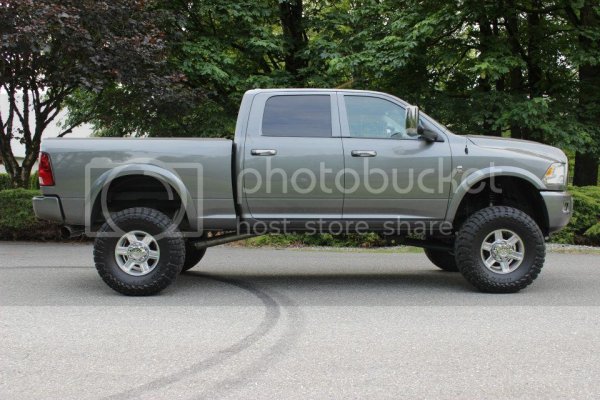
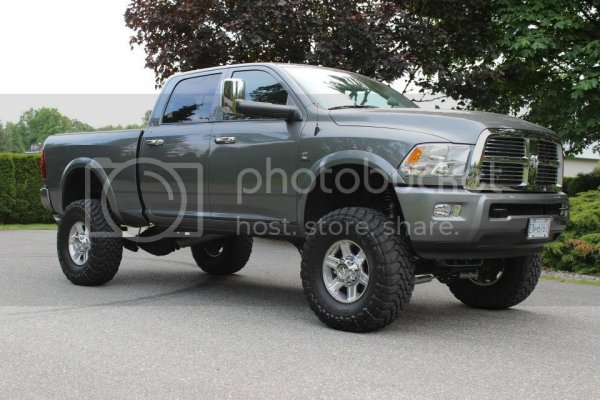
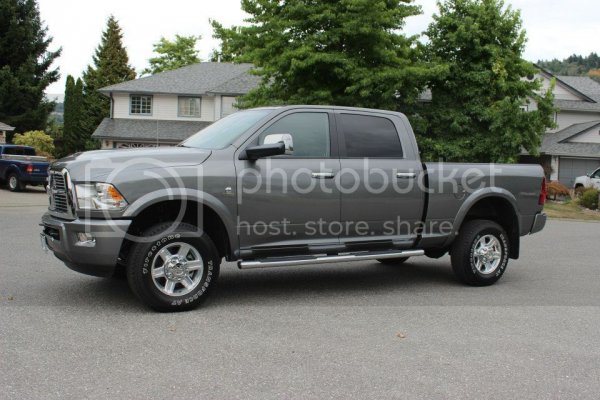
brandonjansen - 2012 Ram 3500 Laramie Limited Build Thread

Disclaimer: Links on this page pointing to Amazon, eBay and other sites may include affiliate code. If you click them and make a purchase, we may earn a small commission.

OP
OP
brandonjansen

brandonjansen

Senior Member
Joined
Feb 14, 2013
Posts
1,701
Reaction score
1,013
Location
Abbotsford, BC, Canada
Ram Year
2012 Ram 3500 Laramie Limited
Engine
6.7 Cummins - Tuned and Deleted
AMP Powersteps Installed – 2-10-14 - Post 1

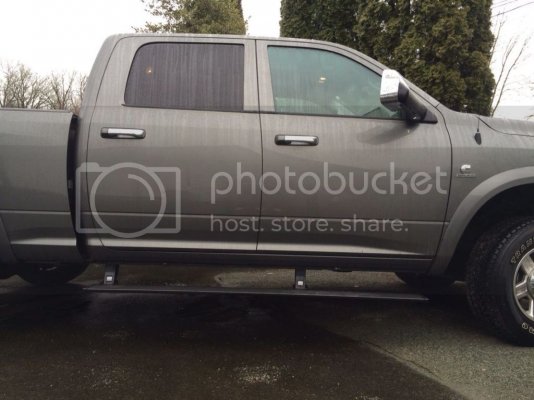
So I finally have another actual mod done to the truck that I can post up about. AMP Powersteps! I knew right from the get go that these would be going on the truck eventually simply because they'll be needed to get into the truck once it's 12 inches higher and I'm really not a fan of the look of running boards. So these steps are the perfect option.

Background:

I was originally going to buy the steps from Bully's Performance and had a price quote on them and was ready to order. But when how much the Canadian Dollar has dropped lately I figured it might be worth it to do a little research from Canadian dealers to see what kind of pricing I could get them for locally. I ended up finding a place in North Vancouver that had them in stock and could do them for only $10 more than what Bully's had quoted me. With that little bit of difference it literally saved me about $100 buying locally because of how low the dollar is right now. I definitely struggled with that decision since I love supporting Bully's Performance and dealing with those guys... but when we're getting into savings of $100 or more it just made sense to buy locally.​

Install:

Anyways... about the install. I picked these up Friday after work and had them on by Saturday evening. I had a lot of work to do before hand seeing as all my tools and garage equipment was still packed in a trailer from when we moved. So first thing was unloading the entire trailer to get all my stuff (yes my tool box was at the VERY front of the trailer). Once I got that done I started getting things set up in the new shop. For now I just brought enough stuff out there to get the steps on so it looks a little bear. We have some big plans for the shop yet but I won't get into that right now. If you want to know, ask about it and I'll answer in a separate post.
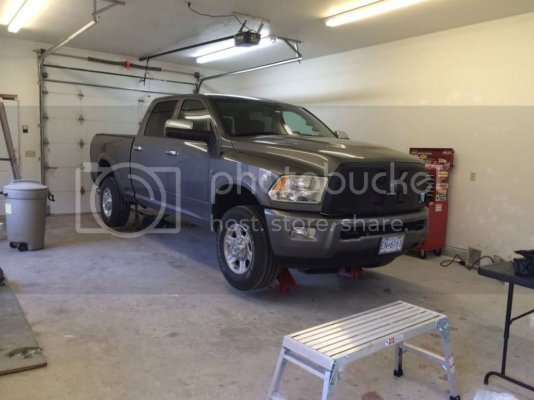
1913364_10151860503210064_227127540_o.jpg

I started by jacking the truck up as high as I could (obviously...) and then laid out everything on a table to make sure all the parts were there and to have easy access to them.
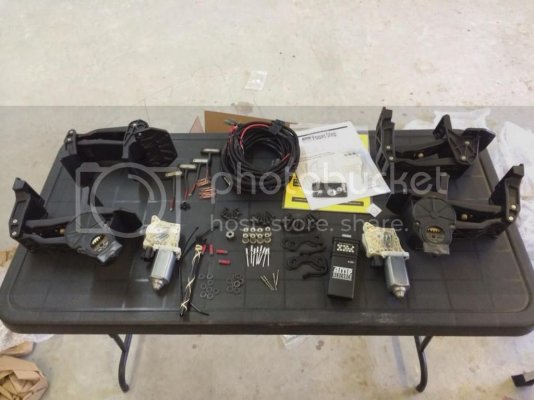
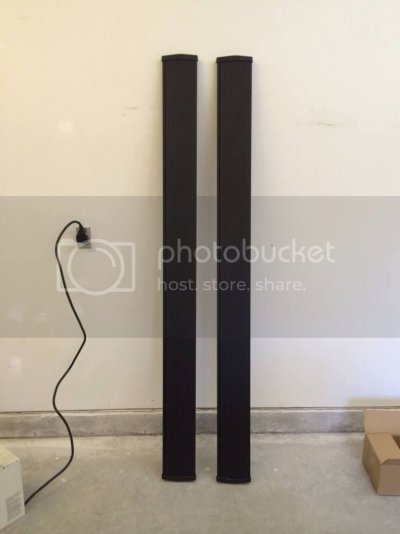
1891564_10151860503195064_2132595385_o.jpg
1913352_10151860503200064_1810587490_o.jpg

Because my truck came with factory steps on it the rivnuts were already installed in the front and back slots of the truck which reduced the amount of work I had to do slightly. However, since I plan on putting a BDS long arm lift on the truck fairly shortly I knew I needed to move the front bracket back far enough to clear the long arm bracket. I had done a bit of research online and watched a couple youtube videos to find out exactly where I needed them. If anyone is interested in seeing the video let me know and I'll post it up. I installed the front brackets two slots back from the front in order to give me enough clearance. I used the reinforcement bracket that came with the steps to mark out where I needed to drill the holes for the new rivnuts and then used a step bit to drill two 9/16" holes for them. I then installed the reinforcement bracket and riveted that in and then installed the two rivnuts. From there you need to use a template the comes with the steps to drill two holes for each bracket in the pinch weld of the truck. Just for extra reinforcement to keep everything solid. After that it takes a bit of messing around to get the brackets slid onto the bolts, in the proper place, and lined up.

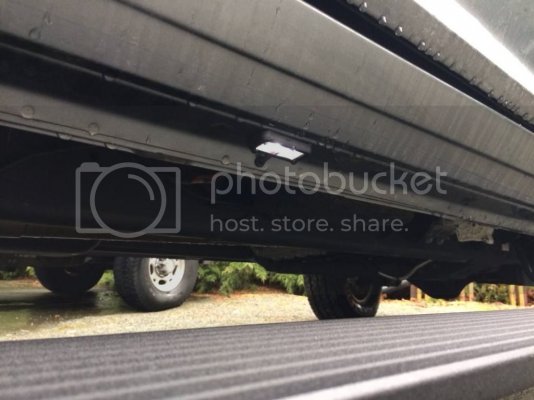
I then grabbed the wiring harness and started running it down to each side of the truck from the engine compartment to make sure I had enough slack in it after moving the front mounts. I then drilled the holes for the LED light wiring and installed those and then wired everything up and tied it up to the frame and in the engine compartment. From there I installed the boards themselves onto the brackets.

Wiring up the steps in the engine compartment is very straight forward and the harness they provide is very good to reach everything. I tapped off the positive on the battery for power and used the factory ground behind the battery for the harness ground. Then I removed the TIPM to get to the connector with the "door ajar" wires on it. When you pull out the TIPM is the connector on the bottom passenger side of the module. Unplug it and pull it out to get at everything. The kit comes with 4 wire taps to connect the wires and everything is colour coordinated; you literally can't screw it up it's so straight forward. Then I put everything back together, installed the fuse in the main power line, and plugged in the control module.
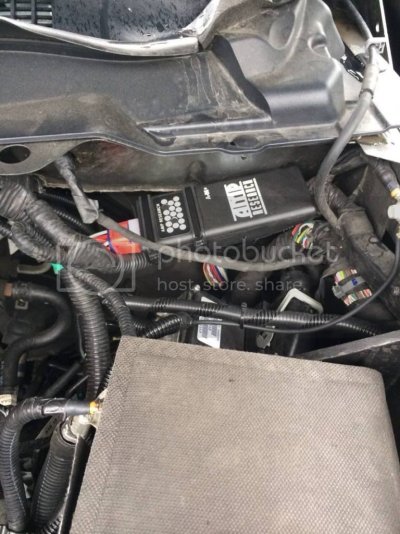
1836874_10151860503425064_1279151075_o.jpg

Then it was time to test out the steps. The passenger side worked flawlessly but the drivers side wasn't retracting all the way. At first I thought the motor might have been turned too far one way and didn't have enough movement in the other direction to bring them all the way up. So I took the motor off, opened the door to put it all the way down, then reinstalled it on the extended step. Still didn't fix the problem. So then I decided to push on it a little bit when it was closing to see if it would go up. Sure enough, it did. So I tried it again only using a finger, and it still did. So I concluded it much just be something slightly misaligned and the safety feature on the step is stopping it thinking it's hitting something. Sure enough the rear bracket was at a slight angle. I loosened it off from the step and tapped it over a bit with a rubber mallet and that fixed the problem. Everything worked great!

I then got back under the truck and drilled out the body through the holes in the top of the brackets to install the last rivets and then went through and double checked all the bolts to make sure they were tight.​

Continued on post 22...
 
Last edited:
OP
OP
brandonjansen

brandonjansen

Senior Member
Joined
Feb 14, 2013
Posts
1,701
Reaction score
1,013
Location
Abbotsford, BC, Canada
Ram Year
2012 Ram 3500 Laramie Limited
Engine
6.7 Cummins - Tuned and Deleted
AMP Powersteps Installed – 2-10-14 - Post 2

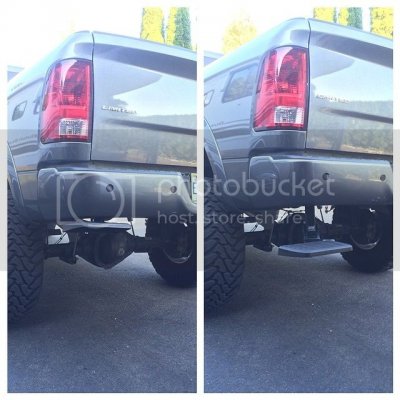
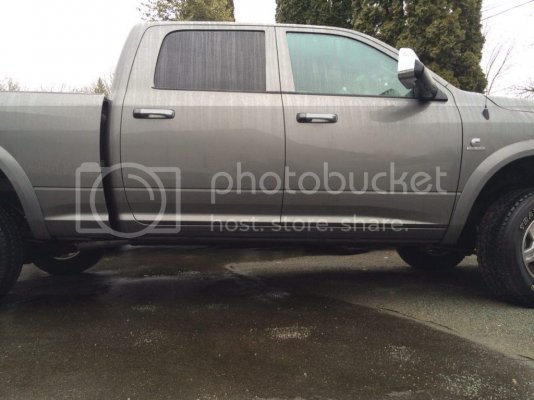
So here's the final product!

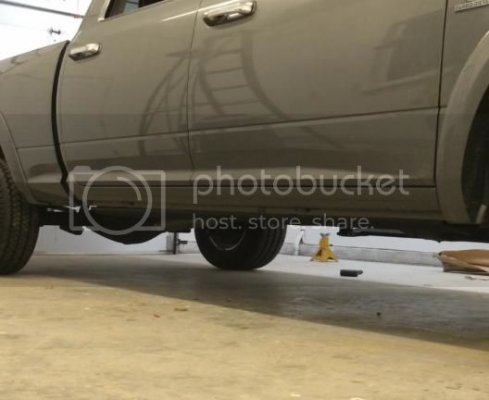
Steps retracted:
1912139_10151860503185064_181962515_o.jpg

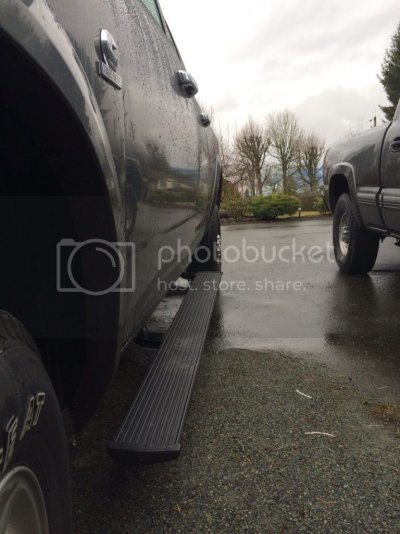
Steps extended:
1602007_10151860503415064_1355863105_o.jpg

LED lights:
1836766_10151860503420064_717289737_o.jpg

Showing how far out they extend:
1888809_10151860503405064_832422496_o.jpg

Video (click on the picture):
h_D1673835-3860-4272-9D8C-A0D638E4771A_zpsdnnhqyug.jpg

Conclusion:

Overall I'm very happy with the steps... how could anyone not be. lol. They're going to take a little bit to get used to just because I'm so used to jumping right up into the truck now. But when I do remember they're there it's definitely a nice feature even with the truck at stock height (which is already pretty high compared to a 1500). The lights are definitely a nice feature as well to help you see everything at night. Plus they match the courtesy lights perfectly and go off at the exact same time so I was pretty stoked on that. The only thing that I think might have been better is to wire the LED's into the courtesy light circuit so that when you pressed the unlock button they came on. But since that's all wired into the AMP harness I'm not going to bother screwing around with it. They work good enough for me.

They also impress pretty much everyone who sees them. I've already had a ton of positive feedback on them and have had a couple people see them and then say "Wait, what the heck just happened?!" and ask me to do it again. lol.​

Heads up for anyone installing them!

The AMP instructions tell you to install the motor onto the front bracket before putting them on the truck. That is wrong, don't do it. In order to tighten the bolts for the bracket you need to be able to move the arm back a ways. Obviously you can't do that if the motor is on there. So save yourself some time and leave them off until after you've tightened the brackets. It's still very easy to bolt them on after the fact once the bracket is on the truck.​
 
Last edited:
OP
OP
brandonjansen

brandonjansen

Senior Member
Joined
Feb 14, 2013
Posts
1,701
Reaction score
1,013
Location
Abbotsford, BC, Canada
Ram Year
2012 Ram 3500 Laramie Limited
Engine
6.7 Cummins - Tuned and Deleted
Full Interior Shot – 3-11-14

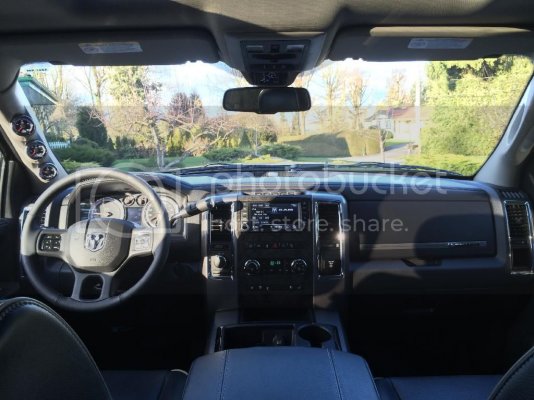
Well I don't have any new mods to share... but I did clean up the truck the other day and thought I'd share a picture of what the interior is looking like right now. I don't think I've shared a full shot of the interior since I put the MiniMaxx and gauges in.

CCB24151-DA5F-4F50-8C47-BE93A02A5575_zps2l3s9h2d.jpg

I've also got things under way to get pricing for the lift and wheels and tires. So hopefully I can get everything sorted out in the next week or two and then get it all ordered. My plan would be to have it installed in a month or so then. But it all depends on how things go. I honestly have no idea what shipping times could look like for it. But things are in the works. :waytogo:
 
Last edited:
OP
OP
brandonjansen

brandonjansen

Senior Member
Joined
Feb 14, 2013
Posts
1,701
Reaction score
1,013
Location
Abbotsford, BC, Canada
Ram Year
2012 Ram 3500 Laramie Limited
Engine
6.7 Cummins - Tuned and Deleted
Valve Set – 3-31-14

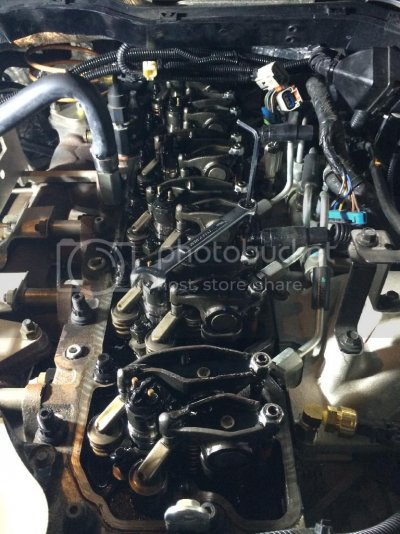
Back when I put the ARP head studs in the truck I had all the rocker arms off the truck. When I put it back together I really should have done a valve set on the truck but because I didn't have the proper tool to turn the truck over and was running out of time I didn't end up doing it. It's something that's been irking me ever since. For a couple of months it seemed like they were okay but now over the past couple weeks I noticed more lifter noise coming from the engine so I knew it was time to rip it apart and set them up right.

First I had to strip the engine back down to the head. Just as annoying as it was back when I did the head studs (see post #301 for more info on that). When I was taking the rocker arm spacer off I accidentally loosened the exhaust rocker arm for cylinder 6 (the furthest one back) and after doing so thought to myself "hmm.... that was a lot looser than I would have liked it to be". So I started by grabbing the torque wrench and re-torquing all the rocker arms again. Sure enough all of them were a little loose. While I had the torque wrench out I decided to double check a few of the head studs and make sure they were up to 135 ft-lbs still as well. All of them were good and tight.

Now for actually setting the valves. I had the instructions/specs for them off another website. The specs stated that the valve lash can be between 0.006" and 0.015" for the intake and 0.021" and 0.034" for the exhaust without having any effect on performance, engine noise, fuel economy, etc. As soon as I read that I thought "No, that's BS... when it comes to setting valves every thou makes a difference." So I found that the actual set specs are supposed to be 0.010" for the intake and 0.026" for the exhaust; so that's what I was going to set them to.
Sure enough every single valve was loose. Most weren't too too bad... but some were definitely way out, especially on cylinders 5 and 6. So I went through every single valve making sure they were all set exactly where I wanted them. I'm very picky when it comes to valve sets so I took my sweet time making sure the feel of them was what I wanted. Setting the back to cylinders was definitely a pain in the ass.... With the lack of room back there and how hard it is to access everything it was tough enough just to get the feeler gauge back there let alone both my hands to set the lash... I was literally laying across the top of the engine with my arms extended back under the cowl and my legs hanging out of the engine compartment. Needless to say my hands and forearms are pretty scraped and cut up from doing this.

F259B8E1-6CF2-4891-B107-F3D03220556D_zpsfgtld6mn.jpg

The only real problem that I ran into was when I was setting the exhaust valve on cylinder 6, dropped the allen key and didn't hear it hit the ground. The only thing I could say was, "You gotta be effing kidding me!" So I ended up just trying to move my hands around on the back of the engine, transmission, and everything around there and finally nudged it enough to make it come loose and hit the ground.

The one other thing I fixed while I had all this apart was a bit of an oil leak I was having. Because the ARP studs are quite a bit longer than the stock head bolts they were interfering with these little plastic tabs that seat the injector harness support. This was causing it not to seat properly which allowed a little oil to seep past it. So I cut about 1/8" off those plastic tabs to give it the clearance it needed. Hopefully that stops the problem.

Overall it was definitely worth my time to set these up properly. From the moment I started it up I could tell the engine was quieter and running smoother. The exhaust even has a bit of a deeper tone to it. I even set a car alarm off when I drove past it at around 30 km/hr up a hill by my friends place. The truck definitely has more power now too; it just keeps pulling up hills effortlessly without needing much more fuel. It should also keep my boost at cruising speed down a little bit which will give me slightly better fuel economy. I'll see how those numbers pan out in the next week or so.
The other good thing about this was that I pulled off my intake tube to give myself some more room. While doing that I found that the intake tube was somewhat loose on the turbo and probably would have come off within a few more weeks. So I'm glad I caught that I got it all tightened up.
 
OP
OP
brandonjansen

brandonjansen

Senior Member
Joined
Feb 14, 2013
Posts
1,701
Reaction score
1,013
Location
Abbotsford, BC, Canada
Ram Year
2012 Ram 3500 Laramie Limited
Engine
6.7 Cummins - Tuned and Deleted
Picked up the Lift – 4-9-14

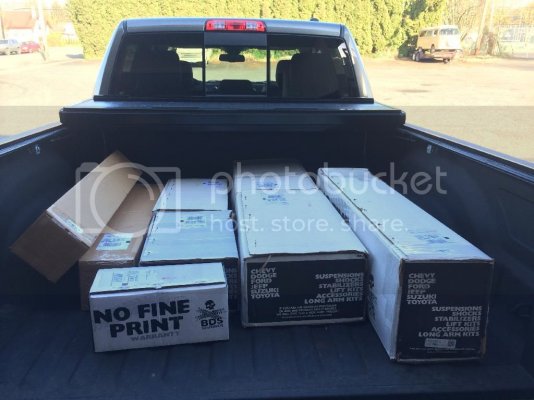
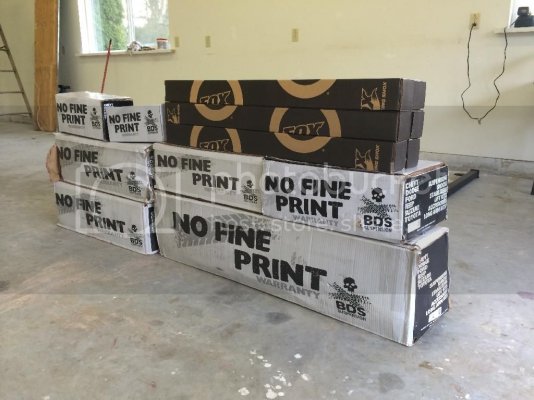
Picked up some goodies today. Here's some teaser pictures for you guys.

Everything in the back of my truck:
DB0D2C90-C300-4CB0-9980-356CF955CED4_zpsybh98x5k.jpg
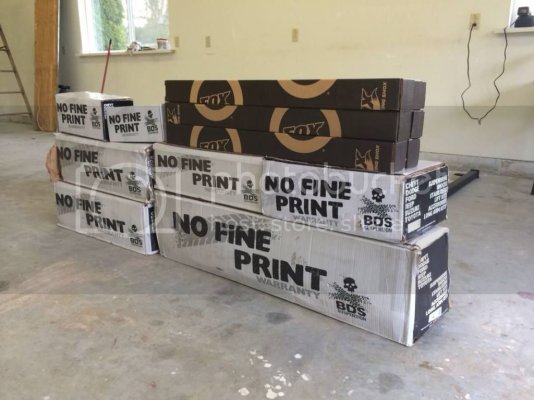
All the boxes unloaded on the shop:
BAD30C0B-12D9-4710-88E1-6CAC6B95E54F_zpsucfytba7.jpg
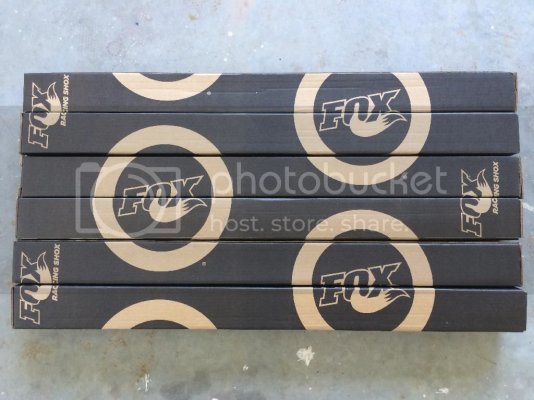
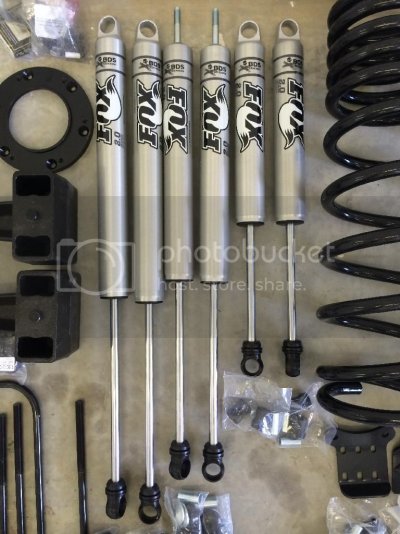
6 Fox Shocks to go on the truck:
3EC821A6-555A-4E97-AEC3-C59C864F648A_zpsxjd7duz2.jpg
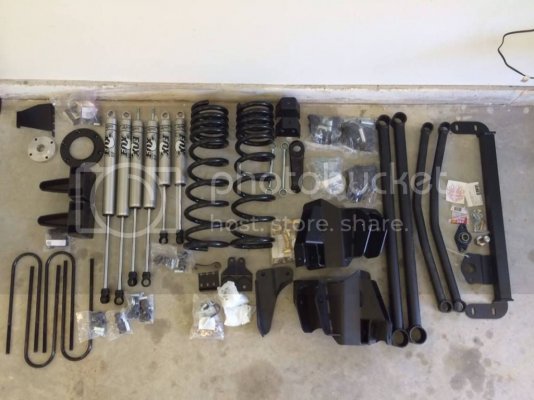
All the goodies:
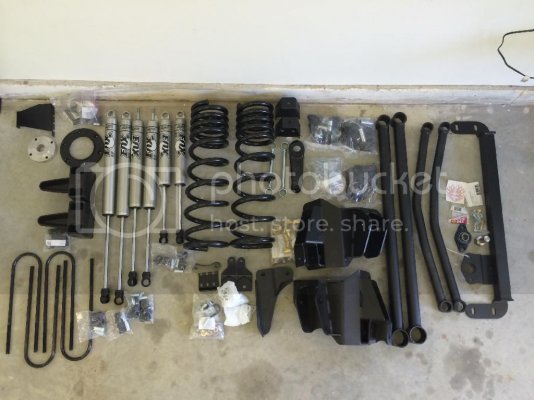
8C30EF0F-5C79-41D8-A68D-28D8759C34EA_zpsko24kig9.jpg
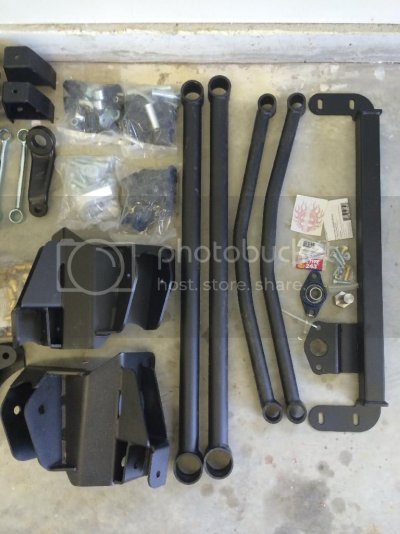
Steering box stabilizer, front long arms and brackets, drop pitman arm, front bump stops, front sway bar links and all the hardware:
4CABC747-5676-4757-A419-E7F5B77B150B_zpshw2zjliz.jpg
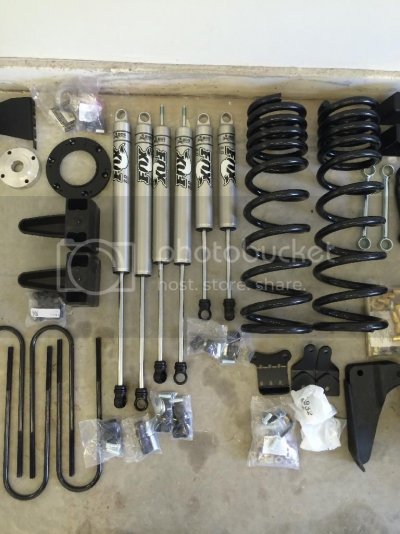
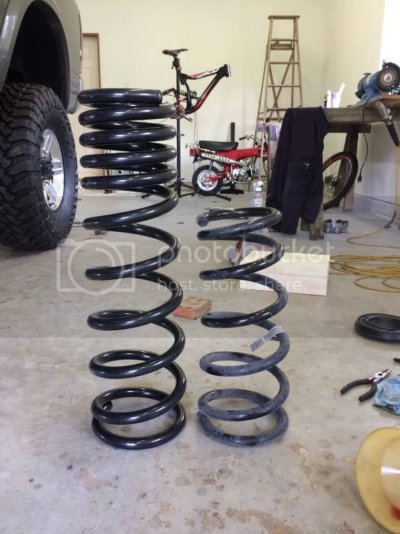
Progressive rate 8" front coils, track bar drop bracket, steering stabilizer hardware, steering stabilizers, front and rear shocks, rear lift blocks and U-bolts, transfer case indexing ring, front driveshaft spacer, rear brake line bracket:
CFE9F3EC-139C-44AB-97BC-01FEC8888752_zps26z74upa.jpg
Shock **** ;)
9635E9F5-0723-4ED1-92F5-43286BF80754_zpsqji8ydiw.jpg
 
Last edited:
OP
OP
brandonjansen

brandonjansen

Senior Member
Joined
Feb 14, 2013
Posts
1,701
Reaction score
1,013
Location
Abbotsford, BC, Canada
Ram Year
2012 Ram 3500 Laramie Limited
Engine
6.7 Cummins - Tuned and Deleted
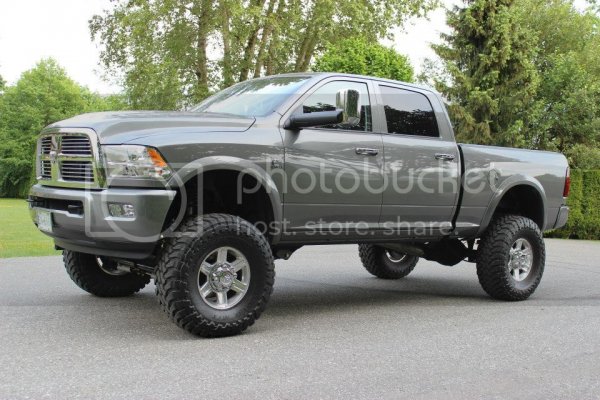
8” BDS Long Arm Lift Installed – 5-22-14 - Post 1

First off I need to say thanks to Eric at Bully’s Performance for the countless emails him and I have sent back forth regarding the lift and components dating back to January. He was always very fast to respond (I generally had a reply within half an hour of emailing him) and was very cooperative in working through some of the custom setups and different ideas that I had. I’m very happy with the service he provided (along with the rest of the Bully’s Performance team) and the product(s) I ended up with.

Products:
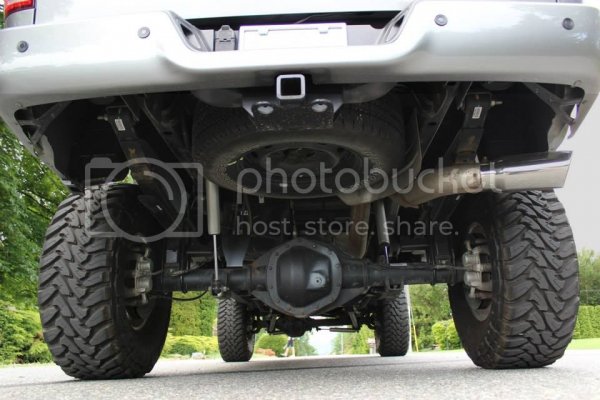
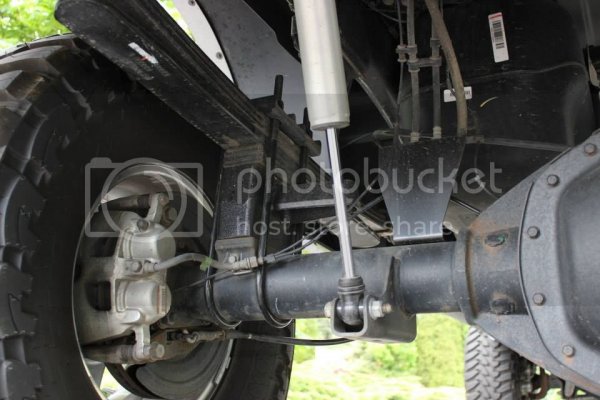
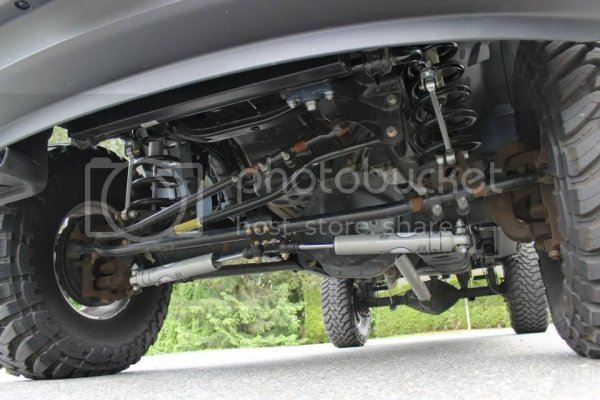
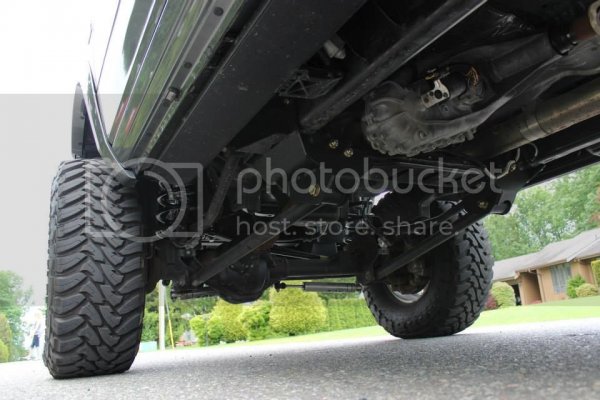
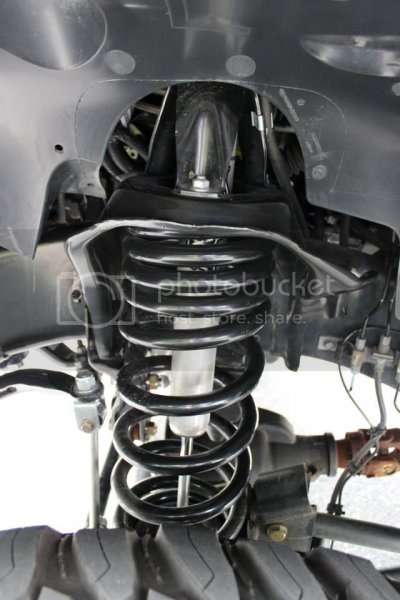
• 8” BDS Long Arm Lift with Fox 2.0 Shocks
o 8” progressive rate front coils
o 5” rear blocks
o Transfer case indexing ring​
• Dual Fox 2.0 Steering Stabilizer
o BDS dual steering stabilizer mounting kit
o 2 – Fox 2.0 shocks​
• Hell Bent Steel Steering Box Brace
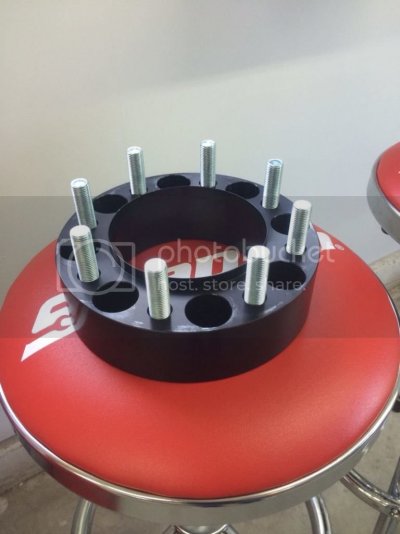
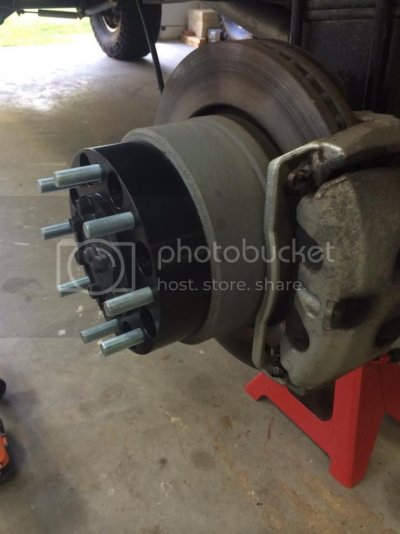
• Motorsport Tech 2” B.O.R.A. hub centric wheel spacers
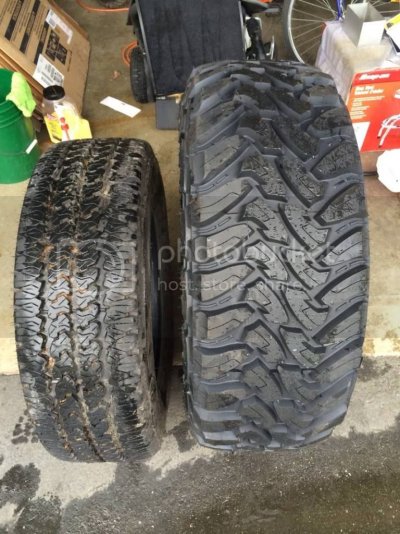
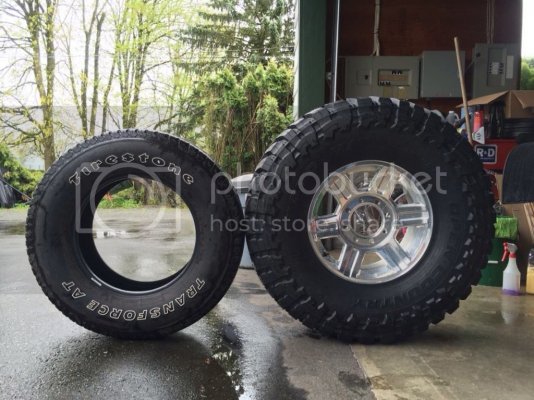
• 37x13.5r17 Toyo Open Country MT’s

10298522_10151999283000064_1412886415677924744_o.jpg
1801134_10151999282980064_5209980531459309805_o.jpg10317697_10152038997055064_1560166911947399078_o.jpg

Technical Info:
• Stock Heights:
o 38.875 38.875
o 42.000 42.750
o Roof: 78.875 (6’-6 7/8”)​
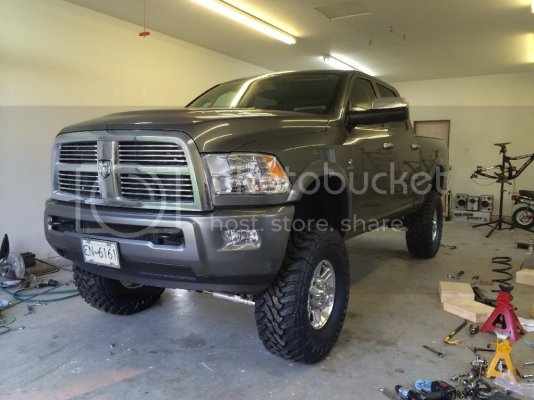
• 8” Lift with 37’s Heights:
o 49.000 48.875
o 50.125 50.000
o Roof: 88.000 (7’-4”)​
• Poke (past the flares - add 1" for past fender value):
o 2.5” 1.5”
o 2.0” 2.0”​

Installation:
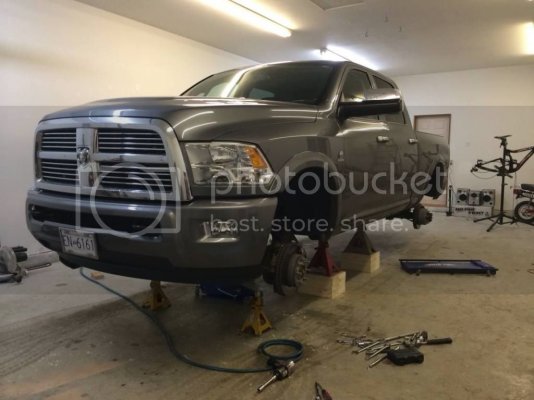
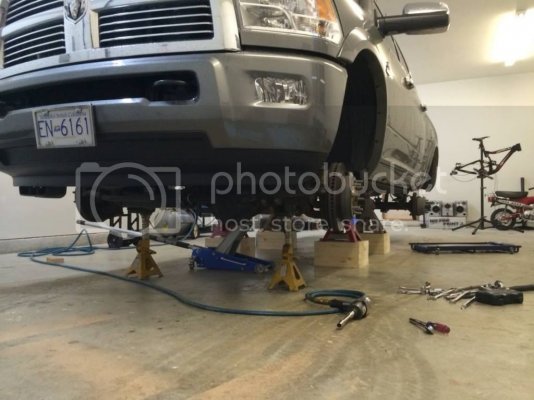
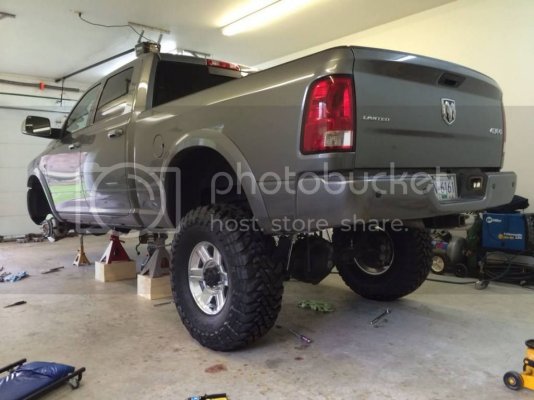
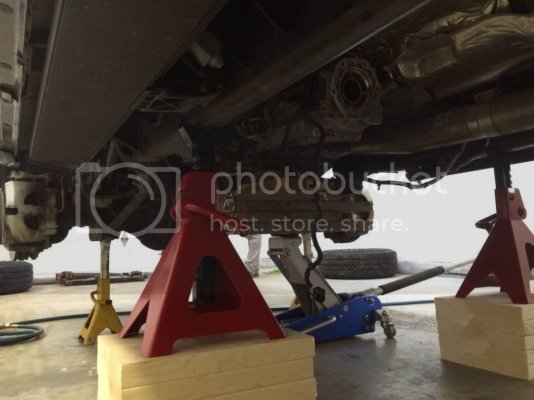
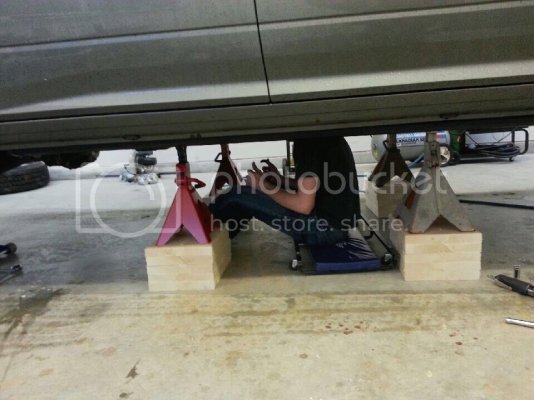
I started on the install Wednesday night (April 16) as I had Thursday and Friday off work as part of the Easter long weekend. I had started some of the prep work the few days prior to get the shop temporarily set up to install the lift (we don’t have our shop fully up and running yet as we just moved into this house a few months ago and have some reno plans for the shop before we fully set it up). So I had enough tools and equipment in there to get going. Obviously the first step was getting the truck up on jack stands as high as possible. I built some blocks out of 2x12’s screwed together to gain the extra height I wanted. You’ll see in the pictures that I also had to use a number of blocks on top of the floor jack in order to reach the truck.​

Transfer Case Indexing:
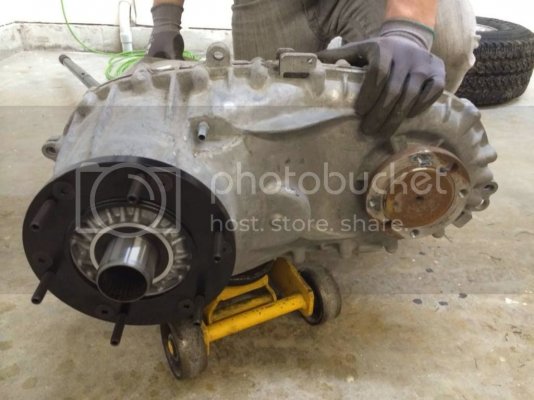
We started by pulling the wheels and tires off and then decided the first task at hand would be installing the transfer case indexing ring which rotates the transfer case 10 degrees down for a better front drive shaft angle. First we pulled both the front and rear drive shafts, followed by the wiring harness going up to the transfer case. We then supported the transmission and pulled the transmission cross member and cross member bracket. From there we loosened off all the transfer case bolts. One of the top ones is definitely not the easiest to get at. I ended up getting it with a swivel head ratchet wrench but it wasn’t easy. We then hand bombed the transfer case down and out of the truck (do-able if you have two strong guys but you won’t want to be supporting it for a long amount of time). We removed all the studs from the transfer case by tightening two nuts together on each stud and then installed the indexing ring and studs with the supplied hardware and red Loctite.

1617847_10151999274925064_2890456338227355520_o.jpg
10256730_10151999274935064_8388959468215011715_o.jpg
1973256_10151999274915064_1381577090089573322_o.jpg
10285735_10151999274930064_2753441854949872462_o.jpg

I then got back under the truck and pulled the rear transmission seal, put in the new seal spacer (fits right into where the seal came out of), and then installed a 48rfe rear seal into the backside of the spacer. From there we hand bombed the transfer base back up into place, threw the nuts on and tightened it up and called it a night.

10325581_10152003929505064_8423836878631179859_n.jpg

Rear Lift Install:
Thursday I was by myself for the majority of the day (as my friend at to work) so I decided to tackle the rear lift since that’s something I could do alone. I started by removing the rear diff vent, brake line bracket, and shocks. I then removed the U-bolts from the passenger side, dropped the rear diff down and installed the 5” lift block, and then installed the new U-bolts just snugging up the nuts. That process was then repeated on the driver’s side. Installing the new Fox 2.0 shocks on the back was a bit of a task as they don’t like to compress very easily… I ended up having to use a pry bar and a long screw driver to compress the shock to get the lower mount into place and bolted up.

At this point in the day I needed to go take my stock wheels and tires to the shop to have my new 37x13.5r17 Toyo MT’s mounted on them (I already made the arrangements to have the tires there waiting). While the tires were being mounted and balanced I ran down to Sumas, WA to pick up my wheel spacers as they had just come in that morning. I then went back to the tire shop and picked up my wheels and tires. They were able to balance them by just putting weights on the backside which I was happy and surprised about. I wanted to keep weights off the front of the wheel if possible (just because it looks better) but I didn’t expect that to happen with these big tires.

10295895_10151999274910064_8183263649918866437_o.jpg
891971_10151999275380064_6763855003229814204_o.jpg

When I got home I ran into the first problem of the install…. The wheel spacers didn’t fit. So I got out the tape measure and sure enough, they were the wrong bolt pattern. I contacted Lenny and Motorsport Tech right away to talk to him about the issue. What ended up happening is that two shipping labels got mixed up so I got spacers for a Ford and that guy got mine. It’s ended up being quite the hassle getting the proper spacers; if you want to know the full story check out posts #473-517 on my build thread.​

continued on post 27...
 
Last edited:
OP
OP
brandonjansen

brandonjansen

Senior Member
Joined
Feb 14, 2013
Posts
1,701
Reaction score
1,013
Location
Abbotsford, BC, Canada
Ram Year
2012 Ram 3500 Laramie Limited
Engine
6.7 Cummins - Tuned and Deleted
8” BDS Long Arm Lift Installed – 5-22-14 - Post 2

Anyways, I continued on by throwing the wheels on the truck, letting it down onto the tires, and then tightening up all the U-bolts. I couldn’t get them to an exact torque since they protruded through the nuts too far for a deep socket. So I used the double wrench method for more leverage and got them as tight as the stock ones came off; good enough for me.

135428_10151999275385064_6044687543708841148_o.jpg10300085_10152038992855064_9215200479661842135_n.jpg10401528_10152038993005064_8447287511909053187_n.jpg

Front Lift Install:
Around 7:00 my friend showed up so we started working on the front install. We started by putting the long arm brackets up into place so we could mark the holes on the frame and drill them out. Getting those heavy brackets up in place and getting the bolts through was no easy task… At one point I dropped one back on myself and took a good chunk of skin/flesh out of my elbow blocking it. We ended up having to use the floor jack to force them up in place and drive the transmission cross member bolts through. From there we marked the holes, took the long arm brackets back off, center punched the holes, and then drilled them out to 11/16” with a step bit. I then went to install the 8 rivnuts in the frame and transmission cross member. Here’s where the problems started… First off BDS didn’t supply a bolt specific for installing the rivnuts; they expected you to use the bolt that actually holds the bracket on. Well those bolts aren’t really long enough for that, they don’t grab all of the threads through the washer and install nut. But I didn’t have another bolt that was the right size and thread so that’s what we had to use. I installed all 8 thinking they were good to go so we threw one of the brackets up there to bolt it on and sure enough, the rivnuts started spinning. So we tried tightening them up a bit more, wasn’t happening. No matter what we did we couldn’t get the rivnuts to seat. So by this point I decided we were going to grind some of the paint off the frame and tack weld the rivnuts to it to stop them from spinning which should let us get the bolts tight enough. So we did that and tried to install the bracket again. We then found out that the threads were too stretched out in a few of the rivnuts because of the install bolt being too short. I tried running a tap through them and managed to fix 2 of them but another 2 were too far gone. So we got out the grinder and ground the outer flange off two of them and took them out. I had one extra one that came with the kit but I needed one more. By this point it was around 11:15 at night so we called it quits.

Friday morning I went out to see if I could find another rivnut to install in the frame. Being Good Friday none of the big industrial supply shops were open and no automotive shops had anything near big enough. So I was SOL there… I ended up getting a piece of ready rod so we could make our own custom rivnut install tool so that we didn’t screw up the threads on the extra one I had. So I went home and grabbed my Dad and he and I started going at the truck again. We got the extra rivnut installed and tack welded to the frame and then put a coat of paint on the frame and rivnuts where we had ground it off. We then grabbed the long arm brackets and went to put them up on place. Again we had to use the floor jack to get the big cross member bolts through them. Then once those were in place I went to put the side ones into the frame. There were a few of them that weren’t lined up 100% (I’m assuming the bracket wasn’t sitting in quite the same place as it was when we marked the holes) and I couldn’t get the bolts in perfectly straight. So I got out the die grinder to machine out the holes in the brackets a little bit to make it all work. After another 20-30 minutes or so of messing around with that they were on. Overall I’d say we had around 6-7 hours into just installing those long arm brackets. It was a pain in the ass to say the least. So yes at the moment I’m missing one rivnut on the passenger side long arm bracket but with the 5 other huge bolts holding it on it isn’t going anywhere. Eventually I’ll probably get another rivnut and pull the bracket off to install it but for right now I’m not worried about it.

From there we started pulling the rest of the front end apart. I had already unbolted the track bar before I jacked up the truck so that was done. We removed the drag link, sway bar links, and sway bar (needed it off completely to install the steering box brace later). Unbolted the front shocks and then dropped down the front diff to remove the front springs and shocks.

10298342_10151999275360064_4634310481568118591_o.jpg

We then installed the new Fox 2.0 shocks loosely to help support the front diff so we could remove the stock control arms. 3 of them came off no problem; the upper passenger side control arm however, was a problem. As soon as I looked at the bolt I knew we were going to have an issue. It went through the frame right beside the exhaust with only about a 1” gap between the exhaust and frame. We got the nut off the other side no problem but couldn’t feed the bolt back through the frame all the way to remove the control arm. So out came the die grinder again, this time with the cut off wheel on it and we cut the head of the bolt off so we could push the bolt back through the other way.

Installing the new control arms ended up being a 3 person job (luckily my step brother showed up for a bit to give us a hand). We had one guy holding the control arm and lining it up with the hole, one guy pulling or pushing on the front diff to help line it up, and one guy pushing up on the pinion to rotate it to the right angle. It was one of those things that took a lot of effort and a little time but overall went together really smoothly. From there we dropped down the front diff again and removed the shocks so we could install the new front coils (along with the shocks). We then installed the Hell Bent Steel steering box brace along with the front sway bar, the new drop pitman arm, the new sway bar links, and the track bar drop bracket. Again, all of that went together no problem. We then removed the stock steering stabilizer and cut the brackets off the front diff to make room for the new dual setup. This is where we ran into one more little fitment issue. The brackets that BDS supplied to fit into slots in the front diff were too wide to seat properly. So out came the grinder again to start grinding off the sides of the bracket to get them to slide in. We finally got those in and bolted up, bolted up the new bracket onto the tie rod and installed the steering stabilizers. After that it was just a matter of reinstalling the drag link and track bar. I then threw the front wheels back on and let the truck back down onto the ground.

02053229-F662-4737-93A0-80FCAF8EB391_zpsctcppuet.jpg

From there I just had to go through all the front end nuts/bolts and torque everything to spec. That was a feat in itself. Getting the control arm bolts to 160/180 ft-lbs while lying under the truck was definitely a task… luckily I have a pretty long torque wrench and was able to either use my full body or leg as leverage or it wouldn’t have happened.

10297612_10152038992780064_5617291368514898329_n.jpg10376935_10152038992915064_703197493231385852_n.jpg1901193_10152038992960064_3100379869148685642_n.jpg

continued on post 28
 
Last edited:
OP
OP
brandonjansen

brandonjansen

Senior Member
Joined
Feb 14, 2013
Posts
1,701
Reaction score
1,013
Location
Abbotsford, BC, Canada
Ram Year
2012 Ram 3500 Laramie Limited
Engine
6.7 Cummins - Tuned and Deleted
8” BDS Long Arm Lift Installed – 5-22-14 - Post 3

Wheel Spacer Install:
When the wheel spacers finally showed up (over a month after the lift was installed) I pulled the truck into the shop right away to get them on there. While I had the wheels off I checked over all the lift components to make sure everything was up to torque. To install the spacers I had to remove all the retaining rings that the factory puts on the studs to hold the calipers on. From there I slid the spacer on and then used the nuts that came with them along with red Loctite and torqued them to 140 ft-lbs. The wheels were then installed and torqued to 85 ft-lbs as per Motorsport Tech's specs.

10382615_10152038997050064_4852321643789008576_o.jpg

Alignment:
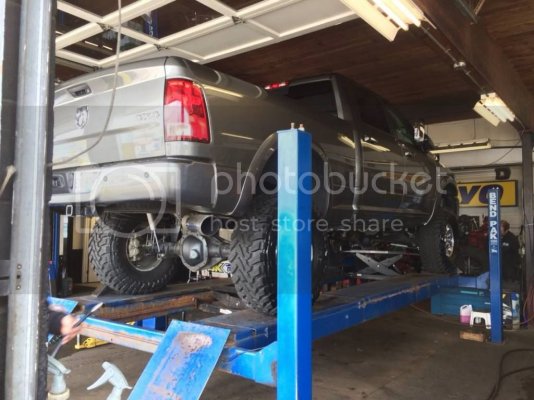
I had an appointment to bring the truck in to Kal-Tire in Abbotsford on Saturday. So I showed up there just before 12:00 for the appointment and handed them the keys. Within a few minutes they had 3 of their techs out there looking at the truck, I assumed they were just checking it out. Well they ended up coming back into the office and told me they couldn’t do the alignment on my truck because my tires are too big. I know how most alignment machines work and have used them so that made absolutely no sense to me. So I went out and talked to the alignment tech directly to find out what was going on. The alignment machine they have uses cameras that point to each other across the truck. So they couldn’t get them far enough away from the rim with the 37’s. So I started calling around to every tire shop and dealership in the area to see if I could get it in. No dice…. So the alignment was going to wait. I wasn’t too worried about it anyway since the toe hadn’t been touched, the camber is unadjustable, so only the caster could be out and the drag link just needed to be adjusted to center the steering wheel. So I went home and adjusted the drag link myself to re-center the steering wheel and called it good. I was away all week for work so the truck was only driven to the airport and back. I then made an appointment at the tire shop I got my tires from (OK Tire) for the following Saturday.

When I brought it in there they got it in right away. The one issue we ran into there was that my truck was too tall…. They couldn’t put their hoist as high as they normally would because my hood would have hit the heater they had hanging from the ceiling. But it would work where it was at. Turns out that the caster was almost dead on where I set it. Close enough that they weren’t going to change it. They did adjust the toe slightly and then re-centered the drag link again and it was good to go.

10313895_10151999275370064_5143461333564954947_o.jpg
906794_10151999275365064_7328251501555721111_o.jpg

Ride Quality:
I’ll be honest; at first I was fairly disappointed with the ride. When I first took it out it was a lot rougher than I expected it to be (rougher than stock). It wasn’t handling bumps in the road very well at all and even over the big bumps wasn’t as good as I thought it should have been. Since then it has definitely got a lot better. I think the springs and shocks just needed some time to break in a little bit. It’s still somewhat rough over certain bumps in the road, but it’s a 3500… that’s to be expected. Overall I’m pretty happy with how the front end is riding. The back end however is rougher than stock IMO. Obviously nothing has changed with the spring rate since it was only a block that was installed under it. But I think with the shocks being charged the way they are they’re pushing down fairly hard on the rear diff so with there not being a lot of weight on the back of the truck it’s pretty rough. I was running the rear tires at 55 psi at first as that’s what the tire shop put them at. Since then I’ve lowered them to 45 psi and it feels quite a bit better. Now that I’ve lowered the tire pressures all around and the truck’s had some time to break in I’m actually pretty happy with the ride.

I am excited to see how it feels with weight in the back end though. I’m going to be going on a bit of a road trip (550 km or so) pulling a 7500-8000 pound travel trailer in a month so that should be a pretty good test for it.​

Handling:
I’m very happy with how the truck handles with all the new components installed. The steering box brace and dual steering stabilizers are definitely doing their job. The steering wheel feels firm and responsive and is very smooth throughout the turning radius. There’s obviously a bit of spongy-ness in the tires but that’s to be expected with 37” MT’s. Overall I like the feel of it better than stock.

The one thing that I will need to add to the truck yet (as some of you may have picked up on by seeing the front poke numbers) is an adjustable track bar to recenter the front axle. The track bar drop bracket isn’t quite enough for the full 8” lift. I’m going to BD Diesel’s Dyno Day this weekend so I’ll see if I can pick one up there.​

Pictures:
I didn't end up washing the truck before taking pictures since it's supposed to end up raining here for the next few days. But it looks pretty clean on the pictures anyway. Ignore any dirt/crap you see.

10401528_10152038990830064_8646642323335070883_n.jpg
10410687_10152039004765064_3340310226180804145_n.jpg
10302050_10152038991015064_141282592185098370_n.jpg
10382155_10152038991145064_6901315096455753049_n.jpg
10378966_10152038991205064_428125915973301037_n.jpg
10382754_10152038993240064_5933016981592153008_n.jpg
10350532_10152039003095064_7859677155644013911_n.jpg
10294422_10152038991345064_4068374325680763279_n.jpg

Continued on post 29...
 
Last edited:
OP
OP
brandonjansen

brandonjansen

Senior Member
Joined
Feb 14, 2013
Posts
1,701
Reaction score
1,013
Location
Abbotsford, BC, Canada
Ram Year
2012 Ram 3500 Laramie Limited
Engine
6.7 Cummins - Tuned and Deleted
8” BDS Long Arm Lift Installed – 5-22-14 - Post 4

10409048_10152038993380064_9174936197006588086_n.jpg
10325787_10152038992610064_122534026266152667_n.jpg
10374934_10152038992650064_1924439719349472508_n.jpg
10339954_10152038992555064_1040225118349178532_n.jpg
10375906_10152038992720064_2097673627481825710_n.jpg
10398672_10152038993040064_8596004821612955840_n.jpg

Me standing in front of it for size comparison (I'm about 6'-0" tall):
10401420_10152038993480064_1580800912418966756_n.jpg

100% stock compared to now:
1185883_10151550635215064_1754576380_n.jpg
10382155_10152038991145064_6901315096455753049_n.jpg
 
OP
OP
brandonjansen

brandonjansen

Senior Member
Joined
Feb 14, 2013
Posts
1,701
Reaction score
1,013
Location
Abbotsford, BC, Canada
Ram Year
2012 Ram 3500 Laramie Limited
Engine
6.7 Cummins - Tuned and Deleted
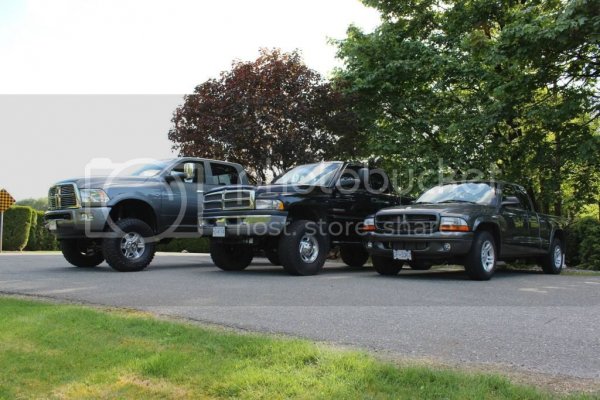
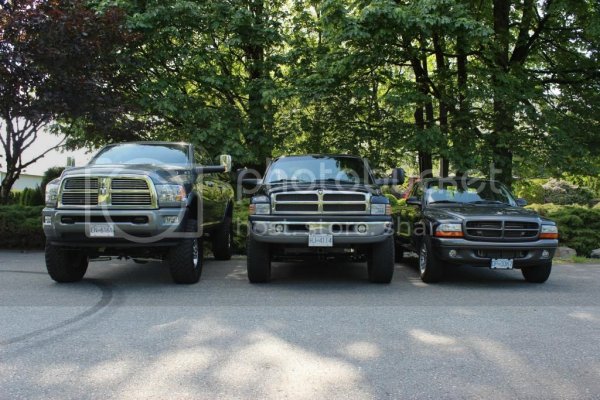
Comparison to Leveled 2nd Gen and Dakota – 5-29-14

Here are a few pictures from a couple weeks ago that I didn't share since I hadn't posted the lift thread yet.

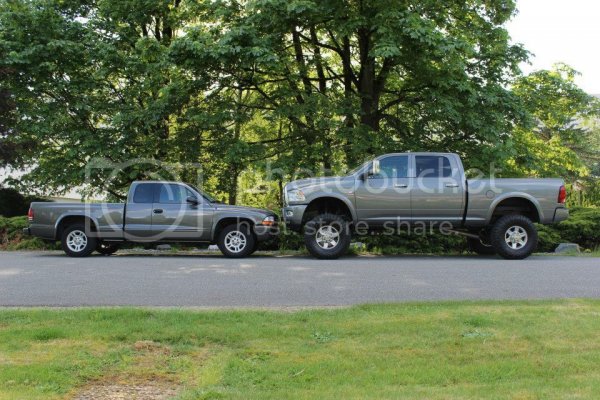
My truck (which you know the details of) VS my friends 01 2500 - leveled on 35's VS my other friends 02 - Dakota completely stock.
10353533_10152038990460064_5579995120809572823_o.jpg
10333532_10152038990560064_7406482453728673399_o.jpg
10361059_10152038990695064_3081206743192635197_n.jpg
 
OP
OP
brandonjansen

brandonjansen

Senior Member
Joined
Feb 14, 2013
Posts
1,701
Reaction score
1,013
Location
Abbotsford, BC, Canada
Ram Year
2012 Ram 3500 Laramie Limited
Engine
6.7 Cummins - Tuned and Deleted
Tuning Update/Changes – 5-30-14

For a while now (probably 2 months) I've had an issue with my exhaust brake surging at times. It's not something I can replicate and seems really sporadic so it's been a bit of a task to nail down exactly what the problem is. Since it didn't go away with one thing I tried I decided to talk to my tuner to see if he had changed anything that would be giving me this issue. We both wanted rule out tuning being the problem. Through that process I loaded another custom tune I have from Anarchy Diesel to completely rule out Draconian's tuning as the issue. Now being a tune written by a completely different company it definitely felt different. There's lots of things I like about it, there's some things I don't. Overall I find it is smoother, shifts better, and runs better however I don't like what I'm seeing for drive pressure and how the turbo tuning is done. This did however spark my interest in trying out some different custom tunes.

For now I have opted to hold off on some tune changes I was going to buy from Draconian (a big tire modifier and 5.9 sound tune) but I have been talking to Anarchy Diesel about getting an updated tune from them to fix the drive pressure and turbo tuning issues and I also just got a file from Ray Rich who was formerly with Draconian Diesel, now doing his own thing. I'll be loading up his file tonight and plan to run it for the next few weeks to see how I like it. I'll post up a few write ups as I run the tunes and what my impressions are of them.
 
OP
OP
brandonjansen

brandonjansen

Senior Member
Joined
Feb 14, 2013
Posts
1,701
Reaction score
1,013
Location
Abbotsford, BC, Canada
Ram Year
2012 Ram 3500 Laramie Limited
Engine
6.7 Cummins - Tuned and Deleted
Tuning Update – 5-31-14

I got my tune from Ray Rich loaded up last night. So far I really like it. Drives very nice and smooth, sounds amazing with a nice, deep, low rumble and overall just feels good. The tunes he gave me right now only go up to 80hp over stock and I can definitely see myself wanting more than that so I may get that changed. But so far I'm liking them.
 
Last edited:
OP
OP
brandonjansen

brandonjansen

Senior Member
Joined
Feb 14, 2013
Posts
1,701
Reaction score
1,013
Location
Abbotsford, BC, Canada
Ram Year
2012 Ram 3500 Laramie Limited
Engine
6.7 Cummins - Tuned and Deleted
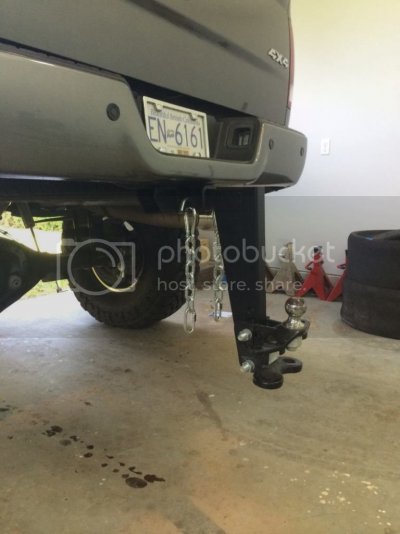
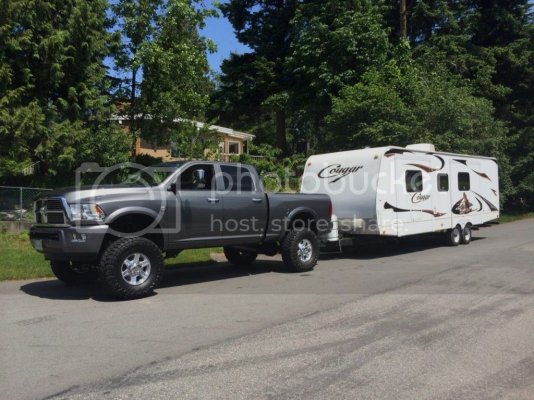
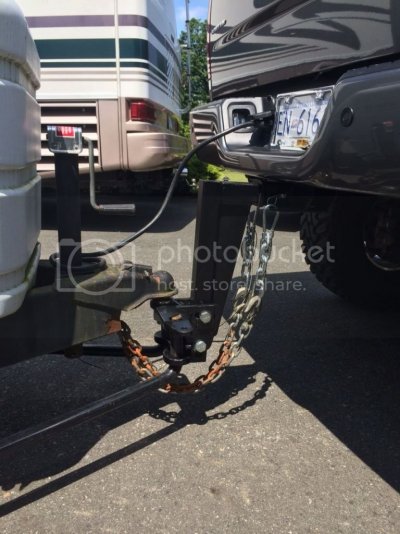
Who Says Lifted Trucks Can’t Tow? – 6-03-14

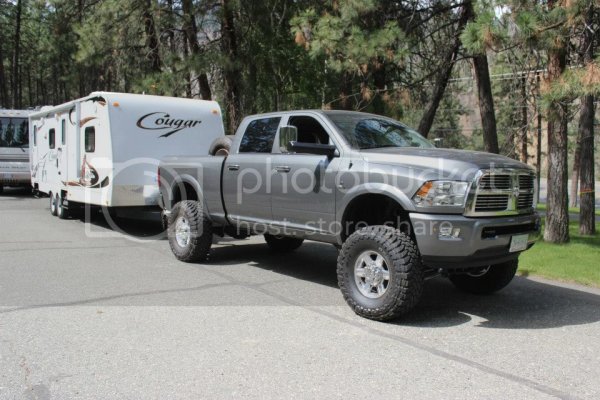
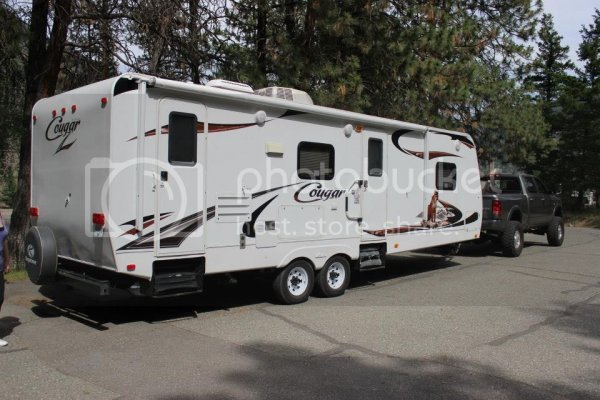
Finally got my drop hitch all set up and bought some extra chain and clasps to go with it to get the truck ready to tow. Sunday I weight and hooked it up to the trailer I'm going to be towing this week to bring it to my house. It's a 26 footer, 31 feet overall and weighs around 7800 or so. From just bringing it across town I have no worries about that trailer even slowing my truck down. I stopped at the bottom of a fairly steep decent length hill and it accelerated up it no problem. But the real test for it will be tomorrow night once the truck is loaded up with a 1000 pounds or so of tools/gear and the trailer is loaded up with water and everything and I pull it up through the mountain passes of BC.

10380547_10152062986535064_2521821027929723947_o.jpg
10443005_10152062986545064_5516931102968039424_o.jpg
1888811_10152062986540064_1806575018363162206_o.jpg
 
OP
OP
brandonjansen

brandonjansen

Senior Member
Joined
Feb 14, 2013
Posts
1,701
Reaction score
1,013
Location
Abbotsford, BC, Canada
Ram Year
2012 Ram 3500 Laramie Limited
Engine
6.7 Cummins - Tuned and Deleted
AMP Research Bedstep – 6-04-14

I've been contemplating putting a Bedstep on my truck for a while now. The one thing making me hesitant about it was that they don't tuck up quite as far as I would like them to. But after loading and unloading stuff in the truck this weekend and knowing I have a few hundred pounds of stuff to load in today I figured it would be handy to have. So I did some calling around yesterday and managed to find one locally.

Install was super simple. You have to remove one of the little corner braces for the rear bumper, remove the bumper bolts, and bolt on the brack, arm, and step. Took about 20 minutes overall.

As I expected it doesn't tuck up quite as far as I would like, but boy is it nice to have on there with the lift. Getting your foot all the way up to the bumper was quite the task before.

0152063798145064_3906108770163378580_n_zps77fce40b.jpg
 
OP
OP
brandonjansen

brandonjansen

Senior Member
Joined
Feb 14, 2013
Posts
1,701
Reaction score
1,013
Location
Abbotsford, BC, Canada
Ram Year
2012 Ram 3500 Laramie Limited
Engine
6.7 Cummins - Tuned and Deleted
First Real Tow Test for the Cummins – 6-10-14

Introduction:

As some of you know from reading this thread I went up to Ashcroft, BC (Eagle Motorplex to be exact) for my families annual trip to the BC Old Time Drags up there. In my family alone we had 8 cars go up and we're good friends with another 6 or so that were up there. This year I was asked by my brother to pull up a travel trailer for his family since my Cummins would pull it a lot easier than his Hemi would (he has a 2009 Laramie 1500). He ended up pulling up one of our cousins cars.
Review:

The travel trailer is a 26ft (31ft overall) Keystone Cougar. Loaded up we figure it weighed about 7700 lbs or so. I then had about 500 lbs of tools, parts, and equipment in the box of the truck and 3 guys inside (about 450 lbs). So for payload/towing we're looking at around 8650 lbs, about 16,450 lbs overall. Our trip was about 275 km (172 miles) each way up through the Fraser Canyon from Abbotsford, BC to Ashcroft, BC. Definitely not the most tolling road like the Coquihalla (known as one of the steepest passes in North America) but there were still a few 7% grades to climb up and down.

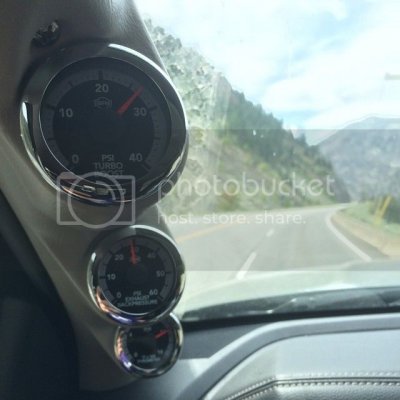
On flat land the truck handled the weight no problem. With cruise control on at about 110 km/h and the truck locked in 5th gear the RPM was about 1900, boost was around 5 psi, and pyro was around 900°F. That was definitely the sweet spot for the truck. Pulling up the hills was no problem for the truck either. A few of them it downshifted to 4th to keep the RPM up in the sweet spot. But most of them it pulled up in 5th no problem. Pulling up ******* hill which was one of the steepest, longest (a few km at 7%) grades on the trip I hit the bottom at 110 km/h, after a few hundred meters the truck downshifted to 4th and kept pulling up the hill no problem. I actually had to let off the fuel a bit because it was gaining speed. To hold that speed boost was around 27 psi, drive pressure was 29 psi, and max EGT was 1300°F. Power wise it had absolutely no issues even with 37's and stock gears.

0152073672040064_5313702936380184168_n_zps18d9b008.jpg

Going downhill was no issue at all either. The exhaust brake on the truck works phenomenal. Half the time it would downshift to 3rd by itself (because of tow/haul mode) going down the steep hills and was slowing the truck down way too much to the point where I had to start giving it fuel again. On the way home I actually turned tow/haul off going downhill and just like the truck stay in 5th with the exhaust brake on to hold the truck back. Worked like a charm. I rarely had to touch the brakes going downhill.

There were two sketchy parts about the whole trip. The first was the size of my drop shank. What I learned very quickly is that because the drop is so large the bottom of the hitch can actually move back and forth sideways quite far. So around corners the tongue of the trailer would be walking sideways a bit which felt super odd. I definitely had to be paying attention and driving the truck to keep it straight in my lane. However once I got used to the feeling it wasn't so bad to deal with.
The other big problem was the wind we faced. Both there and back we were dealing with pretty strong cross winds. The size of the trailer combined with my drop shank made that a little hard to deal with. It was definitely two hands on the steering wheel and having to constantly be counter steering as the wind was blowing different ways. There were a few times where I felt the trailer start to sway back and forth on be. I just let off the fuel and made sure my I was staying in control and counter steering the sway the best I could and it came back into control within a few seconds.

Overall it was a very good trip in both towing and drag racing. Definitely something I look forward to every year. The idea that has popped into my head now is fabricating some strut bars that go from the bottom of my drop shank back up to the frame of the truck to stop it from swaying side to side. I just have to figure out exactly how I want to do that yet.​

Fuel Mileage:

I didn't actually fill up the truck before leaving for this trip or fill it up right when I got back. But I did calculate my fuel mileage for the tank and a half that was partially used for the trip and then did a bit of algebra to determine what my estimated mileage for the trip was based off my average mileage and the total tank and a half mileage. 9.1 mpg US is what I come up with which sounds about right. Keep in mind we were practically racing there and back and I was in no way easy on the skinny pedal.​

Pictures:

10433886_10152072794635064_8257785336317496872_n.jpg
10453308_10152072795315064_3761792682279350572_n.jpg
10354249_10152072795415064_5566579999922421523_n.jpg

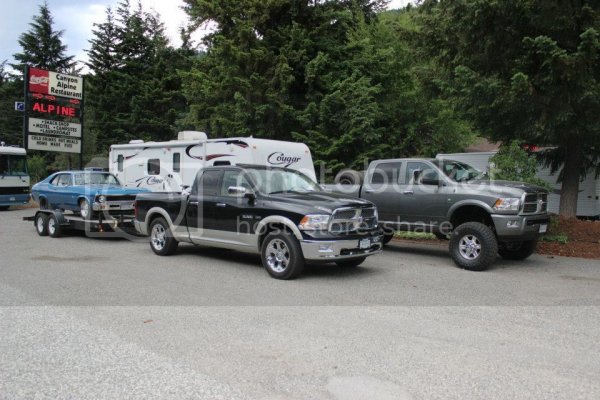
A quick picture we snapped of my truck and my brothers truck after stopping for lunch:

10468677_10152072798050064_5657155813034931647_n.jpg

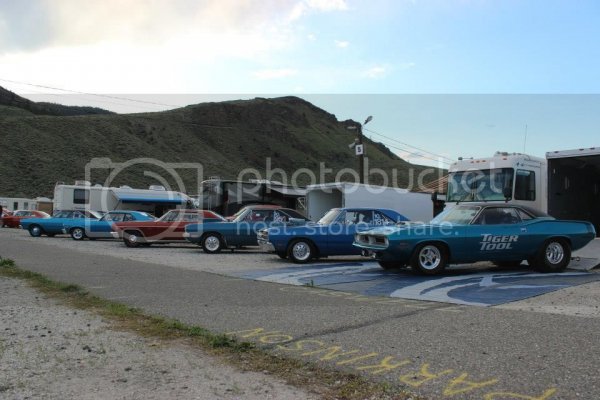
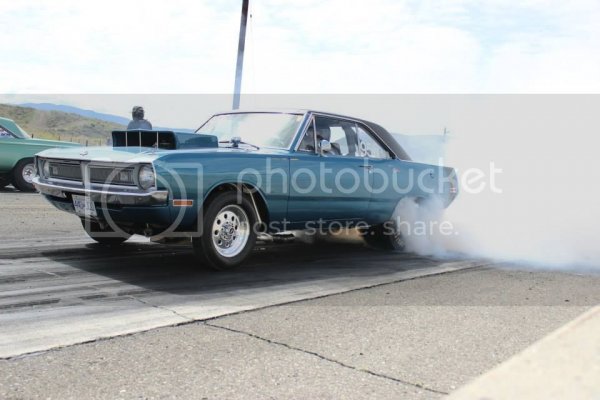
A few pictures of the cars we had up at the track:

10438985_10152072758815064_5688276262896458031_n.jpg

My Dads - 10.44 @ 129 mph:
10462940_10152072771625064_8494858948917649404_n.jpg
10352036_10152072790355064_7270288834590081694_n.jpg

My Uncle Alvin - 10.58 @ 126 mph:
10325398_10152072789185064_2216804862239062531_n.jpg
10360911_10152072789520064_8233183286166962936_n.jpg

My Uncle Ken - 9.77 @ 137 mph:
10421202_10152072787445064_816116017365203800_n.jpg
10371434_10152072788150064_2781311979046157463_n.jpg

Ya, it's got a Hemi ;)

My cousin Dale - 8.91 @ 154 mph:
10359256_10152072767185064_4849657699795577320_n.jpg
10455254_10152072767345064_6433622038973468552_n.jpg

Obviously there's more cars I could share pictures of but those are the coolest ones for now.

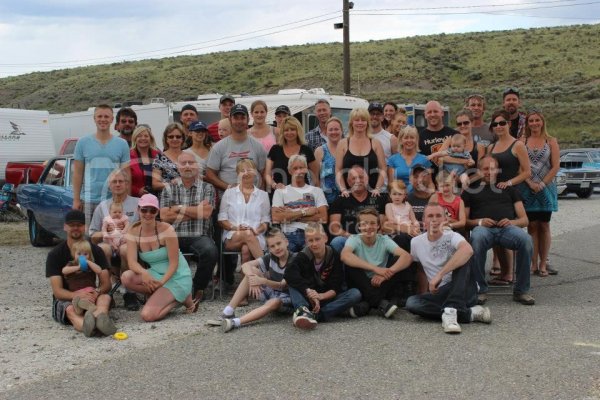
Here's one last picture of my group of family that was up there for the trip:

10447661_10152072769655064_556205186430129655_n.jpg

Video:

I also had the chance to take my Dad's car for a couple passes again this year. I threw together a quick video of the GoPro helmet cam footage and a few pictures of my runs. The video doesn't even do it justice. The feeling is indescribable.

https://www.youtube.com/watch?v=isZ2DLVHkMc
 
OP
OP
brandonjansen

brandonjansen

Senior Member
Joined
Feb 14, 2013
Posts
1,701
Reaction score
1,013
Location
Abbotsford, BC, Canada
Ram Year
2012 Ram 3500 Laramie Limited
Engine
6.7 Cummins - Tuned and Deleted
Shop Update – 6-17-14

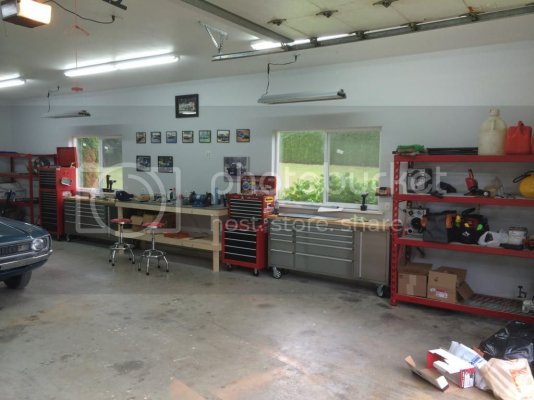
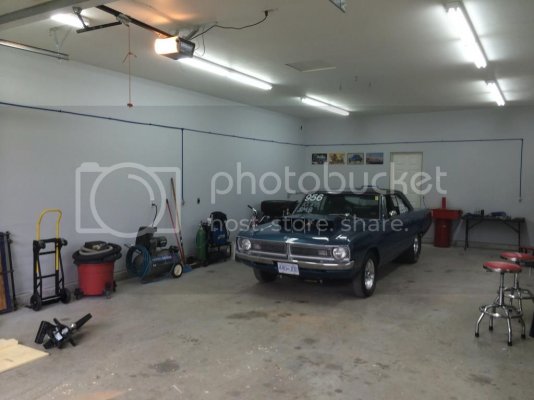
As some of you know by following along with this thread I moved in January (along with my family) to a place that has a shop. We were originally holding off on setting up the shop as we wanted to put epoxy flooring in it first. Well plans have changed since then and we've decided to put off the epoxy flooring for now because of the time of year and expense of it. So we've been slowly getting things together for it (painting, replacing light fixtures, etc.) until this past weekend where we hit it hard.

My Mom, sister and I decided to buy my Dad a couple big Snap-On industrial racks for Father's Day so we got those built and put up in there. Then Saturday my Dad and I went out and got all the equipment we needed to hook up and run hardlines for our 60 gallon compressor. We mounted it in the back room to keep it out of the way and the noise down. Ran a ball valve out of the tank to an air filter/dryer/regulator and then up into the hardline that comes through the shop. I also bought some lumber and built a base for the steel top workbench we had. Sunday I decided I was finally going to buy a workbench/toolbox that we've been eyeing for a while. We wanted to get a couple for under each window in the shop. When we were there I decided it was stupid to just get one for now so I bought my Dad one as well so that we could have the whole wall of the shop set up. We then started moving in more of our shop equipment and tools to really make it useable and put up a number of pictures/signs we had.

12FFDDF7-51B3-4EC7-BB7E-60B5F2A76BC2_zps3vftpbvd.jpg
My setup is on the right, my Dad's on the left.

BE1870EA-1CC3-4DF9-B3F3-1392C8D500A4_zpsfvhwck9o.jpg

We still have a number of different things planned for it including the epoxy floor, a sandblast cabinet, and more pictures and such to put up. But at least it's starting to look pretty good and is very functional now.
 
OP
OP
brandonjansen

brandonjansen

Senior Member
Joined
Feb 14, 2013
Posts
1,701
Reaction score
1,013
Location
Abbotsford, BC, Canada
Ram Year
2012 Ram 3500 Laramie Limited
Engine
6.7 Cummins - Tuned and Deleted
Cabin Air Filter and Fuel Filter Change – 6-18-14

As stated in my post yesterday, it was maintenance day for the Cummins. So after work I stopped in at Mr. Lube to get them to take care of the oil portion of the maintenance. They were great as always (I always end up dealing with the manager there) and had it done quick with no issues. The one thing that I am pretty disappointed in with their work is that they spilled oil everywhere when they removed the filter. When I got home and crawled under the truck I found it all over one side of the frame, front cross member and dripping down onto my one of my steering stabilizers. They must have got some on the turbo as well because I could smell it all burning off once I got off the highway today. I'll be mentioning that next time I go in to make sure they do a better job cleaning up any spilled oil under there. For this time I'll just clean it up myself, no big deal.

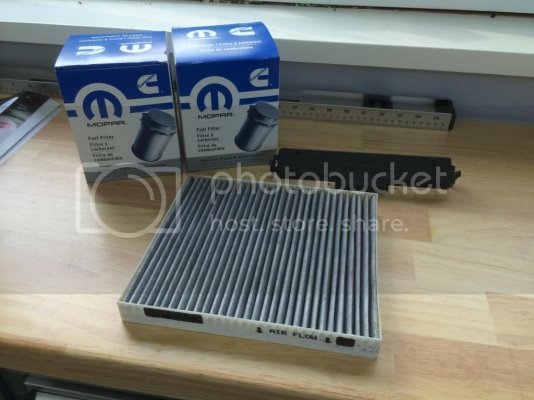
As I mentioned yesterday I ordered 2 fuel filters and a cabin air filter kit from Geno's Garage a couple weeks ago. I figured the $42 per filter from them made a lot more sense than the $140 from the stealership or $169 from Mr. Lube.

PhotoJun1772255PM_zps98cae4a1.jpg

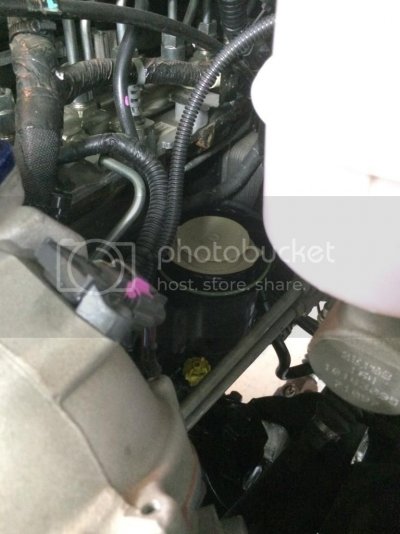
I popped the hood on the truck and started by draining the fuel filter housing. Here's an area where Ram could have done a bit of a better job. There is a hose extending down from the housing drain however it's not long enough to do anything good. Sure enough as soon as I opened the drain the fuel was going all over the front diff and splashing everywhere. I had a big drain pan underneath that area so it caught most of it eventually. But still another mess to clean up on the truck. I'm going to see if I can put a longer hose on there for the next filter change.
Getting the housing cap off was also a bit of a task. It's in kind of an awkward spot, was VERY tight, and the engine was still hot so I had to watch where I was putting my arms/hands. Once I got it cracked loose it was no problem to spin off by hand.

PhotoJun1774047PM_zps6b969708.jpg

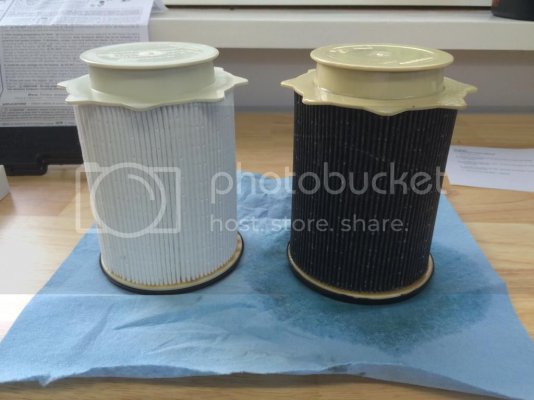
When I pulled the filter out and put it beside the new one it was quite obvious that it was time for a change.

PhotoJun1774324PM_zps41cd7048.jpg

Obviously the fact that one is wet and one is dry accentuates the difference in looks. But the old one still looks super dirty.
From there I just popped the new filter in, put the new o-ring and cap on, closed the drain plug and called it done. Afterwards when I went to move the truck I cycled the key on/off 4 times to prime the system and it started up no problem.


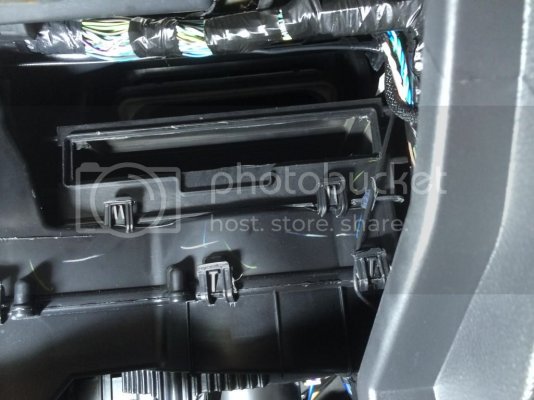
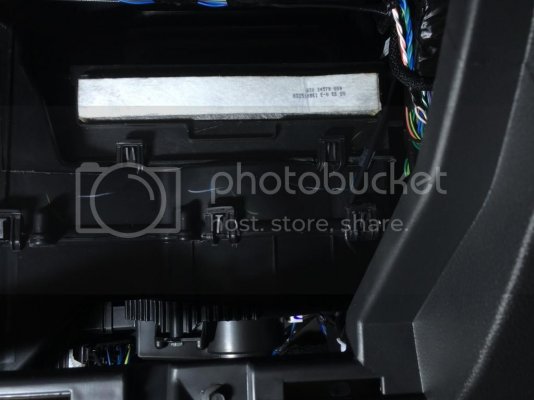
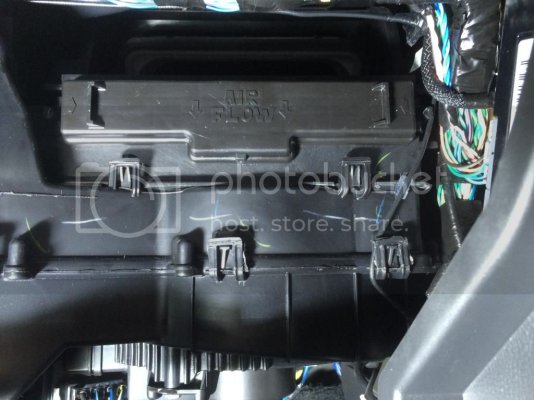
There's enough write ups on the cabin air filter mod around so I won't go into huge detail. I just used a regular blade utility knife with a brand new blade in. It cut through the plastic no problem and worked well to trim up some of the ugly parts after I got the main chunk out. Getting the filter up into the slot was a little more difficult than I expected. I had to kind of bend and twist it to get it up into place but then it popped in no problem. The cover then snapped on just as it should.

PhotoJun1781336PM_zps74cd3ce9.jpg
Right after I removed the large chunk. I cleaned it up more afterwards.

PhotoJun1782120PM_zps6d0e3e6c.jpg
PhotoJun1782211PM_zps247458d9.jpg

So we'll see how well this filter actually does on keeping the cab cleaner. I'm hoping it cuts down on most of the dirty and crap that ends up getting inside and all over my dash, door panels, etc.

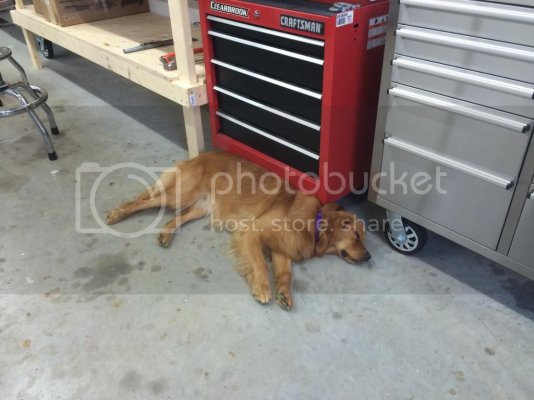
And last but not least, here's a picture of my shop companion while I was doing this work
PhotoJun1774416PM_zps033192f8.jpg
 
OP
OP
brandonjansen

brandonjansen

Senior Member
Joined
Feb 14, 2013
Posts
1,701
Reaction score
1,013
Location
Abbotsford, BC, Canada
Ram Year
2012 Ram 3500 Laramie Limited
Engine
6.7 Cummins - Tuned and Deleted
Wash, Clay bar, and Wax – 6-23-14

Introduction/Products:

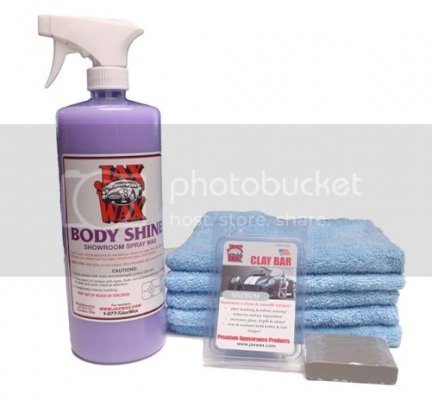
Back in April for my birthday I got a Jax Wax clay bar kit and big bottle of Jax Wax liquid carnuba paste wax. I had used their paste wax before with great results and wanted to try it again on this truck. It's a great product that's super easy to use and looks very good. Plus you use very little of it to wax the truck and it can be used in direct sunlight if you don't have access to a shaded area. This weekend I finally had some time to spend detailing up the truck and use these products.

JWK030-2_zps94fb718b.jpg
JW32-2_zps639e5031.jpg

If you're interested in these products visit Jax Wax website to order. I highly recommend them.​

Wash, Clay bar, and Wax:

Friday evening after work I gave the truck a good wash. I started with the pressure washer with a 40° nozzle on it to get all the loose dirt and junk off and give the wheel wells and frame/undercarriage a good cleaning. Then I gave it a good hand wash making sure every square inch of the painted surface was clean. I then moved it into the shop to sit over night and not get covered in dust, pollen, etc.

Saturday morning I got out to the shop around 10:00 and started working. This was the first time I have clay barred a vehicle so it was a bit of a learning experience for me. I had watched enough videos on YouTube to know exactly how it's done though so it didn't take long to catch on (definitely not a hard thing to do). After doing the roof and hood I couldn't believe how much dirt the clay bar was actually removing; I didn't think my paint was near as bad as it was. I will definitely be recommending a good clay bar to start out any detailing job after my experience. Overall it probably took me about 2.5 hours to clay bar the whole truck with a few breaks in there.

Once I had clay barred the whole thing I needed to touch up a few little rock chips on my front bumper. A couple months ago I picked up a Duplicolour Mineral Grey Metallic rock chip repair kit. Very straight forward to use. Cleaned out the chips with the abrasive tip, put 2 coats of mineral grey on with 30 minute dry time in between and then 1 coat of clear. I thought about putting another coat of clear on but the brush they gave for it was bigger than all of the chips so it was hard to keep it as neat as I wanted. I didn't want noticeable paint lines around the chip from where the clear was sitting.

My original plan was to give the truck a quick machine polish after the clay bar as that's what most detailers will tell you is the next step. I sat there for about 15 minutes staring at the truck and decided a machine polish wasn't necessary. There was absolutely no marring, swirl marks, or scratches of any kind in the paint. I don't think spending the 4 hours polishing was going to make any noticeable difference in the overall finish.

I decided to use my Porter Cable DA polisher with a red waxing pad to machine apply the wax. It's just much easier and faster than hand applying and does a better job in my opinion (as long as you know what you're doing). Plus I go over all of the truck in each direction with it making sure everything is covered. Again I started with the roof/hood and then worked my way around the truck. I did use a hand applicator in certain areas that the polisher couldn't reach or that I thought needed a little extra care/attention. After I had waxed the entire truck I gave it a good final wipe down with a clean microfibre and called it done. Overall I'd say it probably took me about 3 hours to wax it but again, that was with a number of breaks.​

Pictures:

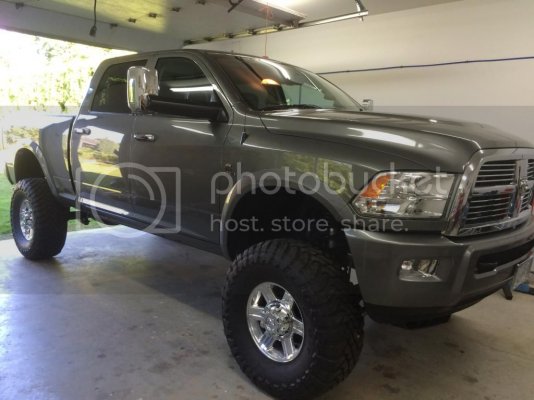
I didn't take any pictures during the process. My phone was plugged in to my stereo and I was just working away. But here's a few that I took right after finishing and then later in the evening when I went out for a drive. Keep in mind they are just taken with an iPhone 5S. They really don't do the truck justice....

C170F501-2789-46CF-9FE8-20EDC374D1EA_zpsdccnj6na.jpg
1AF791F7-5A9D-4B55-A18D-A760B6C8FB85_zpsulsxvxu5.jpg
91880F9F-90E1-47D3-A7A2-DFBA4BEC88E6_zpsq0vyuj73.jpg
AC2F0086-25B8-4982-9979-5834A6330949_zpsfxfror4l.jpg
5543AF11-F7C3-44AE-8963-4E8C8C2A9970_zpskkjuy31v.jpg
4E92A225-45E4-40EE-A67E-C27EF3D9A233_zpsgvqmdcwe.jpg

Since these pictures I spent a little more time on the truck cleaning the windows properly and RainX-ing them and then putting a good tire shine on it. This week sometime (hopefully tonight) I'm going to finish up detailing the inside of the truck and then I'll post a few pictures of that as well.​
 
OP
OP
brandonjansen

brandonjansen

Senior Member
Joined
Feb 14, 2013
Posts
1,701
Reaction score
1,013
Location
Abbotsford, BC, Canada
Ram Year
2012 Ram 3500 Laramie Limited
Engine
6.7 Cummins - Tuned and Deleted
Beside the Peterbilt and some Off-roading – 6-29-14

A few pictures to share from my weekend:

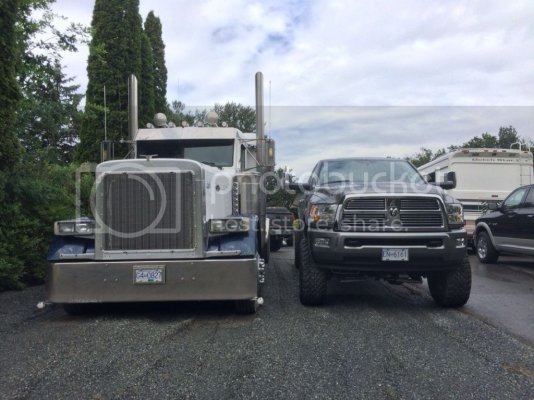
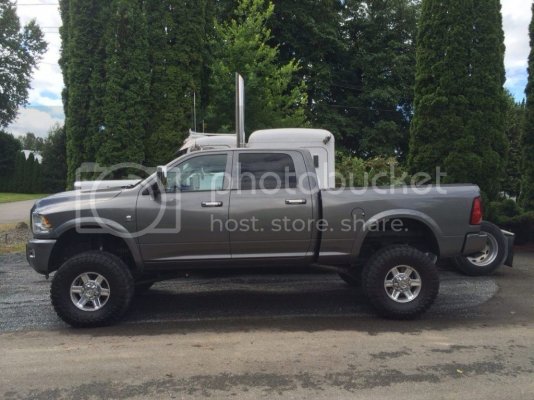
Finally got a chance to park my truck beside my Dad's Peterbilt. A few good pictures to show how big it really is...

10403955_10152114632630064_8453340693839919883_o.jpg
10397204_10152114632600064_1048026847246822446_o.jpg

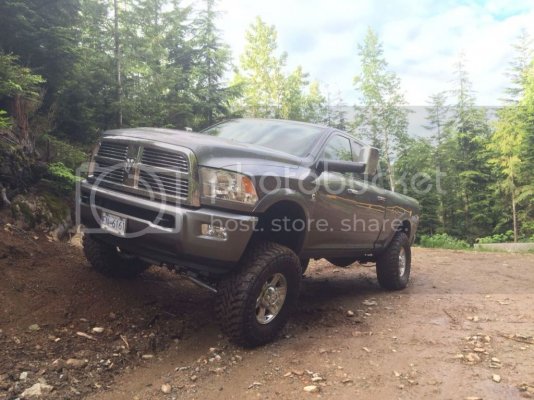
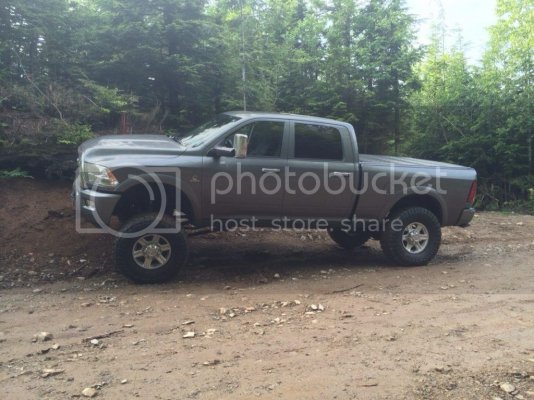
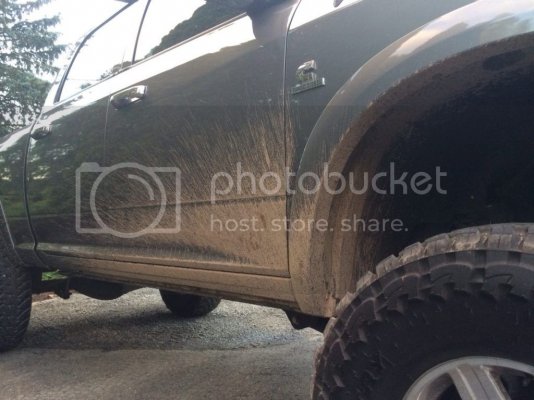
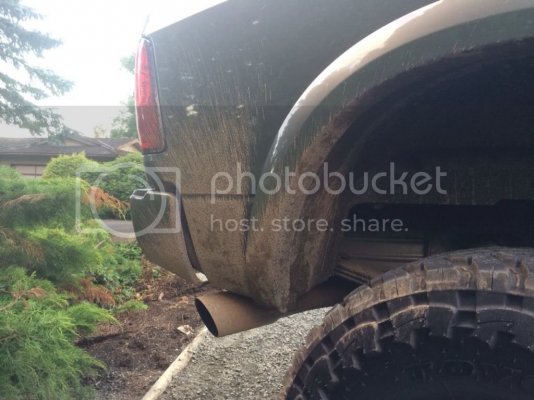
This evening I got bored so I went for a drive up an old local logging road. Nothing crazy but enough to have some fun, get the truck dirty, and flex the suspension out. Great views from up top as well.

10365492_10152114633095064_2847055411703597387_o.jpg
10285616_10152114633105064_5316253331740123090_o.jpg
10497380_10152114633120064_601384904307639557_o.jpg
1889020_10152114633115064_3031661536860254735_o.jpg
10468006_10152114633410064_6066492221109801035_o.jpg
10486385_10152114633395064_2304937991417558984_o.jpg
10504853_10152114633390064_4323726898194056462_o.jpg
10379936_10152114633400064_8305040813370352591_o.jpg

Definitely can't say she's a pavement princess anymore ;)
 
Last edited:
OP
OP
brandonjansen

brandonjansen

Senior Member
Joined
Feb 14, 2013
Posts
1,701
Reaction score
1,013
Location
Abbotsford, BC, Canada
Ram Year
2012 Ram 3500 Laramie Limited
Engine
6.7 Cummins - Tuned and Deleted
Silencer Ring Removal – 7-22-14

Last night I got around to removing the silencer ring on my turbo on my truck. Back in the fall I read posts about guys removing it and thought the entire turbo had to be taken off to do it and that it would be more work than it was worth. I recently found out that the compressor housing can be removed with the remainder of the turbo still on the engine and the silencer ring can be removed that way. Since I've been bored lately and was looking for something to do to the truck I decided to go for it. Gives me something to do and it's cheap.

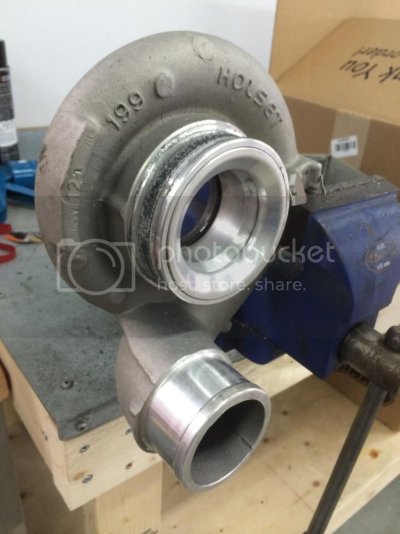
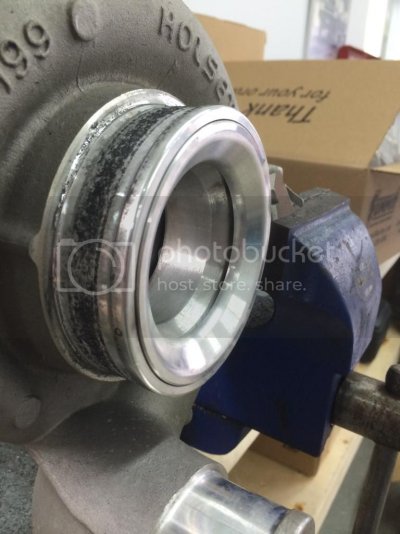
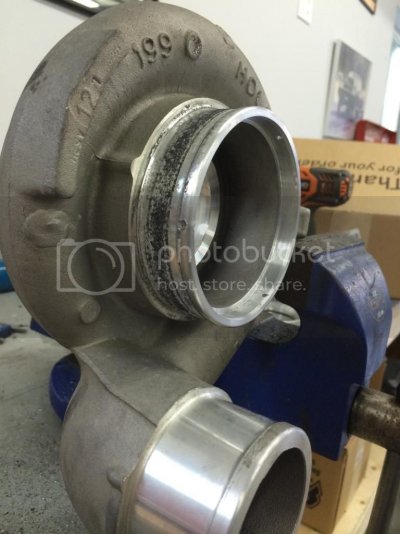
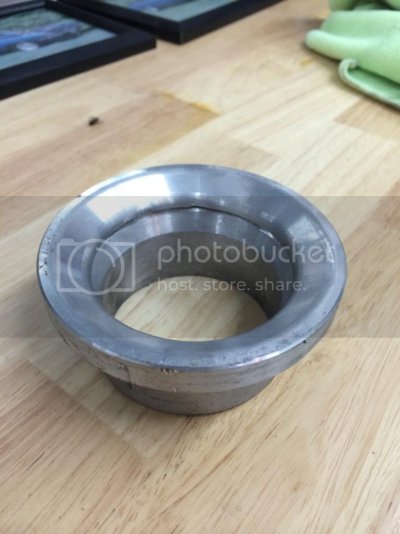
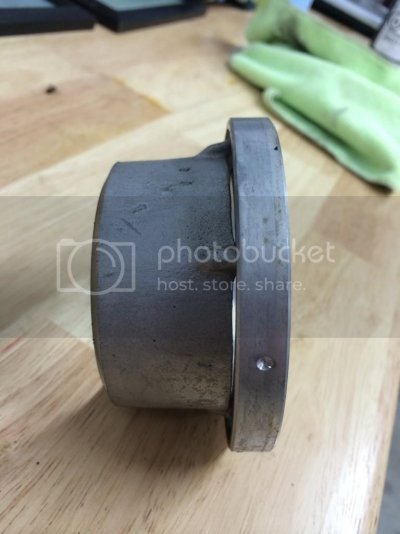
Obviously the air intake and downpipe needed to be removed. I then removed the boost tube from the turbo, loosened off the V-band clamp holding the compressor housing to the rest of the turbo and slid the housing off. Obviously you want to be very careful doing this to not ding or chip the compressor wheel blades. Once it was off I put it in the vice and drilled out the 3 pins that were holding the ring in. Drilling them out was a little more difficult than I had planned. I broke a few drill bits doing it since you had to use really small ones, and it was hard to keep it drilling straight through the pin rather than wandering to the sides. Once they were drilled down far enough I flipped the housing over and tapped out the silencer ring from the backside with a punch.
I then cleaned up the drilled out holes with a file and some scotchbrite so there wasn't any rough or sharp edges and then reinstalled everything.

Compressor housing with silencer ring:
314CA74C-7BAF-41B4-B12C-C221696734AF_zpsdliygztl.jpg
FC919F8F-68C5-4BF7-94E8-1E344FDE384F_zps8pbg3u1h.jpg

Silencer ring removed:
931B2E7A-F5E8-4FA2-A37E-D54C071FF49B_zpsz6l9wi7m.jpg
181D7481-BF7F-47E1-AB12-B5F55853363A_zpstcytojtj.jpg
C8CC31F3-CA01-47BE-879F-B09C79DBDFF4_zps0e4tshbn.jpg

The turbo is definitely louder with it removed however it's not a clean whistle sound like a 5.9 or aftermarket turbo; so don't expect that if you want to do this mod. It has more of a whooshy sound to it if that makes sense. It's not much louder under 5 psi of boost which is alright but it starts to come on after that. Overall I think it was still worth doing but I was hoping for slightly better results. I'll give it a few more days before I really know how it sounds in all conditions.

I've been thinking about making another sound clip video of the truck now that I'm running different tuning that changed the exhaust sound a lot. If so I'll do another ride along to try and pick up the turbo sound.


As far as the next big mods go I'm fairly certain 4.56 gears are going to be it. The stock 3.73's and low RPM the truck is running at is just getting to me and I'm not happy with it. I've actually been running the truck in 5th gear on the highway up around 1800-1900 rpm to get more of a feel of what it would be at with 4.56 gears and I like it much better. There's actually less load put on the engine doing that as well so it might yield better fuel economy.
I leave for vacation in another week and a half so nothing will happen before then. I'll probably hold off until after so I have more spending cash for holidays. End of August/early September is what I'm thinking right now for the gear swap. After that I may take it easy mod wise for a while... start to save up cash for new wheels and tires next spring and put money toward some other hobbies and sides of life. But we'll see how that plan goes ;)
 
Top