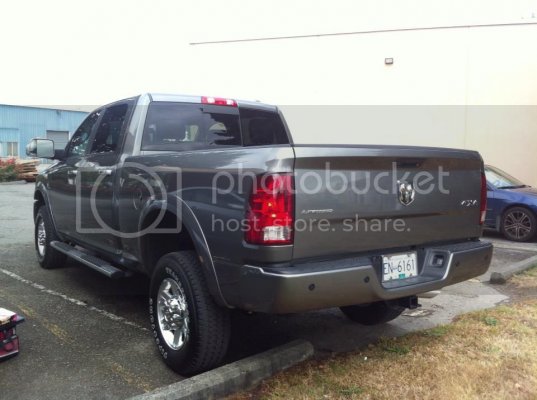
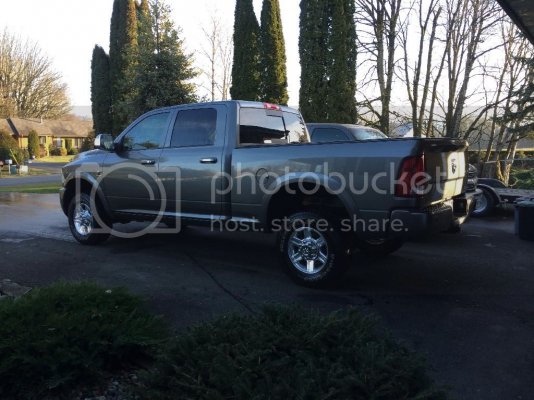
brandonjansen - 2012 Ram 3500 Laramie Limited Build Thread

Disclaimer: Links on this page pointing to Amazon, eBay and other sites may include affiliate code. If you click them and make a purchase, we may earn a small commission.

brandonjansen

Senior Member
Joined
Feb 14, 2013
Posts
1,701
Reaction score
1,012
Location
Abbotsford, BC, Canada
Ram Year
2012 Ram 3500 Laramie Limited
Engine
6.7 Cummins - Tuned and Deleted
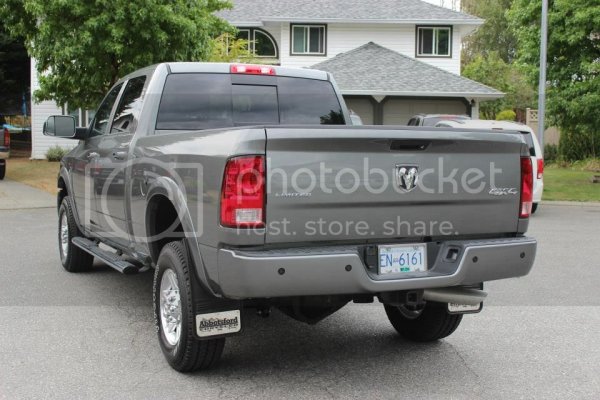
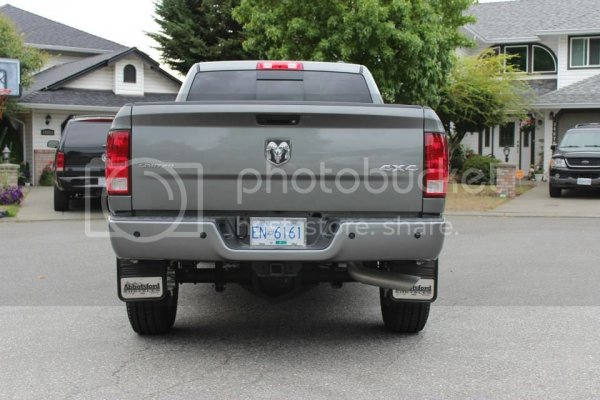
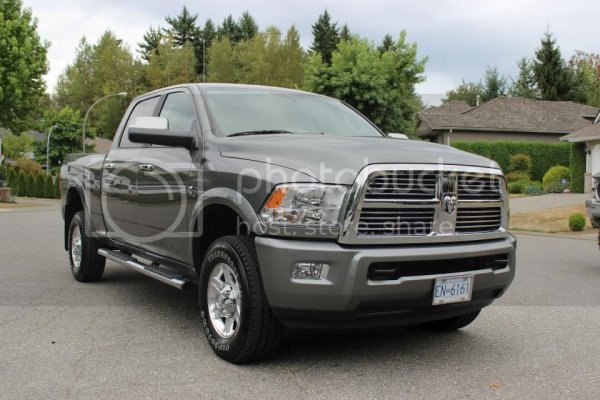
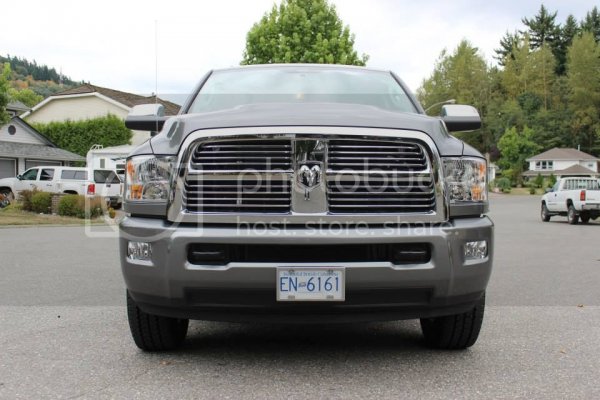
Hey all! I figured it was about time I posted a build thread up on this forum. I've had one up on another forum since I bought the truck and will be posting all the relevant mod posts over to this thread from that so bear with me if some of them have a few irrelevant items in them. My original build thread started in August 2013 and has obviously gone on from there so I'm going to post the original post dates in the title of each post to give you an idea of the timeline of how the mods happened/progressed. There should be about 60 posts or so just to catch up to where I'm at now and from there I'll keep this thread updated as the build goes on.

If you have any questions about the build or mods that I've done feel free to post them up. I'm always up for talking truck and answering questions/discussing ideas.

Thanks for reading!

Brandon
 
OP
OP
brandonjansen

brandonjansen

Senior Member
Joined
Feb 14, 2013
Posts
1,701
Reaction score
1,012
Location
Abbotsford, BC, Canada
Ram Year
2012 Ram 3500 Laramie Limited
Engine
6.7 Cummins - Tuned and Deleted
Purchase – 8-28-13

Well the day finally came where I got my Cummins

A bit of my story:
I've wanted a Cummins ever since I was 14 or 15 years old (I’m 21 now); they were always just so cool and I got the bug that I needed to build one. So it essentially became my dream to do that one day. Obviously it's not something I could afford right out of high school, especially since I went to college right away, so that was put off. So that brings us to the point where I bought my 2012 Ram 1500 SXT. At the time when I bought it that was a huge purchase for me. I had just started a job with my new company so I didn't want to dig in too deep before everything was a little more routine and normal for me. Well since then I've been promoted and gotten a few raises so the Cummins bug was back at me again. I started looking on and off for the right deal to pop up. I wasn't overly serious about making a move but the option was definitely there. Well finally searching Craigslist one day this 3500 fully loaded Laramie Limited popped up and I knew I had to take a look. Well one thing led to another and bam! Now I own it.

For me this is everything I wanted in the truck to start with. It has every option I could think of, the right colour, Laramie Limited, 2012 (no urea junk)... it is essentially the start of my dream truck. So I'm very stoked about it. I figured now was the time to get into a truck like this before I'm overwhelmed with other bills later in life and won't be able to afford this truck. At least now I have the truck and I can slowly mod it as money comes in.

Numbers:(remember, I'm in Canada)
Since I already know a bunch of you are going to ask what numbers I got in the deal I might as well post them now. I ended up negotiating with them on my truck as a trade in to what I consider a decent price considering what it was. I paid $25,500 10 months ago and have put about $10,000 into it since then. With the trade in value and tax savings because of it, it worked out to about $30,500 for my truck which I'm fairly happy with. Considering the depreciation of the truck I got a fair bit back for my mods.

Now for the new truck. The window sticker on it was $76,000. They had it listed for $70,000 on the lot and I got them down to a final price of $60,000. Again, I'm fairly happy with that deal as well considering everything the truck has.

Sponsorship:
This truck and myself are now sponsored by Bully's Performance. The majority of the parts (everything possible) that I want to put on this truck will be supplied by Bully's. I can't say enough about both Andrew and Jeremiah. They are incredible guys to work with and provide exceptional customer service. If anyone needs anything for their truck (even if it's not listed on their website) give either Andrew or Jeremiah a shout at [email protected]. They will help you find what you're looking for and give you the best pricing possible. Very stoked to have these guys supporting me on this build!

24hr Review:
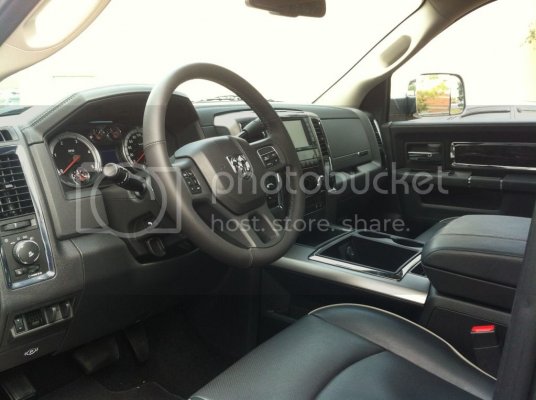
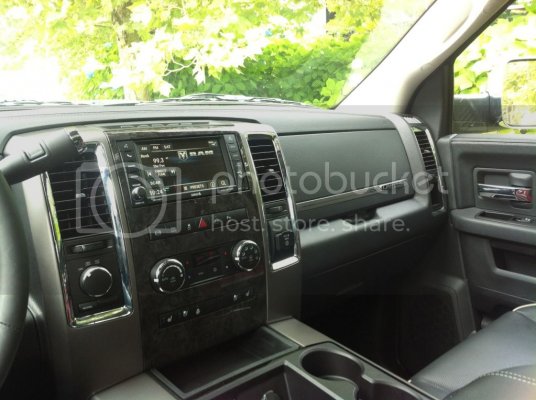
Well so far I've had this truck for about 18 hours and it has been amazing! HUGE step up from my base trim 1500. The ride is incredible, a lot smoother than I expected for a 3500. The interior is immaculate and so well done. The features that it have literally blow my mind. Last night my dad and I just sat in the truck for an hour or so messing around with things and finding out what they all do both amazed at some of the features. The Cummins is amazing, more power and torque than I know what to do with at the moment. But I have huge plans for it, so things will come.... Overall I am 100% satisfied with the purchase of this truck.

Mod Plans:
I definitely have tons planned for this truck in my head already. Overall this will be a much slower build than my 1500 just because of the cost of things and warranty issues. But here are some of my short term and long term mod plans.

Short Term:
Remove mud flaps - complete
AntennaX 7" billet antenna - completed
Remove running boards - within a few days
Remove intake baffle - within a few days
LED license plate, reverse, and cargo lights - within a few days
Bakflip G2 Tonneau Cover - will be ordered right away
Rough Country Leveling Kit - within a few months
Boost and Pyro Gauges in A-pillar mount - within a few months
S&B intake - within a few months

Long Term: (at the moment)
8" or 10" lift, not sure what brand yet
22x11 Fuel Krank wheels
40x15.5 Toyo MT's
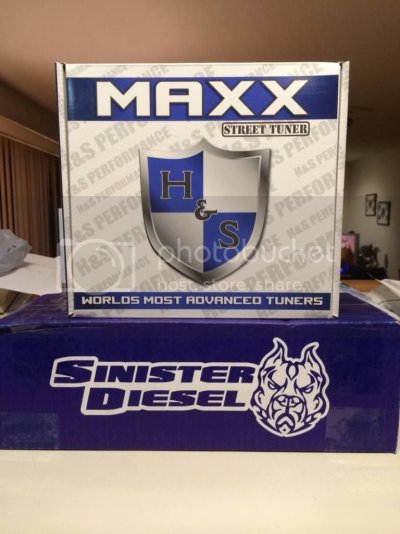
H&S Performance Tuner
EGR delete
DPF delete
4" MBRP turbo back exhaust

Obviously I will think of other mods as time goes on... there will be lots. Everything will be updated in this thread.

Pictures:
And finally the part everyone wants to see.... At the moment I only have a few iPhone pictures, but once I have some time I'll get some with my T3i
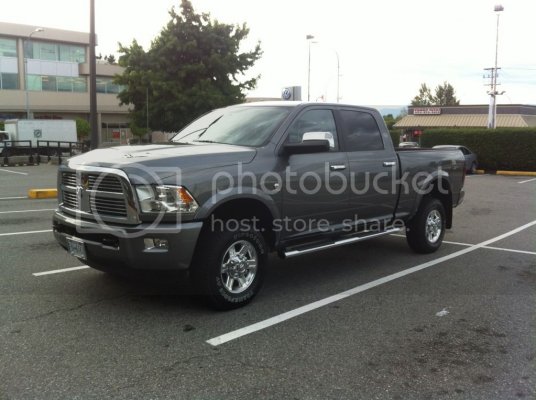
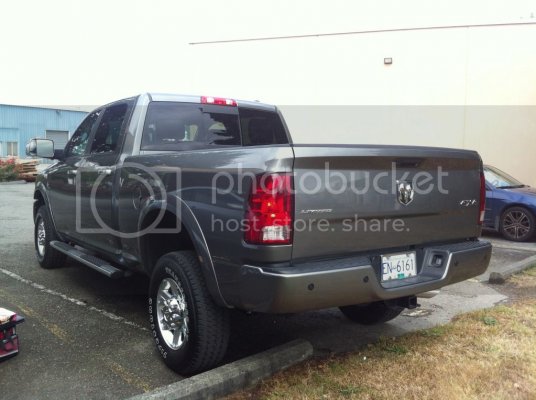
null_zps29d1bfc9.jpg
null_zps1fc26bbd.jpg
null_zps550a36c3.jpg
null_zpsf0d65ccc.jpg
null_zpsb5eeaad0.jpg
null_zps3b74553e.jpg

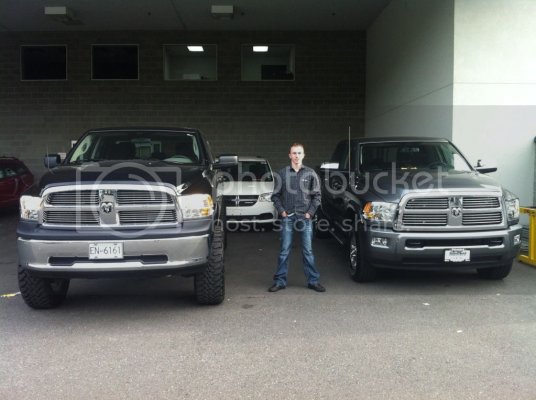
And a picture of me with my old 1500 SXT and my new 3500 Laramie Limited. The 1500 is quite a bit closer to the camera, that's why it looks so much bigger.... But for a brief period of time I owned both these trucks. Very happy to be driving away in the Cummins though ;)
null_zps650e17c5.jpg
 
Last edited:
OP
OP
brandonjansen

brandonjansen

Senior Member
Joined
Feb 14, 2013
Posts
1,701
Reaction score
1,012
Location
Abbotsford, BC, Canada
Ram Year
2012 Ram 3500 Laramie Limited
Engine
6.7 Cummins - Tuned and Deleted
Completely stock truck pictures – 8-29-13

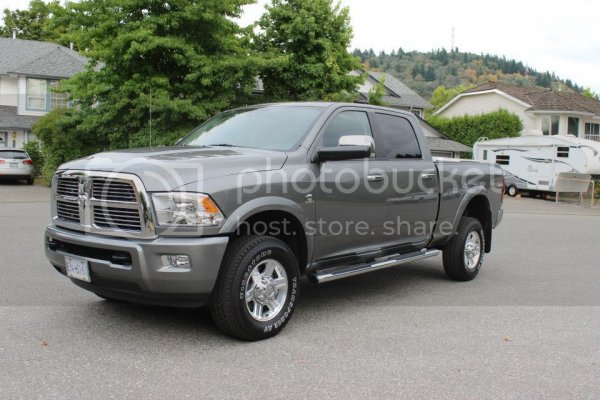
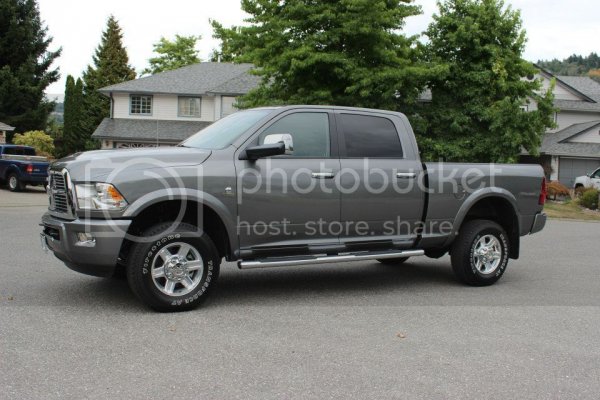
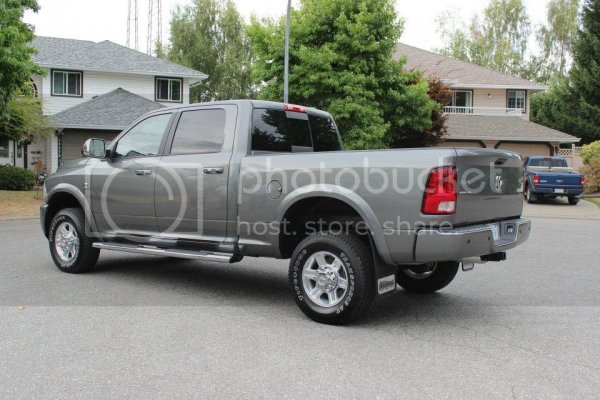
So the mistake I made with my last truck was not taking any good pictures of it 100% stock.... so with this one that was the first thing I did. Here are a bunch of pictures I took as soon as I got it home.

1233505_10151550635245064_489561169_n.jpg
1185883_10151550635215064_1754576380_n.jpg
999456_10151550635230064_1700527406_n.jpg
1234888_10151550635345064_696671573_n.jpg
526307_10151550635395064_1744687626_n.jpg
1186293_10151550635505064_833500196_n.jpg
1003840_10151550635540064_66691017_n.jpg
 
OP
OP
brandonjansen

brandonjansen

Senior Member
Joined
Feb 14, 2013
Posts
1,701
Reaction score
1,012
Location
Abbotsford, BC, Canada
Ram Year
2012 Ram 3500 Laramie Limited
Engine
6.7 Cummins - Tuned and Deleted
First Round of Little Mods – 8-29-14

Here's the first round of mods that I've done to the truck so far.

First thing was removing the mud flaps. Couldn't stand those.
542222_10151550640215064_1155801807_n.jpg

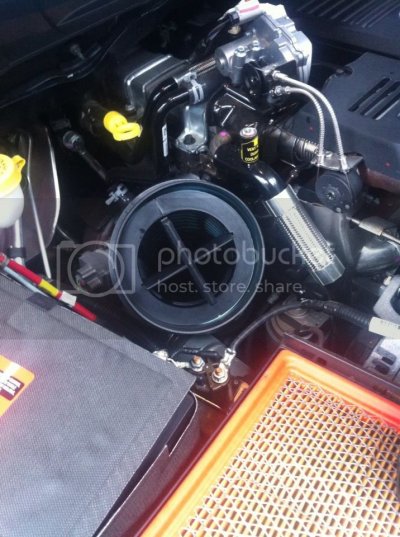
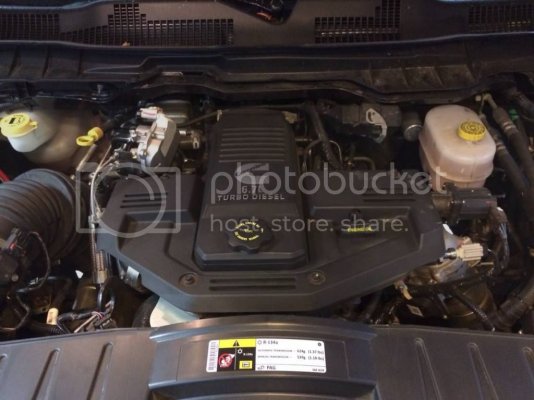
Next was removing the intake baffle. With it installed you literally couldn't hear the turbo at all unless you were really listening for it. Plus something that big and chunky in the intake can't be good for airflow. Now with it removed you can definitely hear the turbo better. It still isn't too loud but there's at least some sound.
1236784_10151550640220064_559129548_n.jpg
1175645_10151550640225064_1416757448_n.jpg
1002637_10151550640235064_1025995488_n.jpg

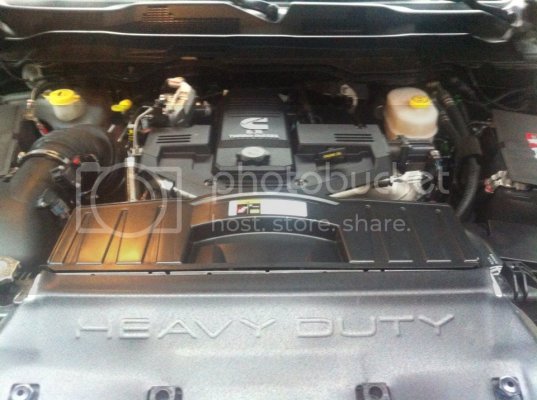
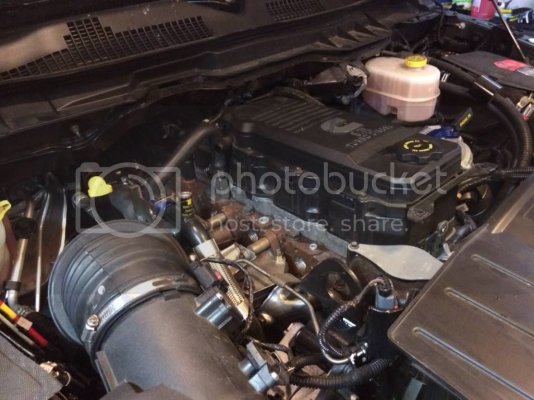
Not a mod, but here's a quick one I took of the engine.
1236097_10151550640230064_327332846_n.jpg

Next was removing the running boards. I've never been a fan of those either, so they needed to come off!
525748_10151550640410064_775468455_n.jpg

I also put all the white LED lights in the license plate lights, reverse lights, and cargo lights but didn't take any pictures of it. I figure most guys know how that looks and it's hard to get a good picture of lights like that. If someone really wants to see them I'll try to snap a few pictures.

My 7" billet stubby antenna was transferred from my old truck to this one as well. Forgot to take a picture of it though...

As stated earlier, next mod will be the tonneau cover which should be arriving in the next few days. From there I haven't decided what mod to do next. Right now it's between an S&B intake, leveling kit (and how far I want to go with it), or A-pillar gauges (boost and pyro). Anybody have any suggestions?
 
OP
OP
brandonjansen

brandonjansen

Senior Member
Joined
Feb 14, 2013
Posts
1,701
Reaction score
1,012
Location
Abbotsford, BC, Canada
Ram Year
2012 Ram 3500 Laramie Limited
Engine
6.7 Cummins - Tuned and Deleted
B-Pillar Vinyl Removed and Bakflip G2 Tonneau Cover– 9-04-13

Yesterday after work I had about an hour to kill so I started on a couple more mods to the truck. First I removed the center speaker from the dash. I didn't take any pictures as it's fairly straight forward and not really cosmetic at all. Then I took a bit of time to tune the stereo and get it all sounding nice. For a stock set up I'm actually very impressed with it. Typically I find the "high end" stereos put into stock vehicles such as the Alpine system overrated but this one actually performs very well. It could definitely use a better sub but the speakers themselves are fine by me for now.

Next I started to remove the B-pillar vinyl off the drivers side. Once I figured out the best way to do it (pulling from the top door jam corner down at a 45 degree angle) it all came off fairly easily. It did leave a lot of glue behind that I didn't have time to take off yet. So far I've only done the drivers side but it definitely looks a lot better without it. I'm hoping to have time to tackle the passenger side today and then get all the glue removed.

B-pillar vinyl still installed on the passenger side:
1229874_10151559778105064_2122822777_n.jpg

Removed on the drivers side:
1185846_10151559778110064_1439340481_n.jpg

My tonneau cover arrived at the shipping location this morning so I'm hoping to have time to go pick it up after work today. As long as I can get it and the weather holds up I'll be installing that tonight. Really looking forward to having it on the truck!

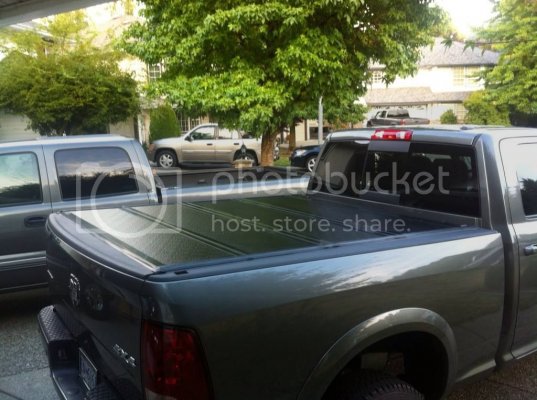
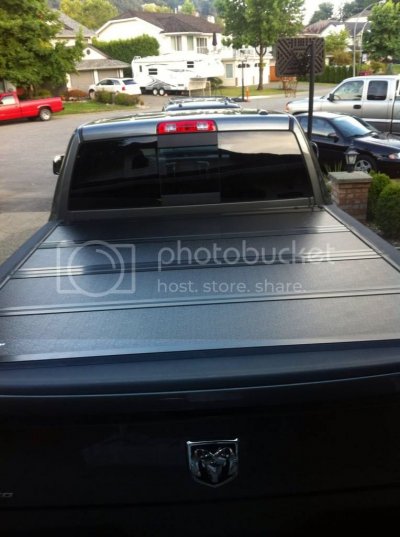
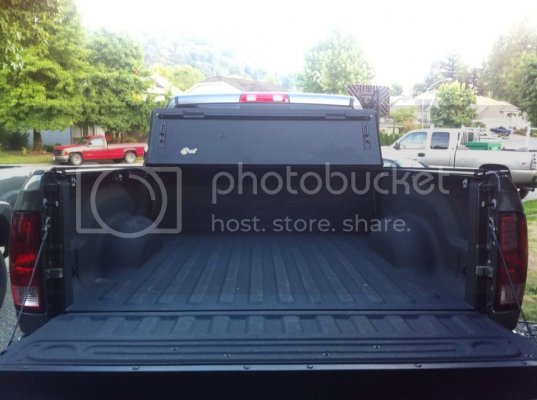
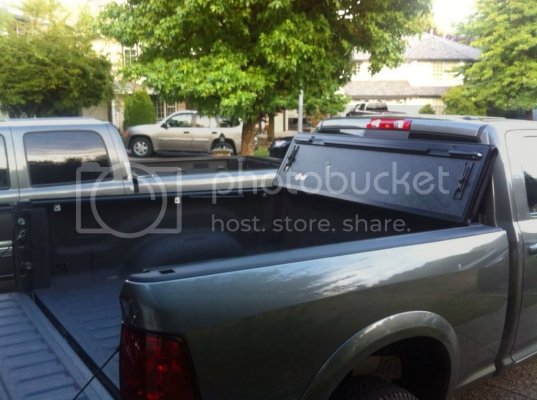
Bakflip G2 Tonneau Cover Installed

Got the Bakflip installed today. Install was really simple despite the fairly basic (unhelpful) instructions. They did say that I was supposed to install the shims on the bottom of the rail to put the rail at the correct angle. I found out pretty quick that there wasn't any need for them. Just install the rails straight to the bed rail with no shims.

There is a small dent on the bottom of one of the panels (visible in the pictures) that I'm not too thrilled about. But it will rarely be seen so it's not the biggest deal. Overall I'm very happy with the cover; it looks and functions great!

1272141_10151560460405064_1742589340_o.jpg[/URL]
1271637_10151560460410064_1247066496_o.jpg
1239355_10151560460400064_1824625274_o.jpg
1294434_10151560460415064_526202901_o.jpg
 
Last edited:
OP
OP
brandonjansen

brandonjansen

Senior Member
Joined
Feb 14, 2013
Posts
1,701
Reaction score
1,012
Location
Abbotsford, BC, Canada
Ram Year
2012 Ram 3500 Laramie Limited
Engine
6.7 Cummins - Tuned and Deleted
Build Sheet – 9-09-14

I finally got my build sheet emailed to me from Chrysler Canada. Here it is if anyone was interested in seeing it.

Prem Leather Trimmed Bucket Seats
Dark Slate
Limited Decor Group
Monotone Paint
Single Rear Wheel Group
160 Amp Alternator
730 Amp Maintenance Free Battery
Electronic Stability Control
Anti-Lock 4-Wheel Disc Brakes
Bucket Seats
Ventilated Front Seats
2nd Row In Floor Storage Bins
Front Height Adjust Shoulder Belts
Supplemental Side Air Bags
Advanced Multistage Front Air Bags**
Supplemental Frt Seat Side Air Bags
Supp. Side Curtain Frt/Rr Air Bags
Floor Covering Carpet
Luxury Front & Rear Floor Mats
Heated Front Seats
Full Length Premium Floor Console
Driver/Passenger Assist Handles
Rear 60/40 Split Folding Seat
Luxury Door Trim Panel
Rear Underseat Compartment Storage
Leather Wrapped Shift Knob
Overhead Console w/Garage Dr Opener
All Automatic Transmissions
6-Spd Automatic 68RFE Transmission
5,500# Front Axle
Elec Shift-On-The-Fly Transfer Case
3.73 Rear Axle Ratio
11.50 Rear Axle
Anti-Spin Differential Rear Axle
Conventional Differential Frt Axle
6.7L I6 Cummins Turbo Diesel Engine
Tinted Glass Windows
Rear Power Sliding Window
Sun Visors w/Illum Vanity Mirrors
Rear View Auto Dim Mirror
Power Chrome Trailer Tow Mirrors
All Vehicles W/Power Mirrors
Power Sunroof
Remote Keyless Entry
Sentry Key Theft Deterrent System
Air Cond ATC w/Dual Zone Control
Dash Liner Insulation
Floor Tunnel Insulation
Instrument Cluster
Instrument Panel Woodgrain Bezel
Instrument Panel Black Bezel
200 KPH Primary Speedometer
Longhorn Interior Accents
Temperature & Compass Gauge
Var Intermittent Windshield Wipers
Dual Note Electric Horns
12V Auxiliary Power Outlet
115V Auxiliary Power Outlet
Power Accessory Delay
Garmin Navigation System
Power Locks
Power Lumbar Adjust
Heated Second Row Seats
Pwr Front Windows, 1-Touch,Up & Down
Pwr 10-Way Mem Drvr 6-Way Pass Seats
Vehicle Information Center
Glove Box Lamp
LED Interior Lighting
Underhood Lamp
Ext. Mirrors w/Supplemental Signals
Exterior Mirrors Courtesy Lamps
Exterior Mirrors w/Memory
Chrome Exterior Mirrors
Traveler/Mini Trip Computer
Radio/Drv Seat/Mirrors/Pedals Memory
Rear Dome w/On/Off Switch Lamp
Halogen Quad Headlamps
Automatic Headlamps
Daytime Running Headlamps, High Beam
Fog Lamps
Cargo and CHMSL Lamp
Security Alarm
Painted Front Bumper
Painted Rear Bumper
Body Color Headlamp Filler Panel
Front License Plate Bracket
MOPAR Bright Door Entry Guards
Bright/Bright Grille
Ram's Head Badge
Body Color Fender Flares
Body Color/Chrome Door Handles
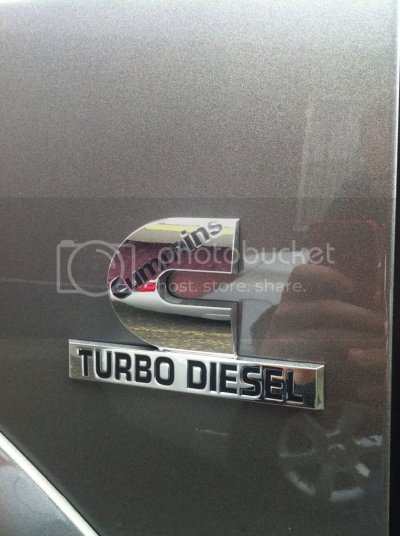
Cummins Turbo Diesel Badge
Black-Out Tape
Delete Wheel Spats
Chrome Tubular Side Steps
4X4 Badge
Limited Badge
Front Air Dam
50 State Emissions
Diesel Exhaust Brake
34 Gallon Fuel Tank
Transmission Oil Cooler
Exterior Mirrors w/Heating Element
Engine Block Heater
Speed Control
Electronically Controlled Throttle
Heated Steering Wheel
Dual Transmission Oil Cooler
Heavy Duty Engine Cooling
Current Generation Eng Controller
Mineral Gray Met. Clear Coat
All Radio Equipped Vehicles
9 Amplified Speakers w/Subwoofer
Fixed Long Mast Antenna
Steering Wheel Mounted Audio Ctrls
6.5" Touch Screen Display
Uconnect 430N CD/DVD/MP3/HDD/NAV
SIRIUS Satellite Radio
Uconnect Voice Command w/Bluetooth
Audio Jack Input for Mobile Devices
Remote USB Port
Power Steering
Premium Leather Wrapped Steering Whl
Front Heavy Duty Shock Absorbers
Rear Heavy Duty Shock Absorbers
Front Stabilizer Bar
Tilt Steering Column
Full Size Spare Tire
Tire Carrier Winch
LT265/70R17E OWL On/Off Rd Tires
Firestone Brand Tires
17X8.0 Aluminum Wheels
17" Steel Spare Wheel
All Aluminum Wheels
Single Rear Wheels
Center Hub
ParkSense Rear Park Assist System
ParkView(TM) Rear Back-up Camera
Power Adjustable Pedals w/Memory
Remote Start System
Tip Start
Pickup Box
Vendor Painted Cargo Box
Winter Front Grille Cover
Tow Hooks
Class IV Receiver Hitch
7 Pin Wiring Harness
Trailer Tow w/4-Pin Connector Wiring
Universal Garage Door Opener
Trailer Brake Control
Locking Tailgate
Body Color Fuel Filler Door
English/USA Language
Spray in Bedliner
40GB Hard Drive w/28GB Available
Seat Parts Module
Instrument Panel Parts Module
Door Parts Module
Front End Parts Module
For More Info, Call 888-539-7474
1-Year SiriusXM Radio Service
Build To Canada Mkt. Specifications
5.5 Additional Gallons of Diesel
Spring - Left Front
Spring - Left Rear
Spring - Right Front
Spring - Right Rear
GVW Rating - 10100#
FAM: D2 TRACKING: 10721T05 MY:2012
FAM: D2 TRACKING: 10727T10 MY:2012
FAM: D2 TRACKING: 11020T04 MY:2012
FAM: D2 TRACKING: 20514T24 MY:2012
FAM: D2 TRACKING: 20716T22 MY:2012
Canada Dealer Retail
Zone 25-Canada-Alberta
Customer Preferred Package 2FM
Customer Preferred Package 2TM
Schedule D To C Tracking
Federal A/C Excise Tax
Special Scheduling Condition II
Special Scheduling Condition VII
4X4 Tracking
Vendor Painted Cargo Box Tracking
Saltillo Truck Assembly Plant
Crew Cab
D2/6333 Vehicle Family
Price Class R
Four Wheel Drive (4WD)/(4X4)
2012 Vehicle Specifications
6 FT. Cargo Box
3500 Series
Vehicle Order Tracking
Canada Specifications Label
British Columbia Province Code
 
OP
OP
brandonjansen

brandonjansen

Senior Member
Joined
Feb 14, 2013
Posts
1,701
Reaction score
1,012
Location
Abbotsford, BC, Canada
Ram Year
2012 Ram 3500 Laramie Limited
Engine
6.7 Cummins - Tuned and Deleted
DeeZee Tailgate Assist – 9-28-14

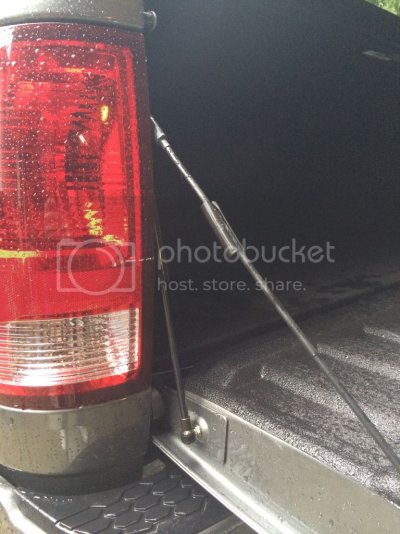
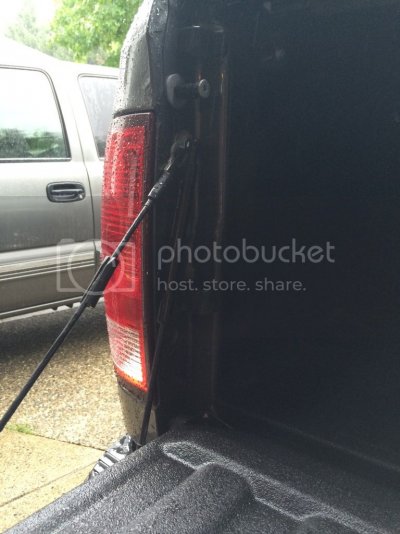
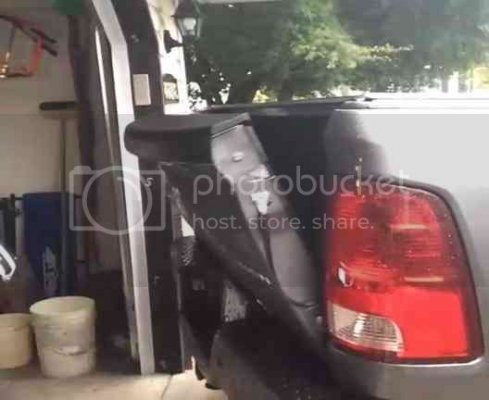
Well I was getting to the point where I needed to fill my mod addiction. So yesterday I went to a local custom truck shop and picked up a DeeZee tailgate assist. Nothing big, but at least it gave me something to do and it will be convenient to have.

Install was simple, took about 10 minutes tops. Just follow the instructions and you won't have a problem.

Here's a couple pictures I snapped with my phone quick:

null_zps637b8c36.jpg
null_zpsaee89a64.jpg

And a link to a quick video I took of it (click the picture)

63C-E5AD443CE504-2661-000001C92C8CC18B_zps51dab6a2.jpg
 
OP
OP
brandonjansen

brandonjansen

Senior Member
Joined
Feb 14, 2013
Posts
1,701
Reaction score
1,012
Location
Abbotsford, BC, Canada
Ram Year
2012 Ram 3500 Laramie Limited
Engine
6.7 Cummins - Tuned and Deleted
First Minor Towing Test – 10-07-13

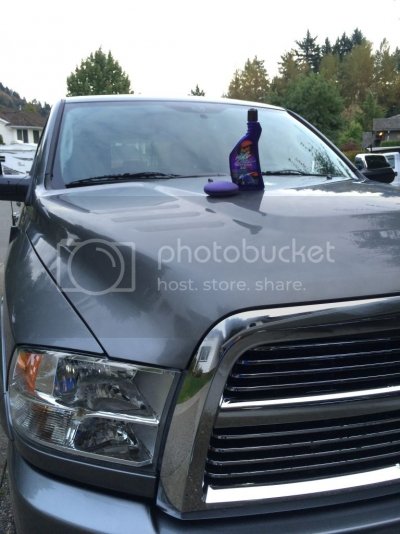
Since we finally had some good weather this weekend I took some time to fully clean up my truck and put a coat of wax on it. I used Meguairs Tech 2.0 wax and am actually fairly happy with it this time around. Before when I used it on my 1500 I machine applied it and I don't think it liked that very much, the results didn't impress me. So this time around I decided to hand apply it and that worked much better. It goes on and comes off very easy and leaves a very nice shine. One thing I really like about it is that it doesn't leave a white residue if you accidentally get it on any plastic or rubber (I still tape up the textured plastic). The only complaint I had about using it is that it's almost impossible to see where you've applied it on a mineral grey truck. It blends right in to the colour of the paint! :doh:

The picture below shows the truck with a coat of wax on it. See what I mean about not being able to tell?

null_zps9148eb21.jpg

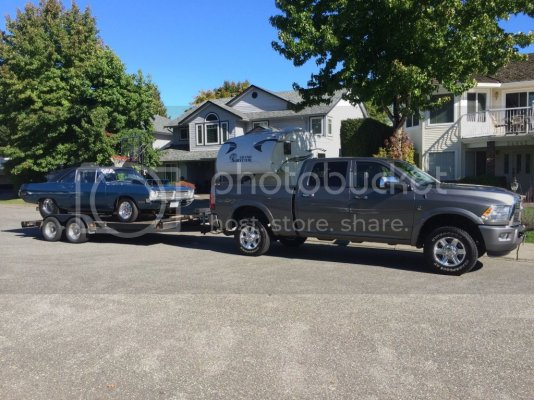
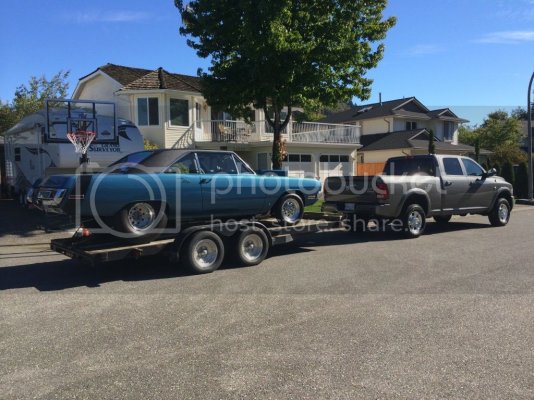
On Sunday I finally got to put the Cummins to a little bit of work hauling my Dad's trailer/car. Not a huge weight for it (my estimate is around 4500 pounds for the car and trailer) but the Cummins pulls it effortlessly. Power wise I barely feel that anything is back there. I notice it more in braking than pulling. The exhaust brake works awesome to hold back the load. There was actually a few times where it downshifted another gear and I actually had to give it a little fuel because it was holding back too well. Overall I'm very happy with how it performed.

null_zps8334fa6e.jpg
null_zpsa49761b9.jpg

The next test for it that will actually put it to some good work will be in a few months. My parents bought a new house so we'll be moving in mid January. The plan is that we're going to use my Uncles 28ft enclosed trailer towed by my truck. So with that thing all loaded up with our furniture and such it should be fairly heavy. I'm pretty excited for that tow already.

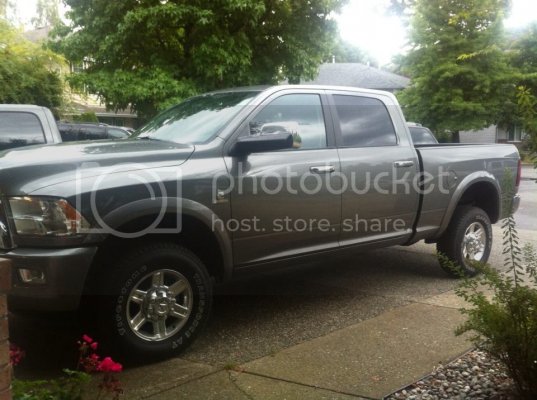
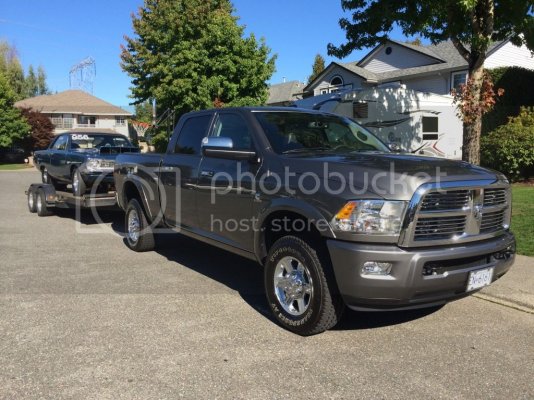
And here's one more picture showing the truck a little better after I detailed it. Keep in mind all these pictures were taken with my iPhone. It looks quite a bit better in person.

null_zps3729387e.jpg
 
OP
OP
brandonjansen

brandonjansen

Senior Member
Joined
Feb 14, 2013
Posts
1,701
Reaction score
1,012
Location
Abbotsford, BC, Canada
Ram Year
2012 Ram 3500 Laramie Limited
Engine
6.7 Cummins - Tuned and Deleted
Second Towing Test - 10-22-14

Some updates and pictures:

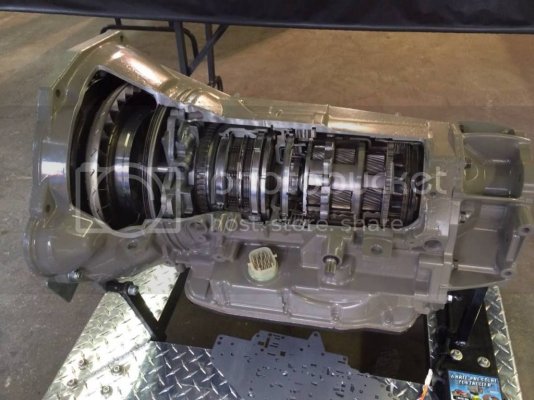
I went down to BD Diesels Dyno Days on Saturday (definitely something worth seeing) and they had a 68rfe transmission cut open to show the internals. I thought it was pretty interesting and thought some of you guys might want to see what the inside looks like. So here's a picture:

622691_10151644593040064_2004322460_o.jpg

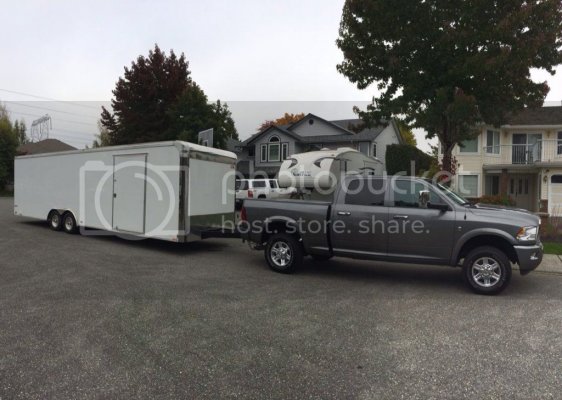
On Sunday I finally got to hook up to a decent sized trailer. As I've probably mentioned before my parents bought a new house so right now we're cleaning ours up and getting rid of a bunch of stuff while we list it to make it look bigger and less cluttered. So we started loading everything up in the trailer. We only loaded it up about half way for now.... but it had quite a bit of stuff in it.

Once it was loaded I took it back down to another Uncles to store there for a while. I literally went up and over a mountain to get to his place. The truck pulled it no problem up, had tons of power to play with and didn't hesitate at all. I could have kept accelerating up the steepest hills pretty good if I wanted to. Then on the way back down the tow/haul nicely shifted it down and let the exhaust brake do the work; I barely had to touch the brakes. There were a few times where I actually had to give it a bit of fuel to get the exhaust brake to let go a bit because it was holding back too well.

It also barely squatted even loaded with all the weight up in the front of the trailer. I didn't have the WD bars on either (too short of a ride to worry about them). Overall all it has 100% lived up to my towing expectations. I'm looking forward to when we actually move and load that trailer up to the max. Then it should be up to some pretty decent weight.

1008815_10151644593045064_624068380_o.jpg
1400313_10151644593060064_1219182443_o.jpg

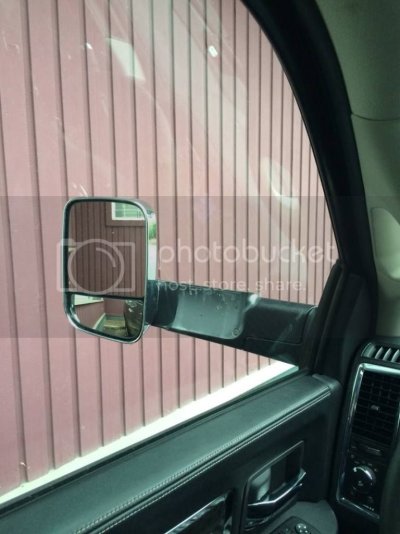
Those tow mirrors stick out quite a ways for everyday driving
841240_10151644593050064_148159826_o.jpg
There were a few places that I had to drive were the road gets fairly narrow and when buses or trucks were coming up the other way I was definitely watching those mirrors closely to make sure they didn't hit anything.

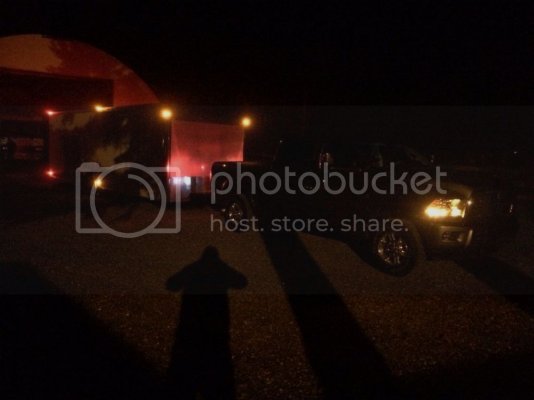
And then a quick night shot I took showing the lights before I backed the trailer into the shop:
1404906_10151644593255064_304915801_o.jpg


My Sinister EGR/cooler delete kit arrived at the shipping office last Thursday and my H&S MiniMaxx is supposed to arrive today. So tonight I'll run down across the border to get fuel and pick both those packages up. Then it's just a matter of replenishing my mod fund to be able to order a full turbo back exhaust kit so I can run all those goodies. I think I might look at installing the tuner and deletes at the end of December or beginning of January so I can put the tow tune to use when we move in mid January.
 
OP
OP
brandonjansen

brandonjansen

Senior Member
Joined
Feb 14, 2013
Posts
1,701
Reaction score
1,012
Location
Abbotsford, BC, Canada
Ram Year
2012 Ram 3500 Laramie Limited
Engine
6.7 Cummins - Tuned and Deleted
H&S MiniMaxx and Sinister EGR Delete Arrived – 10-23-13

Here are the goodies that I picked up last night

1402102_10151645995685064_448926082_o.jpg

H&S Performance MiniMaxx with custom MCC tunes by Draconian Diesel

Mileage - 40hp/116ft-lbs
Tow - close to stock
Street - 100hp/292ft-lbs
Street Performance - 125hp/365ft-lbs

And a Sinister EGR/cooler delete kit.

I also have the overhead mount coming for the MiniMaxx to be able to install it nice and cleanly into the truck. Then it's just a matter of ordering up an exhaust system and then I'll have everything to be able to run the tuner and deletes.
 
Last edited:
OP
OP
brandonjansen

brandonjansen

Senior Member
Joined
Feb 14, 2013
Posts
1,701
Reaction score
1,012
Location
Abbotsford, BC, Canada
Ram Year
2012 Ram 3500 Laramie Limited
Engine
6.7 Cummins - Tuned and Deleted
MiniMaxx Install and Interior Detail – 11-10-13

After the issue with the MiniMaxx last weekend I had a few things to deal with during the week. I called H&S Monday morning and let them know what was going on with the tuner. Right away they agreed that it was most likely a faulty tuner. They agreed to send me out a new one with a packing slip enclosed for me to ship out the faulty one. I was pretty happy with that. It arrived Friday already so I went down, picked it up and plugged it in to see if it would work. At first there was a bit of an issue with the SD card. It wouldn't accept the SD card from that faulty tuner that has my custom tunes on it. So I put the new one that came with it in and then it started up no problem. Everything works 100% so I boxed up the old one and shipped it out.

Then the next issue I ran in to... which is 100% my own fault and not a big deal. But it was kind of funny once I realized what I did. To install the ignition wire that powers on the MiniMaxx I didn't want to run a wire up to the fuse box. First of all I think that's a pretty dumb way to install it and I hate the idea of that messy install of having a wiring running into the fuse box like that. So it got under the dash with a test light to see what had keyed power and would stay on when the engine cranked. Didn't take long and I found one on the brake pedal switch. Used a wire tap and got power no problem. Well it wasn't until I plugged in the new MiniMaxx and started driving until I noticed that the tuner shut off every time I hit the brakes. Right away I knew exactly what I did. There were two wires with keyed power on the brake switch. One is a feed and one turns off when you hit the pedal which must trip a relay to turn on the brake lights. I obviously hooked it up to the wrong one :doh: So I felt kind of stupid but at least it was a super easy fix to get it working.

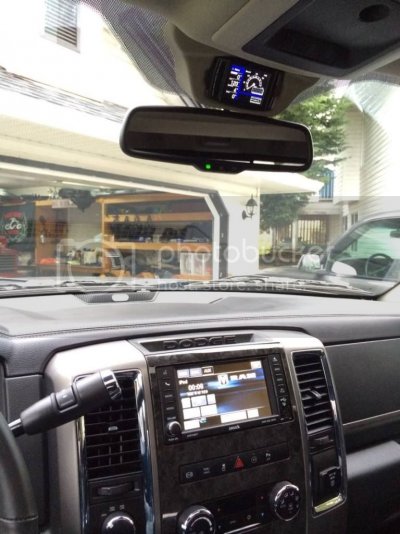
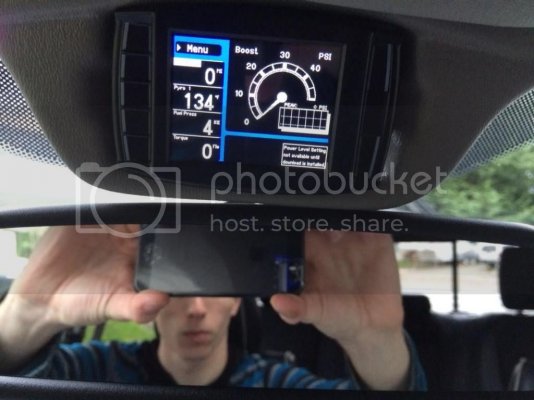
The install of the rest of the MiniMaxx stuff was fairly straight forward. Running the HDMI cable up to the overhead mount was no issue at all. The hardest part was getting the slack in the wiring going to the rear view mirror in order to get the overhead mount in the right spot. I had to drop the front of the headliner in order to get it done right. The other issue I had was the overhead mount itself. It's definitely not made 100% perfect. First off it didn't fit the contours of the headliner as tight as I would like. Then once I had it in I realized there was no way I could get my rear view mirror angled high enough to see everything. So out came the sharpie and I started marking where I needed to grind away the mount. I spend a couple hours last weekend marking it up, grinding parts off and then going back to the truck to see how it would fit. Definitely took some time but I've very happy I did it; it fits great now.

I have a few things to figure out with the SD card and custom tunes which I'm going to work on as soon as I'm done with this post. Hopefully that all goes well. Then next week I'll probably be ordering the exhaust system to get everything deleted.

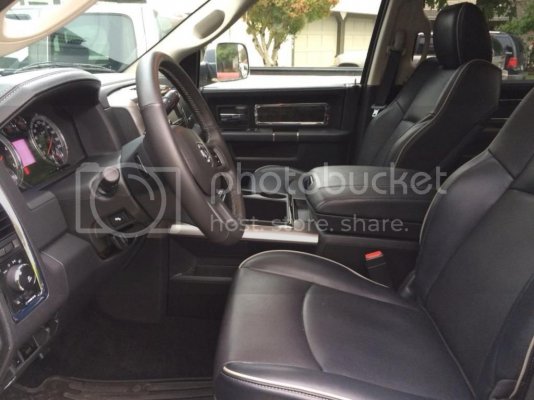
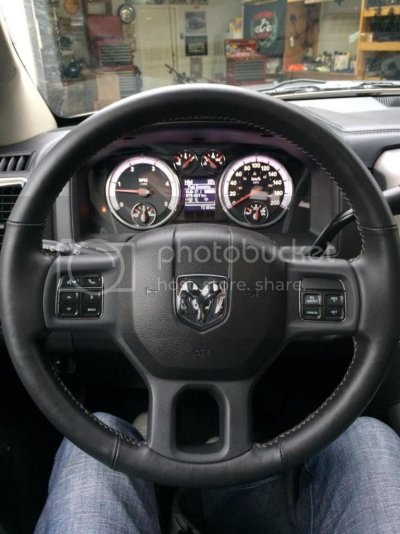
This afternoon we actually had some good weather so I took a couple hours to detail the entire interior of my Ram. First gave the entire interior a good vacuum. Then I used Mcguiars Leather Conditioner on all the seats and leather accents within the truck which worked very nicely. I hadn't used it on this truck yet but I'm very happy with how it turned out. Then went over all the plastic with Mcguiars Interior Shine and Protectant which also works very well. Isn't ridiculously shiny like some products, just leaves a nice clean black look to everything. Then of course a quick once over on all the windows with a good glass cleaner (forget the name at the moment). Overall I'm very happy with how it looks; made me fall in love with the interior of the truck all over again. lol.

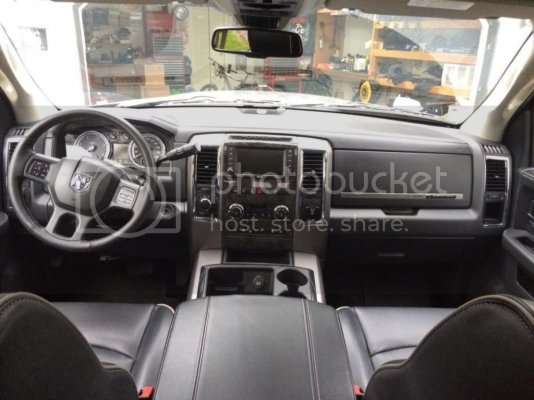
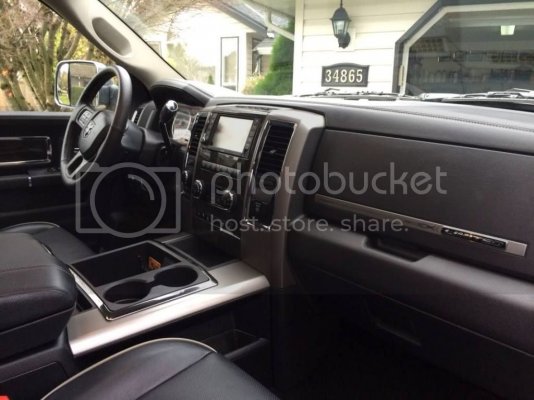
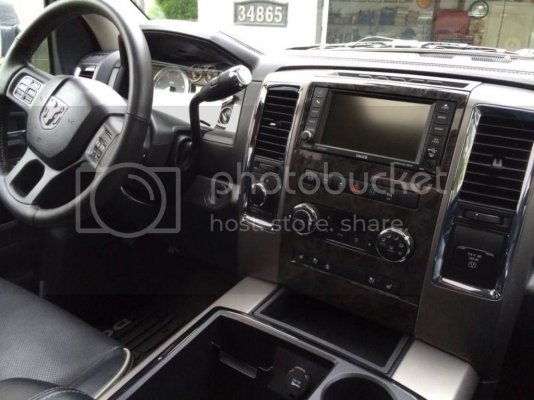
Here are a bunch of pictures I took after the detailing this afternoon. The pictures don't even do it justice. The interior is just so nice in this truck.

1402177_10151688585380064_875216928_o.jpg
1401133_10151688585395064_893412787_o.jpg
883194_10151688585400064_1263241952_o.jpg
1399111_10151688585390064_724679205_o.jpg
1398347_10151688585475064_764872451_o.jpg
1403163_10151688585385064_1909803345_o.jpg
1462808_10151688585490064_735471147_o.jpg

Obviously in the pictures of the MiniMaxx I had just started up the truck to get the pictures. Otherwise that pyro would be WAY to cold. lol. With just having it on for a day or so and trying to take a look when I can the numbers I'm seeing are pretty good. It's been peaking at 32 psi of boost, and 706 ft pounds of torque. Pyro is normally between 450 - 800 degrees (but that sensor is down far in the exhaust) and the rail pressure is between 4000psi and 18,000 psi. Nothing out of the normal so that's good. It will be interesting to see where the numbers are at once it's tuned and deleted.
 
Last edited:
OP
OP
brandonjansen

brandonjansen

Senior Member
Joined
Feb 14, 2013
Posts
1,701
Reaction score
1,012
Location
Abbotsford, BC, Canada
Ram Year
2012 Ram 3500 Laramie Limited
Engine
6.7 Cummins - Tuned and Deleted
FloPro Exhaust – 11-27-13

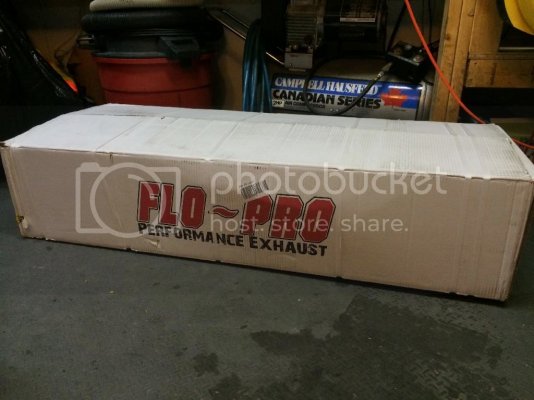
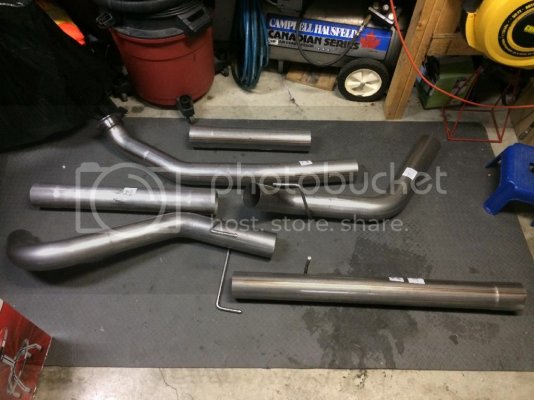
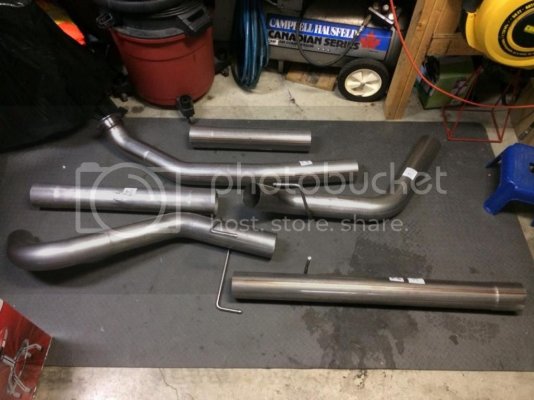
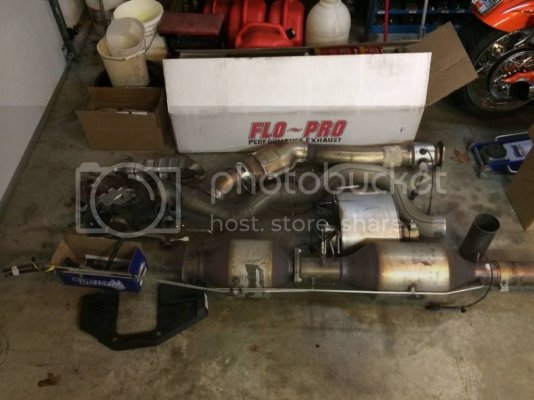
Picked up the final piece to the delete puzzle last night. A lot of big 4" pieces of stainless pipe ;) Right now my plan is to tune it and do all the deletes this Saturday. Unless that changes for some reason she should be breathing clear by Saturday afternoon.

B5DAF985-D38B-4818-997E-120E1AFF2370_zpssvptsn40.jpg

D978C2A9-93F3-4B9A-8125-F336353ACB36_zpsqm7xvzep.jpg
 
OP
OP
brandonjansen

brandonjansen

Senior Member
Joined
Feb 14, 2013
Posts
1,701
Reaction score
1,012
Location
Abbotsford, BC, Canada
Ram Year
2012 Ram 3500 Laramie Limited
Engine
6.7 Cummins - Tuned and Deleted
Delete Tune and Exhaust Installed – 11-30-13

Here's a few little teasers of what I got done last night

E4069D90-98F6-4206-BE59-70617F9BAB62_zpsw5mkcmhn.jpg

http://instagram.com/p/hU3jBqP7W4/

http://instagram.com/p/hU33Qmv7XN/

I'm hoping those links work....

I still need to do the EGR delete which I'll be starting on shortly. Once I have everything done I'll do a better write up of everything and post some pictures and a full exhaust video.
 
OP
OP
brandonjansen

brandonjansen

Senior Member
Joined
Feb 14, 2013
Posts
1,701
Reaction score
1,012
Location
Abbotsford, BC, Canada
Ram Year
2012 Ram 3500 Laramie Limited
Engine
6.7 Cummins - Tuned and Deleted
Fully Deleted – 12-02-13 - Post 1

Well the Cummins is now fully deleted! And boy is it awesome!! I'll get into all those details later in the post.

Most of you know the things I used to delete the truck but I'm going to repeat them all in this post just so it's complete....

Tuner:
First was the H&S MiniMaxx tune with custom tunes from Draconian Diesel. This includes 4 custom engine tunes and transmission tuning. Draconian is known for their very efficient no smoke tunes that provide safe (or as safe as they can be) and reliable tunes. Plus the option of always adding different modifiers and things to the tunes as I do more mods. The tunes I got (and power from them) are as follows:

Mileage - 25-40hp/80-116ft-lbs
Tow - close to stock
Street - 100hp/292ft-lbs
Street Performance - 125-150hp/365-438ft-lbs​

And yes, those numbers are all the gains at the rear wheels, not the flywheel. Kind of a downer for you guys tuning gas vehicles eh? ;)

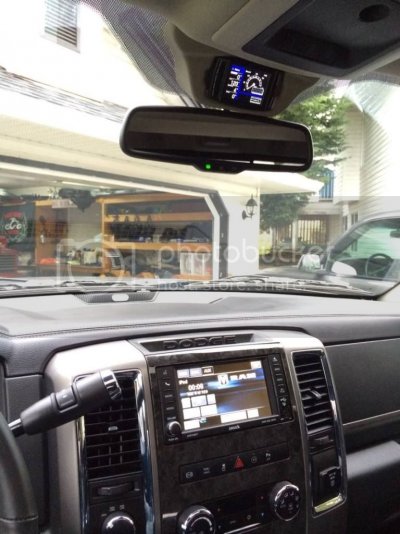
I also got an overhead mount for my MiniMaxx to give it a clean install. I ended up having to spend a couple hours modifying it to make it fit exactly how I wanted it but it was definitely worth it. Now it looks like it was meant to be in the truck from the factory.

1403163_10151688585385064_1909803345_o.jpg

EGR Delete
At pretty much the same time as I bought the tuner I got a Sinister EGR and cooler delete kit for the truck as well. I got it from a guy on CumminsForum brand new in an unopened box for $165. Couldn't pass up that deal. So it showed up and sat on the shelf for a couple months.​

Exhaust:
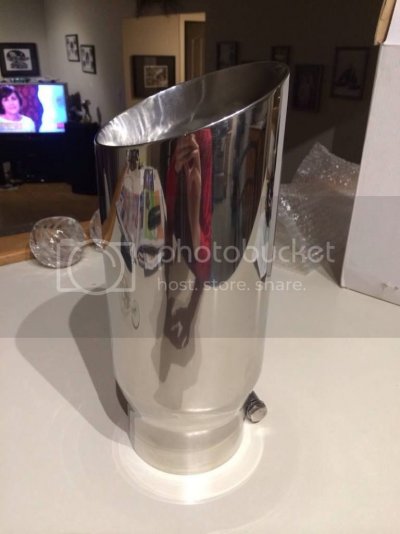
Finally the last piece of the puzzle was the exhaust. I definitely changed my mind a few times on what exhaust system I wanted to run. After watching tons of youtube videos I knew I wanted a 4" system rather than a 5". To me it just sounds way better. A little more raspy and not so much of a low droney sound. I was also 95% sure I wanted to run a straight pipe system after watching those videos but I was concerned about the total volume and possible drone at cruising speed. For that reason I was originally dead set on an AFE kit that came with both a straight pipe and a muffler. As time went on I was more and more sure I'd want a straight pipe and that if I did need to muffle it at all I wouldn't want the big muffler that came with the kit. So I ended up scrapping the AFE idea and with with a 4" Flo Pro stainless turbo back kit and a 4"-5"x12" stainless dual walled tip. It ended up being over $100 cheaper than the AFE kit. The muffler wasn't worth that IMO.

1397717_10151730515425064_172311707_o.jpg
735535_10151730515445064_917304635_o.jpg

Install:
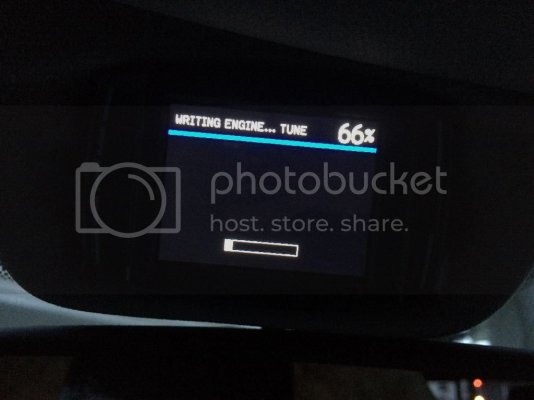
Since the tuner needs to be installed on the truck when it's at operating temp I knew I needed to do that as soon as I got home from work Friday. Quickly read through the instructions once more to make sure I wasn't missing anything and then went ahead and did it. First off I can say it's much easier than my Bully Dog was on my 1500. None of that key on, key off BS that it makes you do. You first have to go through a few setting and it asks you questions about transmission tuning (I had to enter a code) and speed limiters, etc.... then it probably took about 10 minutes to actually install the tune. From there it was just one key on, key off cycle for it to clear the codes and it was good to go. Started right up.

Since I got off work early and the tuning when faster than I thought it would I said screw it, I'm doing the exhaust tonight. So I pulled the truck into the garage (or at least as far as it would fit) and started on the process. The first step was now loading my custom tunes into the tuner to make it a race tuner (for a deleted truck). It was pretty much the same process as the original tune, I just had to enter in another code and then search for the file. No big deal. After that I got underneath the truck and started ripping the stock stuff off. Most of it came off fairly easy. I had to fight with a few of the rubber hangers and a few of the sensor connections for the exhaust system were a pain to get at and unplug, but nothing any more challenging than what I expected. The worst part was probably removing the transmission cross member (had to be done to remove the down pipe). It was in there super tight and is a little wider than the brackets that support it.... so I had to use a pry bar to move it around a bit. Then there was a bit of fighting to get the stock down pipe out because of the cat that's in it and the tight space between the transmission and the floor. But once I got it past one point it dropped right out.

Putting the new exhaust on was for the most part a piece of cake. It took a little bit of fiddling around to get the down pipe clamped back on the turbo (it's hard to hold the pipe with one hand and then get the clamp on and tightened with only one had...) But after that was on it literally took me 3 minutes to bang on the pipes to the axle... they're all just straight pipes with band clamps. Then I had a little screwing around to do with the final pipe. Flo Pro leaves it long from the factory in case you don't put a tip on it so obviously it needed to be cut. In order to figure out where I needed to cut it I had to install it fully and then put the tip on to mark it. Both were pain because that back rubber hanger is the toughest one to get on and sliding the tip over 10" of pipe isn't fun either.... Anyways, finally got it marked and cut and then threw it back on. From there I made sure everything was lined up properly and then tightened all the clamps from the turbo back and aligned the tip. Threw the transmission cross member back in and then it just took a few minutes to tape and tie up all the wiring/connectors from the stock exhaust and it was good to go.

Overall it took me about 4 hours to fully tune the truck and do the exhaust. Definitely not bad considering it did it all by myself at night, with the truck up on blocks sticking halfway out my garage. lol. The 1600 Lumen Snap On work light that I bought definitely helped me get it done. It lit up the underside of that truck better than daylight!

Here are links to the videos I took at initial start up. The first one is literally the first start up. Because the truck was cold the exhaust brake kicked in after a few seconds which makes it sound a little funny. The second video is high idle with the exhaust brake on. It sounds like a jet...


I took some video clips of the stock exhaust on the truck with my Canon camera and plan on taking more of the truck now with the straight pipe to make a comparrison video. Unfortunately we had bad weather all weekend so I couldn't get them. Hopefully next weekend I will be able to get some and then I'll put the video together and post it up.

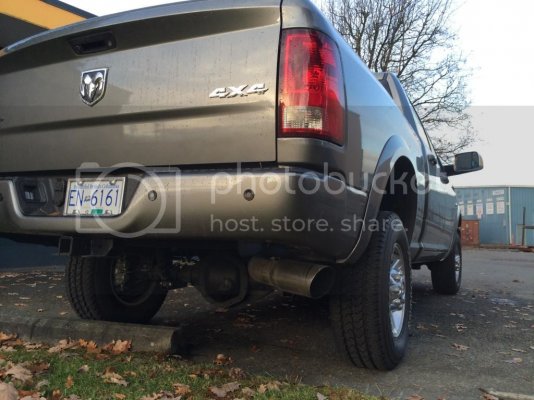
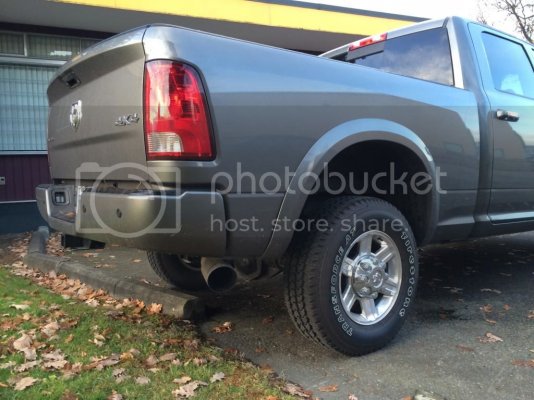
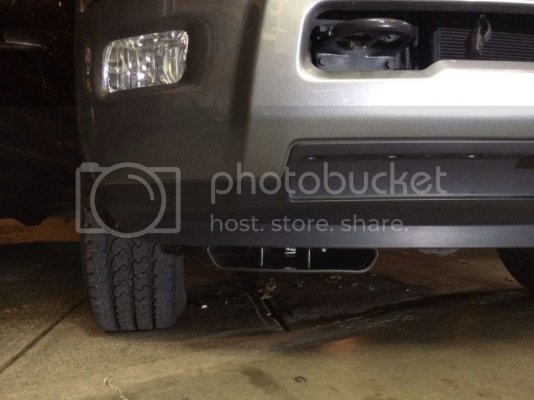
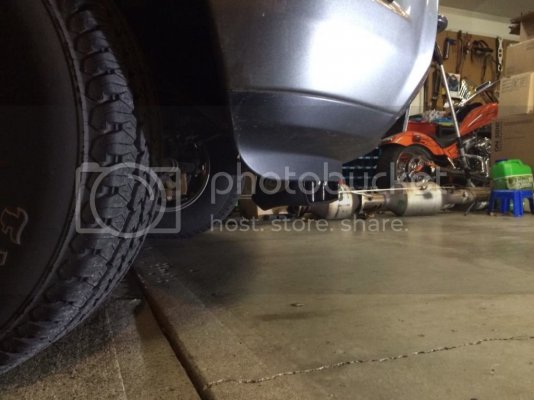
I didn't take any pictures of the exhaust underneath the truck. It's pretty straight forward, it's literally a straight pipe from the down pipe to the axle, bends up and over the axle and then out the side of the truck. Here's a couple I quickly took this morning to show you guys:

PhotoDec0283417AM_zpse2084baf.jpg
PhotoDec0283424AM_zps1b4bfaf8.jpg

continued on post 15...
 
Last edited:
OP
OP
brandonjansen

brandonjansen

Senior Member
Joined
Feb 14, 2013
Posts
1,701
Reaction score
1,012
Location
Abbotsford, BC, Canada
Ram Year
2012 Ram 3500 Laramie Limited
Engine
6.7 Cummins - Tuned and Deleted
Fully Deleted – 12-02-13 - Post 2

Saturday afternoon I started on the EGR and cooler delete. I'll tell you one thing... I'm very glad I have a 2ft height work platform to stand on in order to work in the engine compartment of this truck. Even at stock height it's flippin high. I was literally on top of the engine or rad for half of it just to be able to reach stuff.

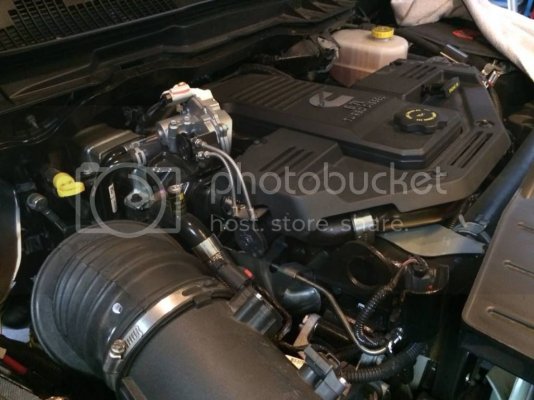
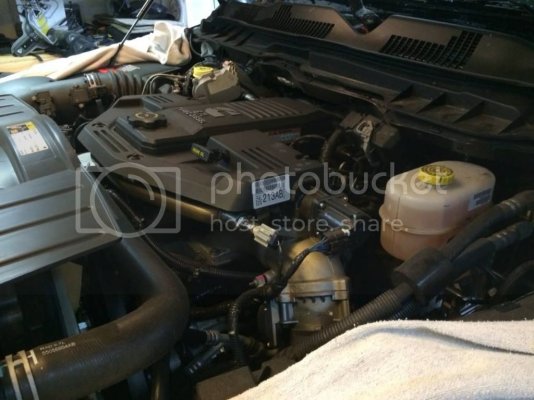
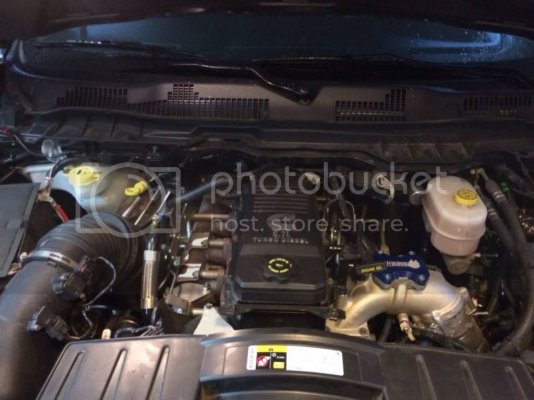
Deleting the EGR itself wasn't a problem at all. Plugged it, unbolted it, put the block off plate on and that was done. Most of the work was the EGR cooler. There's quite a bit involved in taking it all off (lots of random bolts, cross over tubes, coolant lines etc.). Most of it went pretty smooth and easy. The worst part was getting at the back bolts for the cooler which are pretty much at the very back of the engine which backs way under the cowl. They're hard to see let alone get a tool on. Without a swivel and a few long extensions there'd be no way of getting the inside one off. After I got them off it was just a matter of throwing the block off plates on, a few brackets, adapters and a coolant line, refill the coolant and she was good to go. Fired it up and there was no intake, exhaust, or coolant leaks.

Before EGR and cooler delete:

1239072_10151730515460064_137986587_o.jpg
1403709_10151730516585064_1585889927_o.jpg
740015_10151730516560064_1746631854_o.jpg

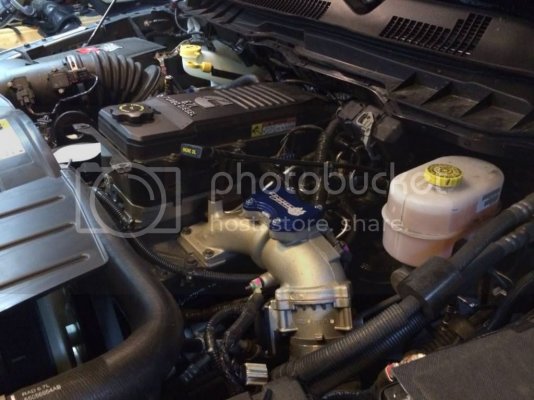
After EGR and cooler delete:

1397701_10151730516540064_1327927603_o.jpg
914072_10151730516535064_635756898_o.jpg
967150_10151730516550064_46245777_o.jpg

I wouldn't mind buying or building some brackets to put the engine cover back on because I kind of like the looks of it.... It just finishes off the engine compartment that much nicer.​

First Impressions:
Finally the part the a lot of you are waiting for. My thoughts on the truck now that it's deleted. Well I can tell you this, when guys say it's a completely different truck once deleted they aren't exaggerating at all. I am blown away by how amazing this truck is to drive now. Now keep in mind I'm not sure how much of that is because of the deletes and how much of that is because of my custom tunes. Both obviously play into this.

Obviously the truck sounds and runs amazing now that it can finally breath and has all the useless crap removed from it. The throttle response is amazing and the power it has now is unbelievable. So far I've only been running my mileage and tow tunes just to give the truck a chance to get used to everything, break in, and play it safe and it's still insane! It builds boost so much better now and if you start putting your foot into it you better be holding on. Even just gradually giving it fuel up to 60-70% throttle it starts spinning (on wet roads). But even on dry roads it will spin if you want it too. It's just insane.... It's actually hard to describe what it really feels like without taking you for a ride. The torque it has is crazy... it goes from 60 kph - 130 kph right now! It just moves! Oh, and the estimated torque reading on the MiniMaxx at 60-70% throttle on my tow tune was 1029 ft-lbs :SHOCKED: Now I don't believe it would dyno that high but keep in mind that's only my tow tune, which is supposed to be close to stock power. My street and street performance tunes are much higher than that.

The exhaust brake is now working much better as well. I have noticed that it doesn't come on as often... but when it does come on it's definitely slowing you down. Most hills I end up having to give it more fuel to keep the truck moving otherwise it starts pulling it down below the speed limit. Should be great when loaded, I'm excited to try it out pulling a trailer.

I am having a bit of an issue with the tuning. When I'm light on the throttle cruising on flat land around 55 kph (35 mph) at around 1300-1400 RPM the throttle is super sensitive and easily cuts out and surges. I've already emailed my tuner about it and he agrees that something is wrong and needs to be looked at. He will be fixing the tunes and sending me a new file to load up that should fix the problem.

I'm also very impressed that my exhaust has absolutely no drone at cruising speed. Driving on the highway to work this morning the exhaust doesn't sound much louder in the cab than the stock one did (until it starts getting fuel that is). So far that has affirmed my decision to stick with the straight pipe. It's pretty much the perfect volume and set up for me and the type of driving I do most of the time. When towing I can definitely see it being more droney though as the RPM will be higher.​

Here's a picture of the pile of junk I took off the truck.

1415143_10151730516665064_1814282646_o.jpg
 
Last edited:
OP
OP
brandonjansen

brandonjansen

Senior Member
Joined
Feb 14, 2013
Posts
1,701
Reaction score
1,012
Location
Abbotsford, BC, Canada
Ram Year
2012 Ram 3500 Laramie Limited
Engine
6.7 Cummins - Tuned and Deleted
Exhaust Video – 12-08-13

As promised, here's a video I put together comparing the stock exhaust with the 4" straight pipe and a ride along....

http://www.youtube.com/watch?v=_MAhYEJ-S_w&feature=youtu.be

And yes my truck is a mess today. Haven't had a chance to wash it since it was -8 degrees C outside today.
 
OP
OP
brandonjansen

brandonjansen

Senior Member
Joined
Feb 14, 2013
Posts
1,701
Reaction score
1,012
Location
Abbotsford, BC, Canada
Ram Year
2012 Ram 3500 Laramie Limited
Engine
6.7 Cummins - Tuned and Deleted
ARP 425s Installed – 12-24-13

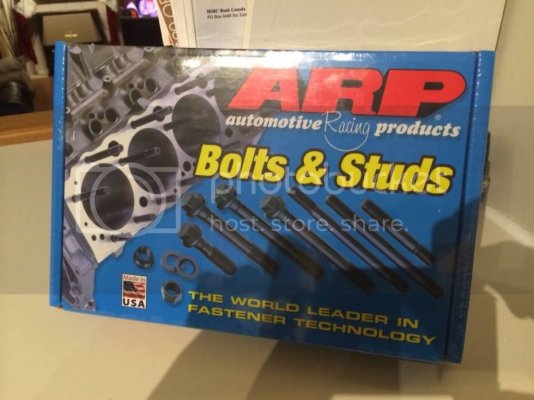
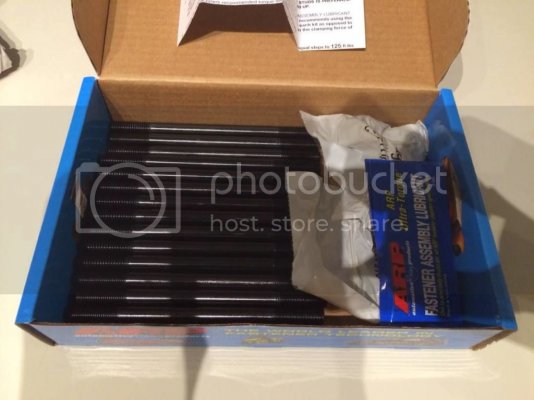
I ended up ordering head studs (ARP 425's) on Friday around 2:00pm from Bully's Performance. I wasn't expecting to get them until after Christmas but when Eric sent me the tracking number Saturday morning it was followed by the line "looks like they should be there today". Sure enough they showed up around 1:00pm. Talk about some great shipping time!!

1504234_10151772357125064_765605450_o.jpg
859736_10151772357560064_953641201_o.jpg

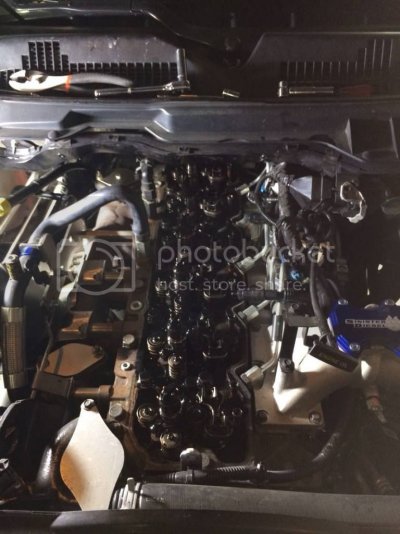
So yesterday I decided to tackle the job and put them in. I can tell you right now that is probably the worst job I've ever had to do on a vehicle.... and I've worked on a lot of vehicles. What makes is so difficult is how far back the engine goes into the compartment. 2 and a half of the cylinders are back underneath the cowl so it's a pain to get at anything back there let alone get a torque wrench on things to get it all back together properly.

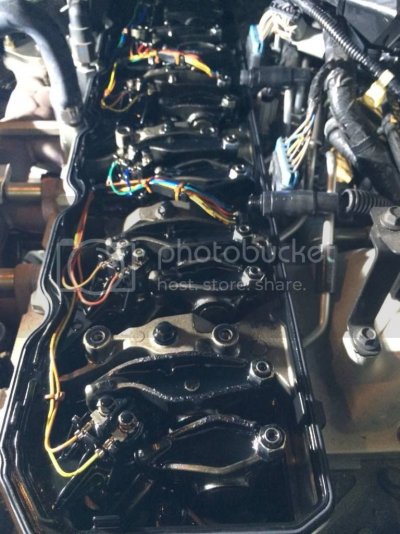
Anyways, here's the full story. It started with taking the CCV cover and filter off, no big deal. Then there was 6 bolts holding the valve cover itself on and two oil lines into the side of it, those were a bit of a pain to get out. From there you open it up and see this

1496338_10151772357565064_20870800_o.jpg

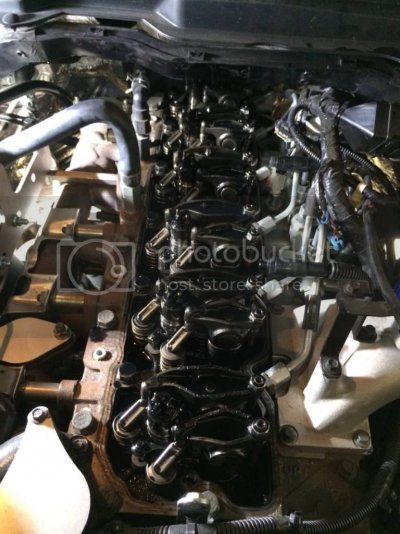
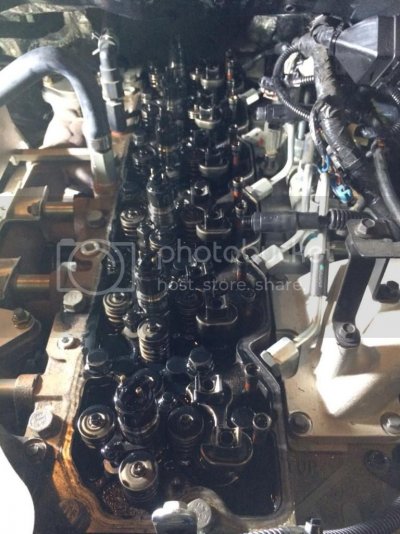
Next thing to come off was the entire injector harness and support bracket. The main thing to watch there is what wires are connected to each post on the injectors because they had to go back on the exact same way. So I just took lots of pictures for reference. After that the rocker arm spacer came off bringing us right down to the head. Then all the rockers had to come off to give access to all the head bolts.

1522607_10151772357595064_23075783_o.jpg
1534836_10151772357600064_1160193906_o.jpg

After that we started on the painstaking process of pulling a stock bolt and replacing it with an ARP stud and torquing it to 100 ft-lbs one by one to keep torque on the head at all times. The pattern starts in the middle and works in a circular motion towards the outside. All the ones on the front were super easy to do, the back... not so much. It was a pain to get the stock ones out, pain to put the new studs in and line them up properly, and then even more of a pain to get the torque wrench on them and actually have some room to move it back and forth to tighten them. So it was a very slow process. Once we finally got them all swapped out they needed to be torqued up higher in two steps. I went up to 118 ft-lbs first and then 135 ft-lbs.... so it was the same process all over again to get at the studs. Plus by this point I was super sore from doing this already so it made it even worse. lol.

Here's a picture from further back showing how far the engine goes under the cowl. It doesn't even show all the engine but you get the idea...

1497896_10151772357585064_1527107892_o.jpg

Finally that was all done so it was time for reassembly. The rockers all went on pretty smoothly once I figured out a few of the little tricks. Then I had to do a bit of machining on the rocker arm spacer to give more clearance around a few off the studs since they're taller. I forgot to take pictures of that though.... Then the rest went back together nice and smooth. The one thing I want to do yet is a valve set but I don't have the proper tool to turn the engine over to TDC to do it.... so I'll have to order that up and then take some stuff back apart to set the valves.

Now that they're on I decided to give my street tune (100hp) a shot... What a load of fun that is! It runs so smooth and just picks up and goes!! I didn't put my foot to the floor yet but boy does it have some power! My gauges are supposed to be in within a week or so, once I have those in I'll bump up to the street performance tune (150hp) and see how that one is.
 
Last edited:
OP
OP
brandonjansen

brandonjansen

Senior Member
Joined
Feb 14, 2013
Posts
1,701
Reaction score
1,012
Location
Abbotsford, BC, Canada
Ram Year
2012 Ram 3500 Laramie Limited
Engine
6.7 Cummins - Tuned and Deleted
S&B Intake Installed – 12-31-13

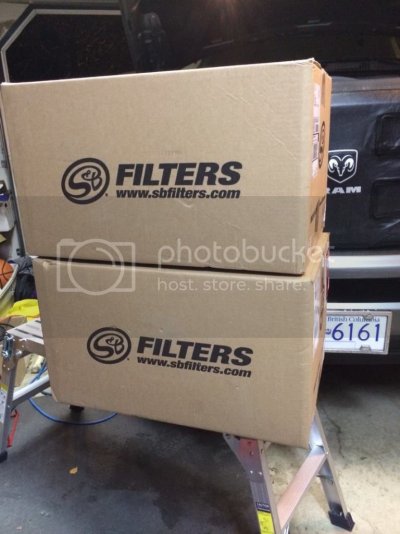
I ended up ordering my S&B intake on boxing day through a Canadian retailer. Since the Canadian dollar is so bad right now and S&B intakes are pretty much the same price from every retailer it ended up saving me money. Believe it or not this is the first things I've ordered from a Canadian site.... it was kind of weird to have the UPS guy actually bring something straight to me. He ended up leaving them in the garage without even knocking on the door. I walked out and there they were!

1523843_10151785378485064_1168120619_o.jpg

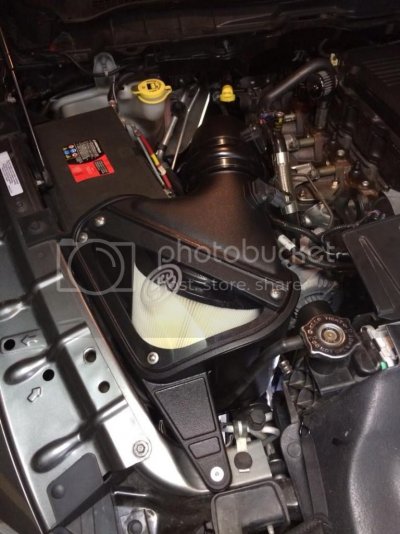
The install was very simple.... especially after the other stuff I've been doing to the truck lately. The instructions S&B provides are very well done as well so anyone should be able to follow along. The worst part was getting one of the bolts in for the bottom part of the scoop... It's right up against the plastic fender liner and didn't want to line up right. I had to fight with it quite a bit but finally got it.

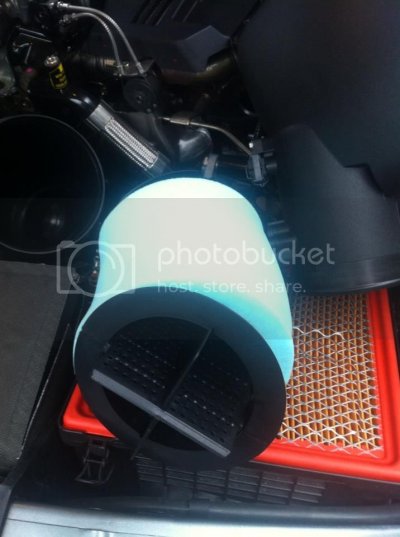
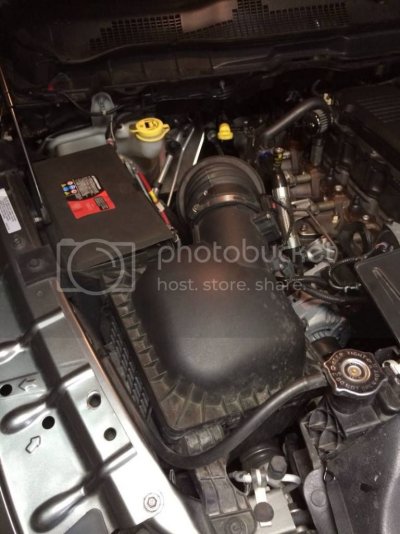
Stock intake:
1518431_10151785379495064_674192527_o.jpg

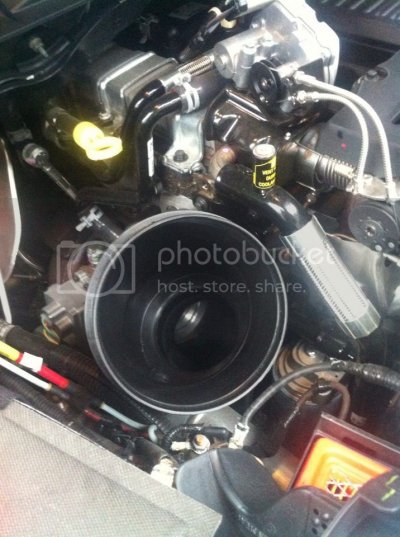
S&B intake:
1522583_10151785379515064_848916373_o.jpg

Scoop:
1497876_10151785379700064_1590756479_o.jpg
1519226_10151785379690064_488014586_o.jpg

Overall I'm happy with the intake. It's exactly what I expected it to be. The one thing I'm a little disappointed in is the lack of seal around the clear cover on top of the box. IMO it should have come with a foam or rubber seal just to try and keep as much of the hot air from the engine compartment out as possible. I have some 3M foam at home, I'll probably just make a little seal myself.

First Impressions:
Based on the two short drives I've taken the truck on since installing the intake again, it's pretty much just what I expected. The turbo is slightly louder now but not much which I expected since it's still a closed design. The exhaust brake does sounds nicer though. It seems to have slightly less turbo lag and feels a little more responsive as well which I'm very happy about. My butt dyno feels like it has a little more power but it's hard to tell such a small increase on the amount of power/torque my truck is putting out. Obviously I won't know any MPG gains until I've driven with the intake for a while. Even at that, it will be hard to pin down any gain since it will be very minimal.
 
OP
OP
brandonjansen

brandonjansen

Senior Member
Joined
Feb 14, 2013
Posts
1,701
Reaction score
1,012
Location
Abbotsford, BC, Canada
Ram Year
2012 Ram 3500 Laramie Limited
Engine
6.7 Cummins - Tuned and Deleted
ISSPRO EV2 Factory Match Gauges Installed – 1-08-14

I decided to tackle the job of installing my gauges last night. It was a bit of a gong show because I'm moving in a week so right now our garage is full of boxes and half of the stuff I needed was already packed up. But I wanted to get it done. So I moved enough stuff around to at least get the nose and front doors of my truck inside the garage to work on it.

Product:
ISSPRO EV2 4th Gen Factory Match Gauges
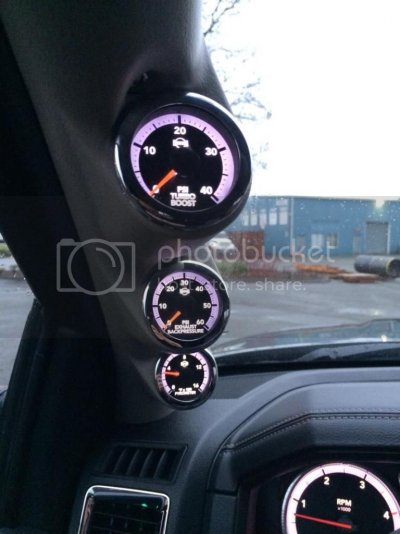
I ordered my gauge kit from Diesel Manor. They have a number of kits already put together but didn't one with exactly what I wanted. So I ended up emailing them and then talking to them on the phone to place my order and have a custom kit put together. I also got a bit of a discount through a membership on CumminsForum which was nice. Here's a list of everything I ordered:

• 0-40 PSI Boost Gauge with electric sensor, wiring harness and DMI Boost Bolt
• 0-60 PSI Exhaust Back Pressure Gauge with exhaust gas backpressure sensor installation kit
• 0-1600 F Pyrometer with lead wire and matching Inconel thermocouple, 1/8" NPT fitting and Weatherpack connector
• Full A-Pillar gauge mount
• ISSPRO 10' wiring harness with built-in dimmer control
• Installation kit
• Vehicle specific installation instructions​

Boost Sensor:
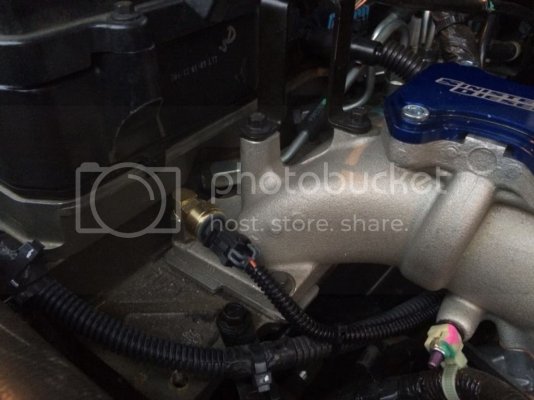
I started with the sensor for the boost gauge. The kit I bought came with a boost bolt so all I had to do was pull one of the intake horn bolts and replace it with the bolt. I made sure to put a decent amount of high heat silicone on the threads and shoulder of the bolt to avoid any boost leaks. I then installed a little 90 degree brass fitting and the sensor.

1501633_10151800245900064_865344773_o.jpg

Exhaust Back Pressure Sensor:
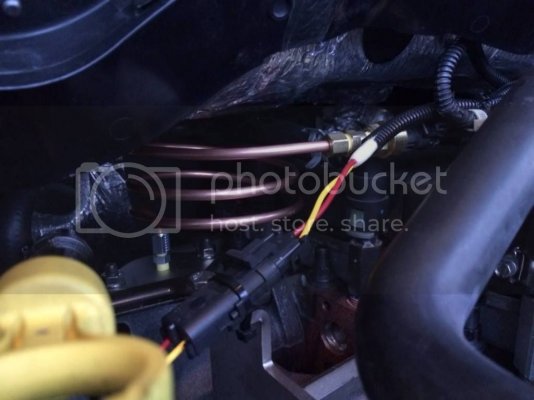
After the boost gauge I went for the exhaust back pressure gauge since it was second easiest. My block off plate for my EGR cooler was already drilled and tapped for a 1/8" NPT fitting so that's where I wanted to put this gauge. Because the manifold and block of plate get so hot I bought an install kit for the gauge sensor which is pretty much just some copper piping and fittings to reduce the amount of heating going to the sensor. I took the block off plate right off the truck for easier access and then started bending the copper pipe how I wanted it so that everything would be installed nice and clean looking. Then I just threw the plate, piping, and sensor back on.

It's a bit hard to get a good picture of it because it's back under the cowl a ways.... but you can see everything in this picture. The block off plate is the silver plate with the fittings going into it to the left of the picture and then the copper pipe coils around and the sensor is up on the right of the picture.
1599431_10151800245905064_1911983003_o.jpg

Pyrometer Sensor:
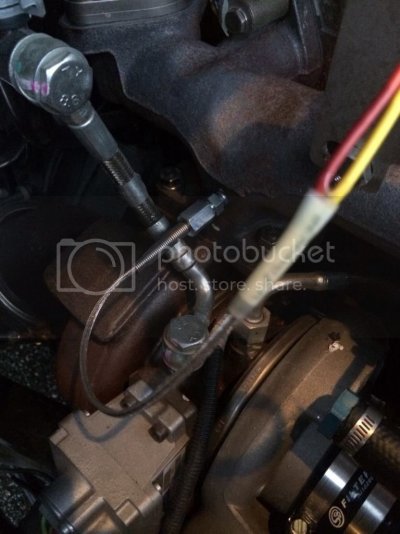
Next was the part I was least looking forward to.... the pyrometer sensor. Some guys do mount them in the EGR block off plate but it's somewhat of a false reading since exhaust is cooler there than in the collector. So the best option is to drill and tap the manifold right in the collector. Obviously the risk with that is having shavings end up in the turbo.
The first thing I did was take off the tube from my intake box to the turbo for better access and then stuffed some paper towel in the intake side of the turbo to avoid getting anything in there. I then marked and center punched where I wanted the hole to be. It's about 2" up from the bottom of the manifold flange right in the center of the collector. I then grabbed my right angle drill (you wouldn't be able to get in there with a normal one) and a 5/32" bit to drill the pilot hole. I dipped the bit in a grease tube so that shavings would stick to it rather than go inside the manifold. Drilling at that awkward angle is definitely a little hard on the arm and the manifold was thicker than I expected it to be. I'd say it was probably about 3/8" thick. Once that whole was done I moved up to a 21/64" bit again dipped in grease. To tap it I used a 1/4" 8 point socket on a ratchet with the tap in it because there was no way I was getting the actual tool that came with that tap on there. Again I dipped the tap in grease and slowly started cutting the threads. NPT is tappered so it too a bit of trial and error of tapping to a certain depth, pulling it out and then seeing how far in the fitting went but eventually I got it right where I wanted it. Then I did a quick check to make sure the end of the prob was approximately centered in the manifold and bolted it all together.

1524253_10151800245920064_657691444_o.jpg

Wiring:
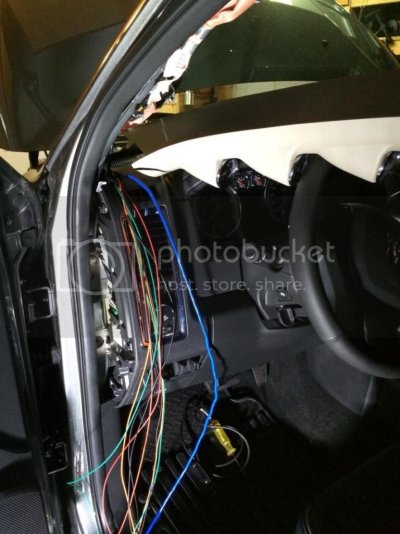
I then started running all the wiring harness for everything. I wrapped all the wiring in the engine compartment with 1/4" lume to protect it and make it look factory. I then took off the cover plate for where the clutch pedal would be installed on a manual truck and drilled a 1/2" hole in it and put a grommet in and ran all the wires to the inside of the truck. I also had another harness with a potentiometer in it to install inside the truck for the power, lighting, and ground. So I got to work on that too. I tapped into the pink wire with the yellow tracer in the 100 pin harness for ignition power and ran a fuseable link with a 3 amp fuse in it for the power. And then the orange wire with the blue tracer on the back of the headlight switch for the lighting. I nicely tied everything up under the dash as neat as possible to make it look like it was there from the factory.
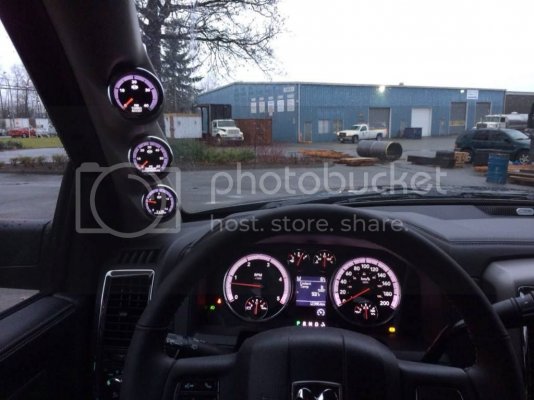
I then ran all the wiring up the dash to the A-pillar to get started up there. Then it was just a matter of sorting out each wire to find out where they need to go and installing the connectors that go to the gauges. I daisy-chained all the power, lighting, and ground wiring together and then ran the wires from each individual sensor to the proper gauge. After that it was just a matter of plugging everything in, installing the A-pillar gauge pod, and making sure all the gauges were sitting straight.

1556316_10151800243150064_2062735661_o.jpg

Final Product:
1052820_10151800243145064_1344661975_o.jpg
1540445_10151800245895064_1453214542_o.jpg

First Impressions:
So far I'm very happy with the gauges. They look great and work great. The one thing I have noticed is that the A-pillar pod could have the gauges pointing a little more straight/downward. Right now they're point a little higher up that I would like... especially the top one. But there's nothing I can do about it.
It's also very nice finally being able to see what's going on with some of this stuff. I had a boost gauge on my MiniMaxx (a very small one) but not exhaust back pressure or a pyro. My exhaust back pressure is slightly lower than I expected it to be which is a good thing. Although I haven't got on it hard yet to see how far it will climb up. And my EGT's are definitely lower than I thought they would be. They were only about 600-700 degrees F cruising down the highway this morning and then got up to around 800 if I hit a bit of a hill. Can't complain about those numbers! I think my tuning, intake, and the fact that it's winter has a lot to do with that.​
 
OP
OP
brandonjansen

brandonjansen

Senior Member
Joined
Feb 14, 2013
Posts
1,701
Reaction score
1,012
Location
Abbotsford, BC, Canada
Ram Year
2012 Ram 3500 Laramie Limited
Engine
6.7 Cummins - Tuned and Deleted
Moving/Towing – 1-27-14

Haven't posted in a while so I figured I'd at least post a bit of an update with some pictures and what's been going on lately.

Moving/Towing:

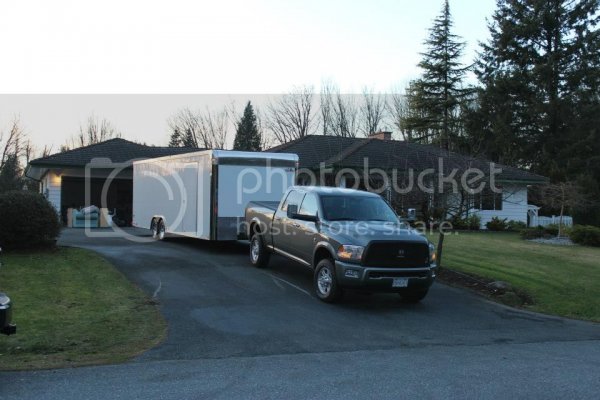
I finally moved last weekend (17th) so I got the put the truck to work once again. I had my Uncle's 28 ft enclosed trailer loaded up going back and forth between the old house and the new house (just across town). This is the first time I've used the truck to tow since deleting and tuning it and I can tell you it is ridiculous.... That truck has so much power and torque now, the fully loaded trailer didn't even phase it. I'm not exactly sure what the trailer weighed fully loaded, I would guess at least 9000 lbs if not more (for the heaviest load at least). On one part of the drive you come around a sharp corner and then there's a fairly steep hill right after it. So I was essentially starting with no speed at the bottom of the hill. I started giving it enough fuel to get it moving and it hit the hill like it wasn't even there. I looked at my MiniMaxx and it was only at 65% load and still accelerating like crazy. I had to finally let off because I was gaining on the cars ahead of me too quickly. I was very impressed with the truck!
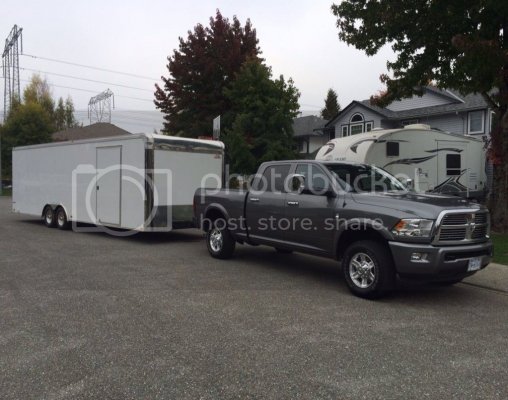
The exhaust brake also works amazing at holding back all the weight. Most hills I didn't even have to touch the brakes unless I was actually coming to a complete stop. All the rest of them it would either hold it at the correct speed or actually slow it down. The highest drive pressure I saw with the exhaust brake on was 55 psi which was very good considering how much it was holding back.

Unloading at the new house:
1017421_10151831206095064_29858984_n.jpg
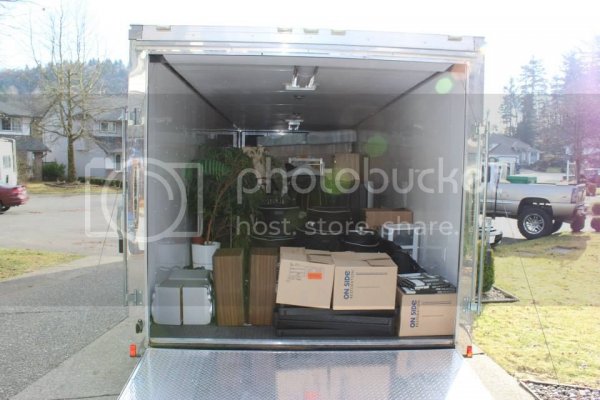
One picture I quickly snapped of the inside of the trailer on one load:
1544447_10151831205860064_987073838_n.jpg

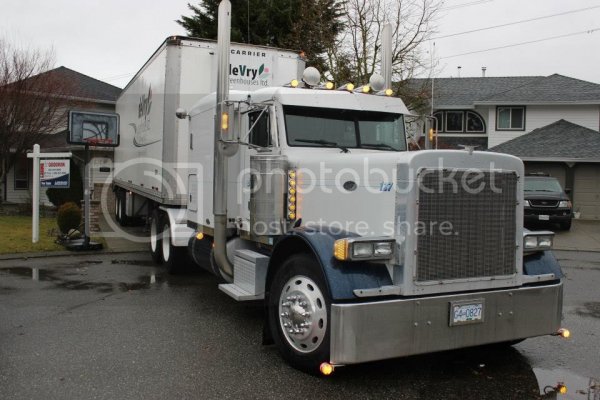
On a side note, here is our other moving vehicle:
1620878_10151831205715064_403197082_n.jpg

My Dad ended up borrowing a trailer from work so that we could load up all our or garage stuff (tons of tools, equipment, parts, etc.) and all of our garden shed stuff before our actual moving day to spread the work apart. That way we could just park that trailer and not worry about unloading it right away.​

Winter Wash/Cruise:

We've also been having some super good weather here lately. It's still somewhat cold at night (about 0C or 32F) but during the day it's warming up to 11C (52F) or so which I definitely can't complain about for this time of year up here. The last 3 months we've actually broken records for the driest winter months.
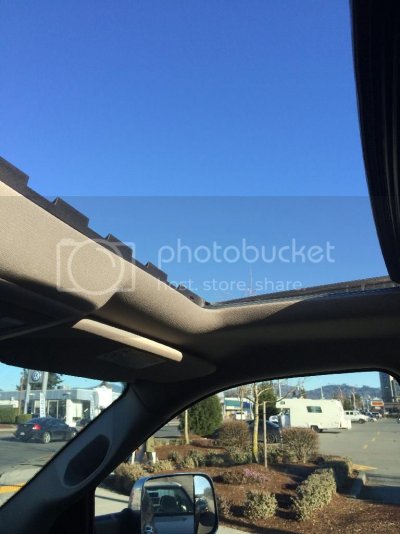
So just to bug any of you fellow Canadians out east this is how I was cruising around on the weekend.

1EF75096-7CA8-4B5A-9ECA-4D6F9EE31837_zpssu2s8b2z.jpg

Sunroof open and not a cloud in the sky!!

I also took that opportunity to wash the truck since it's supposed to be nice all this week as well. It was in desperate need of a wash; absolutely covered in salt, sand, and mud. So I spent a good couple hours yesterday afternoon giving it a good wash.

CDA06223-E50F-4769-A743-15AFB349AE27_zpsa4bchrcv.jpg
24605651-7B0C-47F7-A53F-00D9DD551F57_zpsrnc1odbn.jpg

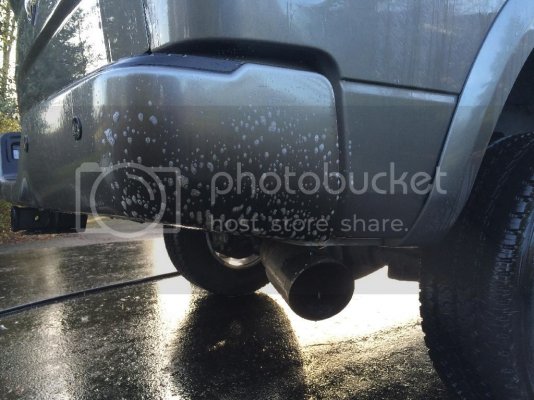
By the way... wash soot off your bumper is definitely not a fun thing. It's really hard to get off! Fortunately I found some Fantastik to spray on there and let soak, it helps a lot. I ended up pulling my exhaust tip out about 1.25" after this wash to see if that helps keep some of the soot off my bumper.

I don't have all my cleaning supplies at this house yet (they're still in that deVry trailer) so I did the best I could with what I've got. It's definitely better than what it was. Once I get my stuff back I'll go over it again and do a full detail and interior clean as well. It's probably about time for another couple coats of wax as well so that should probably happen soon.​

Future Mod Update:

As far as future mods go the frequency of them is going to slow down a bit as I am now getting into the lifting part of the build. At this timing I'm planning to get some AMP research steps next month (since they'll be needed for the lift) and then possibly a few other small things like an AMP bedstep and HID lights. After that it will probably be in hiatus for a while so I can save up some cash for the lift and wheels/tires. But we'll see how that all goes. Plans always change and for some reason I seem to get a lot of mods done before I actually planned on. lol.​
 
Last edited:
Top