Gofishn 2014 Ram 1500 Express Crew Cab 4x4 Cherry Red Build Thread

Disclaimer: Links on this page pointing to Amazon, eBay and other sites may include affiliate code. If you click them and make a purchase, we may earn a small commission.

OP
OP
gofishn

gofishn

Senior Member
Joined
Sep 12, 2014
Posts
5,082
Reaction score
10,140
Location
Iowa
Ram Year
2022 Ram 1500 5th Gen, Big Horn, 4X4, Crew Cab, 6'4" Box
Engine
hemi 5.7L, 345 cu in
Installed an 60" LEDGLOW Tailgate Light Bar.
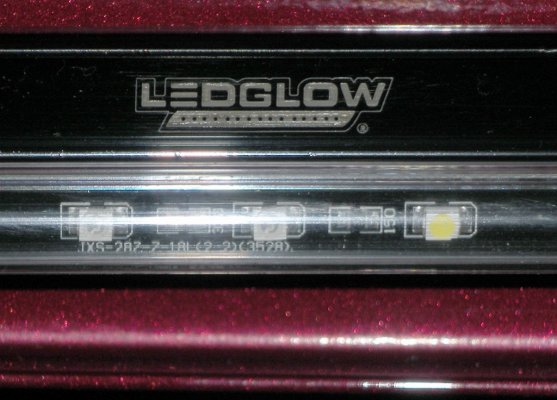
ledglow000.jpg


Got it here:
https://www.amazon.com/gp/product/B003BL1H0M/ref=oh_aui_detailpage_o02_s02?ie=UTF8&psc=1

Because I am basically lazy and figured it would be much easier to buy a T-connector than wiring everything up, I also bought this handy dandy, highly recommended piece of ease and contentment :
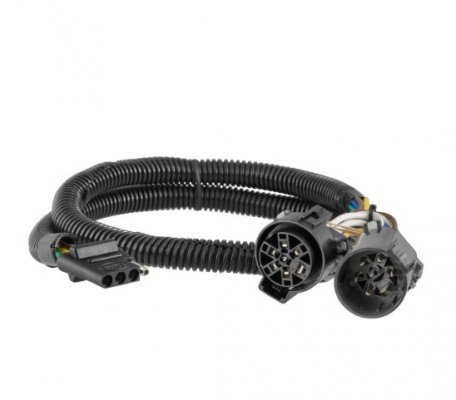
ledglow006.jpg

Got it here:
https://www.amazon.com/gp/product/B0009FJ38Q/ref=oh_aui_detailpage_o02_s00?ie=UTF8&psc=1


Remove the tailgate, as directed by the Owners manual.
Once tailgate is removed, might be a good idea to lug the light bar 'in', make sure the light bar works, has no dead LED's and figure out which side is left blinker, which is Right Blinker.
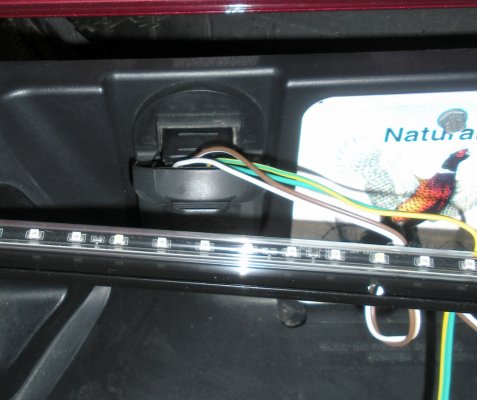
ledglow001.jpg


ALRIGHT!! Everything works and I now know which side is which.


Time to grab a few CD jewel cases, lay those down on the rear bumper, for a level spot to work from. Laid the light bar on the cd cases. Found the exact center of the light bar AND the the opening, below tailgate area.

RUT ROH!

Light bar goes over the very very top of the spare tire opening, which has a plastic cover, that is pushing my light bar up, and away, from the trucks metal.
That ain't going to cut it.
Pop off the cover, for light bar installation. Can tell, there will be no interference, from the light bar, once mounted, in place.

NOTE: once light bar was installed, and everything back together, I still had PLENTY of access to the spare tire winching mechanism. Simply sawed down the cover, to fit in place below light bar, and re-installed it, using weatherstrip adhesive. Could have left it off, completely but figured the the bar, when winching spare up and down, would rub off the trucks paint, form within the opening, and that would not be good.

Put the foam tape on back of light bar, press light bar into place, gently, then drill out holes for screw mounting.
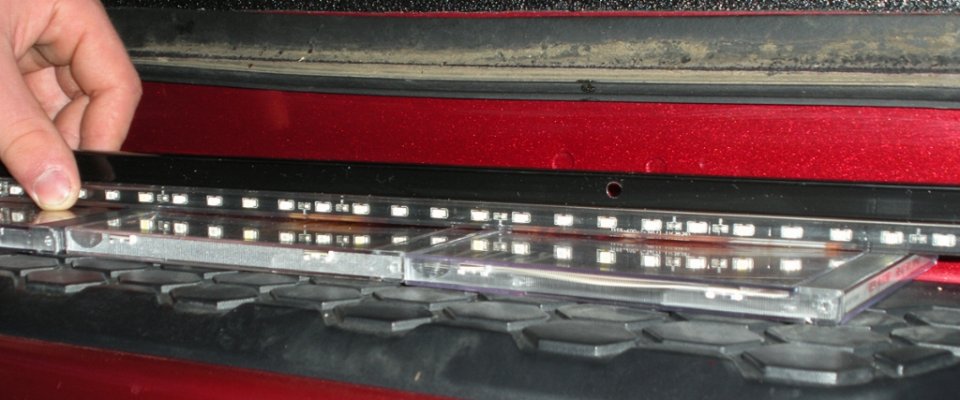
ledglow002.jpg


Light bar now in place, time to get under the truck and hide my wiring.

Locate the 7 pin connector. Press down on the clip retainer and slide it out, and away from, the permanently mounted connection.
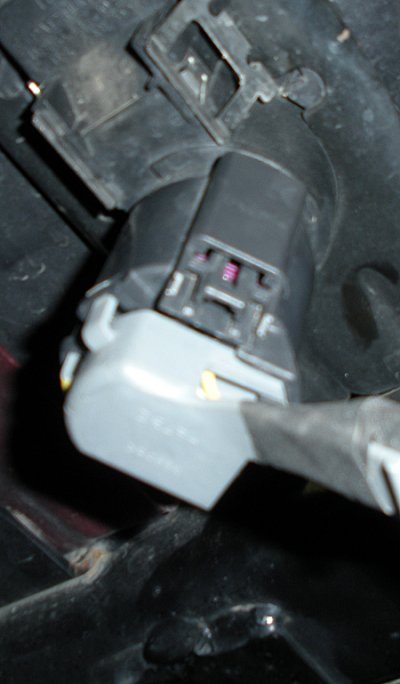
ledglow004.jpg


Here is another pic , of the part that needed removed, shows the plug clip which needs to be pressed down, for removal.
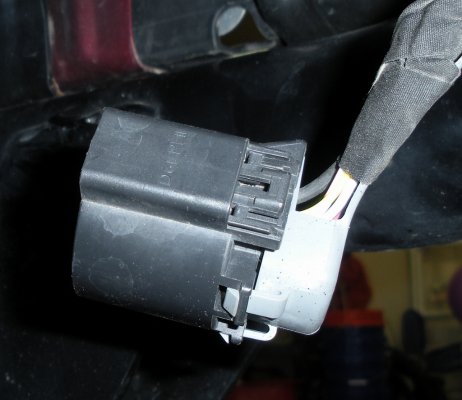

ledglow005.jpg


Grab the CURT pigtail connector and hook it up.
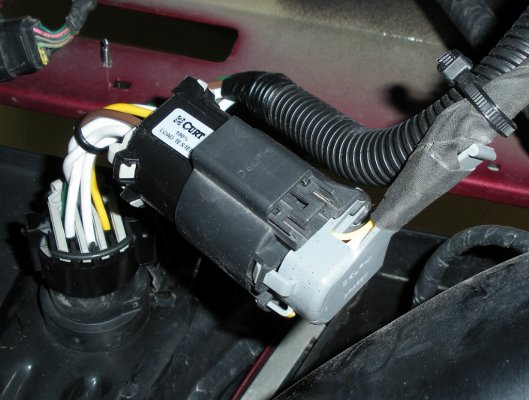

ledglow007.jpg


Plug the long end, of the Curt connector, to the plug that was removed. Plug the short end, of the Curt connector, to the permanently mounted 7 pin plug.
Plug your light bar into the 4 pronged connection, behind the bumper and out of sight.
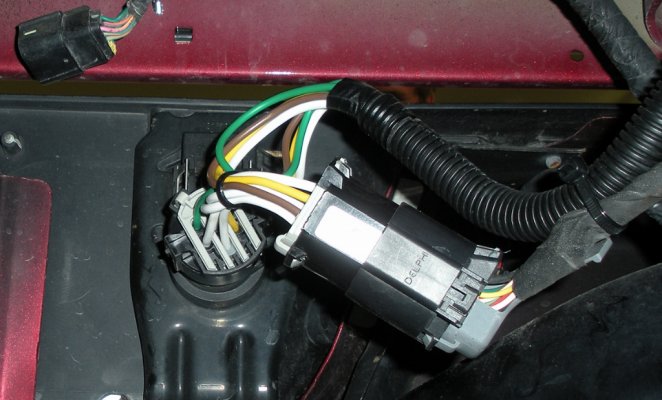


ledglow008.jpg

Zip tie, in place.

Grab a Torx, remove 2 torx screws, from the side of the drivers rear tail light assembly.
Pull the rear tail light assembly, firmly but gently, straight back from the truck.
There are two "slide Over" plastic posts/clips that hold the assembly, in place.
Find the white wire, with thin brown strip.
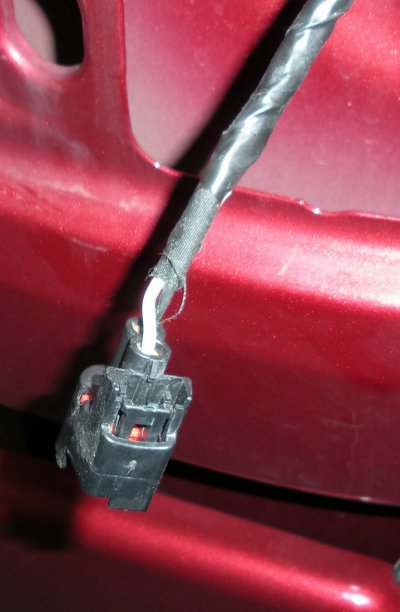

ledglow009.jpg


Splice in the white wire from the Curt harness.
Use Liquid tape or some such, for a water tight seal and wrap everything up.

Re-install the tail light assembly and the tailgate, then play with your new light bar.

Worst part, about all of this, is when I drive, I cannot see how cool it looks.
Dang it!
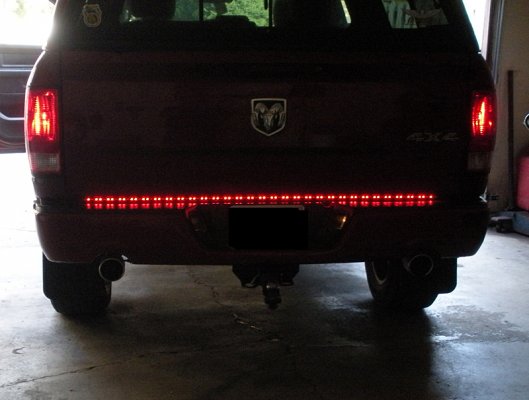

ledglow010.jpg


EDIT:
Someone asked how I got the light bar to fit, with that plastic piece, which goes around the access port for the spare tire winch mechanism.

I did not go around the hole.

I removed that plastic piece. With it , in place, the light bar was pushed out. So, I took the plastic trim piece off of the spare tire winch access opening.
Placed the tailgate light bar, where I wanted it. Double checked to insure that there was still enough room to use the opening. then installed the light bar, permanently.

When I went to raise my spare tire, which I had lowered for ease of access for the wiring part of the light bar install, I realized that raising the tire would cause the paint to be rubbed of the metal, around the opening. To prevent that form happening, I needed to re-place that little trim piece.

I measured the distance, from the bottom of the light bar, to the very bottom of the access hole, then trimmed the plastic trim piece to fit.

Used Weatherstripping adhesive to hold it in place. Weatherstripping adhesive is what every one used in the 1970's to hold body side molding on, before 3m came out with their double sided super tape. Worked like a charm. IF I ever need to remove that plastic piece again, for whatever reason, it can come off (Be a Pain the butt ... BUT it can come off) and some mineral spirits or goo be gone will clean up the residue.

Hope this helps
 
Last edited:
OP
OP
gofishn

gofishn

Senior Member
Joined
Sep 12, 2014
Posts
5,082
Reaction score
10,140
Location
Iowa
Ram Year
2022 Ram 1500 5th Gen, Big Horn, 4X4, Crew Cab, 6'4" Box
Engine
hemi 5.7L, 345 cu in
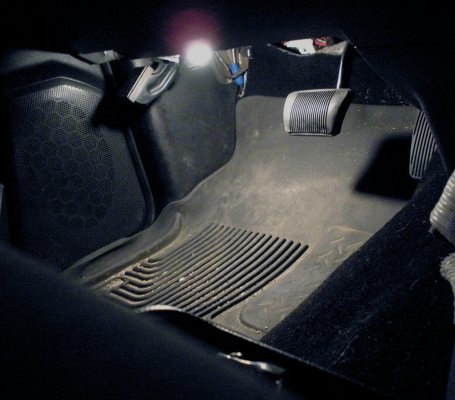
Decided I needed some foot well lighting.
Read a whole bunch about OEM Products, after market products, etc.
When I came across something that I figured even I could do.

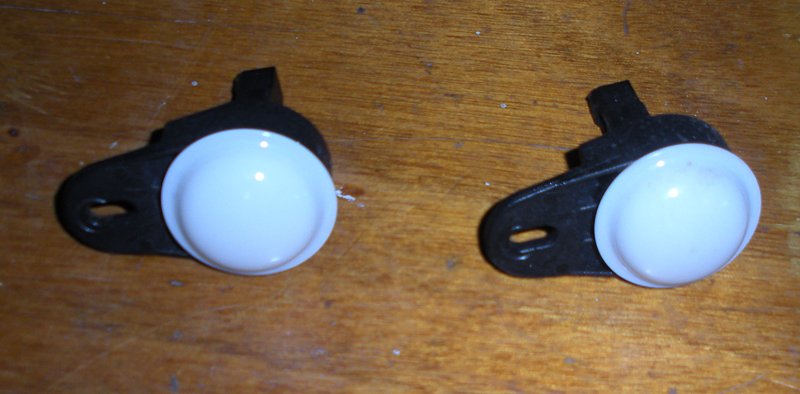
MOPAR Part # 68305400AA , most places have it for $10 or less.
Need two of them, once for each side.

Also available, in most junk yards, out of a 1999 & up Jeep Grand Cherokee.
Got mine from one of those "Pick-n-Pull" junk yards, because I did not want to wait.

foot01.jpg


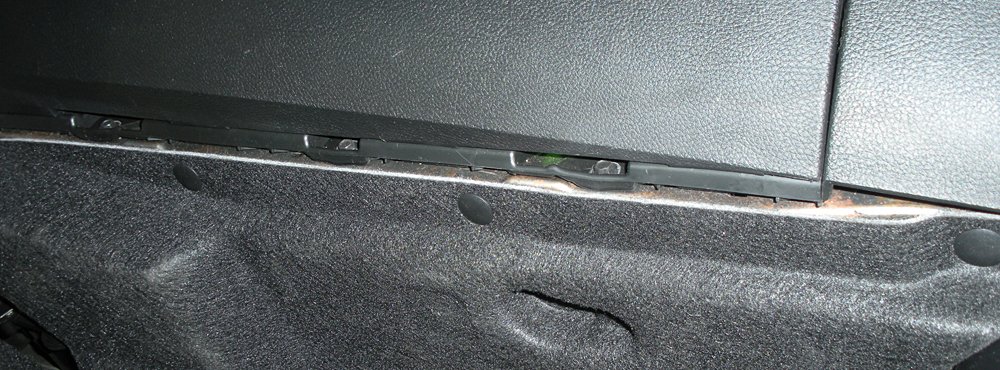
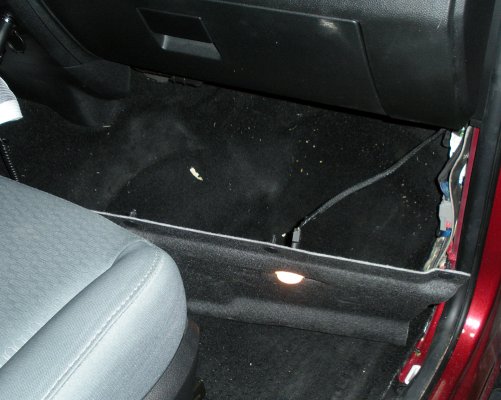
Passenger side, under the glove box, there is an cover that needs to be removed.
It is held in by 3 push pins. Use a trim tool to remove.


foot02.jpg


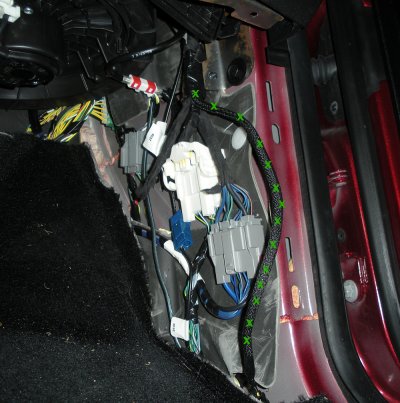
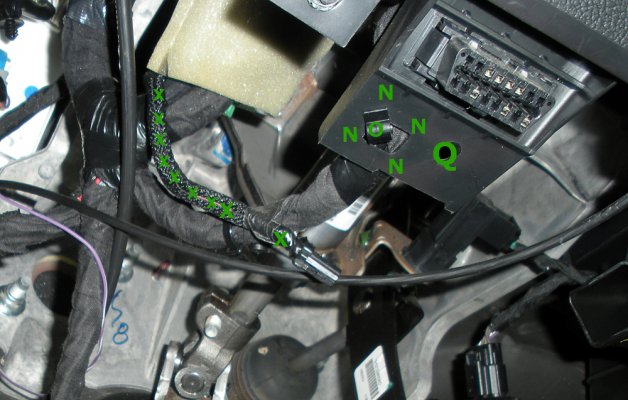
With that piece removed, look and see if your wire is hanging down.
Mine was over under the side panel but I am pretty sure I put it there,
after I dynamated my floorboards.

Anyway, I didn't see the OEM wire so took side panel off and there it was.
It is the wire with all the green "X"'s on it.


foot03.jpg


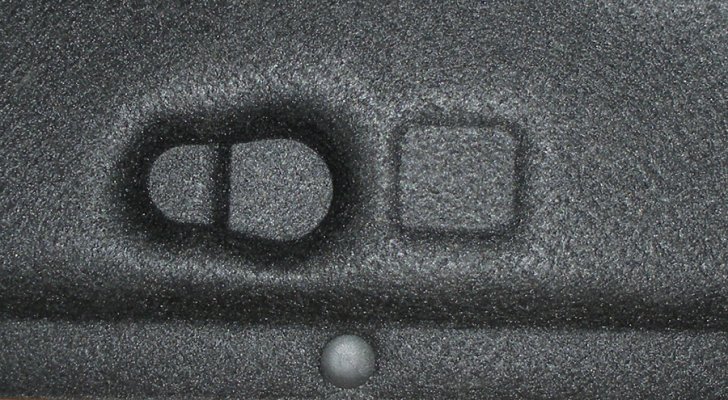
Now it is time to put the light, in the panel I had removed earlier.
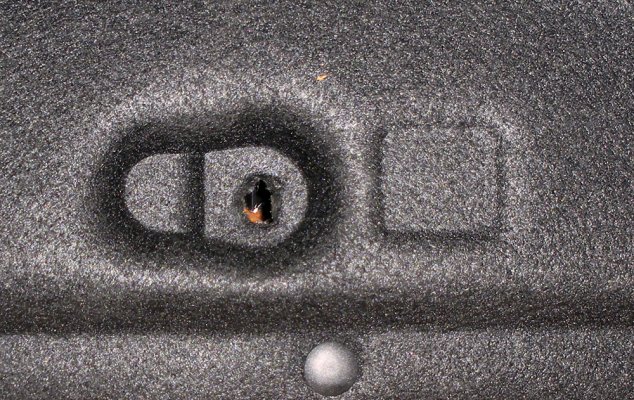
See that boot looking form on the panel?


foot04.jpg


Was going to be all precise, take exact measurements, transfer those measurements to the cover,
then use an exacto knife for pristine cuts, . . . then I asked myself, "Who are you kidding?".

Grabbed a screwdriver, "just" smaller than the plug on the light,
and poked a hole, dead center of the toe section of the boot.

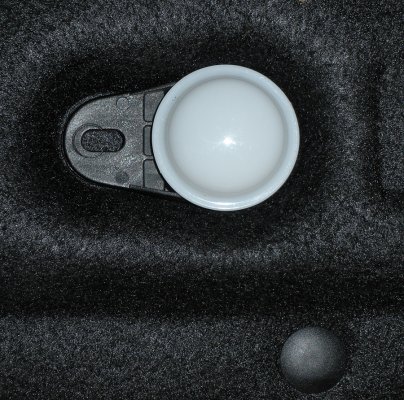
foot05.jpg


Grab your light and wiggle in the hole you just made.

If you want, you can even put a plastic push pin in the other hole, for double down mounting.
I figure the light is tight enough, it does not weigh anything and I did have a plastic push pin.
Might get one, if the light ever does fall down, but doubt if it ever does.
She is pretty tight.


foot06.jpg

Perfect fit !!!
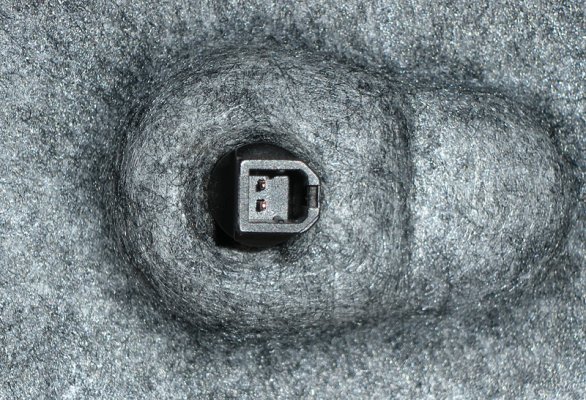
Here is the backside of the light, that is pretty darn tight.


foot07.jpg


Better make sure it actually works, before I put everything back together.


foot08.jpg


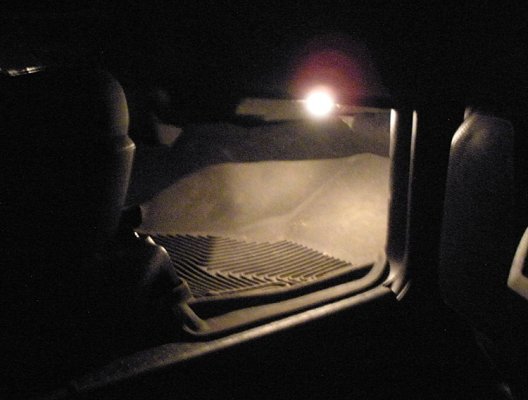
Might as take a quick one, in the dark.


foot12.jpg


Time to do the drivers side.

This wire was readily visible.
It is the one lined with green "X"'s.
Taped to the wiring for the OBD2 port.
Simply remove that tape.


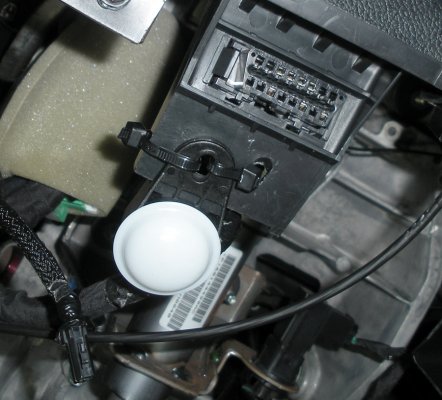
foot09.jpg


Now you see that "O"?
That is a C clip which keeps the OBD2 wiring from flopping around.
Not that there is much play in that loom, let me tell you.
I wanted to use that hole, to mount my light, so I moved that c-clip out of the way.


DSCN0344.jpg


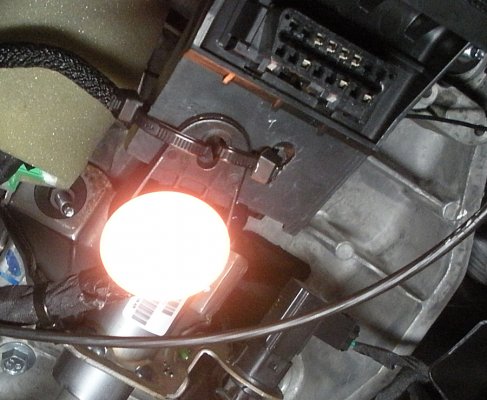
Better make sure this light works too.


DSCN0347.jpg


Alright, time to put that C-clip some where and call it done.


foot13.jpg


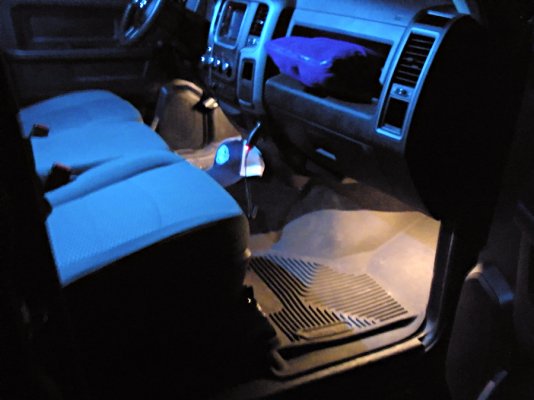
And here is both of them.
NOTE: My overhead light is an insanely bright LED.
However, at night, I found if very hard, to find anything, on the floor, unless I got out of the truck.
My legs caste too much shadow.

Doubt I have that problem anymore.


DSCN0337.jpg
 
Last edited:
OP
OP
gofishn

gofishn

Senior Member
Joined
Sep 12, 2014
Posts
5,082
Reaction score
10,140
Location
Iowa
Ram Year
2022 Ram 1500 5th Gen, Big Horn, 4X4, Crew Cab, 6'4" Box
Engine
hemi 5.7L, 345 cu in
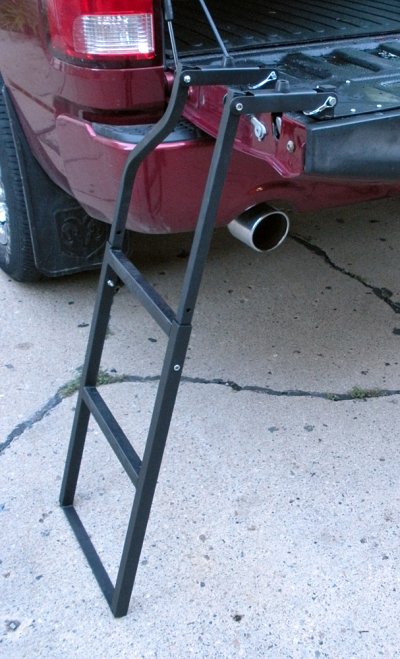
Traxion Tailgate Ladder

Been wanting to figure out something, anything, that would make getting in & out of the truck easier. When I came across this nifty, neat idea.

Had to have one, so off to Northern Tool I go.
Hey, it's on sale, this week, for $39.
It's Destiny!

Directions suck. Flat out suck.
Thankfully, after a beer or three, it is pretty easy to figure out.

Took about 15 minutes to install.
Most of that was telling the Wife she was wrong, this thing is a great idea.


traxion01.jpg


Had the Wife climb on it , first, just to make sure it was safe.
I would much rather collect the Life Insurance, than her get it.

Dammit. Thing worked great.
Even the Wife thought so.
She said, "That thing IS a great Idea!"
Almost made me feel bad thinking about all that Life Insurance money.
Almost . . .

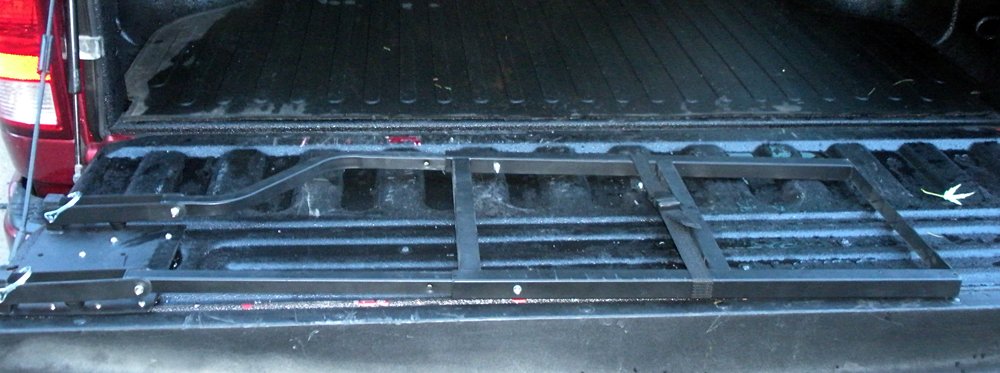
Here it is, all folded up.


traxion02.jpg


Nice thing about it is the two easy & quick to remove clips that hold the ladder to the mount.
Only takes second to remove the ladder for full bed access.
Ladder looks crappy against the plain tailgate, so a new bed rug tailgate mat in on order.
Figure to add some self sticking rubber to the bottom of the bottom step.
Maybe some velcro to the bottom of the ladder sides to help keep it tight to the bed rug mat.
Should eliminate any rattles too.


.
 
OP
OP
gofishn

gofishn

Senior Member
Joined
Sep 12, 2014
Posts
5,082
Reaction score
10,140
Location
Iowa
Ram Year
2022 Ram 1500 5th Gen, Big Horn, 4X4, Crew Cab, 6'4" Box
Engine
hemi 5.7L, 345 cu in
Been trying to decide between 275/65R20 vs stock 275/60R20. Have always had Load Range 'E' tires and loved them. But stressing out about the axle rating, on this truck. Not to mention it being a C-clip axle and knowing my tendencies.

Sam;s Club had a sale on Michelin tires, my Stock Junkyears were down to 7/32nds, starting to hydroplane if someone spit on the pavement, time to decide.

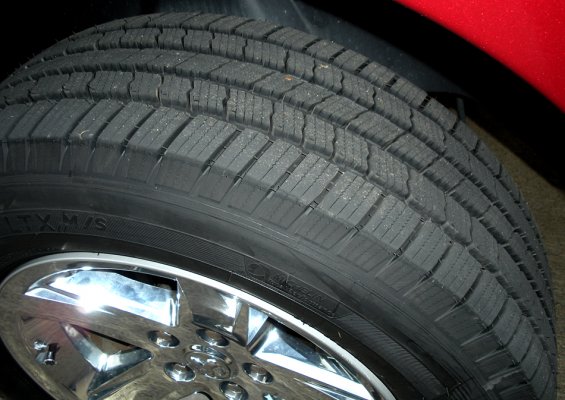
In the end, it was the spare tire that decided it, for me. I just didn't want to tie up an extra $300 for a same size spare, if I moved up in diameter. So, picked up a set of Michelin Defender LTX M/S in stock 275/60R20.

Have always bought straight LTX M/S's prior. My Wife has a set of Defenders , on her Grand Caravan, and we love them. Think I am going to like these tires even more.

My Vibration is darn near gone. Before I always had cyclic vibration. as I looked in y rear view mirror, road signs, grills of cars behind me, etc,. would blur out, about every 4-5 seconds. Not unlike how everything "jiggles", in teh rear view mirror, when you go over a pretty good bump or roadway crack. Except mine was constant, every 4-5 seconds, even on brand new asphalt.

No more. Only juggling I see now is bumps or roadway cracks.


DSCN0354.jpg


Still have the same terrific siping of my LTX M/S's !!


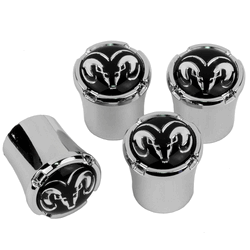
New tires need new valve stem caps. Right?
So got these.


dodge-black-ram-head-valve-stem-caps-8.gif


From Amazon. They've been sitting around, just waiting for new rubber.
https://www.amazon.com/gp/product/B0...?ie=UTF8&psc=1


Since summer is about over, decided it was time to pick up a windshield Visor.
Bought one, and sent it back. The fit was horrible. Custom Fit, yeah right.

Decided to give it yet another go and got this one.

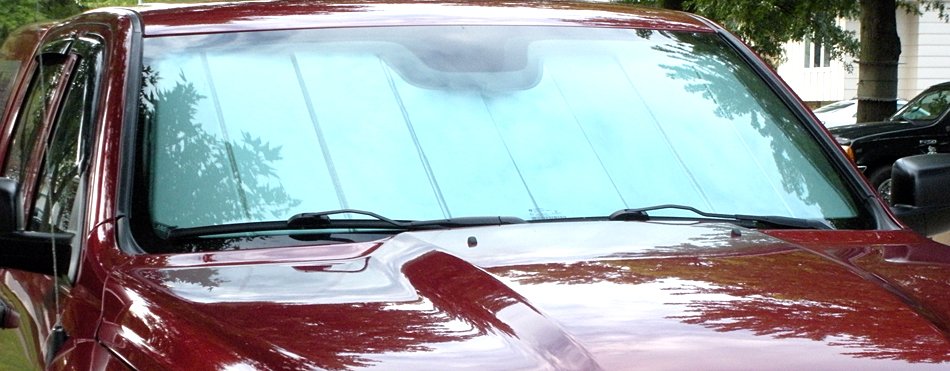
Covercraft UVS100, from amazon.
https://www.amazon.com/Covercraft-UV...eat+shield+ram

This one, I like. Fits rather nicely.


DSCN0355.jpg


Edge to edge coverage and just a bit of a gap, right at the top.
My only Complaint is the visor is rather thick, so it shows indentations readily & easily.

That, and because it is so thick, it's hard to store.
Simply too thick to fit between fold flat floor and a lowered rear seat.

Guess it is time to do the folding rear seat back mod.

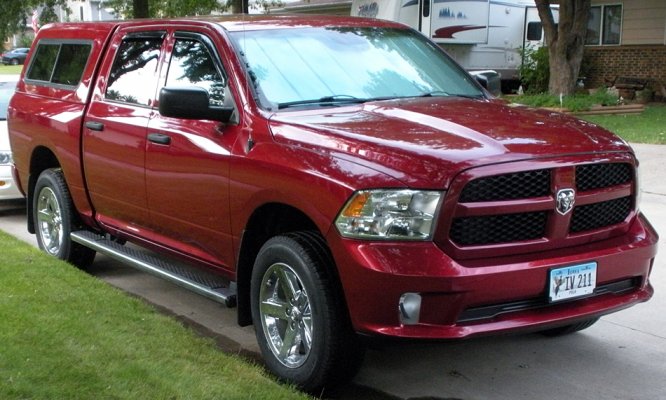
Anyway, here is the truck with new shoes and windshield visor.


DSCN0356.jpg


PS

I really cannot say enough about these Michelin Defender LTX M/S's.
They are superb, feel planted and, best of all, my Vibration is Gone.

Sure hope it stays that way . . . . ..
 
OP
OP
gofishn

gofishn

Senior Member
Joined
Sep 12, 2014
Posts
5,082
Reaction score
10,140
Location
Iowa
Ram Year
2022 Ram 1500 5th Gen, Big Horn, 4X4, Crew Cab, 6'4" Box
Engine
hemi 5.7L, 345 cu in
Installed a Kenwood DDX492 radio quite awhile back.
Figured it was high time I hooked up the rear view camera to it.
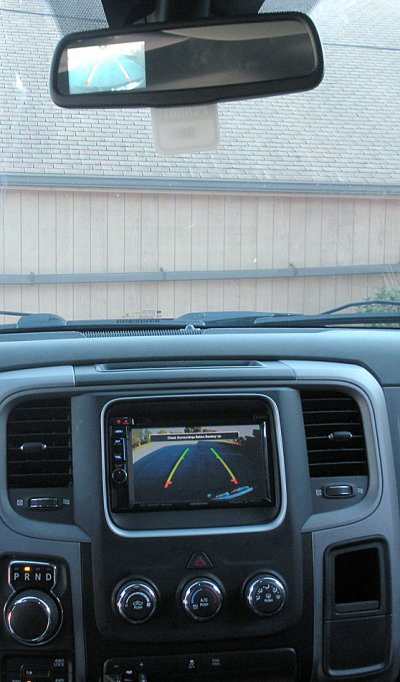
Rear View Camera shows up in the rear view mirror but is just to small to see much.


First things first, remove the side panel from the passenger side of the dash.
The one at the very end of the dash.
Plain-Jane, plastic panel that you never really see, account the passenger door covers it up, when closed.
Yeah, that panel!
Take it off, just hooked in there, no screws or nothing.


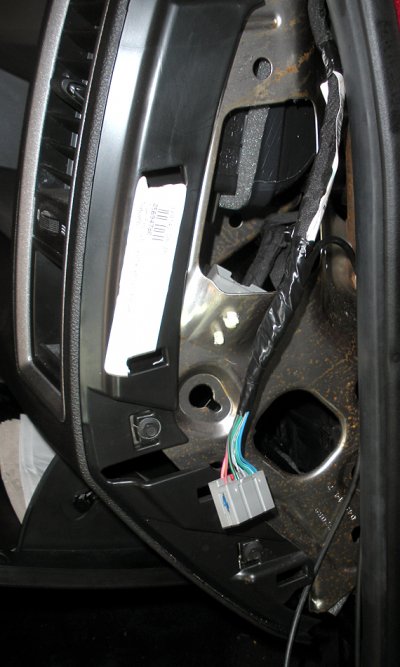
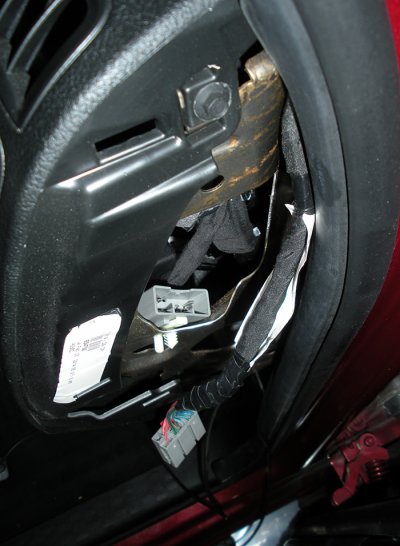
DSCN0389.jpg

See that hanging gray plug, yep that;s the one we want.

Here is the other end of that plug Forgot to take a picture with it together.


DSCN0390.jpg


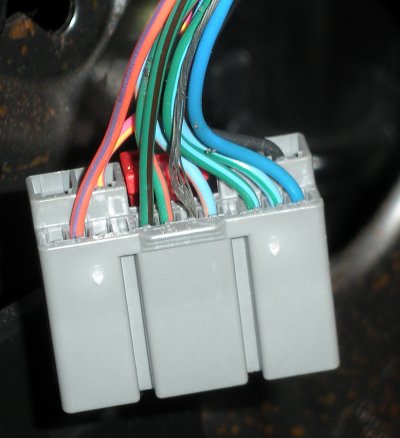
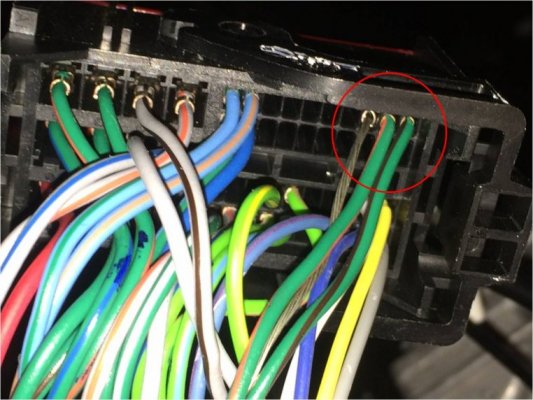
Dead center of the plug are the three wires I need.
Bare Shield Wire, Green/Brown stripe is video or positive wire, Green with Orange stripe is negative wire.

DSCN0394.jpg

Pretty much only two ways to do it.
Splice into the wires and run them, each one, over to the OEM Radio connection.
OR
Splice into those wires with an RCA plug and run that over to the radio itself.

I went RCA Plug. Easier, but will give both directions for connecting via either Method.

Method #1
Splice into those three wires and run those three wires, from this connector, over to the OEM radio connection.
Once there, add it to the connection, as follows:

Green Wire/Orange Stripe, Positive, Pin #31
Green Wire/Brown Stripe, Negative, Pin #32
Bare Wire, Shield, Pin #33

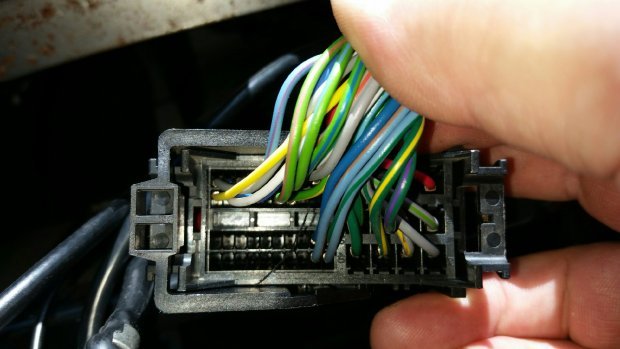
This is what the OEM plug, behind the radio looks like.

OEM%20Plug%2001.jpg


Notice the bottom corner has no wires?


OEM%20Plug%2002.jpg

Add the three wires you ran from the side of the dash to this connector, at those locations.
Now, the factory OEM radio connection has rear view camera feed.
Can hook it up to OEM Radio that is rear view camera capable OR an aftermarket radio, like I did.


Method 2

Clip one end off your RCA wire.
Outer wire connects to Green Wire, Orange Stripe.
Inner Wire connects to Green Wire/ Brown Stripe.
Do not worry about the bare wire.

Seal each individual wire connection.
hen, wrap everything up in a little reynolds wrap.
Then black tape over the entire connection.


Tie into the reverse on the OEM Radio Connection.
I use a Metra Harness.
Didn't really pay attention to where that wire mated, in the OEM Radio Connector.
Sorry.

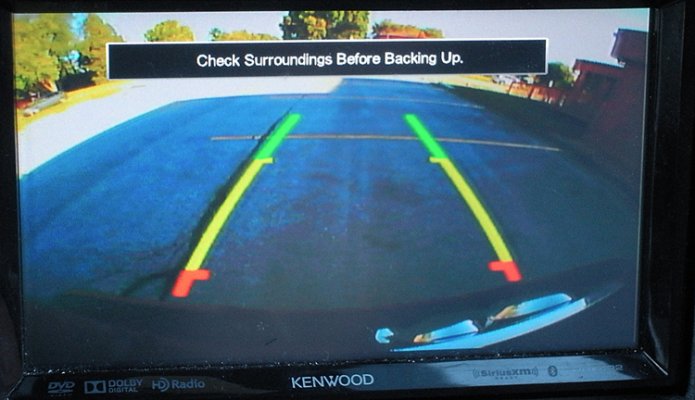
Here is my rear view camera, displayed on my Radio.

DSCN0406.jpg

Here it is, on both the radio And the Mirror.

DSCN0396.jpg
 
Last edited:
OP
OP
gofishn

gofishn

Senior Member
Joined
Sep 12, 2014
Posts
5,082
Reaction score
10,140
Location
Iowa
Ram Year
2022 Ram 1500 5th Gen, Big Horn, 4X4, Crew Cab, 6'4" Box
Engine
hemi 5.7L, 345 cu in
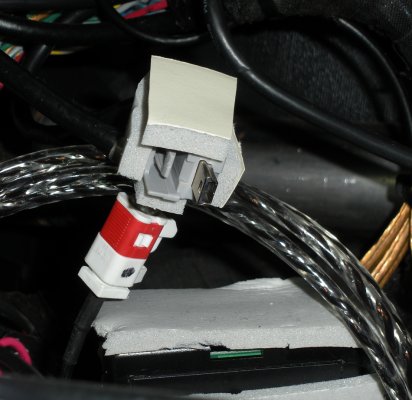
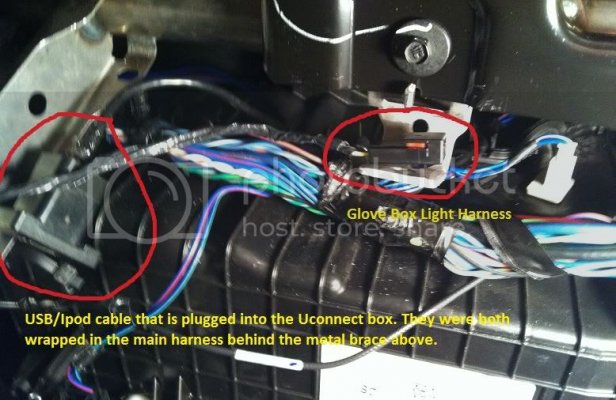
By the way, there is a micro USB behind the OE Factory radio location.
It is wrapped up,inside the main wiring loom, along with the plug for the upper glove box light, on Express models.
I wrapped mine in sticky Foam, t prevent it from rattling around, behind the dash.
Unwrapped it, just in case I ever need it. Afraid I would forget it was there, if I left it wrapped up in the loom.


DSCN0382.jpg

Can you tell I like to wrap up things that might 'Rattle" with self sticking Foam?


FYI, Model years 2009 to 2013 have this USB Port wrapped up in their wiring loom.

Harness-0.jpg


.
 

Sandbox

Senior Member
Military
Joined
Sep 23, 2016
Posts
337
Reaction score
156
Location
Warrenton, VA
Ram Year
2017
Engine
6.4 HEMI
Installed a Kenwood DDX492 radio quite awhile back.

Method 2

Clip one end off your RCA wire.
Outer wire connects to Green Wire, Orange Stripe.
Inner Wire connects to Green Wire/ Brown Stripe.
Do not worry about the bare wire.

Seal each individual wire connection.
hen, wrap everything up in a little reynolds wrap.
Then black tape over the entire connection.

What method did you use to tap into the truck's harness? Did you use some sort of t-tap or do a cut, splice and solder? Thanks!
 

dkmesa

Senior Member
Joined
Sep 3, 2014
Posts
580
Reaction score
190
Ram Year
2014
Engine
5.7
Calling floor mats, mud flaps, and cupholders a "build" is a bit of a letdown. Came in this thread expecting a build lol. Undercoating is not a mod...it is maintenance.
 

Graygoose

Indecisive Car Owner
Supporting Member
Joined
Nov 21, 2011
Posts
16,824
Reaction score
31,460
Location
Oklahoma
Ram Year
Convert, for now.
Engine
small
Calling floor mats, mud flaps, and cupholders a "build" is a bit of a letdown. Came in this thread expecting a build lol. Undercoating is not a mod...it is maintenance.

To me, a 'mod' is any alteration from stock. I like to see what others have done, even if its something simple. If its not your style to see everyone mods, you don't need to click on them, much less degrade. IMHO


I just looked for your build log, didn't see anything.

Post up some we can see.
 
Last edited:
Sandbox

Senior Member
Military
Joined
Sep 23, 2016
Posts
337
Reaction score
156
Location
Warrenton, VA
Ram Year
2017
Engine
6.4 HEMI
Calling floor mats, mud flaps, and cupholders a "build" is a bit of a letdown. Came in this thread expecting a build lol. Undercoating is not a mod...it is maintenance.

Well, I guess opinions are like A55-holes. What about documenting your experiences to help others. Isn't that the point of the forum? I find a lot of interest in his build thread because it's helped me answer some of the questions I had. Good job putting another member down buddy.
 

dkmesa

Senior Member
Joined
Sep 3, 2014
Posts
580
Reaction score
190
Ram Year
2014
Engine
5.7
To me, a 'mod' is any alteration from stock. I like to see what others have done, even if its something simple. If its not your style to see everyone mods, you don't need to click on them, much less degrade. IMHO


I just looked for your build log, didn't see anything.

Post up some we can see.

No "build" thread because my Ram hasn't been built. I'll pass on starting my "cabin filter mod, lighting upgrades, leveling kit, and helper bags" thread because it's been done and shared a thousand times and no one would care.

Glad you got enjoyment out of seeing his third brake light waterproofing...I'll make sure to take pictures the next time I put some silicone around mine.

I enjoy hearing tips from folks' DIY projects as much as the next guy, but misrepresenting this as a build thread just left me disappointed. :roflsquared:

Carry on OP. Let's see the jugs of oil next time you change her oil.
 

Graygoose

Indecisive Car Owner
Supporting Member
Joined
Nov 21, 2011
Posts
16,824
Reaction score
31,460
Location
Oklahoma
Ram Year
Convert, for now.
Engine
small
I get the joy out of all builds.

Keep em coming OP !!
 
OP
OP
gofishn

gofishn

Senior Member
Joined
Sep 12, 2014
Posts
5,082
Reaction score
10,140
Location
Iowa
Ram Year
2022 Ram 1500 5th Gen, Big Horn, 4X4, Crew Cab, 6'4" Box
Engine
hemi 5.7L, 345 cu in
What method did you use to tap into the truck's harness? Did you use some sort of t-tap or do a cut, splice and solder? Thanks!

For the main connection, to my after market Kenwood radio itself, I used a metra wire harness, from Crutchfield, to connect to the OEM Wiring loom.
Wished I had paid more attention to the reverse location, for illustration purposes. But that Metra harness Schematic is long gone.

For the back-up Camera wiring, I used a RCA Cable.
Which I soldered to the Back-up camera wiring.
Located in the OEM wiring loom, at the passenger side dash panel, as shown.

Soldering each individual wire for my connections.
Applied liquid tape to each wire.
Wrapped each wire in Reynolds Wrap, to provide for some shielding.
Then wrapped each wire in Electrical Tape, as well as the final wiring loom.

Reynolds wrap was probably unnecessary but, I was in there anyway.

.
 
Last edited:
OP
OP
gofishn

gofishn

Senior Member
Joined
Sep 12, 2014
Posts
5,082
Reaction score
10,140
Location
Iowa
Ram Year
2022 Ram 1500 5th Gen, Big Horn, 4X4, Crew Cab, 6'4" Box
Engine
hemi 5.7L, 345 cu in
Guys, don't pay any attention to the monkey, when he masturbates or plays with his feces.
Simply be thankful you are much farther up the evolutionary ladder.


Next Subject of my Build Thread - How To Ignore Someone . . . and never see another thing they post, ever again.
(For those who may read this thread at a later date.)

Top of every page, immediately below RAMForum.com and the pick up truck graphic, there is a grey bar that contains navigation links.
Such as Quick Links, Community, USER CP, etc.

Click on USER CP

Left side of the newly opened page, there is a column of yet more navigation links.
Notice it is divided into sections?
Look for the third section, titled "Settings & Options".
Click on "Edit Ignore List"

On the next page to load, simply put the ************ monkey's name into the box and "****" they go away.

Hope this helps another, down the road.
 
Last edited:
OP
OP
gofishn

gofishn

Senior Member
Joined
Sep 12, 2014
Posts
5,082
Reaction score
10,140
Location
Iowa
Ram Year
2022 Ram 1500 5th Gen, Big Horn, 4X4, Crew Cab, 6'4" Box
Engine
hemi 5.7L, 345 cu in
Think of it as "Child-Proofing" your RAMforum experience.
 
Last edited:

Sandbox

Senior Member
Military
Joined
Sep 23, 2016
Posts
337
Reaction score
156
Location
Warrenton, VA
Ram Year
2017
Engine
6.4 HEMI
Guys, don't pay any attention to the monkey, when he masturbates or plays with his feces.
Simply be thankful you are much farther up the evolutionary ladder.


Next Subject of my Build Thread - How To Ignore Someone . . . and never see another thing they post, ever again.
(For those who may read this thread at a later date.)

Top of every page, immediately below RAMForum.com and the pick up truck graphic, there is a grey bar that contains navigation links.
Such as Quick Links, Community, USER CP, etc.

Click on USER CP

Left side of the newly opened page, there is a column of yet more navigation links.
Notice it is divided into sections?
Look for the third section, titled "Settings & Options".
Click on "Edit Ignore List"

On the next page to load, simply put the ************ monkey's name into the box and "****" they go away.

Hope this helps another, down the road.

This just made my day! LOL
 
OP
OP
gofishn

gofishn

Senior Member
Joined
Sep 12, 2014
Posts
5,082
Reaction score
10,140
Location
Iowa
Ram Year
2022 Ram 1500 5th Gen, Big Horn, 4X4, Crew Cab, 6'4" Box
Engine
hemi 5.7L, 345 cu in
Yet another Mod, Change, Alteration, to my Truck I had completely forgot, all about.

Disable the Seat Belt Chime

Found it here:
http://www.ramforum.com/f76/seatbelt_chime_delete-28510/

NOTE: The following steps must occur within the first
60 seconds of the ignition switch being turned to the ON
or START position. DaimlerChrysler does not recommend
deactivating the Enhanced Warning System
(BeltAlert).
1. With all doors closed and the ignition switch in any
position except On or Start, buckle the driver’s seat belt.
2. Turn the ignition switch to the ON position and wait
for the Seat Belt Warning Light to turn off.
3. Within 60 seconds of turning the ignition switch to the
ON position, unbuckle and then re-buckle the driver’s
seat belt at least three times within 10 seconds, ending
with the seat belt buckled.
NOTE: Watch for the Seat Belt Warning Light to turn on
while unbuckling and off while re-buckling the seat belt.
It may be necessary to retract the seat belt.
4. Turn the ignition switch to the LOCK position. A
single chime will sound to signify that you have successfully
completed the programming.

The Enhanced Warning System (BeltAlert) can be reactivated
by repeating this procedure.

By the by, biggest reason I created this thread was for myself.
An effort to keep track of what I did and how I did it, in case I needed to do it all over again. the fact that others can learn form it too, is a plus.


.
 

derekp

Senior Member
Joined
Mar 10, 2015
Posts
2,131
Reaction score
1,789
Location
Buda, Tx
Ram Year
2007
Engine
1990 5.9 Cummins
Yet another Mod, Change, Alteration, to my Truck I had completely forgot, all about.

Disable the Seat Belt Chime

Found it here:
http://www.ramforum.com/f76/seatbelt_chime_delete-28510/

NOTE: The following steps must occur within the first
60 seconds of the ignition switch being turned to the ON
or START position. DaimlerChrysler does not recommend
deactivating the Enhanced Warning System
(BeltAlert).
1. With all doors closed and the ignition switch in any
position except On or Start, buckle the driver’s seat belt.
2. Turn the ignition switch to the ON position and wait
for the Seat Belt Warning Light to turn off.
3. Within 60 seconds of turning the ignition switch to the
ON position, unbuckle and then re-buckle the driver’s
seat belt at least three times within 10 seconds, ending
with the seat belt buckled.
NOTE: Watch for the Seat Belt Warning Light to turn on
while unbuckling and off while re-buckling the seat belt.
It may be necessary to retract the seat belt.
4. Turn the ignition switch to the LOCK position. A
single chime will sound to signify that you have successfully
completed the programming.

The Enhanced Warning System (BeltAlert) can be reactivated
by repeating this procedure.

By the by, biggest reason I created this thread was for myself.
An effort to keep track of what I did and how I did it, in case I needed to do it all over again. the fact that others can learn form it too, is a plus.


.

Interesting. I wonder if it works on the 3rd gens. You don't need to justify anything man. Mod on.
 
OP
OP
gofishn

gofishn

Senior Member
Joined
Sep 12, 2014
Posts
5,082
Reaction score
10,140
Location
Iowa
Ram Year
2022 Ram 1500 5th Gen, Big Horn, 4X4, Crew Cab, 6'4" Box
Engine
hemi 5.7L, 345 cu in
Interesting. I wonder if it works on the 3rd gens. You don't need to justify anything man. Mod on.

Yes, it does.

Hmm, 3rd Generation ?
Have you tried to roll your windows down, with your key fob?
I know 4 Generation will not but think 3rd generation may be able to.
 
Top