Hope this helps someone!
MY BILSTEIN INSTALLATION @ +2.8"
My Ram : 2014 4X4 QC 5.7L 6 SPEED XSMN 3.55 DIFFERENTIALS
Bilsteins set @ + 2.8 " top ring . Bought new from a member here .
Installed Mevotech UCA'S for cheep insurance. $100.00 for the pair from
www.rockauto.com Painted them with 3ea coats of VHT Chassis paint from Autozone .
Almost a perfect level for me .
Front 39.25"
Rear 39.5 "
I got 2.75" of lift @ the 2.8" setting . Have been installed for aprox 7,000 miles and I've had very little settling . Maybe 1/4"
☆☆☆☆EDIT☆☆☆☆
It's been about 55,000 miles now , still rides GREAT and I'd say less than a 3/8" of settling actually closer to 1/4" , mainly due to the coils setting in imo , either way not bad at all and still rides great ! Better than stock .
I've also noticed ZERO mpg change as some have expressed a concern of this , due to raising the front and taking out slight aerodynamics of the truck.
I'm on stock Goodyear tires & wheels / 275-65-20 on 20X9 Chrome Clads.
I am considering .75" - 1" rear coil spring spacers so I'm level when pulling the boat .
☆☆☆☆☆☆☆Edit☆☆☆☆☆☆☆
I've recently installed 1.5" rear coil spacers and I really like the look !
Here's a link to my 1.5" rear coil spacer install.
http://www.ramforum.com/showthread.php?p=1418741
Back to the Bilsteins install.
I'm terribly happy with the ride . Noticably better than stock imo.
Pretty easy install , if your mechanically inclined and a DIYER a 4 out of 10 imo.
First side took me 2.5 hours( Bilsteins & UCAs ) the second about 1.5 . I rotated my tires in the process jackstands on the floor at the same time .
If your not familiar with this type of work watch this video / it's not the greatest but will give you a good idea of what to prepare for and should give you the confidence to do the install yourself ! I wish I had found this prior to my install..
I had to wait a week for an alignment, in my case it drove normal prior to the alignment .
Advice :
1) Take pictures of everything prior to disassembly paying close attention to bolt direction , exposed threads beyond the nuts and general orientation of all components .
2) You do not need to disconnect the anti-sway ( count exposed threads) loosen enough to push the lower control arm down for shock & coil removal and reinstallation.
3) Spray WD-40 on all nuts and threads the day before and just prior to the job.
4) Use a quality coil spring compressor with safety locks , this is no area to skimp ! Use an impact to compress the coils litle @ a time side to side , takes 30 seconds with an impact
5) Have metric tools wrenches and sockets 16mm -22mm I think . Have 1/2" drive breaker bar avail , there's a couple stiff tqs to break .
6) for the top nut on the shock assy for removal & install I used an electric impact , had it off in 2 seconds ! Beats struggling with an offset wrench !
7) For the upper control arm( UCA ) ball joint separation , use a separation tool ( Rented ) or as I did WD-40 soak heat with a heat gun then a couple medium taps with a medium hammer straight up on the bottom of the ball joint stud (carefully not to damage the threads)
7a) Important to know where to apply heat with the heat gun . Ref. My photos below, do not heat the black upper control arm, apply Heat to the Silver piece the tapered ball joint stud protrudes through. Heat this until it's just too hot to leave the palm of your hand on it . This will slightly expand this assy and sometimes just fall apart as my 2nd side did [emoji38]

××××××××IMPORTANT STEP×××××××××
8) Very important : washer placement for the bils . It goes on against the piston below the threads then install the upper spring housing assy. then install the top nut ( the washer that comes with the bilsteins DOES NOT go under the nut and contacting the nut ! This washer goes directly on top of the piston because the piston diameter of the Bilsteins are slightly smaller in diameter than the OEM pistons . If you do not install it here , some have had clunking right away and or after a few k miles . Due to the smaller piston diameter wearing out the upper oem assy.
Refer to this excerpt from the Bilstien's installation instructions ( steps 5 & 6 )

All OEM Equipment installed .

OEM Equipment removed .

Bilsteins & Painted Mevotecs installed .

Painted Mevotecs

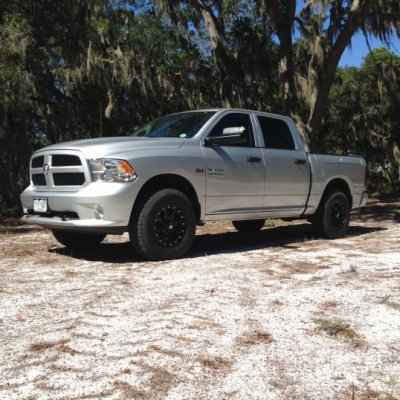
Before photo

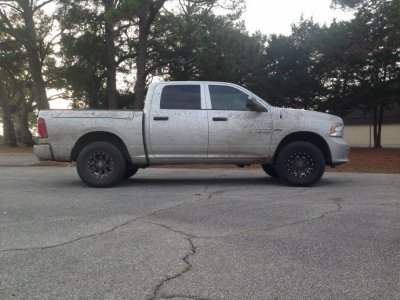
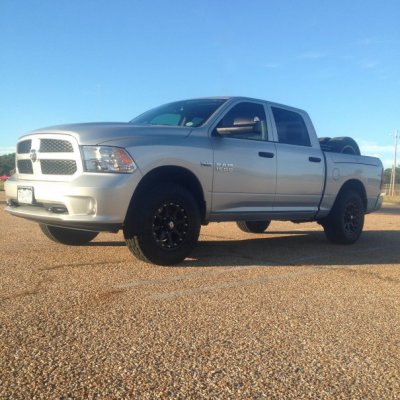
After photos

In this photo It looks nose high , but I had a full tank of gas and 3 deer , my bow and deer stand in the back so about 400 - 500 lbs +gas , this is why I'm thinking of a .75" - 1.0" spacer in the back for when I'm pulling my boat.


In this photo I have the 1.5" TGC rear coil spring spacers installed