loveracing1988
Senior Member
- Joined
- Jul 4, 2013
- Posts
- 3,505
- Reaction score
- 913
- Location
- Clarkston, MI
- Ram Year
- 2020
- Engine
- 6.7 Cummins
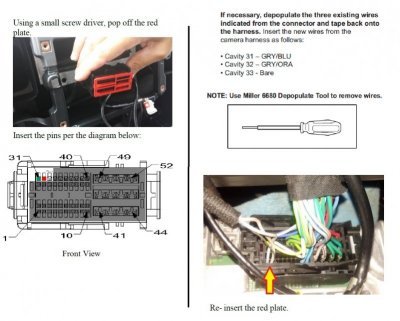
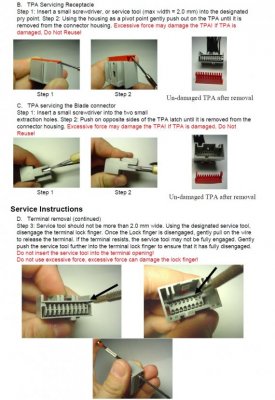
Was not aware you were a fellow vampire.See posts 228-231, you need to check all 4 connectors
http://www.ramforum.com/showthread.php?p=1085524
Also for see post 694-670 or so (more of the same)
http://www.ramforum.com/showthread.php?p=1273045
PS: If you want, pm me and we can talk via phone sometime this weekend (I work 3rd shift EST) to clear up any questions so you can better decide what you want to do and know what to check.
Sent from my SM-G930P using Tapatalk
Sent from my Nexus 6 using Tapatalk