Question...

Disclaimer: Links on this page pointing to Amazon, eBay and other sites may include affiliate code. If you click them and make a purchase, we may earn a small commission.

ramthis9501

Senior Member
Joined
Jul 25, 2010
Posts
2,939
Reaction score
31
Location
Oklahoma
Ram Year
2001
Engine
5.2 V8
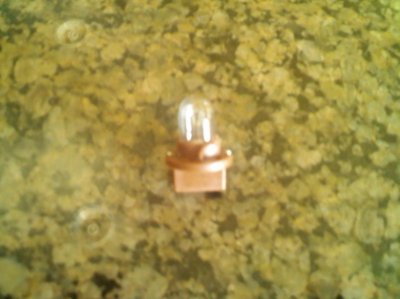
I called super bright leds this morning. The guy said that the light bulbs are supposed to come out of the socket and the new ones go in it's place. Only problem though, the light doesnt seem to want to come out :biggun: is this true?
 

AWE Daniel

Banned
Joined
Jun 29, 2010
Posts
3,750
Reaction score
0
Ram Year
2004
Engine
Hemi 5.7
You probably have to twist them, at least mine did
 

AWE Daniel

Banned
Joined
Jun 29, 2010
Posts
3,750
Reaction score
0
Ram Year
2004
Engine
Hemi 5.7
I dunno which ever way they move lol, are we talking about taking the stock bulbs out of the dash? They came out real easy.
 

AWE Daniel

Banned
Joined
Jun 29, 2010
Posts
3,750
Reaction score
0
Ram Year
2004
Engine
Hemi 5.7
try to get a picture of the back of the panel so we can see what your talking about here
 
OP
OP
ramthis9501

ramthis9501

Senior Member
Joined
Jul 25, 2010
Posts
2,939
Reaction score
31
Location
Oklahoma
Ram Year
2001
Engine
5.2 V8
016.jpg

that bulb is supposed to come out of the red socket...
 

AWE Daniel

Banned
Joined
Jun 29, 2010
Posts
3,750
Reaction score
0
Ram Year
2004
Engine
Hemi 5.7
ohh so you wanna actually remove that part, well.... I think he is right should pull right out, have you tried different bulbs or do they all not wanna move?
 
OP
OP
ramthis9501

ramthis9501

Senior Member
Joined
Jul 25, 2010
Posts
2,939
Reaction score
31
Location
Oklahoma
Ram Year
2001
Engine
5.2 V8
I havent tried any others, but they are all the same though. Looks like it should just pop right out, but it's not even budging
 

AWE Daniel

Banned
Joined
Jun 29, 2010
Posts
3,750
Reaction score
0
Ram Year
2004
Engine
Hemi 5.7
try taking a hair dryer and heating up just the base
 

AWE Daniel

Banned
Joined
Jun 29, 2010
Posts
3,750
Reaction score
0
Ram Year
2004
Engine
Hemi 5.7
Dont cook it just warm it up a little, i dunno im out of Ideas
 
OP
OP
ramthis9501

ramthis9501

Senior Member
Joined
Jul 25, 2010
Posts
2,939
Reaction score
31
Location
Oklahoma
Ram Year
2001
Engine
5.2 V8
It sucks, cause now I'm either gonna have to send those back and get some new ones. Or just give up on it. But I think I might send the ones I got back and get some that are already in the twist lock
 

adamwilkes14

Senior Member
Joined
Oct 20, 2010
Posts
2,414
Reaction score
10
Are the contacts for those bulbs on perimeter of the base and as you screw them in they make contact? I know Autozone sells just the sockets for those...
 

Bigtman07

Registered User
Joined
Jun 28, 2010
Posts
9,329
Reaction score
287
Location
Piqua, Ohio
Ram Year
2000
Engine
Cummins 5.9
Ok colton IIRC from another DIY I read that you just bought the bulbs and not the base. the bulb comes out of the base by removing the 2 tiny retainer clips in the plastic base. I'll see if I can't dig up a part of a DIY.

If you decide to not do the mod let me know and I'll see if I can get the LEDs from ya.
 

Bigtman07

Registered User
Joined
Jun 28, 2010
Posts
9,329
Reaction score
287
Location
Piqua, Ohio
Ram Year
2000
Engine
Cummins 5.9
Hope this helps colton I ahem got this from another site. cough.....


6.) All twist locks will unlock with a slight turn to the left. Pull each one out one at a time. The next process takes place with EACH twist-lock, so only undo one at a time. Unlock one, I started with the High Beam indicator light for reference. I forgot to take before and after pictures, so I’m showing you what you should DO, not what you see in my picture. You will have a stock bulb connected rather than the LED. I started with the High Beam indicator light pictured below:

2vifu48.jpg


7.) Once removed, pull the stock bulb out of the twist-lock. You will notice on the inside of the twist-lock two metal connectors. DO NOT LOSE THEM. Take your new LED (T1.5-B INSTRUMENT LED BULB) and bend the two wires down into a V shape. Your new LED replacement and empty twist lock should look like this:

11bq0pt.jpg


8.) Once bent into V shape, bend them so they touch the OUTSIDE of the LED. You will understand what I mean if you study the twist-lock. The two connectors on the twist-lock are what your trying to touch the wires to. You might have to double them up to make it a snug fit.

2wnbntj.jpg

Finished should look like so:
5ajfd5.jpg


9.) Install the High Beam Indicator back in place and remove one of the seven orange colored twist-locks. This next process is slightly tricky and is the same process for ALL SEVEN orange twist-locks, still noticing that my LEDs in the pictures are already installed. Yours will have the stock bulb. On the bottom of each twist-lock, you will see two small metal parts that are part of the connections on the other side.

2jea00.jpg

10.) Take a small prying tool, and push both metal connections upward simultaneously. This will release the glass stock bulb. ::CAUTION:: There is the potential for broken glass. Watch your fingers and handle carefully.

2u7ptmw.jpg

11.) This may not release the bulb completely, which calls for a small amount of force. I used needle nose pliers and pulled the metal tabs out. The stock bulb wires will be soldered to the tabs for reinforcement.

r1x4lu.jpg

12.) Break the wires from the tabs, but KEEP THE TABS. Do not lose them. It is extremely difficult and time consuming to fabricate new ones. Trust me, I know from experience. Bend the wires on the new LED’s ( 7 of WLED-B5 LED WIDE ANGLE BULB ) into a V shape, but this time, do not bend to the sides.

wcfe5h.jpg

13.) Place the LED inside the twist-lock, allowing the ends to protrude from the bottom.

2rc7wh0.jpg

14.) Place the two small unlost connections back in their slots, ensuring a secure fit. Bend the two small protruding wires around the connectors, and tuck them into the twist lock. They should look similar to the way the stock bulbs did when they were installed.

15tw15.jpg

15.) Once finished with the lights on the back of the cluster, ensure once more that everything is secure and has a good connection. Reinstall the cluster in the same manner that you removed it. Keep in mind that the gear shift cable needs to also be placed in the right slot that will allow you to access it from underneath the dash. Push cluster into dash, and you will notice the lights to indicator lights to come on. Hold in place and test your new LED’s. If there are problems, review your steps and ensure all connections are connecting and secure. Keep in mind that they may be directional. If so, untwist and rotate 180 degrees and replace.
 
Last edited:
OP
OP
ramthis9501

ramthis9501

Senior Member
Joined
Jul 25, 2010
Posts
2,939
Reaction score
31
Location
Oklahoma
Ram Year
2001
Engine
5.2 V8
Just saw your post lol thanks alot man, i'm gonna try it out and let you know how it goes. Probaly do it tomorrow when i get some time
 
Top