Merc225hp
Senior Member
How to install gauges in a A pillar pod.
Mechanical oil pressure gauge install keeping the factory oil psi sending unit in play.
As we all know the factory sending units suck, so this is a way to install your new mechanical oil pressure gauge and keep the stock sending unit so as no cel is triggered.
All fittings are 1/8 NPTF, three compression fittings are needed.
Thread tape is not to be used on the fittings, use a small dab of pipe dope or thread sealant.
Flexline kit and fittings, these parts should come with a gauge kit.

There are many ways to make up the oil tree but these are the parts I had around.
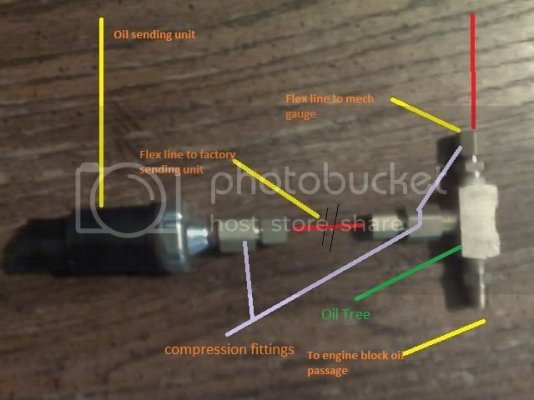
Clean the area as best you can around the org sending unit, remove the org sending unit with the sending unit socket. Install the oil tree in it’s place and start to run the flex oil line. The line uses compression fittings do not over tighten them, just snug and 1/16 turn.
In this photo (below) you can see the oil tree installed and the org oil sending unit zip tied to the heater hose. For those with the org keg style intake you will be almost working blind.
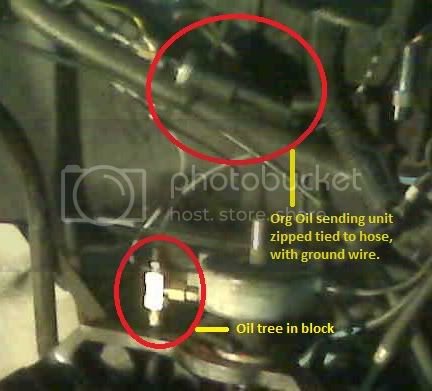
The org sending unit needs a ground wire, I just used a small hose clamp to hold the wire to the sending unit; then find a good spot to ground the wire to.
This is under the hood driver’s side, I used a small punch to make a hole in the rubber grommet, and then feed the oil line and wires through it.
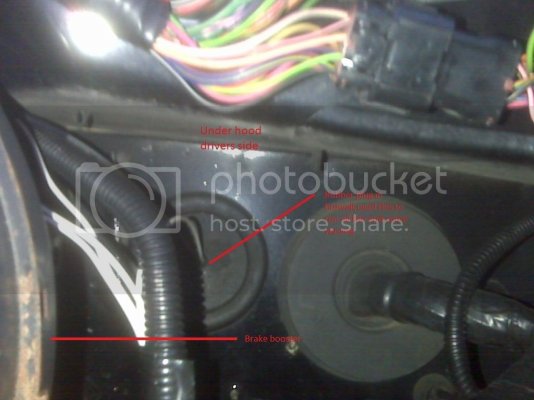
This is under the dash, oil line running under dash and up into the fuse box area.
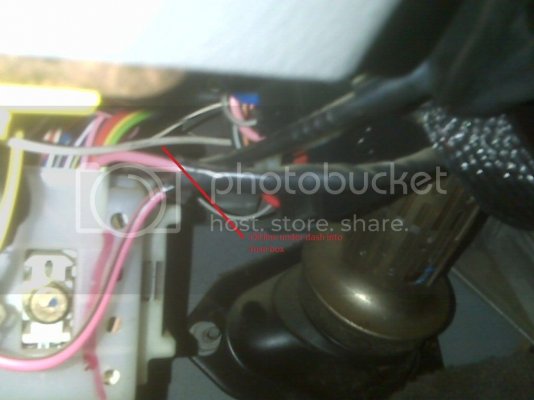
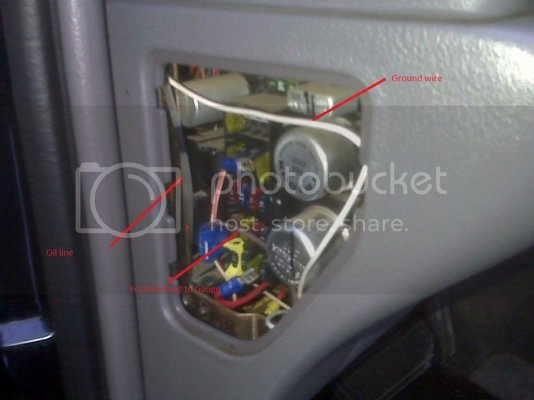
This is the fuse box; you can see the oil line going up and through it. This was done just for the photo, I moved the oil line out of the fuse panel after the photo was taken.
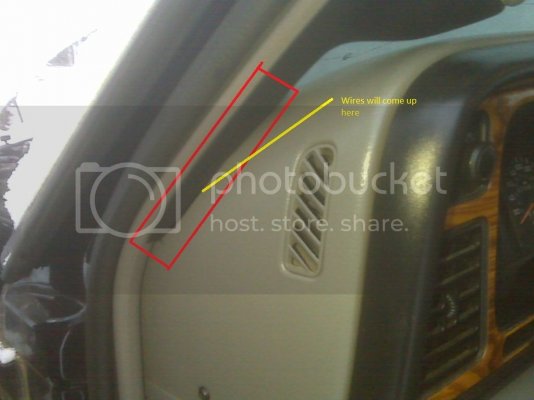
This is where the oil line and any other wiring will come up through; it is then routed up and into the gauge pod.
I used the Accel 2650-1157-00 dual gauge pod it is a cover not a complete a pillar, there is supposed to be a spot to run wires and lines between the two pieces; it does not work, I had to cut the org pillar (holes right behind the pods) so I could run the wires through it and behind.
INSTALLATION INSTRUCTIONS
Full Pillar
For all model Gauge Pods, 2650-1157-00
NOTE: Due to normal manufacturing processes you may have “flashing” (small fibers of plastic) around the pod holes. Once the gauge(s) are installed in the pod you will not be able to see the “flashing.”
Air Bag Warning: A-pillar gauge mounts should never be installed over an A- pillar or “curtain-side” airbags.
1. Your new A-pillar cover installs over the stock A-pillar. There is no need to replace the stock pillar.
2. Remove the stock A-pillar.
* For Dodge Ram with Infinity speaker, remove speaker from A-pillar. Cut or grind down the raised speaker portion of stock A-pillar to allow the mounting of new A-pillar cover and gauges.
Note: The other option is to purchase and install the base model A-pillar plastic from your local Dodge dealer. This will save the extensive modification made to the original speaker fitted pillar. You can order the original A-pillar from your local Dodge dealer.
3. Hold the A-Pillar cover in mounting position on the A-pillar. Slight modifications (trimming) of the A-pillar cover may be required for a perfect fit in some applications. Drill 3/16" holes through the four corners of both the A-pillar cover and A-pillar.
4. Install gauges (and/or speaker) in A-pillar cover. No retaining hardware is needed to hold gauge(s) or speaker. The gauges are press fit and the speaker snaps in place.
5. The A-pillar cover has clearance for gauge lines to be run down the back and exit through the bottom. Secure wiring and tubing to the back of the new A-pillar cover. Make sure gauge lines do not interfere with fit. If interference occurs create an opening in the stock A-pillar for the gauge lines to pass through. Secure gauge lines to the back side of the stock A-pillar.
Mechanical oil pressure gauge install keeping the factory oil psi sending unit in play.
As we all know the factory sending units suck, so this is a way to install your new mechanical oil pressure gauge and keep the stock sending unit so as no cel is triggered.
All fittings are 1/8 NPTF, three compression fittings are needed.
Thread tape is not to be used on the fittings, use a small dab of pipe dope or thread sealant.
Flexline kit and fittings, these parts should come with a gauge kit.

There are many ways to make up the oil tree but these are the parts I had around.

Clean the area as best you can around the org sending unit, remove the org sending unit with the sending unit socket. Install the oil tree in it’s place and start to run the flex oil line. The line uses compression fittings do not over tighten them, just snug and 1/16 turn.
In this photo (below) you can see the oil tree installed and the org oil sending unit zip tied to the heater hose. For those with the org keg style intake you will be almost working blind.

The org sending unit needs a ground wire, I just used a small hose clamp to hold the wire to the sending unit; then find a good spot to ground the wire to.
This is under the hood driver’s side, I used a small punch to make a hole in the rubber grommet, and then feed the oil line and wires through it.

This is under the dash, oil line running under dash and up into the fuse box area.

This is the fuse box; you can see the oil line going up and through it. This was done just for the photo, I moved the oil line out of the fuse panel after the photo was taken.

This is where the oil line and any other wiring will come up through; it is then routed up and into the gauge pod.

I used the Accel 2650-1157-00 dual gauge pod it is a cover not a complete a pillar, there is supposed to be a spot to run wires and lines between the two pieces; it does not work, I had to cut the org pillar (holes right behind the pods) so I could run the wires through it and behind.
INSTALLATION INSTRUCTIONS
Full Pillar
For all model Gauge Pods, 2650-1157-00
NOTE: Due to normal manufacturing processes you may have “flashing” (small fibers of plastic) around the pod holes. Once the gauge(s) are installed in the pod you will not be able to see the “flashing.”
Air Bag Warning: A-pillar gauge mounts should never be installed over an A- pillar or “curtain-side” airbags.
1. Your new A-pillar cover installs over the stock A-pillar. There is no need to replace the stock pillar.
2. Remove the stock A-pillar.
* For Dodge Ram with Infinity speaker, remove speaker from A-pillar. Cut or grind down the raised speaker portion of stock A-pillar to allow the mounting of new A-pillar cover and gauges.
Note: The other option is to purchase and install the base model A-pillar plastic from your local Dodge dealer. This will save the extensive modification made to the original speaker fitted pillar. You can order the original A-pillar from your local Dodge dealer.
3. Hold the A-Pillar cover in mounting position on the A-pillar. Slight modifications (trimming) of the A-pillar cover may be required for a perfect fit in some applications. Drill 3/16" holes through the four corners of both the A-pillar cover and A-pillar.
4. Install gauges (and/or speaker) in A-pillar cover. No retaining hardware is needed to hold gauge(s) or speaker. The gauges are press fit and the speaker snaps in place.
5. The A-pillar cover has clearance for gauge lines to be run down the back and exit through the bottom. Secure wiring and tubing to the back of the new A-pillar cover. Make sure gauge lines do not interfere with fit. If interference occurs create an opening in the stock A-pillar for the gauge lines to pass through. Secure gauge lines to the back side of the stock A-pillar.
Last edited:

