How to: Baking open and re-sealing headlights

Disclaimer: Links on this page pointing to Amazon, eBay and other sites may include affiliate code. If you click them and make a purchase, we may earn a small commission.

Solid State

Senior Member
Joined
Apr 18, 2016
Posts
824
Reaction score
487
Ram Year
2011 Bighorn
Engine
Hemi 5.7
Whats up gentleman. Spent the last week opening up my oem quads, painting, adding klear corners, and re sealing them. Would like to share my experience, and some tips for those of you wanting to do the same. Headlights have become a pretty popular mod lately, and I think a lot of us are on the fence about taking on this project. There's tons of tutorials out there already on this, but still didnt prepare me for everything. So here goes...
 
OP
OP
S

Solid State

Senior Member
Joined
Apr 18, 2016
Posts
824
Reaction score
487
Ram Year
2011 Bighorn
Engine
Hemi 5.7
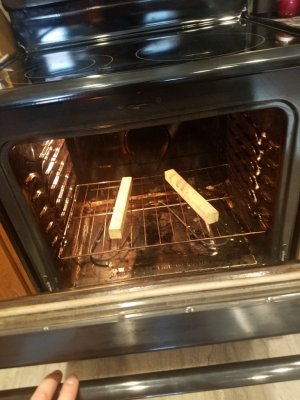
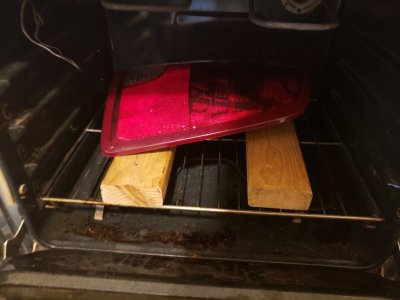
Acoording to the headlight sealant data base over at hid planet, all oem headlights 09' and newer are permasealed. Duals, quads, and projectors. Supposedly in 15' they started using a different kind of permaseal thats harder to open. Recommended baking temp is 245 degrees @ 18 minutes. PRE HEAT your oven! Turn it to temp and let it run for at least 20 minutes. If you dont wait the elements will come on and over shoot temp by up to 60 degrees and you will melt things. I put one rack on bottom slot and set 2) 2x2's on rack so not to touch headlight to anything metal. Put headlight in oven and set timer. Trust the process and don't keep opening door to check. This will cause element to come on and over heat the set temp.

20190119_151434.jpg
 

daveray9

Senior Member
Joined
Oct 22, 2015
Posts
1,698
Reaction score
585
Ram Year
2020
Engine
Hemi 5.7
Subscribed!!

Sent from my SM-G960U using Tapatalk
 
OP
OP
S

Solid State

Senior Member
Joined
Apr 18, 2016
Posts
824
Reaction score
487
Ram Year
2011 Bighorn
Engine
Hemi 5.7
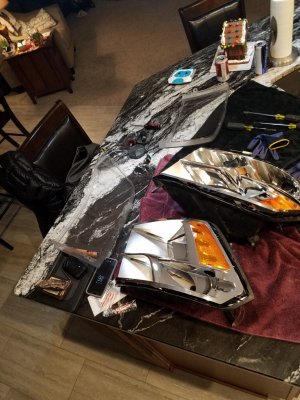
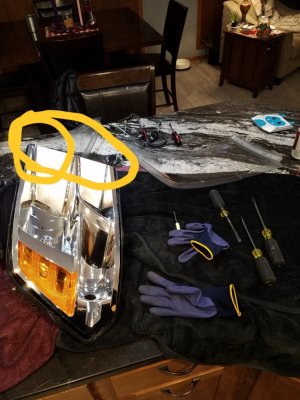
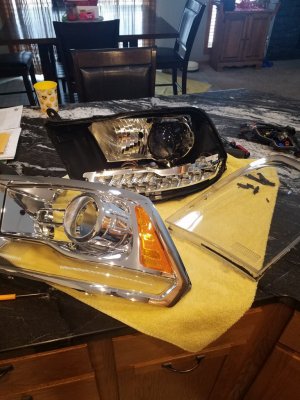
Find some gloves that you can work with, cause ***** gonna be hot. Burned tips of fingers with gloves on, fyi. Have a few different flat head screwdrivers ready to see what works best for you. Start on the lower corner and side where the headlight meets the grille. Start working screwdriver in between the lense and the housing, breaking the sealant. Everything should be pretty soft and pliable. Work quickly, but patiently if that makes sense. As soon as you can get under the edge of the lense, and "break" the seal. Once this happens you can start to just pull things apart with hands pretty easily. Pull with slow force and they seperate. I'd say you've got somewhere around 6-8 minutes of working time before things start cooling down to where you need to put it back in the oven. Same temp another 5-6 minutes. Repeat til open. First one I got lucky and had open with one heat cycle. Second one took 2 or 3 to get all the way apart.

20181217_212023.jpg

20190119_170129.jpg
 
OP
OP
S

Solid State

Senior Member
Joined
Apr 18, 2016
Posts
824
Reaction score
487
Ram Year
2011 Bighorn
Engine
Hemi 5.7
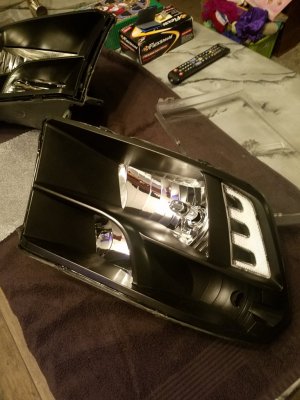
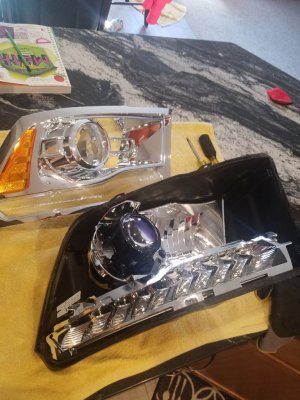
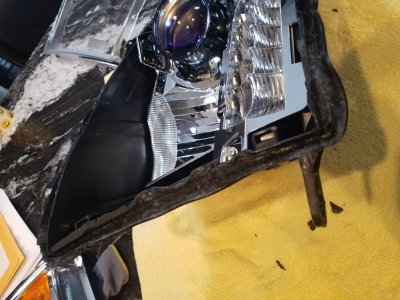
Once apart, take the lense and put it in a garbage bag or something. That way it will stay clean and you wont have to worry about cleaning it. They scratch very easily. Seperate the chrome out of the shroud. Now, do yourself a favor, and clean all of the sealant out of the channel in the shroud. There are videos out there that say you can just re use the factory sealant. This is a lie, and caused me the biggest headache out of the entire procedure. I literally spent 3.5 hrs trying to get them back together unsuccessfully. Almost caused me to throw in the towel and say f%@k it!!!
 
OP
OP
S

Solid State

Senior Member
Joined
Apr 18, 2016
Posts
824
Reaction score
487
Ram Year
2011 Bighorn
Engine
Hemi 5.7
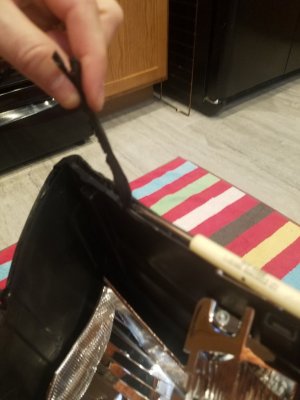
Cleaning out the channel is a slow painful process. My hands hurt like hell. Here is a very helpful tip, as I read about many different ways to do this. You will need to continuously re heat in oven at 245 for 6 minutes between working times. Which again are around 6 minutes? You'll know when it starts cooling down, because it becomes a pain in the ass to work. Take a small pocket screw driver, and start working sealant out of channel. Get enough pried up that you can grab onto. Now slowly pull at it while you push the screwdriver along the bottom/ sides of channel. Go slow and it will all come out in a large strip, instead of tiny little chunks. Jus keep slight pressure against it. Make sense? This is the worst part and is just time consuming. Repeat process until channel is completely clean

20190119_142528.jpg

20190119_144419.jpg

20190119_142449.jpg
 
OP
OP
S

Solid State

Senior Member
Joined
Apr 18, 2016
Posts
824
Reaction score
487
Ram Year
2011 Bighorn
Engine
Hemi 5.7
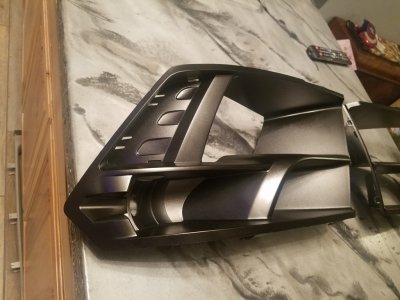
Not gonna spend much time on painting, or anything regarding building. Thats all up to the individual build. I used easy off to remove chrome from shroud. Scuffed with 400 grit, spray primer. Let dry 24 hrs,sand with 6-800 grit and sprayed duplicolor (pxr) to colormatch. I suck at painting, but they turned out good enough. Opted to not clear, as read it isnt really necessary. Up to you. Let paint cure and off gas for a few days, or run the risk of ruining your lenses.

20190112_170849.jpg

20190105_192757.jpg
 
OP
OP
S

Solid State

Senior Member
Joined
Apr 18, 2016
Posts
824
Reaction score
487
Ram Year
2011 Bighorn
Engine
Hemi 5.7
Quick note on klearz corners if you go that route. Use a hairdryer or heat gun to soften them a little before install. It will make them a little pliable, so you dont break the little clips installing them. Also, it is recommendes to use a small dab of silicone to hold them in place, or the will fall out.

20190114_185144.jpg
 
OP
OP
S

Solid State

Senior Member
Joined
Apr 18, 2016
Posts
824
Reaction score
487
Ram Year
2011 Bighorn
Engine
Hemi 5.7
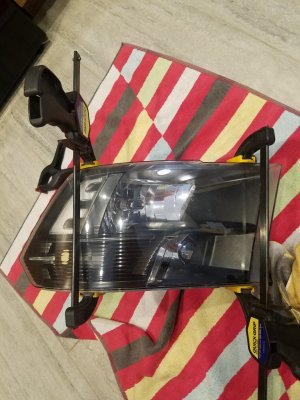
Putting things back together. As I stated earlier, clean the channel out and use butyl to reseal them. I attempted to just re-use the factory sealant, and COULD NOT get the lense back into the channel no matter what I did. Gave up after 3.5 hrs. Using the butyl after cleaning out the channel took 5 min, lol. Run a bead of butyl in the channel just enough to fill it. Put only the housing, not the lense or the shroud in the oven at 245. This was another mistake I made. I tried putting the shroud in the hosing first. Didnt realize it's supposed to snap into the lense, and then you put those parts together into the housing. Take out after 5-6 minutes and the butyl will be soft enough that everything goes together like butter. Clamp, and let cool. Some will run an addtional bead of silicone around the lense/housing as extra insurance. I did not.Thats about it. Hope this helps anybody interested in taking on the task. I chose to do a test run with my quads before opening up a set of 1k dollar oem projectors. I recommend getting a set pf craigslist, or a broken one from ebay to learn on if your worried. That way you dont screw up your nice oem lights. Also, get a second set to throw on your truck in the meantime. That way your not in a hurry to try and tackle everyting in a few hrs. All in all, its not that difficult. Just time consuming. Good luck!

20190118_123042.jpg
 

daveray9

Senior Member
Joined
Oct 22, 2015
Posts
1,698
Reaction score
585
Ram Year
2020
Engine
Hemi 5.7
That looks awesome, thanks for the write up. I'm actually about to do my projectors (about to like been talking about it for a year) so this was super helpful. If you wanna take pics of how you do yours, esp the painting of the shroud that would be great too :)
 
OP
OP
S

Solid State

Senior Member
Joined
Apr 18, 2016
Posts
824
Reaction score
487
Ram Year
2011 Bighorn
Engine
Hemi 5.7
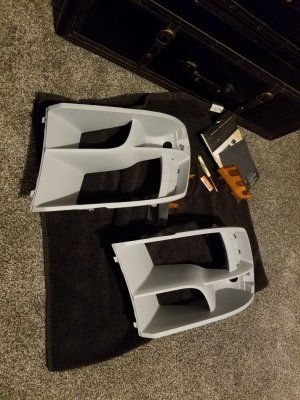
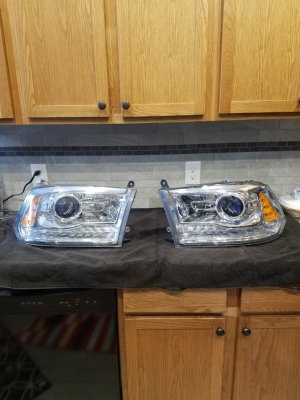
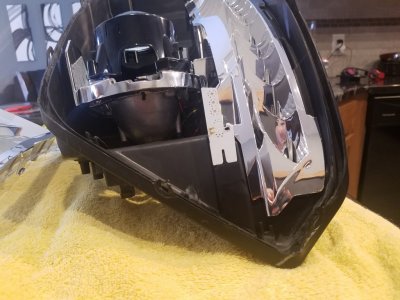
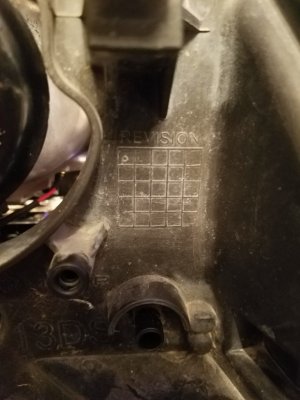
Had some time today, so I started opening my set of oem projectors. I aquired these at seperate times, and will note they are from different years. According to Jeremy over at retro, there are several revisions to these lights. This is indicated by a marking on the back of the housing. 1 dot, not that bad to open. 2 or 3 dots and thats the new sealant which is supposed to be a nightmare. The later CAN be opened using an oven, but pretty sure he opts to cut these open with a sonic cutter now a days.I happen to have one of each. I opened up the single dot one today, and it wasnt bad. Same exact procedure as before but took a little longer. Think i had them in the oven 5 or 6 times before I had them apart. Start to finish, including cleaning out the channel took just under 2.5 hrs. I will update the thread when I get to the "bad" one.

20190119_151744.jpg

20190118_134023.jpg

20190119_151840.jpg

20190119_194238.jpg
 
OP
OP
S

Solid State

Senior Member
Joined
Apr 18, 2016
Posts
824
Reaction score
487
Ram Year
2011 Bighorn
Engine
Hemi 5.7
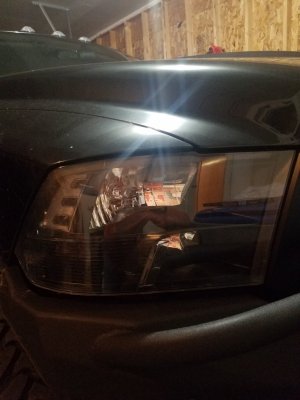
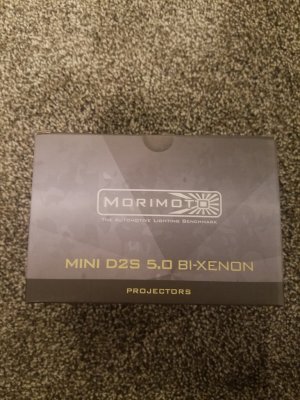
Here's a crappy pic of light mounted on truck. Its cold as hell here in Nebraska right now. Hi was about 9 today. Went from a 73 degree house to a about a 20 degree garage. No condensation. Plus a shot of the new projectors since my order from TRS showed up.

20190119_205910.jpg

20190119_205533.jpg

20190119_205604.jpg
 

Nick_rp

I=V/R
Military
Joined
Jun 21, 2018
Posts
676
Reaction score
679
Location
puyallup, wa
Ram Year
2012 1500
Engine
5.7 Sport
Looks good man good job.

First time I researched how to remove a housing lens on my old minivan and they said put it in the oven, I thought I was being hazed. So instead i used a heat gun. It was difficult because you couldnt get the entire seal to melt at once so you had to heat it in sections, pry, heat, pry and so on. Obviously, you cant see the temp of the seal while using a heat gun, so while i was at it, heated section seemed like it was ready, so I pryed and fractured about 4 inches across the top of the lens. The whole point was to remove water accumulation and reflector debris because it kept shorting my tail lights and add a fresh seal. Now it has an ugly layer of gray epoxy at the top.

Round 2, I used the oven and made the whole thing a breeze.

Heat gun is still an option but it requires patience and finesse, something I'll remember the next time if an oven is not an option
 
Last edited:
OP
OP
S

Solid State

Senior Member
Joined
Apr 18, 2016
Posts
824
Reaction score
487
Ram Year
2011 Bighorn
Engine
Hemi 5.7
Just a quick update on opening the other headlight that is the newer revision. IT SUCKS ASS, AND IS A COMPLETE ***** TO OPEN!!!
 
OP
OP
S

Solid State

Senior Member
Joined
Apr 18, 2016
Posts
824
Reaction score
487
Ram Year
2011 Bighorn
Engine
Hemi 5.7
Where do I begin? Succesfully opened the newer headlight. It was seriously waaaay harder than I was expecting. Without the experience of opening the other 3, I don't know if it would have happened without serious damage. Or, flat out giving up. On the others as soon as I was able to break the seal and get a flathead inside the corner, I was able to pry apart enough to grab with both hands and seperate them. They just pulled apart. Not even close with this one. I had to bend the housing almost flat and slide a flathead in along the seam under the plastic lens. Can't even count the number of times they went back in the oven. I bumped the temp up to 250, and left them in for 8 minutes, instead of 6. That seemed to help get the glue to the point where it would finally give. I have absolutely no idea how anybody could do this with a heat gun. I mangled up the housing a bit, but was able to straighten things out while cleaning out the channels.

20190122_113915.jpg

20190122_113935.jpg
 

Nick_rp

I=V/R
Military
Joined
Jun 21, 2018
Posts
676
Reaction score
679
Location
puyallup, wa
Ram Year
2012 1500
Engine
5.7 Sport
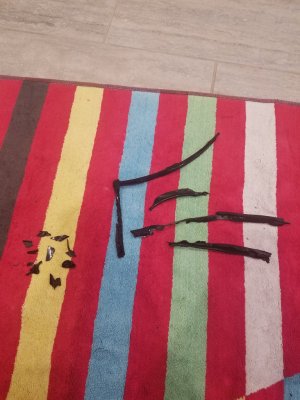
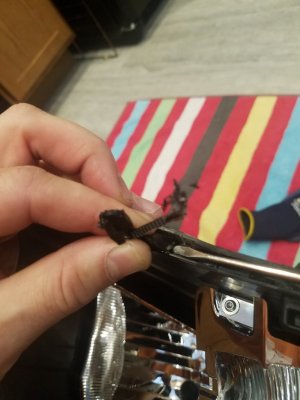
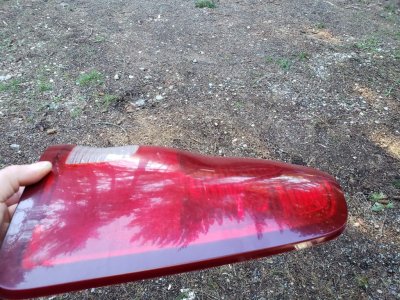
Either my oven is hotter then what the thermostat says or you shouldnt use this process on tail lights

20190228_100112.jpg
20190228_101934.jpg

I had moisture in the housing so I was going to re seal it but a new housing works to I guess lol
 
OP
OP
S

Solid State

Senior Member
Joined
Apr 18, 2016
Posts
824
Reaction score
487
Ram Year
2011 Bighorn
Engine
Hemi 5.7
Oops! I'm pretty sure taillights get cut open.
 

Latest posts

Members online

Forum statistics

Threads
195,469
Posts
2,870,596
Members
156,177
Latest member
joeyoliver45
Top