dougg3
Junior Member
My 2009 Ram 1500 came with the basic RES stereo with AM/FM/satellite radio and CD player. The previous owner had replaced it with an inferior Kenwood unit + Axxess CHTO-03 that was needlessly adding 28 mA of parasitic battery draw. I wanted to install a backup camera and also fix the parasitic drain. 28 mA isn’t that much, but it was a lot higher than stock.
This might be kind of crazy in hindsight given the limitations of the Uconnect stuff from 2009, but I decided to do my radio replacement and backup camera completely as stock. I got an RER radio with navigation/Bluetooth and the Mopar backup camera kit. This was cool, but I realized that with this combination, the truck would have also come with the auto dimming rear view mirror with the microphone built in. I know I could have just bought a mic, but I decided to go crazy and wire up the factory harness to add the auto dimming mirror instead…for fun I guess!
Parts needed:
Radio, Backup Camera, GPS antenna installation
I started this project last summer by installing the backup camera kit, RER radio, and GPS antenna. I planned ahead for installing the factory auto dimming mirror while I was in there. I'm not going to go through the whole process of replacing the radio and installing the backup camera because I'm sure there are plenty of tutorials showing how to do that. But I will document the special stuff I had to do in preparation for the mirror.
I followed all of the stock backup camera installation instructions, including the scary part: splicing into the backup lamp feed for powering the camera (on 2009: TIPM C6, pin 5 = white with red stripe). While I had the TIPM out for that splicing, I also paid attention to the factory wiring information for the auto dimming mirror. It turns out that the only complication for adding the auto dimming mirror is that it needs two wires from the TIPM. This mirror is pretty "dumb". It doesn't have any special CAN bus communications or anything. The wiring is just power, reverse, ground, and the microphone. Anyway, the two TIPM wires I needed to splice were:
I pulled those two wires through the same "grommet nipple" that the backup camera kit uses. That was quite a struggle because it wasn't meant to be big enough for those two additional wires, but I got everything through with lots of patience and help from my neighbor.
Anyway, I programmed the truck to add the backup camera using Appcar DiagFCA so I wouldn't have to bother with asking the dealer to program it for me, and everything worked great. I kept those two wires ready for the future, and obviously I covered the ends up with some heatshrink and electrical tape so that they wouldn't accidentally short out because that wouldn't be fun at all.
I just stuck the GPS antenna on top of the radio. It sticks to it magnetically, fits just fine, and picks up a signal with no problems.
Auto dimming mirror installation
Now fast forward to this summer, I finally finished up the auto dimming mirror. This is where this post probably gets more interesting.
I started out by installing the factory mirror to harness cable. I decided to hardwire a dashcam at the same time, so I zip-tied my dashcam power cable to the factory cable before I installed it.
To install the cable, you basically just need to drop the front of the headliner down. I was able to do this by removing both A pillar handle trim panels, the visors, and the clips that hold the other end of the visor in place. I didn't take pictures of this process, sorry!
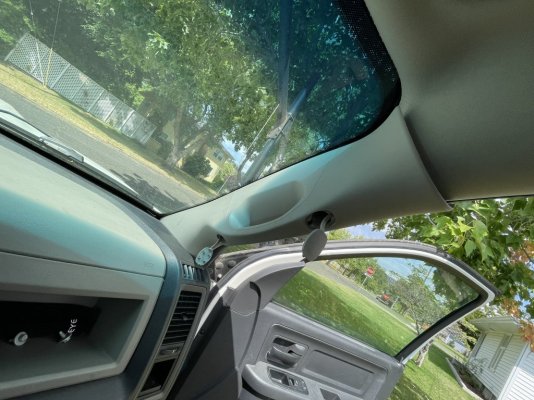
This loosened the headliner enough so I could reach in and pop the factory cable into place. This graphic from the service manual helped me see where everything was supposed to go. The little Christmas tree clips on the factory cable lined up perfectly with the holes in the metal so it was pretty easy to figure it out.

So at this point, I was done with things under the headliner so I put the headliner and visor stuff back in place. Old mirror is still installed at this point, but now I have the cabling for the mirror and my dashcam:
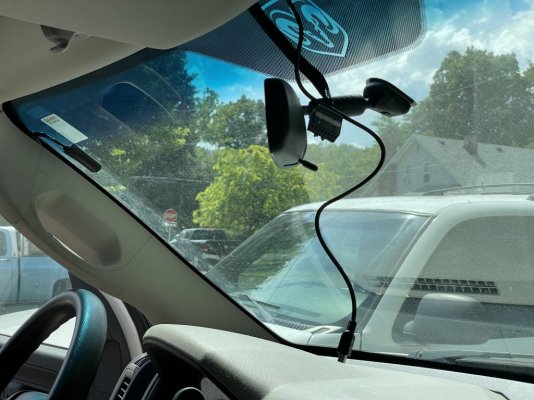
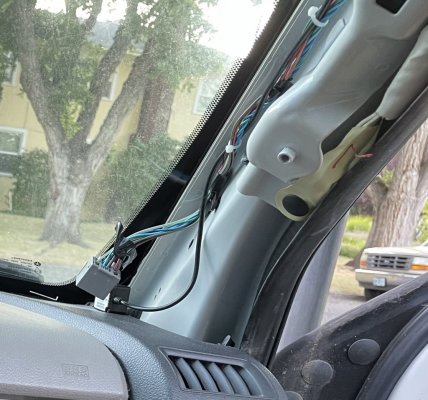
Now, all that was left was making a special cable that plugs into the connector pictured above. The little black box behind the connector is my dashcam hardwire kit, you can ignore that.
My custom cable pinout is listed below. Pin numbers are the numbers on the 10-pin Yazaki connector. I started with the Uconnect jumper cable and cut off the wide end that would go to the factory Uconnect wiring that my truck doesn't have. The jumper cable wasn't long enough to reach from the radio to the A pillar so I had to solder additional wire onto it to extend it. Then I crimped pins onto the extended wires.
The microphone wires on pins 2, 3, and 7 were twisted together on the factory cable so I twisted them together on mine too. I think this is for better signal integrity for the microphone.
Here is the cable with everything except the 2 wires from the backup camera install. The big long wire is the ground wire, I cut it to length once I found a ground to use.
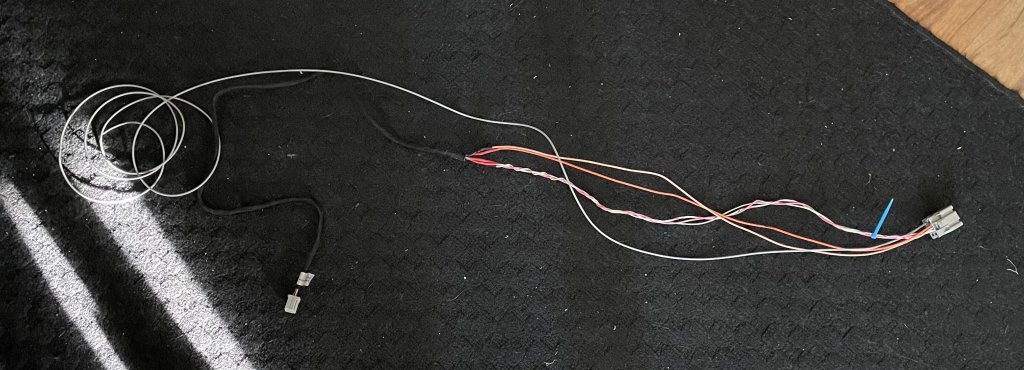
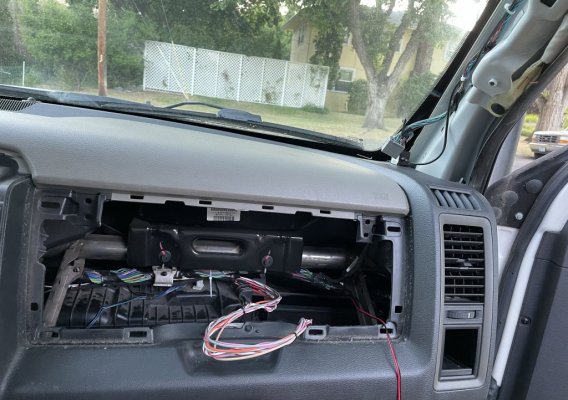
I fit the cable into place inside the dash along with the 2 wires from the backup camera install, neatly grouped the wires together with zip ties, and finished up the connector. Then it was just a matter of routing the new wiring, I tried to follow the big factory harness as much as I could.
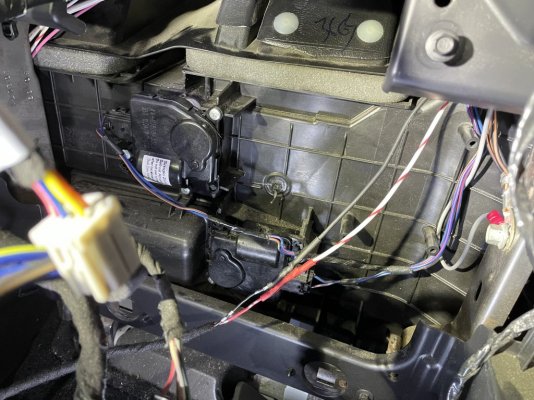
In the next picture you can see my dashcam wiring and the ground I used for the mirror cable:
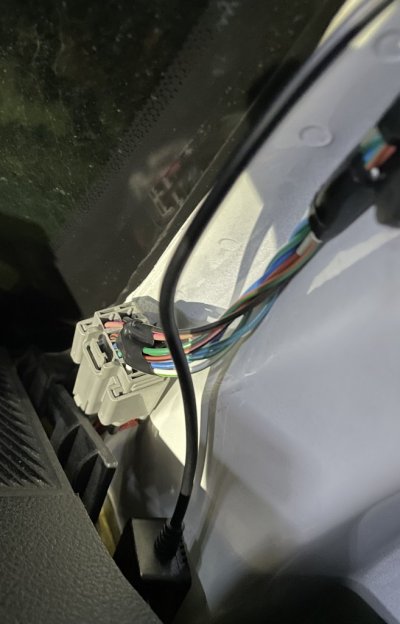
Here is my custom cable plugged into the newly installed factory A pillar harness:
I'm very happy with the end result. It's basically the same wiring as if it came from the factory, just slightly messier because it's not bundled inside the existing group of wires. I routed the dashcam along a similar route but left it separate from the other wires so it's obvious it's not part of the "factory" wiring.
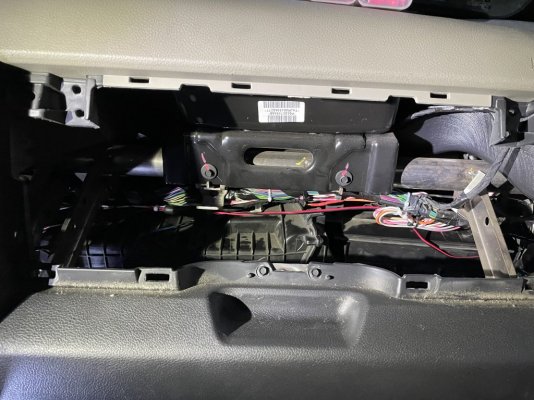
Here's how everything looks all closed up:

The auto dimming mirror works fine, and so does the microphone in it. I probably put way more effort into this project than it's worth, but it feels good to have added a new factory feature with very minimal cutting of the original wires! The only cutting I did to the factory harness was the two splices during the backup camera installation.
This might be kind of crazy in hindsight given the limitations of the Uconnect stuff from 2009, but I decided to do my radio replacement and backup camera completely as stock. I got an RER radio with navigation/Bluetooth and the Mopar backup camera kit. This was cool, but I realized that with this combination, the truck would have also come with the auto dimming rear view mirror with the microphone built in. I know I could have just bought a mic, but I decided to go crazy and wire up the factory harness to add the auto dimming mirror instead…for fun I guess!
Parts needed:
- RER 730N radio (high speed)
- Mopar backup camera kit, part number 82211184
- Auto dimming rear view mirror with mic, part number 55157457AC
- Factory mirror to harness cable, part number 68004379AD
- Uconnect module jumper cable from Infotainment.com, part number C-UCTJMP
- I only needed this for the connector that plugs into the RER radio. If you can find a pigtail at the junk yard that would work too, or if someone figures out what the part numbers for the connector and pins are, you could make one instead.
- Optional: Yazaki Kaizen YESC connector part number 7282-6459-40 and crimp pins for it. This will mate to the harness end of the "mirror to harness" cable near the bottom of the passenger side A pillar. Looks like you can buy this at Mouser, they didn't have it at the time when I bought it but it looks like they do now.
- I did a ton of searching to find the correct part number for this by the way! I had to peruse through catalogs and spec sheets, but I found it!
- For pins: I used 7114-4111-02 for wider pins and 7114-4101-02 for thinner pins, these work with 16 to 18 gauge wire.
- For crimping: I used my Hozan P-706 crimper for this, it was slightly deforming things but it worked.
- This connector is optional. You could also cut off the connector from the factory mirror to harness cable and solder directly, or find a pigtail at the junkyard, or use a different connector or something.
- GPS antenna, I didn't go with the stock part for this because getting the top of the dash off to install it looked very intimidating
- Wiring, heatshrink tubing, soldering iron, etc.
- I used 16 and 18 gauge wiring for everything because it was what I had on hand. The thickest wire in the mirror harness is 18 gauge so as long as you use 18 for everything you should be fine.
Radio, Backup Camera, GPS antenna installation
I started this project last summer by installing the backup camera kit, RER radio, and GPS antenna. I planned ahead for installing the factory auto dimming mirror while I was in there. I'm not going to go through the whole process of replacing the radio and installing the backup camera because I'm sure there are plenty of tutorials showing how to do that. But I will document the special stuff I had to do in preparation for the mirror.
I followed all of the stock backup camera installation instructions, including the scary part: splicing into the backup lamp feed for powering the camera (on 2009: TIPM C6, pin 5 = white with red stripe). While I had the TIPM out for that splicing, I also paid attention to the factory wiring information for the auto dimming mirror. It turns out that the only complication for adding the auto dimming mirror is that it needs two wires from the TIPM. This mirror is pretty "dumb". It doesn't have any special CAN bus communications or anything. The wiring is just power, reverse, ground, and the microphone. Anyway, the two TIPM wires I needed to splice were:
- The same backup lamp feed used by the backup camera. The mirror uses it for detecting when the vehicle is in reverse so it can disable the dimming. So I spliced another wire into the same splice I did for the backup camera.
- Ignition run/start for powering it. In 2009 Ram 1500s, this comes from TIPM C6, pin 23 = pink with light green stripe when it's installed from the factory, so I just spliced into that wire while I had C6 unplugged.
I pulled those two wires through the same "grommet nipple" that the backup camera kit uses. That was quite a struggle because it wasn't meant to be big enough for those two additional wires, but I got everything through with lots of patience and help from my neighbor.
Anyway, I programmed the truck to add the backup camera using Appcar DiagFCA so I wouldn't have to bother with asking the dealer to program it for me, and everything worked great. I kept those two wires ready for the future, and obviously I covered the ends up with some heatshrink and electrical tape so that they wouldn't accidentally short out because that wouldn't be fun at all.
I just stuck the GPS antenna on top of the radio. It sticks to it magnetically, fits just fine, and picks up a signal with no problems.
Auto dimming mirror installation
Now fast forward to this summer, I finally finished up the auto dimming mirror. This is where this post probably gets more interesting.
I started out by installing the factory mirror to harness cable. I decided to hardwire a dashcam at the same time, so I zip-tied my dashcam power cable to the factory cable before I installed it.
To install the cable, you basically just need to drop the front of the headliner down. I was able to do this by removing both A pillar handle trim panels, the visors, and the clips that hold the other end of the visor in place. I didn't take pictures of this process, sorry!

This loosened the headliner enough so I could reach in and pop the factory cable into place. This graphic from the service manual helped me see where everything was supposed to go. The little Christmas tree clips on the factory cable lined up perfectly with the holes in the metal so it was pretty easy to figure it out.

So at this point, I was done with things under the headliner so I put the headliner and visor stuff back in place. Old mirror is still installed at this point, but now I have the cabling for the mirror and my dashcam:


Now, all that was left was making a special cable that plugs into the connector pictured above. The little black box behind the connector is my dashcam hardwire kit, you can ignore that.
My custom cable pinout is listed below. Pin numbers are the numbers on the 10-pin Yazaki connector. I started with the Uconnect jumper cable and cut off the wide end that would go to the factory Uconnect wiring that my truck doesn't have. The jumper cable wasn't long enough to reach from the radio to the A pillar so I had to solder additional wire onto it to extend it. Then I crimped pins onto the extended wires.
- Pin 1 = Backup lamp feed from TIPM splice (white/red) - one of the 2 wires I brought in from the backup camera install
- Pin 2 = Microphone 1 in (+) from radio, this goes to pin 2 (blue) of the Uconnect jumper cable
- Pin 3 = Microphone in (-) from radio, this goes to pin 7 (green) of the Uconnect jumper cable
- Pin 4 = Sensor ground from radio, this goes to pin 8 (orange) of the Uconnect jumper cable
- Pin 5 = Ignition run/start from TIPM splice (pink/light green) - the other wire I brought in from the backup camera install
- Pin 6 = empty
- Pin 7 = Microphone 2 in (+) from radio, this goes to pin 1 (pink) of the Uconnect jumper cable
- Pin 8 = Microphone feed from radio, this goes to pin 4 (yellow) of the Uconnect jumper cable
- Pin 9 = empty
- Pin 10 = Ground, just find a good ground under the dash. I crimped on a ring terminal and attached to an existing ground screw that was being used for other grounds too.
The microphone wires on pins 2, 3, and 7 were twisted together on the factory cable so I twisted them together on mine too. I think this is for better signal integrity for the microphone.
Here is the cable with everything except the 2 wires from the backup camera install. The big long wire is the ground wire, I cut it to length once I found a ground to use.

I fit the cable into place inside the dash along with the 2 wires from the backup camera install, neatly grouped the wires together with zip ties, and finished up the connector. Then it was just a matter of routing the new wiring, I tried to follow the big factory harness as much as I could.

In the next picture you can see my dashcam wiring and the ground I used for the mirror cable:

Here is my custom cable plugged into the newly installed factory A pillar harness:

I'm very happy with the end result. It's basically the same wiring as if it came from the factory, just slightly messier because it's not bundled inside the existing group of wires. I routed the dashcam along a similar route but left it separate from the other wires so it's obvious it's not part of the "factory" wiring.

Here's how everything looks all closed up:

The auto dimming mirror works fine, and so does the microphone in it. I probably put way more effort into this project than it's worth, but it feels good to have added a new factory feature with very minimal cutting of the original wires! The only cutting I did to the factory harness was the two splices during the backup camera installation.

