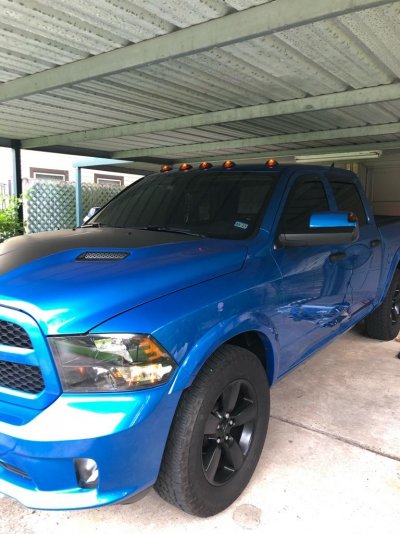
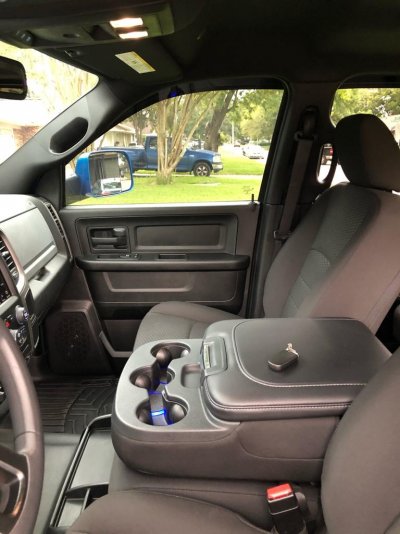
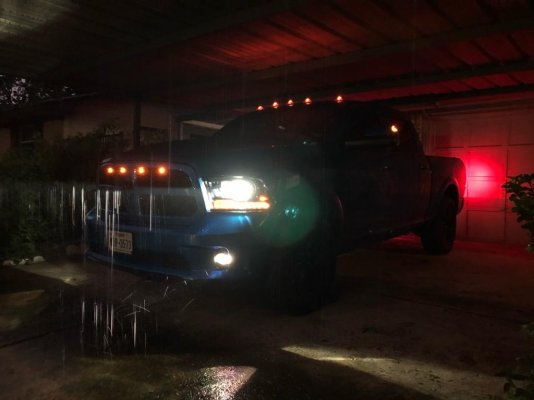
'19 1500 Express Classic

Disclaimer: Links on this page pointing to Amazon, eBay and other sites may include affiliate code. If you click them and make a purchase, we may earn a small commission.

HTXRamExp

Senior Member
Joined
Mar 27, 2018
Posts
328
Reaction score
278
Location
Houston, TX
Ram Year
2019
Engine
Hemi 5.7
Started out last year purchasing a '16 Ram 1500 ST 2WD with the Express and black accent packages.
IMG_6891.jpg

This was my first truck and I really enjoyed it! Didn't do much mod-wise, just Weathertech mats front/rear, Amazon shorty antenna, Billet Technologies oil catch can, cut out cabin air filter slot and K&N filter, and DeeZee Tailgate Assist.

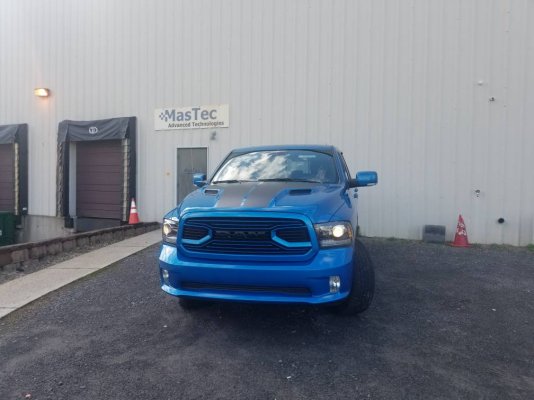
Wasn't in the market for a new truck at all, but came across a couple of the Hydro Blue '19 classics and ended up talking to the dealer about them. Being that they had been on the lot for a while, extra Memorial Day rebates, and they valued my '16 way higher than what I had thought it would be appraised at (given the back bumper had a bit of damage and some interior carpet damage) I decided to pull the trigger.

IMG_9308.jpg

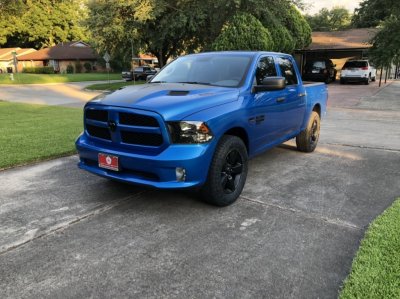
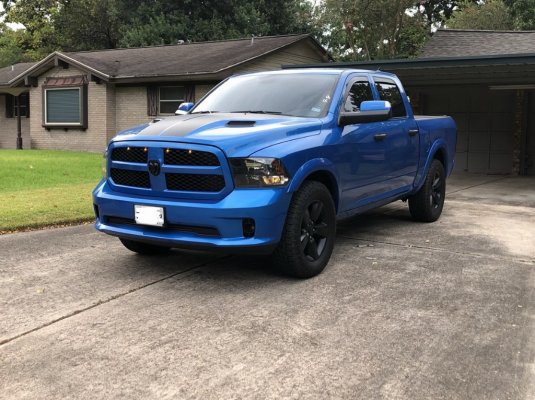
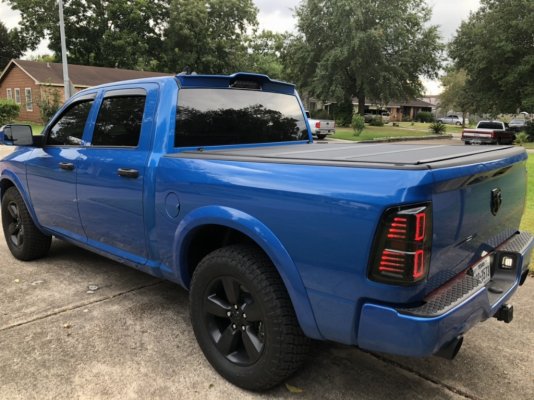
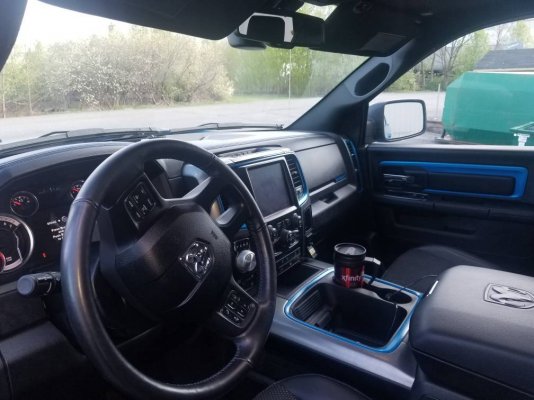
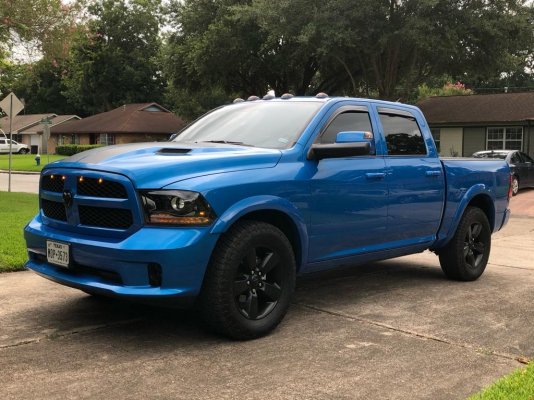
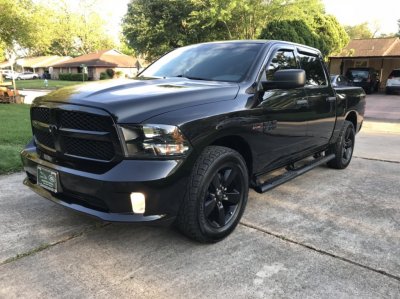
It's a '19 Ram 1500 Tradesman with the Express, Hydro Blue, black accent, and electronics packages.

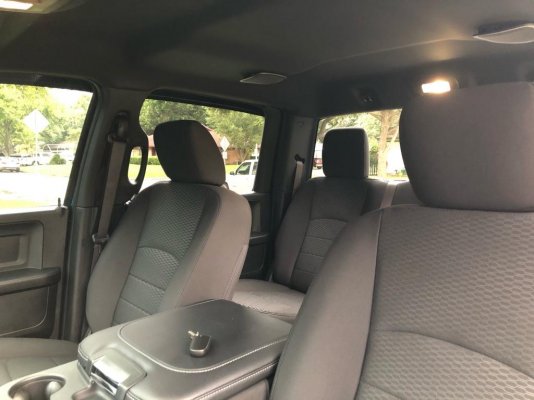
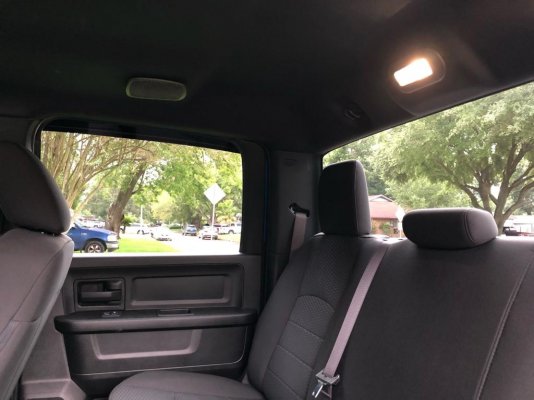
Basically the same tuck I had before expcept this is 4WD, 3.92 rear diff, Anti-Spin rear axle, black cloth interior, 7" EVIC, and 8.4" radio.

I already transferred over all the items I had on the '16 and also installed:
Nitto Terra Grappler G2s in 275/65r20
Morimoto XB LED Fog Lights
*See below for info pertaining to these
Remote Start (Dealer Installed)
AVS Low Profile In-Channel Window Visors
AMP Research Power Steps (Dealer Installed)
Carven 5" Exhaust Tips
BakFlip MX4 Tonneau Cover
*Waiting on a new one, as mine arrived damaged


Sent from my iPhone using Tapatalk
 
Last edited:

buddy guy

Senior Member
Joined
May 22, 2019
Posts
2,559
Reaction score
2,119
Location
alberta
Ram Year
2018
Engine
5.7 hemi
nice truck!!! you're waiting on a new what? fog lights?
 

Graygoose

Indecisive Car Owner
Supporting Member
Joined
Nov 21, 2011
Posts
16,824
Reaction score
31,460
Location
Oklahoma
Ram Year
Convert, for now.
Engine
small
Looks good, love that color!!
 
OP
OP
HTXRamExp

HTXRamExp

Senior Member
Joined
Mar 27, 2018
Posts
328
Reaction score
278
Location
Houston, TX
Ram Year
2019
Engine
Hemi 5.7
nice truck!!! you're waiting on a new what? fog lights?

New tonneau cover. Ordered mine from Moe's Performance. Great guy to work with, got a new covered ordered immediately.

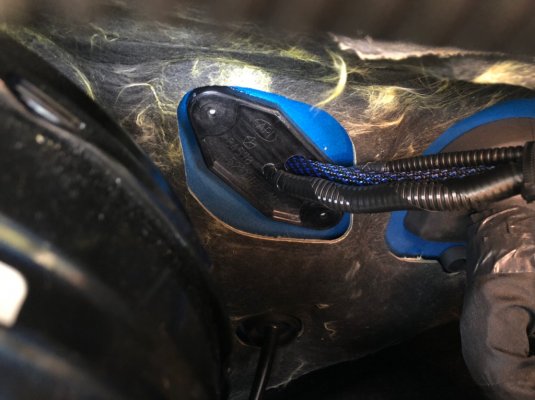
My fog light brackets don't "snap-in/over" on the outter guides that the fog light pivots on. Rather they use a plastic cap with a torx screw that threads into the OEM fog light. I secured mine with 3M tape for now. If I notice they start to wiggle/vibrate, I'll see about locating a set of vertical fog light brackets from an '18 or older 4th gen.


Sent from my iPhone using Tapatalk
 

mboymopar

MOPAR
Military
Joined
Oct 7, 2018
Posts
1,457
Reaction score
1,261
Location
West Michigan
Ram Year
2012 1500 Sport
Engine
345 HEMI
Love that color, did not see any of that color in my area.
But lots of orange ones.
 
OP
OP
HTXRamExp

HTXRamExp

Senior Member
Joined
Mar 27, 2018
Posts
328
Reaction score
278
Location
Houston, TX
Ram Year
2019
Engine
Hemi 5.7
Love that color, did not see any of that color in my area.
But lots of orange ones.

I think I remember reading they only produced about a thousand of the Hydro Blues? I'm not sure about the Ignition Orange, but they do seem to be a bit more abundant.

There was only 1 dealership in all of TX that had the Hydro Blues (had 5 in fact). The others I found in WI, MO, IL, KY, NY, MD, NC from my searching.


Sent from my iPhone using Tapatalk
 
OP
OP
HTXRamExp

HTXRamExp

Senior Member
Joined
Mar 27, 2018
Posts
328
Reaction score
278
Location
Houston, TX
Ram Year
2019
Engine
Hemi 5.7
This last week was a busy one! I ended up installing:
MX4 tonneau cover
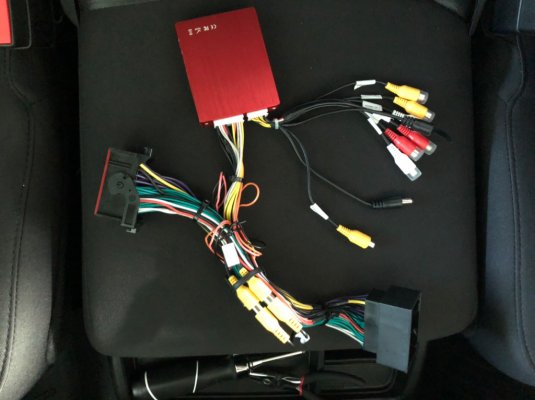
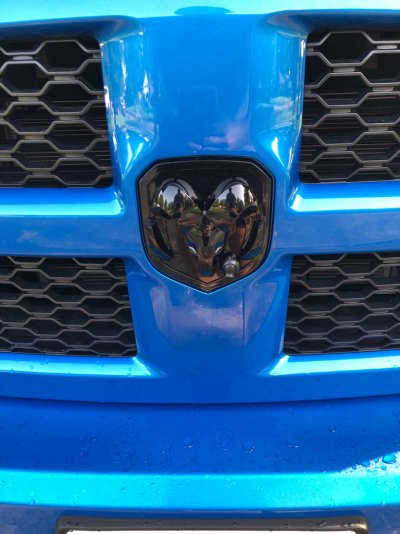
Customtronix front camera and Enzo Jailbreak
1A Auto power, heat, power fold tow mirrors w/ turn and puddle lights
OEM door Modules w/ power fold function
OEM driver master switch w/ power fold function
JHD lighting kit (tow mirror turn LEDs come on w/running lights)

Before I left for work, dropped the truck and some OEM fender flares and EGR cab spoiler off at a detail shop for install w/ PPF and ceramic coating as well.

Will update with more pictures once I get back from work and pick up the truck.

Currently spying the 4th of July deals and what I may want to get done next.

31527e1bd59dd81e6621de1e5aecdc1c.jpg369cd592e0c0a9b402376d0e0e5ad856.jpg37e131d8dfb8eee6d3dae208576bc242.jpgf9a0fb075c939bea4d69bd77e83b192d.jpg

Sent from my iPhone using Tapatalk
 
Last edited:
OP
OP
HTXRamExp

HTXRamExp

Senior Member
Joined
Mar 27, 2018
Posts
328
Reaction score
278
Location
Houston, TX
Ram Year
2019
Engine
Hemi 5.7
Got the truck back from the detailer 7/31. Ended up going with a full front + lower rocker panel Suntek PPF install, CQuartz Pro ceramic coating, 20% front window (to match rear) and 60% ceramic windshield tint.

I have to say, I'm happy that I went with paint matched for the fender flares and cab spoiler. I think it gives it a much more finished/OEM appearance.
9495184127ea00315bd2a3043dfc715e.jpg45137f7be9f07461944c1ffe0a88018a.jpg


After getting the truck back, I installed a whole slew of mods that I had been stockpiling.

-Philips H9 low beam bulbs w/ PnP adaptors

-Philips HIR1 High Beam Bulbs

-Morimoto X-VF LED Amber Turn Signal Bulbs

-GTR LED Interior Lights (Dome, Map, Glovebox, Footwell)
***Truck came w/ driverside Footwell lighting, so I just need to change the bulb, but I purchased a second light housing for the passenger side. Fished out the wiring harness and attached the housing to the carpet.

-OEM Upper Glovebox Kit

-OEM Steering Wheel Audio Controls

-OEM Pedal Covers

-Adapted a Charger? Clutch Pedal cover (found a DIY on the forum) to the parking break

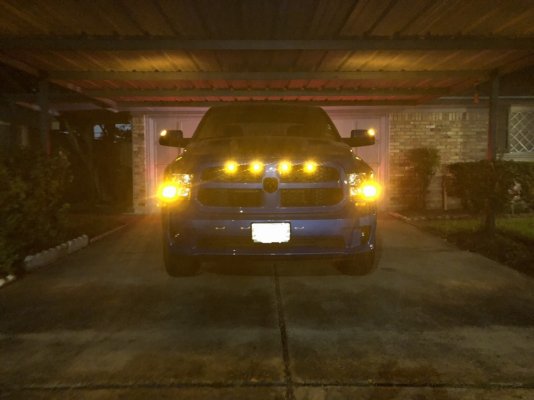
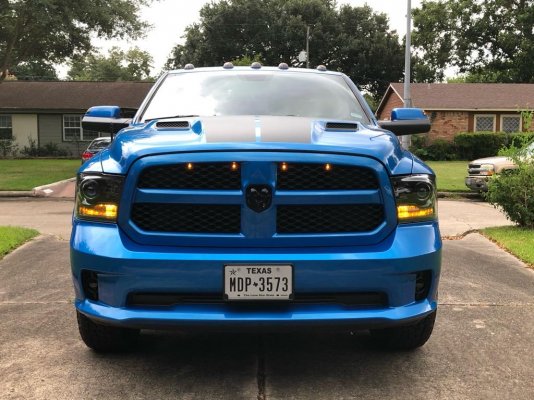
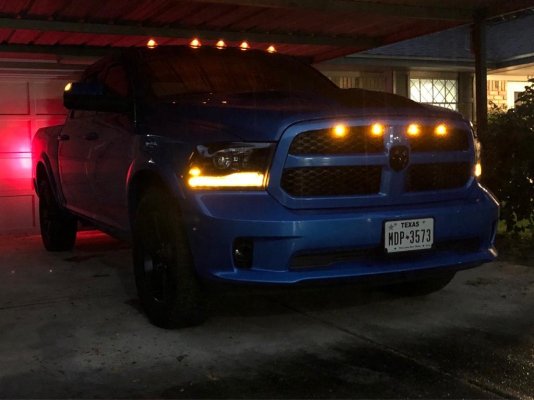
-Grille LED accent lighting per @JB1
923073c61f78836c2d0077fe17801ae6.jpg

-4th gen electronics Aux Panel

-OEM Trailer Brake Controller

-OEM Rear Fold Flat Floor Storage

-Originally installed an eBay LED 3rd brake light w/ a Detroit Muscle gasket, but as soon as I saw M2Mods was making the CHMSL harness again, I picked that up and an OEM CHMSL w/ Cargo Camera

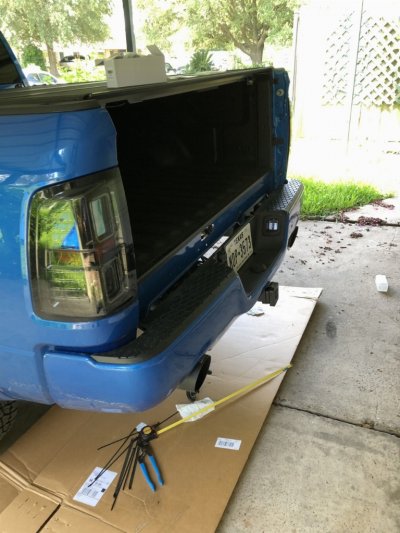
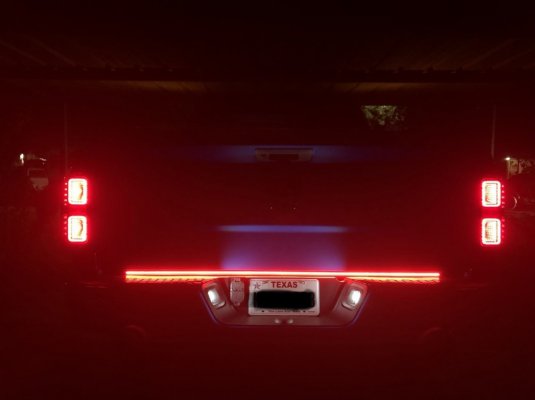
-Originally installed a set of eBay C OLED taillights, but a BNIB set of Morimoto XB Tail Lights came up on Facebook that I got for a good discount

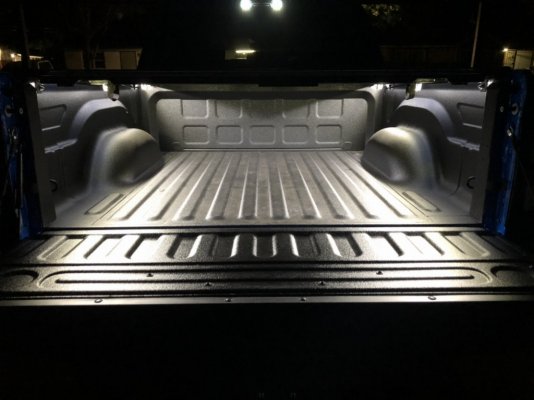
-OEM bed lighting w/ switch
* I had some trouble with this when it came to terminating the wires. It called for 1 wire in Pin5 of the C1 connector and 1 wire in Pin26 of the C6 connector. The instructions stated that Pin5 may already have a wire, and would need to be spliced, but nothing about Pin26. Well my Pin26 already had a wire as well and not wanting to screw anything up, ended up taking it to the dealer with the job 98% done. Just terminate/splice two wires and flash a sales code. Well.....2 days and $245 later, it all works :grumpy: apparently the tech was having issues with the install and required to run/splice a new wire? I was a bit sore about it all being an OEM part/factory option for the truck. But I needed the sales code flashed anyways for the switch to be functional.

-Aftermarket LED bed lighting strips from Amazon (tapped into OEM bed lighting)
5c3963320c4aec4ddb79349240d20d65.jpg

-Putco Red Blade Tailgate LED strip
3e1fae7cd99e5bc99521a0555527979c.jpg
5e5f7614c01cb824d58239b2474fec15.jpg

-VIPMotoZ Tinted/LED License Plate housings/lights

-Carven 5" black exhaust tips

-Bedrug XLT Bed Mat


Sent from my iPhone using Tapatalk
 
Last edited:

xFURIOUSJONESx

Senior Member
Joined
Jul 9, 2018
Posts
126
Reaction score
72
Location
Phoenix
Ram Year
2018
Engine
V6
Looks sharp bro. Not too many Blue trucks out there. I like it. What taillights are those? They look great! Also when you added LED turn signals, did you need to add any resisters or anything to prevent codes being thrown or hyper flashing?


Sent from my iPhone using Tapatalk Pro
 
OP
OP
HTXRamExp

HTXRamExp

Senior Member
Joined
Mar 27, 2018
Posts
328
Reaction score
278
Location
Houston, TX
Ram Year
2019
Engine
Hemi 5.7
Looks sharp bro. Not too many Blue trucks out there. I like it. What taillights are those? They look great! Also when you added LED turn signals, did you need to add any resisters or anything to prevent codes being thrown or hyper flashing?


Sent from my iPhone using Tapatalk Pro

Thanks!

The taillights are the Morimoto XBs. I originally had OEM incandescent taillights.

For the turn signals, I used AlfaOBD to set the turn signals to LED, so I did not add any resistors and do not have any codes.
 

twizt3dkitty

Member
Joined
Sep 14, 2019
Posts
47
Reaction score
12
Location
Earth
Damn morimoto doesnt make tails if you have factory leds....

Sent from my SM-N975U using Tapatalk
 

twizt3dkitty

Member
Joined
Sep 14, 2019
Posts
47
Reaction score
12
Location
Earth
Are your headlights stock quads? Also does the hydro classic have the matched interior. Also I would consider a grill swap maybe. I love my hydro. Drove 2hrs one way to get it.6975080a666620c1814eba242389b0fb.jpgfd304654735465e3269c69da7722b3a0.jpg


Final edit, looks like the mirrors are different too.


Sent from my SM-N975U using Tapatalk
 
OP
OP
HTXRamExp

HTXRamExp

Senior Member
Joined
Mar 27, 2018
Posts
328
Reaction score
278
Location
Houston, TX
Ram Year
2019
Engine
Hemi 5.7
My headlights are the stock quads. The Hydro Blue classics don't have the same, matched interior that the sports do, just the standard cloth, except the cloth in the hydro blues is black instead of the standard grey.

I installed 1AAuto power, power fold, turn signal, puddle light tow mirrors and had the caps paint matched. Truck originally came with the textured black, manual fold lights w/ no turn signals or puddle lights.
 
OP
OP
HTXRamExp

HTXRamExp

Senior Member
Joined
Mar 27, 2018
Posts
328
Reaction score
278
Location
Houston, TX
Ram Year
2019
Engine
Hemi 5.7
It's been a long while since I've updated my build thread, a hiatus in mods is mostly to blame, but over the last couple months I feel I've made up for it with gusto.

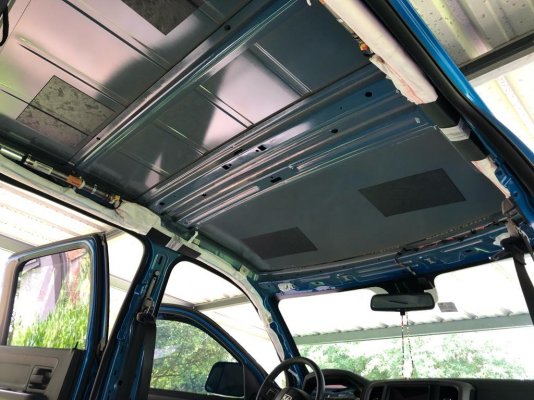
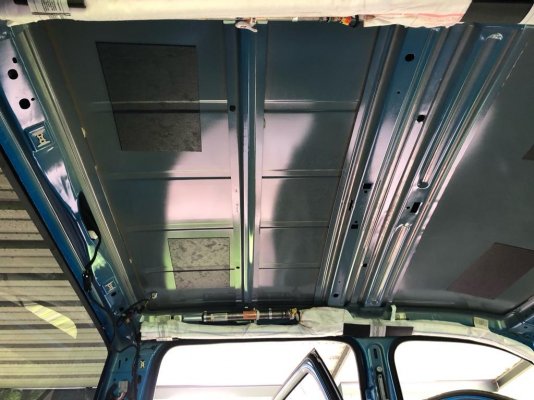
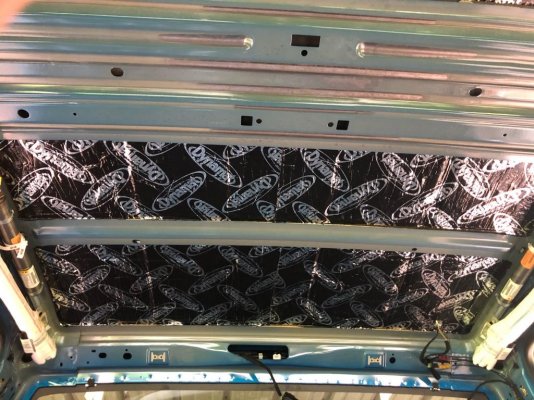
Inspired by @S0CAL , I undertook the task of applying dynamat, dynaliner, and dynapad to the whole truck, because...why not.

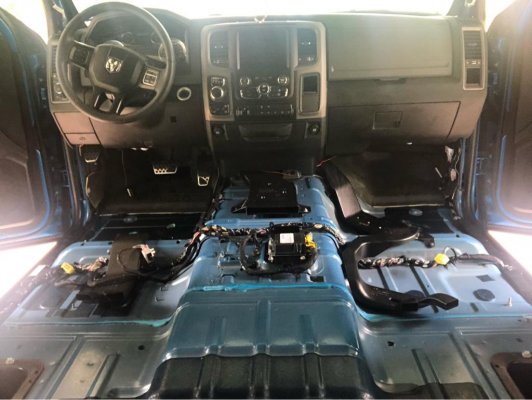
I pretty much followed the recipe laid out by Jack for the roof, back wall, floor, and doors.

Jack's Full Dynamat Build https://...at-Build.106747/&share_type=t&link_source=app

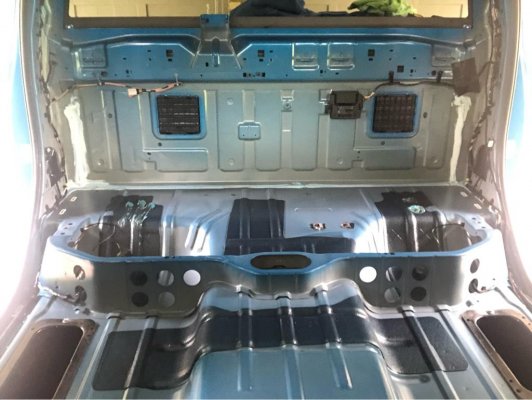
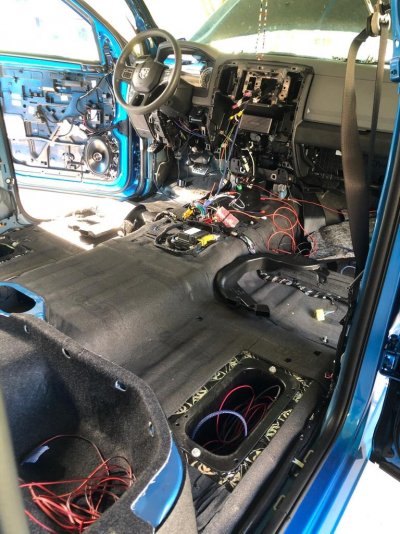
I had the entire inside stripped down to sheet metal, which wasn't too difficult of a task. Removing the rear bench seat alone was a bit of a chore.

3dd5e378f6814a02e1db4dda4a8f90f0.jpg

b37612b262865deda45d2dfcdf15a4e7.jpg


The headliner was a challenge in itself, tackling it alone added another degree of difficulty.

Tediously, I managed to get the headliner down and out the driver Sider rear door. Definitely helped having the entire cab stripped. I even removed the weather stripping around the door for that extra inch of clearance. Thankfully, the headliner itself is quite robust and "springy". There were a few of f*#$ moments where my internal dialogue was "what have you just done, that's it, you're screwed", buy thankfully it was no worse for wear.

0c3aee95cd749fa3912efc27b27df239.jpg
69d696d6e88c747531f313ca5fb22436.jpg

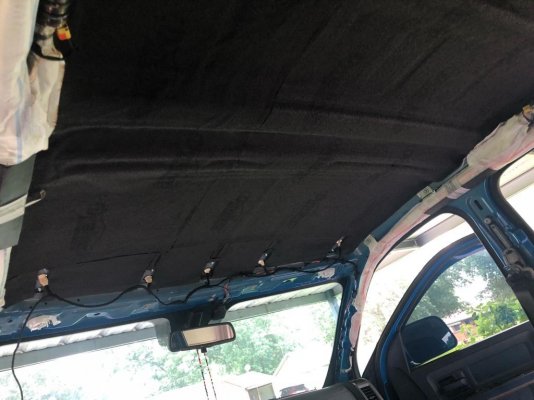
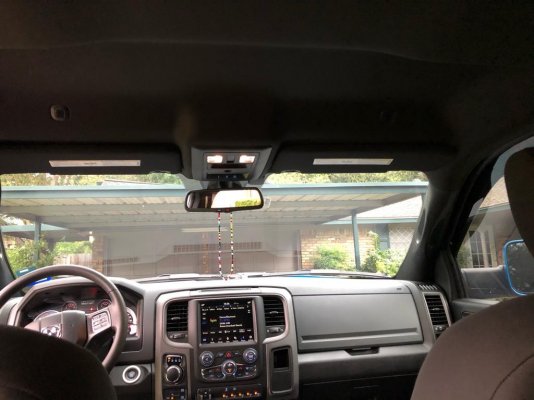
Got the roof covered in dynamat and dynaliner. I also decided that I wanted cab lights and there was no better time than with the headliner down, so drilled my holes and installed them as well. And back in went the headliner.

Getting it in the truck was relatively painless. Getting the entire headliner up in the air level, so as not to crease any where to, to get a coat hanger or sun visor started to get it started being secured back up was a battle! Not one I ever wanted to do again.

7bf881a96372fd0800594256b0e8826f.jpg
9f15ab1ce7d460a9dd14edafcda953ff.jpg
4101762b5c79fe8d8b8084fb014ac84d.jpg

Cab light lenses tinted courtesy of Retroshop.

Got dynamat and dynaliner laid on the back wall and full floor of the truck. But then I was called back to work early, so threw the carpet and driver's seat back in and headed to work for 5 weeks offshore.


Sent from my iPhone using Tapatalk
 
OP
OP
HTXRamExp

HTXRamExp

Senior Member
Joined
Mar 27, 2018
Posts
328
Reaction score
278
Location
Houston, TX
Ram Year
2019
Engine
Hemi 5.7
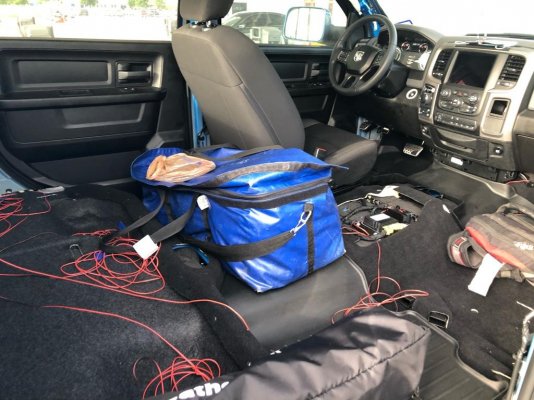
I forgot that I had also started the Passive Entry/Keyless Go mod before I left for work. had only managed to get the harness built, and installed the keyless to portion.
87df10c90fb07e8a53caf987e55f87e2.jpg

While away, isolated on a drilling rig for 5 weeks, with not much more entertainment than the internet or gym, I stumbled acrossed @allmoparparts 's thread on black interior conversion.

4th Gen Black Interior Trim Pieces ...m-Pieces.155305/&share_type=t&link_source=app

Much like the cab lights, thought to myself, no better time to do it than while you have everything already torn out. And so I researched what I would need to complete the conversion and got that on order for when I'd return.

They won't ship headliners (too risky for damage I assume) or front seatbelts (air bag/crash parts related), but luckily theres a distribution center just outside Dallas. So I made the quick trip up and picked up my seatbelts and headliner.

Once I returned, I started looking and running the Passive Entry/Keyless Go harness through the truck. Ran wire for the exterior antennas into the rear doors to be mounted and the handle wires were run into the front doors.

Interior antennas were mounted on the back wall and forward with the electrical equipment that resides under the jumpseat.

As I ran wires into the doors, I disassembled them, applied dynamat and dynaliner to the exterior sheet metal, some strategic dynamat to the middle plastic carrier plate-especially around the speaker housing, and dynamat and dynaliner to the door skin.

With the doors apart I also installed new rear/front door speakers - infinity reference REF-9632ix 6x9 2-way speakers (fronts needed a 1/4" spacer). I also installed infinity reference REF-3032cfx 3-1/2" speakers in the dash.

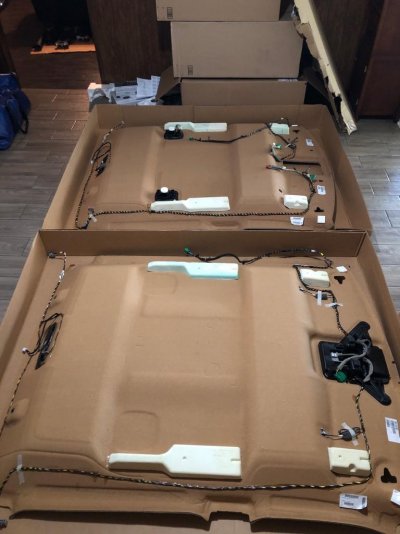
Having just enough time passed that I forgot how much of a pain the headliner is I decided it was time for the swap.
c0038939b5077997a8a585e61b83dbd4.jpg

To start, I used a heat gun and carefully warmed the glue holding the harness to the black headliner. I then repeated the process for my original headliner.

I then began installing the new black pieces in the black headliner (rear dome light, microphone covers, overhead console.

The black headliner only comes in high end trims, so it has the cutouts for the the headliner Alpine speakers. I purchased the speaker covers, but didn't bother with any speakers.

The overhead console comes configured for homelink module and rear window button. I had neither option before, so I purchased the homelink module (plug and play mod) and transferred over my middle blank section in place of the window switch.

The black dome light and map lights come as LED already. But after re-gluing my harness on to the back headliner, all the connectors plugged in without issue and everything works as it should from factory.

While I had the headliner down, since the black sun visors have vanity lights, I made a jumper harness to run from the visors to the main harness and tapped the map lights wiring. And those work great.

With my experience from last time, getting the black headliner back up was still tedious, but went MUCH smoother.

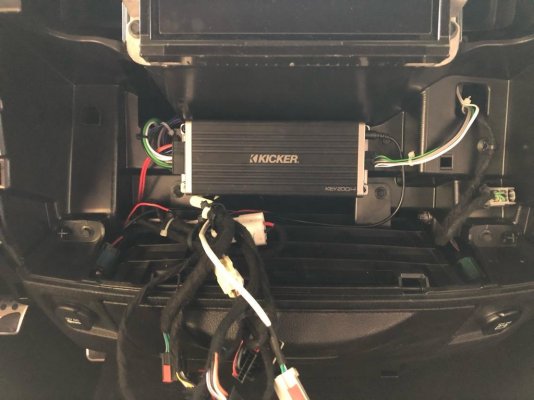
Since I was doing all this sound deadening/proofing and installing new speakers, I decided I should get an amp. I've never had anything but stock audio components in my vehicles, none of them ever being a "premium" OEM system either. I ended up on the Kicker Key 200.4 amp.

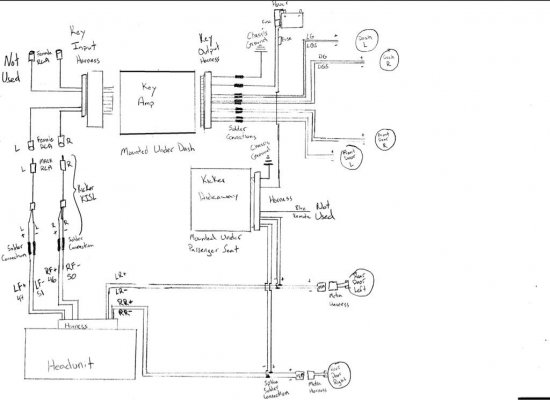
Never having installed anything like this before, I was quite confused and hesitant. But with a lot of help from @Graygoose , and the kicker tech support came up with a plan.
ed0cda7209bf2b076069318bf168146e.jpg

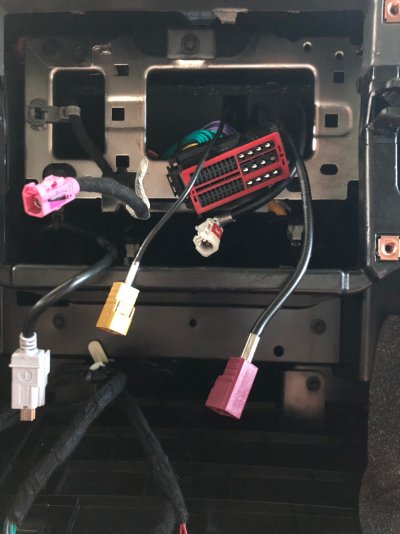
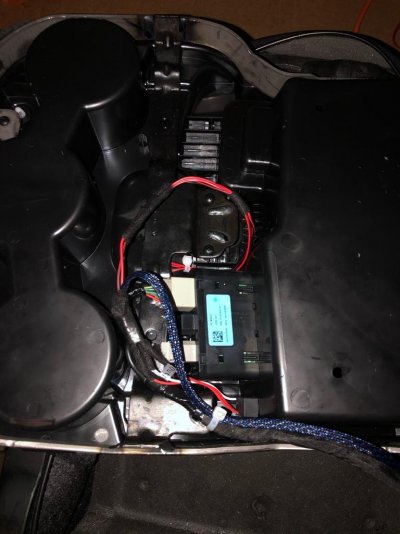
I ended up installing the key amp underneath the radio, behind the radio/HVAC bezel. I routed the input harness up to.behind the headunit and tapped the front speaker outputs. For the output I ran new speaker wire to the dash and front door speakers as I planned to use the amp in bi-amp mode and it's auto tuning tech.
34a14f88e5a79c18eb8f41b4ff63f406.jpg
5ecd89898d5d8690da125331ac1c1f3a.jpg

Since I was going so far with the install already, I decided to add a kicker powered 10" sub. I mounted it under the passenger seat and tapped the rear speaker wires at the b-pillars for signal and ran the remote bass knob to the little cubby below the aux panel.

With all the wiring loomed and ran, I got the carpet back in and started to re-install trim panels. I used dynamat and dynaliner on both the c and b, upper and lower trim panels before re-installing.

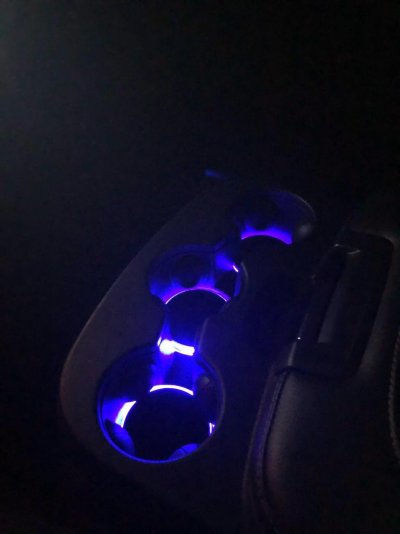
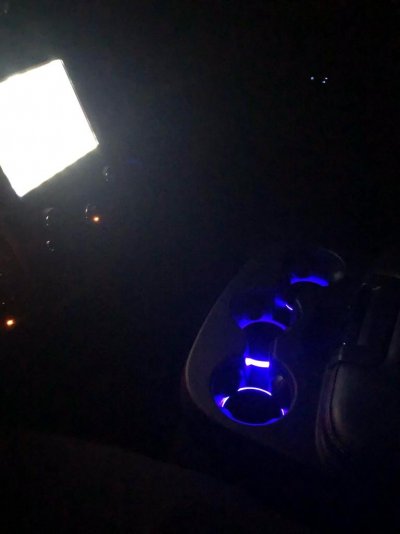
Inspired by/copying @MaizeNBlue I decided I wanted to add some LED cupholder accent lighting. I followed maize's thread to get a good base on how to get it done.

Installed 3 LED rings, one per cup holder. I disassembled the jump seat so I could run the wires internally - initially with hopes of taping power/ground at the jumpseat harness, but unfortunately I don't have that with my configuration.

I ended up wiring all the LEDs together and ran them to a dimmer switch I mounted next to the media hub in the jumpseat console. I then ran a harness down following the factory harness and added a two pin plug at end when it reached under the driver's seat.
f940d42f4af3ba34d925d0f476d7b8a9.jpg


For the other half of the harness, instead of tapping more wiring, since I used DC Offset (speaker high level input) to turn on the amp, I used the remote on wire (which turns to a 12v output when using DC Offset). I ran the harness from the amp (using the same.ground as the amp, and ran the wires to under the driver's seat/two pin plug. So now.if need be, I can in plug the harness and remove the jumpseat without issue.
bd12dd5d04c692c03b0360fabb876aad.jpg
1702a3c2173dc019744294d4041b4a06.jpg
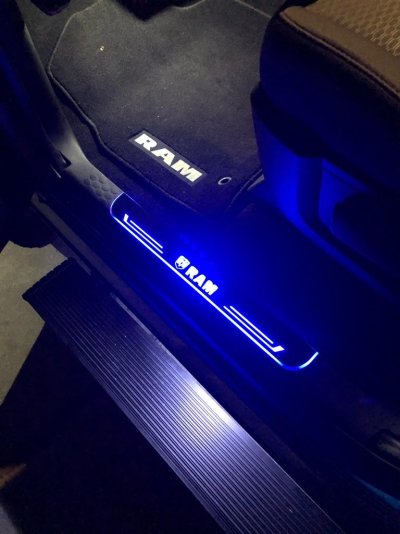
I also happened upon some decent looking led door sill plates, typically not my thing, but figured ehhhh, lll try them out. Got a set for front and rear, spliced them together and ran them up and tapped the OEM footwell wiring.
5fb64687eed8795cb4c0d8a8453829fb.jpg
They're not bad expect for the wires exit at the top of the plate, so they come out and immediately come down to jump behind the OEM plastic door sills. This you can see a smidge of the wiring before it disappears underneath.

Putting everything back in was a bit of a challenge and took some extra persuasion due to.thr extra volume of the dynamat, dynaliner, and dynapad, but I got it all back in.

I did however end up with 1 extra screw, 2 extra bolts, and one nut/washer....really couldn't say from where, but all the seats, seatbelts have the correct hardware and I don't hear rattling from anywhere....so [emoji2369].


Sent from my iPhone using Tapatalk
 
OP
OP
HTXRamExp

HTXRamExp

Senior Member
Joined
Mar 27, 2018
Posts
328
Reaction score
278
Location
Houston, TX
Ram Year
2019
Engine
Hemi 5.7
Some more pictures of the black interior:
aea35a60a36fc2bd87431c721f9bed11.jpg
1de0cb44ad529ffdd0a0dc27a15414f5.jpg
575aa017ef9ea032860110dd61d521e5.jpg
8009165d7502137201ad15c95bcefd7a.jpg

I also installed a set of Retroshop retrofitted projector headlights.
e79abcc939df7636d63781f2187f9c13.jpg
8c33fa2c114e79d9095a6037cc5d7e16.jpg
a5cab5b65e5316027d30bb169a191442.jpg
db53e28cef3a5a3d91362633faeb9729.jpg


Sent from my iPhone using Tapatalk
 
Top