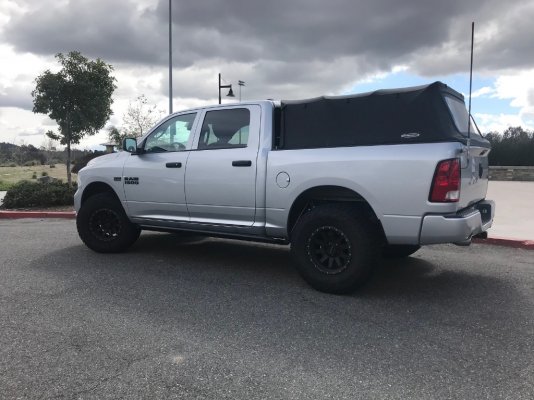
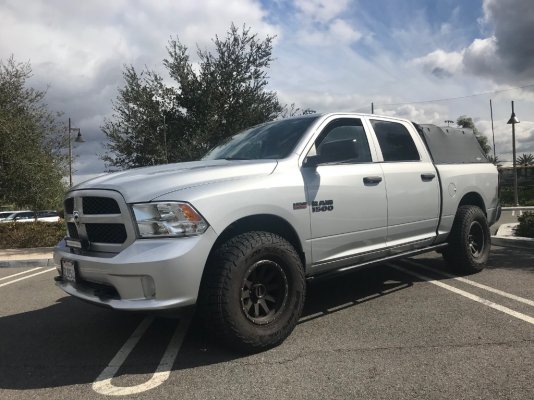
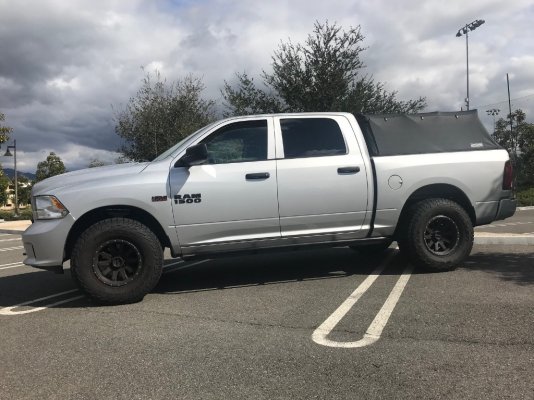
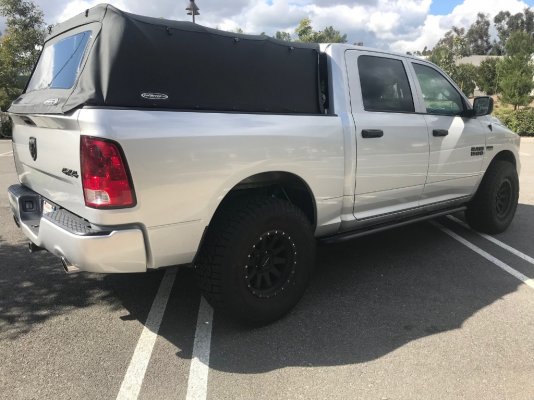
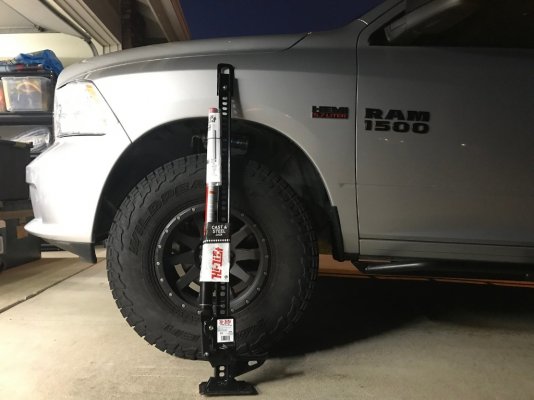
2014 RAM 1500 Express Crew Cab

Disclaimer: Links on this page pointing to Amazon, eBay and other sites may include affiliate code. If you click them and make a purchase, we may earn a small commission.

revitupmoto33

Senior Member
Joined
Mar 11, 2018
Posts
875
Reaction score
1,741
Location
Flagstaff
Ram Year
2017
Engine
Ecodiesel

JB1

Senior Member
TOTM Winner
Joined
Nov 3, 2011
Posts
8,366
Reaction score
7,529
Location
Houston, Texas
Ram Year
2017
Engine
Hemi 5.7
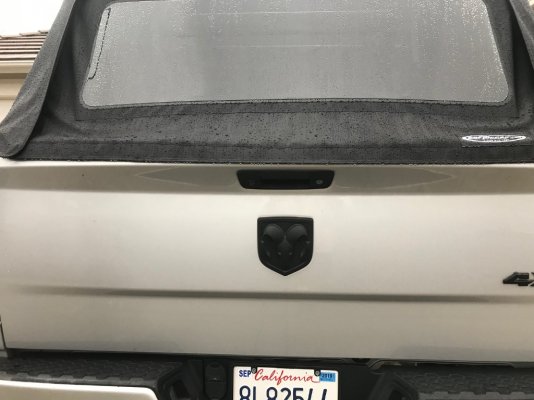
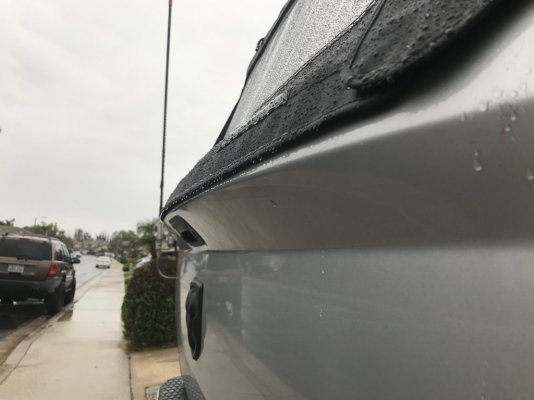
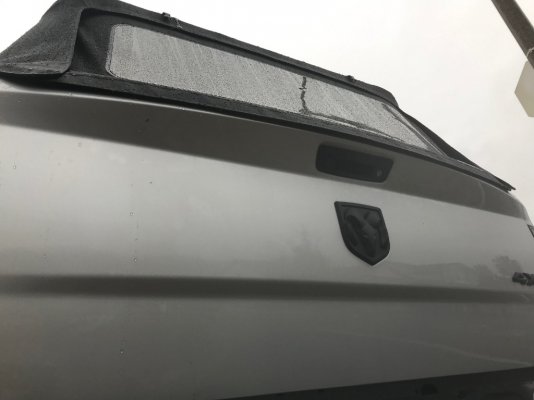
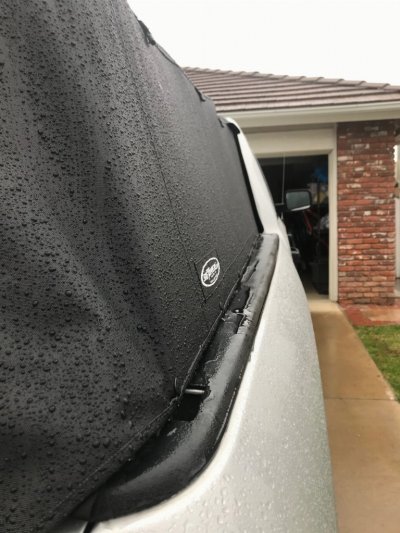
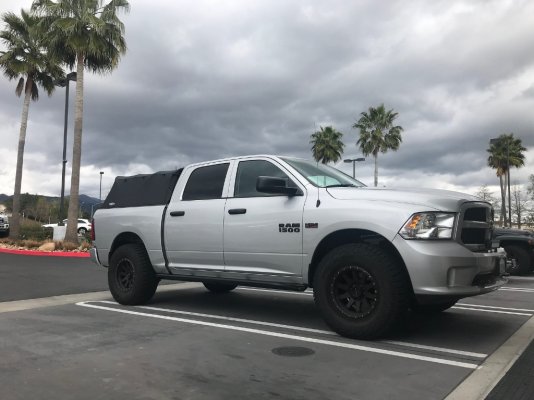
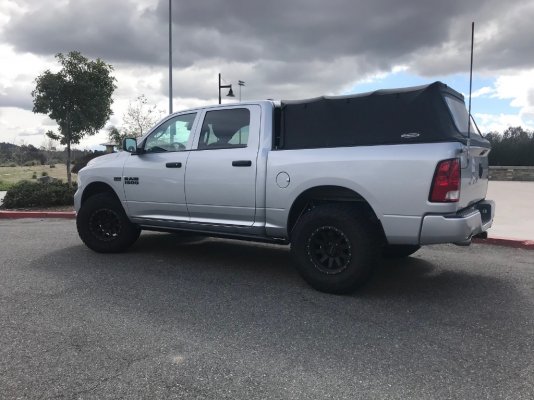
Got the softoper installed, for now i'm not using any velcro to hold the portion that goes in the tailgate, came out great.

Damn you don’t waste time lol

That looks great, I’ve been thinking about getting one myself just for temp use but I’m not sure it’s practical to take on and off a few times a year, is it really that easy to install?

One thing I didn’t care for is the rear Velcro. I notice you left it off too, does it flap around without it at highway speeds?

I saw a new product a vendor here has that might work good for the Velcro versus sticking it to the paint, would this cover the area needed for that Velcro?


https://www.ramforum.com/threads/ge...9-ram-tailgate-protector.134965/#post-1930408
 
Last edited:
  • Like
Reactions: kad

hodge-xj

Senior Member
Joined
Jun 7, 2013
Posts
2,802
Reaction score
2,354
Ram Year
2006
Engine
5.9 cummins
So here’s the thing I thought I had the dimensions written down in my “book o’ mods” but didn’t. So started my new set from scratch today. I’d be more than happy to share my centerline of bends and angles of the new set I’m working on. Haven’t got to drop leg lengths and angles yet
Thank you, that'd be great, you can shoot me a pm I don't wanna keep hijacking this build.

Sent from my SM-N920V using Tapatalk
 

hodge-xj

Senior Member
Joined
Jun 7, 2013
Posts
2,802
Reaction score
2,354
Ram Year
2006
Engine
5.9 cummins
Is there enough material on the lower portion to have a few magnets sewn in? One other thing I used to do with jeeps is check out the marine supply store or websites. I remember I used to get all my radio and electronic things from there, worked way better when dealing with water and bad environments. They might have some crazy setups to keep the canvas tops attached to boats.

Sent from my SM-N920V using Tapatalk
 
OP
OP
ram1500rsm

ram1500rsm

Senior Member
Joined
Jul 24, 2018
Posts
4,818
Reaction score
5,284
Location
Trabuco Canyon, CA
Ram Year
2014
Engine
Hemi 5.7
Damn you don’t waste time lol

That looks great, I’ve been thinking about getting one myself just for temp use but I’m not sure it’s practical to take on and off a few times a year, is it really that easy to install?

One thing I didn’t care for is the rear Velcro. I notice you left it off too, does it flap around without it at highway speeds?

I saw a new product a vendor here has that might work good for the Velcro versus sticking it to the paint, would this cover the area needed for that Velcro?


https://www.ramforum.com/threads/ge...9-ram-tailgate-protector.134965/#post-1930408


It took me about 2 hours to get it installed, but that's also including the time to unpack it, lay all the pieces down in the floor, read the instructions and watch a couple of install videos.
i used this video to help me visualize the intructions


Once everything is put together, it takes literally couple of minutes to unzip/unlatch/unsnap and fold. Add one extra minute to remove it completely out of the truck.
For instance, it took almost 3 min for this dude, he could have shaved about 30 sec or so if he didn't have such mess in that bed :)

It'll take about the same time to get back on.

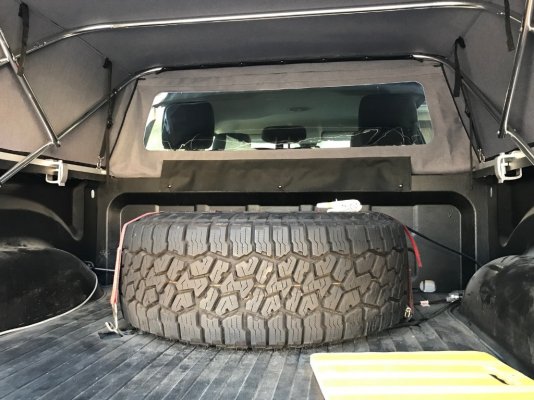
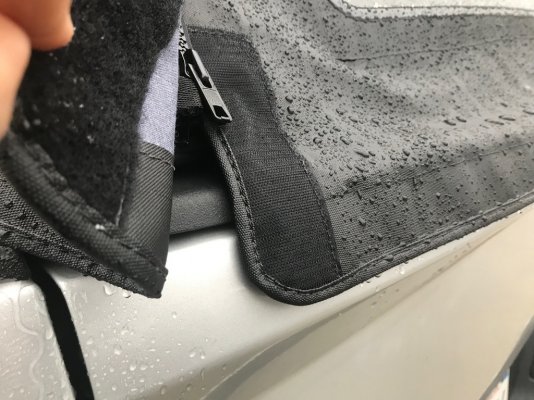
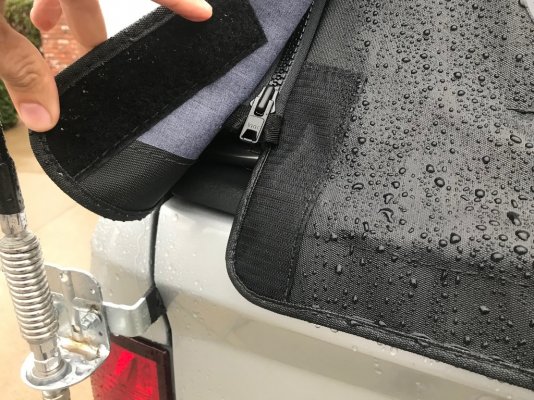
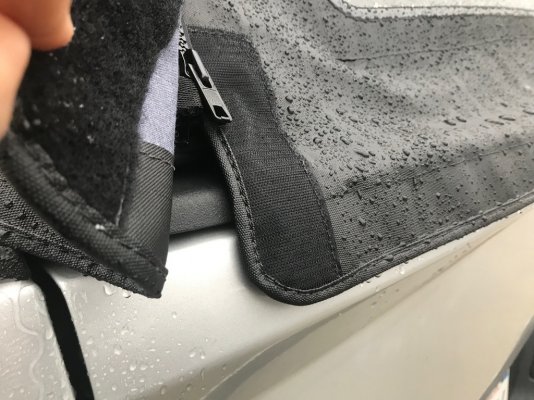
About the Velcro portion, i don't hear any flapping at the moment and the window flap seems to fit nicely around our rounded tailgate. I may sew couple of magnets down in the fabric anyways on both windows, i'm using Velcro in the front one, though not exactly needed but i wanted to keep that portion resting a little bit better against the truck bed, little OCD i guess :)

No drill needed except for this 3 snap screws here in the front window, (it's optional if you want to drill the little holes, you could use velcro or magnet sewed in the fabric), those 3 snap screws are part of the reason we don't need to add velcro in the front window according to the instructions, the window behind is secured at the top of the canvas asides fron the snaps, but i just added some velcro strips to the bottom portion anyways, doubt it will hold long but i again wanted to see how it looked and i like it, so i'll just sew 4-6 magnets in there.
32089691047_acdbadf814_h.jpgUntitled by RAM RSM, on Flickr

You can see the fit in the rear window here without any velcro,
46314491924_e78876a686_h.jpgUntitled by RAM RSM, on Flickr

46986256632_a475f16658_h.jpgUntitled by RAM RSM, on Flickr

46124599575_9fa1609863_h.jpgUntitled by RAM RSM, on Flickr

32096757227_4a811db788_h.jpgUntitled by RAM RSM, on Flickr

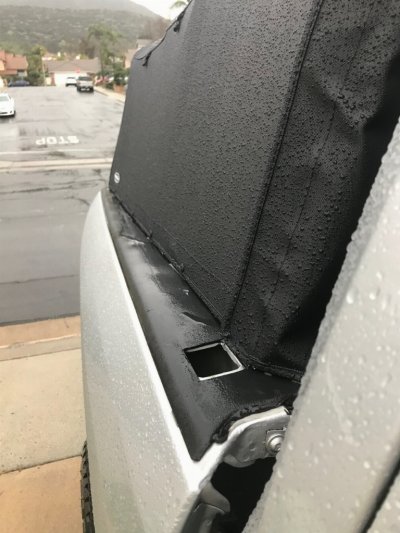
Something i didn't know was that our beds (at least the 5.7ft version, don't know about the others) was wider towards the front of the truck, and of course now i have those damn holes visible in there
46314316444_fe5be6662f_h.jpgUntitled by RAM RSM, on Flickr
46124603915_fe019bcabd_h.jpgUntitled by RAM RSM, on Flickr
so i've ordered 2 sets of this stake pocket covers to fill those holes, they'll sit flush in there so it'll work out well
https://www.amazon.com/ES-ENGINEERED-SCHILDMEIER-Pocket-2009-2018/dp/B078P6QMT2/ref=sr_1_2_sspa?crid=9AYZE3G7JNGZ&keywords=ram+1500+stake+pocket+covers&qid=1549734545&s=gateway&sprefix=ram+1500+stake+,aps,188&sr=8-2-spons&psc=1
 
Last edited:
OP
OP
ram1500rsm

ram1500rsm

Senior Member
Joined
Jul 24, 2018
Posts
4,818
Reaction score
5,284
Location
Trabuco Canyon, CA
Ram Year
2014
Engine
Hemi 5.7
Is there enough material on the lower portion to have a few magnets sewn in? One other thing I used to do with jeeps is check out the marine supply store or websites. I remember I used to get all my radio and electronic things from there, worked way better when dealing with water and bad environments. They might have some crazy setups to keep the canvas tops attached to boats.

Sent from my SM-N920V using Tapatalk
Yep, should be more than enough to put some decent magnets behind the fabric
46986418262_693b822a09_h.jpgUntitled by RAM RSM, on Flickr
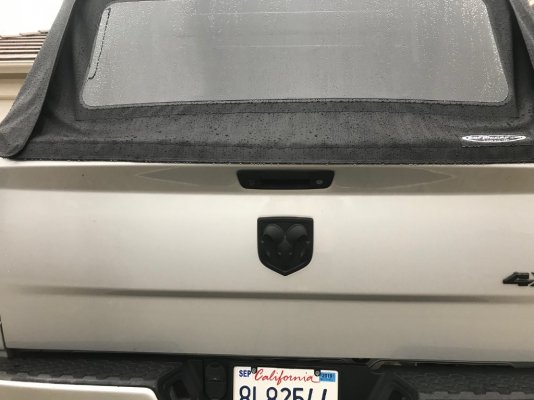
46314491924_e78876a686_h.jpgUntitled by RAM RSM, on Flickr
46986256632_a475f16658_h.jpgUntitled by RAM RSM, on Flickr
 
  • Like
Reactions: JB1

bruiserRAM

Senior Member
Joined
Mar 30, 2018
Posts
211
Reaction score
232
Location
Eastern Sierra, CA
Ram Year
2017
Engine
5.7L Hemi
wow, looks great. nice contrast. I have the 6'4" bed and my rails are straight, ie: equal distant from edge of bed to rails along entire length. I put mine a little closer to the cab than the directions say to cover the corners better so rain wouldn't drip down into the bed (and onto my head.) notice any leaking in the rain yet?
 
OP
OP
ram1500rsm

ram1500rsm

Senior Member
Joined
Jul 24, 2018
Posts
4,818
Reaction score
5,284
Location
Trabuco Canyon, CA
Ram Year
2014
Engine
Hemi 5.7
wow, looks great. nice contrast. I have the 6'4" bed and my rails are straight, ie: equal distant from edge of bed to rails along entire length. I put mine a little closer to the cab than the directions say to cover the corners better so rain wouldn't drip down into the bed (and onto my head.) notice any leaking in the rain yet?
Very little so far, from what i can see most of the water came inside from the stake holes. It's been raining the whole day non stop, and tomorrow will be the same :(

Sorry hodge, i'll post some pictures once i'm able to work on those sliders.
 

hodge-xj

Senior Member
Joined
Jun 7, 2013
Posts
2,802
Reaction score
2,354
Ram Year
2006
Engine
5.9 cummins
Very little so far, from what i can see most of the water came inside from the stake holes. It's been raining the whole day non stop, and tomorrow will be the same :(

Sorry hodge, i'll post some pictures once i'm able to work on those sliders.
No rush at all. It's gonna be a god bit before I have time free to do em. Working 6 days a week and school eats up.my life

Sent from my SM-N920V using Tapatalk
 

bruiserRAM

Senior Member
Joined
Mar 30, 2018
Posts
211
Reaction score
232
Location
Eastern Sierra, CA
Ram Year
2017
Engine
5.7L Hemi
Not to change the topic....but I'm installing my Icon Stage 2 and Delta UCAs today and tomorrow! I am looking for torque specs. I've found a pretty big list that's been reposted a lot, but upon further research, I've found many other numbers for the same nuts/bolts! Long story short, the torque specs I've found online are pretty inconsistent.

Do you happen to know the following specs (2017 Ram 1500 4X4, Hemi)?

I'll also post all the diff specs I've found, next to them in { }...

Front:
Lower shock mount bolt (shock to lower control arm) {100ft-lbs or 155ft-lbs}
Tie rod end nut (tie rod to spindle) {45ft-lbs or 55ft-lbs}
Sway bar link to sway bar {16ft-lbs or 20ft-lbs or 27ft-lbs}
Sway bar link to lower control arm {75ft-lbs or 49ft-lbs!}
UCA to frame mounts bolts {70ft-lbs or 120ft-lbs or 130ft-lbs}

Rear:
Upper shock mount bolt {100ft-lbs]
Lower shock mount bolt {100ft-lbs}
Sway bar to Sway bar links {79ft-lbs}
Sway bar link to frame {55.5ft-lbs}
Track Bar {129ft-lbs}

I need to narrow these down ASAP! Thanks in advance for any advice! I know you've taken these bolts and nuts on and off multiple times.
 
OP
OP
ram1500rsm

ram1500rsm

Senior Member
Joined
Jul 24, 2018
Posts
4,818
Reaction score
5,284
Location
Trabuco Canyon, CA
Ram Year
2014
Engine
Hemi 5.7
Not to change the topic....but I'm installing my Icon Stage 2 and Delta UCAs today and tomorrow! I am looking for torque specs. I've found a pretty big list that's been reposted a lot, but upon further research, I've found many other numbers for the same nuts/bolts! Long story short, the torque specs I've found online are pretty inconsistent.

Do you happen to know the following specs (2017 Ram 1500 4X4, Hemi)?

I'll also post all the diff specs I've found, next to them in { }...

Front:
Lower shock mount bolt (shock to lower control arm) {100ft-lbs or 155ft-lbs}
Tie rod end nut (tie rod to spindle) {45ft-lbs or 55ft-lbs}
Sway bar link to sway bar {16ft-lbs or 20ft-lbs or 27ft-lbs}
Sway bar link to lower control arm {75ft-lbs or 49ft-lbs!}
UCA to frame mounts bolts {70ft-lbs or 120ft-lbs or 130ft-lbs}

Rear:
Upper shock mount bolt {100ft-lbs]
Lower shock mount bolt {100ft-lbs}
Sway bar to Sway bar links {79ft-lbs}
Sway bar link to frame {55.5ft-lbs}
Track Bar {129ft-lbs}

I need to narrow these down ASAP! Thanks in advance for any advice! I know you've taken these bolts and nuts on and off multiple times.

What's up Victor,
This is what i'll use for specs

Front:
Lower shock mount bolt (shock to lower control arm) :100 ft/lbs
Tie rod end nut (tie rod to spindle): 55 ff/lbs
Sway bar link to sway bar : 16 ft/lbs
Sway bar link to lower control arm : 45 ft/lbs
UCA to frame mounts bolts: 120 ft/lbs

Rear:
Upper shock mount bolt: 100 ft/lbs
Lower shock mount bolt :100 ft/lbs
Sway bar to Sway bar links: 75 ft/lbs
Sway bar link to frame:55 ft/lbs
Track Bar:120ft/lbs

With that said, the only thing i did torque down with the torque wrench were the UCA bolts and rear trackbar, for the rest i just used german torque either with a impact driver, braker bar or wrench.
 
Last edited:
OP
OP
ram1500rsm

ram1500rsm

Senior Member
Joined
Jul 24, 2018
Posts
4,818
Reaction score
5,284
Location
Trabuco Canyon, CA
Ram Year
2014
Engine
Hemi 5.7
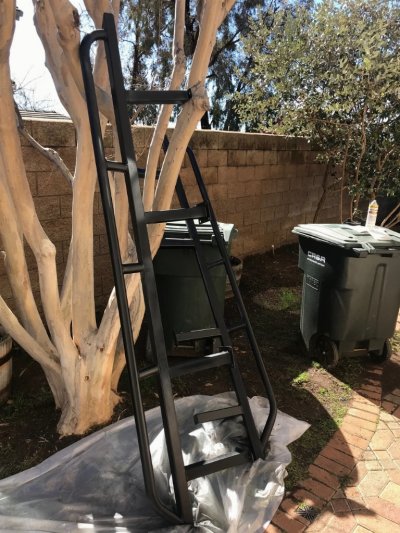
Did some little prep work on the rock sliders today with some water, scuffed them up with a pad, then poured some acetone to clean them out, primed them, and applied the 1st rusteolum black coat.

40100004603_9d4c3dbe2e_h.jpgUntitled by RAM RSM, on Flickr
 
OP
OP
ram1500rsm

ram1500rsm

Senior Member
Joined
Jul 24, 2018
Posts
4,818
Reaction score
5,284
Location
Trabuco Canyon, CA
Ram Year
2014
Engine
Hemi 5.7
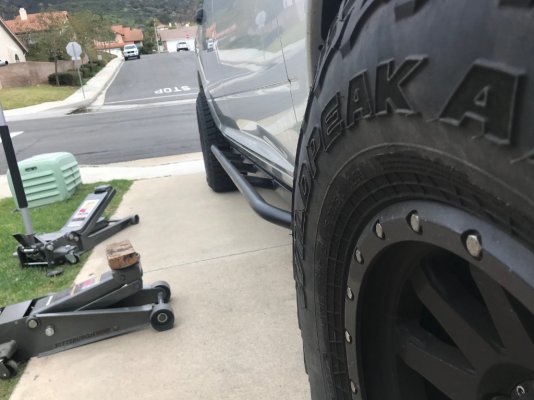
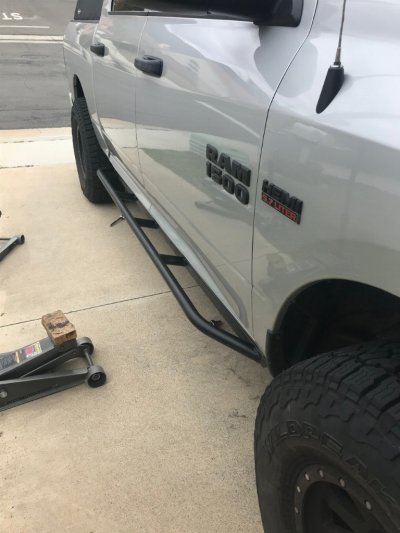
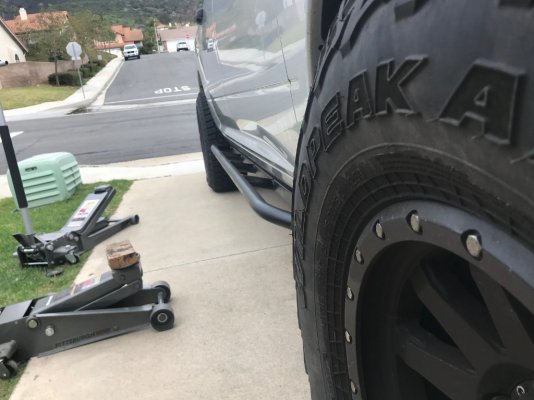
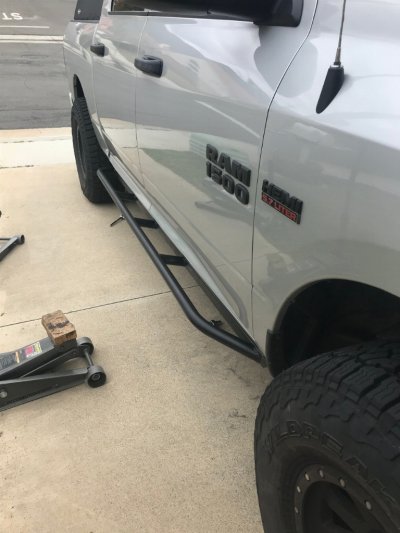
Finally had the chance to install the rock sliders. Thanks again @revitupmoto33 they came out great.
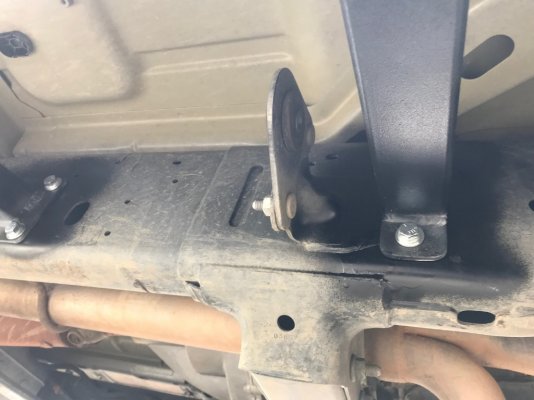
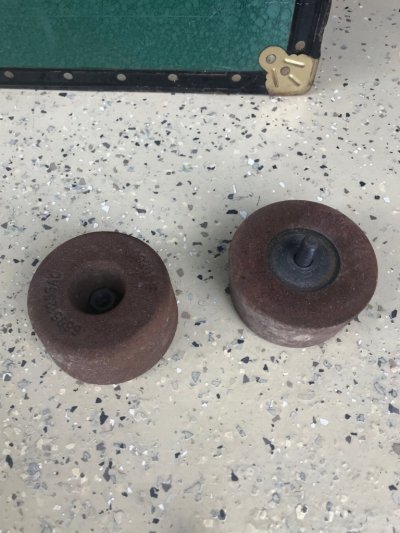
Had to drill 24 pilot holes, drill them to 5/16 and tap them 3/8. also had to shave some metal on the frame close to a couple of rounded heavy thingies that are hanging on the frame.I still have no idea what those things are lol. I had to remove them to shave the bumps close to them and i forgot to put them back. Also messed up one of holes i made cause it was a little cold out and i wanted to finish the job quicker haha, so when i put the center mark to drill the hole it wasn't in the right spot and the bolt won't go through. Oh well not a big deal anyways, and the kids are more than happy to be able to step onto someting to climb up to the rear seats.

46622121674_97b13b7587_h.jpgUntitled by RAM RSM, on Flickr
47292735052_9827aaf576_h.jpgUntitled by RAM RSM, on Flickr
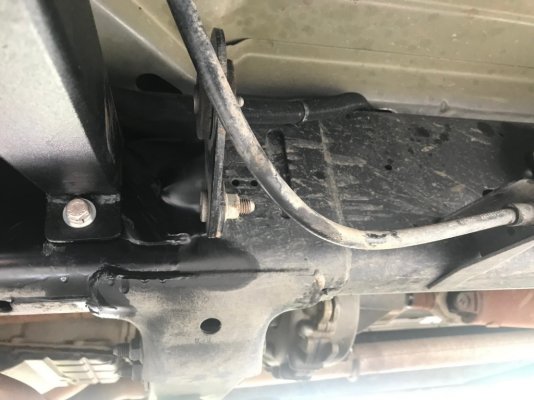
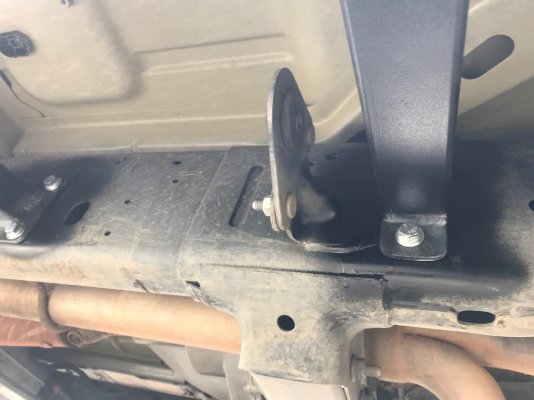
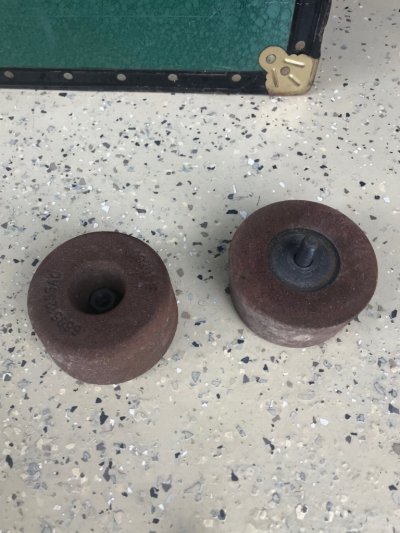
This is the spot where the round thingies go, what that heck are this things???, i still have them in the garage just in case.

Driver side
46622121504_c3a030e4d4_h.jpgUntitled by RAM RSM, on Flickr
Passenger side
46622121694_d448305b94_h.jpgUntitled by RAM RSM, on Flickr
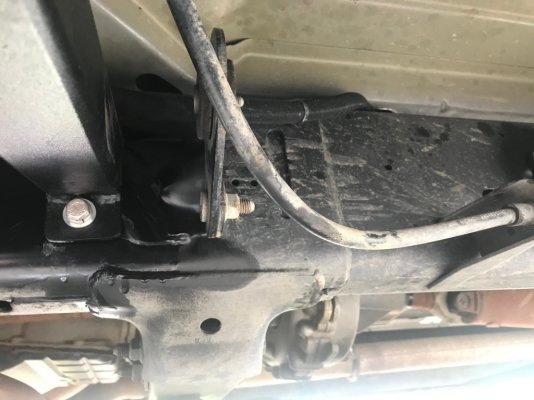
And this are things that hang in there with a bolt that has a bushing inside.
The rounded pieces are heavy, i left the bushings mounted in place in the bracket

47292734792_e8bf0e6552_h.jpgUntitled by RAM RSM, on Flickr
 
Last edited:
OP
OP
ram1500rsm

ram1500rsm

Senior Member
Joined
Jul 24, 2018
Posts
4,818
Reaction score
5,284
Location
Trabuco Canyon, CA
Ram Year
2014
Engine
Hemi 5.7
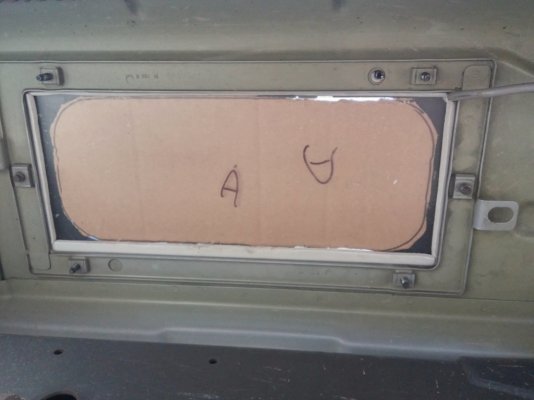
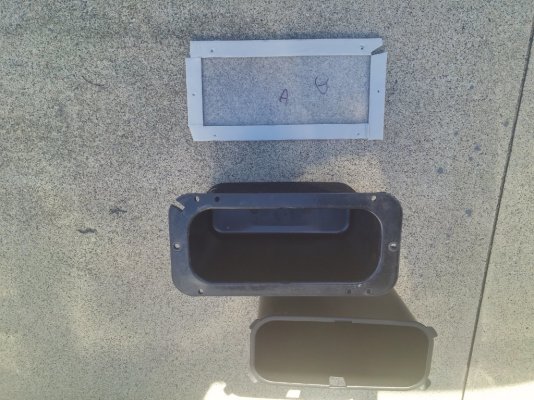
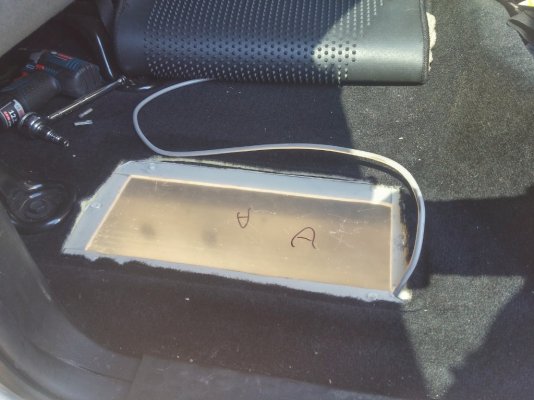
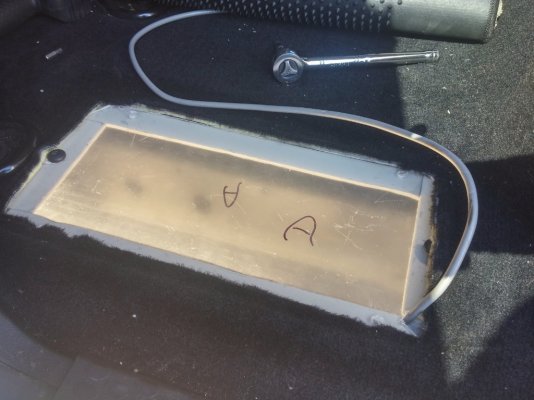
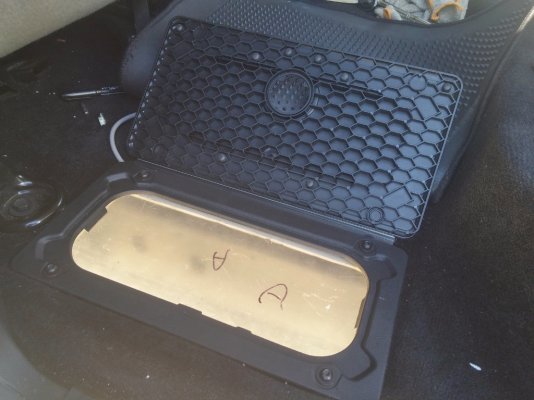
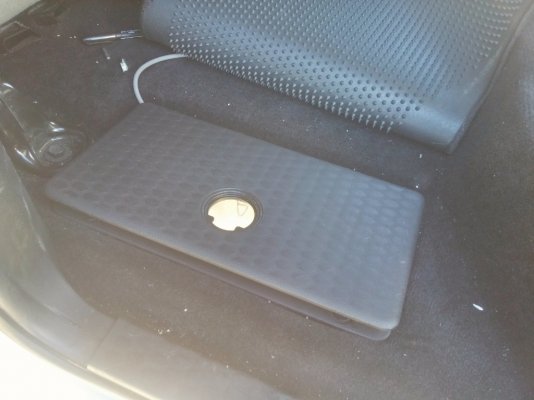
Forgot to post i also had to delete the in-floor storage bins to install the sliders. i used plexi glass to basically covered the holes and reused the bolts and plasti covers.
I started with a .22" plexiglas sheet and weather stripping i got from Lowes, and it's totally reversible.
40237564413_82356cbff7_h.jpgUntitled by RAM RSM, on Flickr
40237552883_01cf942887_h.jpg2019-02-24_04-14-18 by RAM RSM, on Flickr
Had to cut the same corner to fit my CB wire through it

33326927188_ff7a7b7152_h.jpg2019-02-24_04-14-33 by RAM RSM, on Flickr
40237555883_98b499c04d_h.jpg2019-02-24_04-14-50 by RAM RSM, on Flickr
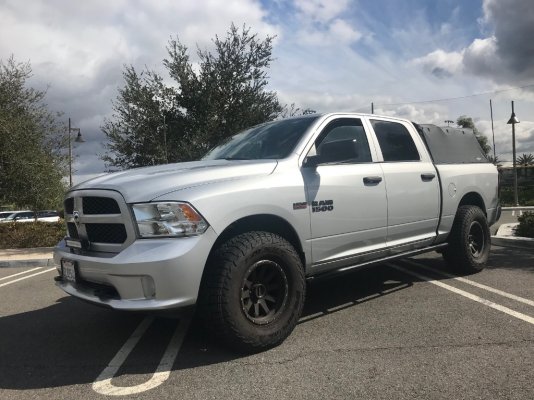
I ended up shaving the ears on the covers, will still work without them if i decided to put the bins/holders back.
46287884855_1c66d89626_h.jpg2019-02-24_04-14-59 by
RAM RSM, on Flickr
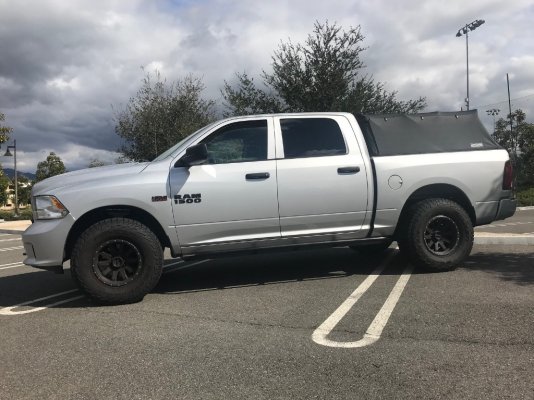
And i also had to remove the locks, they're held by 2 screws
47150540852_3e99321b70_h.jpg2019-02-24_04-15-17 by RAM RSM, on Flickr
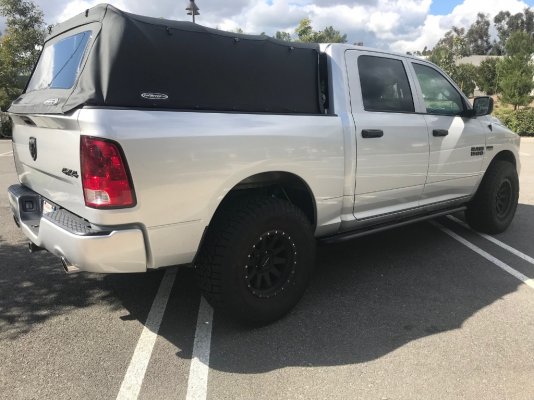
40237560063_be32747acd_h.jpg2019-02-24_04-15-26 by RAM RSM, on Flickr
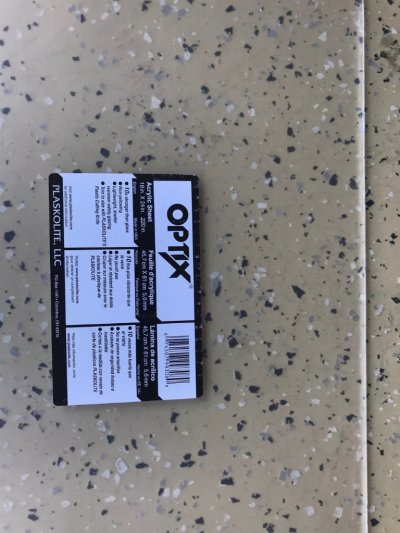
And that was it the rear mat is covering the covers and hopefully they'll last, zero issues so far.
 

revitupmoto33

Senior Member
Joined
Mar 11, 2018
Posts
875
Reaction score
1,741
Location
Flagstaff
Ram Year
2017
Engine
Ecodiesel
Finally had the chance to install the rock sliders. Thanks again @revitupmoto33 they came out great.
Had to drill 24 pilot holes, drill them to 5/16 and tap them 3/8. also had to shave some metal on the frame close to a couple of rounded heavy thingies that are hanging on the frame.I still have no idea what those things are lol. I had to remove them to shave the bumps close to them and i forgot to put them back. Also messed up one of holes i made cause it was a little cold out and i wanted to finish the job quicker haha, so when i put the center mark to drill the hole it wasn't in the right spot and the bolt won't go through. Oh well not a big deal anyways, and the kids are more than happy to be able to step onto someting to climb up to the rear seats.

46622121674_97b13b7587_h.jpgUntitled by RAM RSM, on Flickr
47292735052_9827aaf576_h.jpgUntitled by RAM RSM, on Flickr
This is the spot where the round thingies go, what that heck are this things???, i still have them in the garage just in case.

Driver side
46622121504_c3a030e4d4_h.jpgUntitled by RAM RSM, on Flickr
Passenger side
46622121694_d448305b94_h.jpgUntitled by RAM RSM, on Flickr
And this are things that hang in there with a bolt that has a bushing inside.
The rounded pieces are heavy, i left the bushings mounted in place in the bracket

47292734792_e8bf0e6552_h.jpgUntitled by RAM RSM, on Flickr
I think I remember cutting those things off mine too lol
 
Top