Adding Rain Sense Wipers with AlfaOBD

Disclaimer: Links on this page pointing to Amazon, eBay and other sites may include affiliate code. If you click them and make a purchase, we may earn a small commission.

chrisbh17

Senior Member
Joined
Oct 12, 2017
Posts
6,691
Reaction score
7,474
Ram Year
2017
Engine
Hemi 5.7
Yeah I just learned that the seat covers I ordered wont work with any heated/vented seats because they are for the Big Horn type "buckets" but the ones that are vented are always the "sport type" buckets.

Not really too upset, wife has vented seats in her Lexus and they are just "OK". Nothing against RAM but I assume Lexus does it better than RAM so I dont feel like Ill miss it too much. Heat only is good enough for me (and my custom seat covers are gray and red so they shouldnt attract heat like the black ones)
 
OP
OP
Ghost_RAM

Ghost_RAM

Senior Member
Joined
Jan 10, 2018
Posts
1,367
Reaction score
1,089
Location
VA
Ram Year
2016
Engine
Hemi 5.7
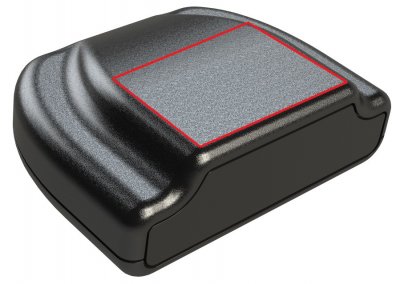
Found a promising case for the sensor. Aesthetically it has a sleek design and I think would look great next to the humidity sensor and mirror covers. Just waiting to hear back from them with some interior dimension info (red box area).

271521537813677-xl.jpg.pagespeed.ce.em3BmDYTOm.jpg
https://www.polycase.com/ag-43

It is a bit big at 3" x 4" x 1 3/8". The height is perfect for the sensor and lens as the total height is 1 1/4". To fully cover the sensor and lens it needs to be a minimum of 2" wide and 2 1/2" long (interior dimensions). Cut the bottom of the case to slide over the sensor/lens and adhere with double sided tape or a black silicone. The only part left would be some kind of wire mold to hide the harness.

Edit: They got back to me. Totally missed their 2D drawings on their site. It looks like it will work with some creative cutting on the bottom cover.
 
Last edited:
OP
OP
Ghost_RAM

Ghost_RAM

Senior Member
Joined
Jan 10, 2018
Posts
1,367
Reaction score
1,089
Location
VA
Ram Year
2016
Engine
Hemi 5.7
Ok, so I ordered the case for the sensor. Hopefully it will work out but if not, it was only $15.06 total.

While I was in the ordering spirit, I also ordered another lens for the sensor. Not sure why it took so long to mess up but I started getting ghost wipes on startup and randomly going down the road. I think when I tried to reposition the lens I damaged the surface when cleaning. I should not have used the primer on the lens surface. I just wasn't thinking clearly. I tried to take a pic to show but I could not get a clear image. You can see a weird haze through the center of the lens window that was not there before. So learn from my mistakes and take your time the first time.

After you have your spot picked out, the harness is long enough to reach and the lens/pad is in a clear wiping path of the wiper blade... Clean the area with the primer. Keep a little bit of primer to wet the surface where you will be applying the lens/pad. While wet and before it starts to dry, roll the lens/pad from top to bottom (shortest distance of pad) to ensure you don't trap and bubbles. This is the hardest part. Don't try to move or reposition as it will be STUCK on there at this point and you don't want to disrupt the pad. You can press from inside the lens area if you have small abubbles near an edge but do not press in the center where the little window is located.

I will tell you the primer leaves a little bit of residue behind around the edges of the pad and of course after you cannot reach to clean because of the lens overhangs the pad. I might try to mist a water with extremely light Dawn detergent solution instead of using primer to apply this go around as it should dry clear versus having a haze.
 
OP
OP
Ghost_RAM

Ghost_RAM

Senior Member
Joined
Jan 10, 2018
Posts
1,367
Reaction score
1,089
Location
VA
Ram Year
2016
Engine
Hemi 5.7
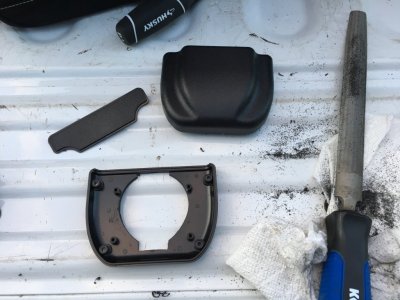
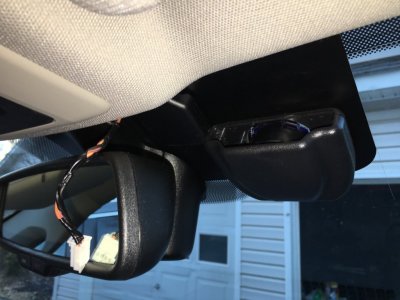
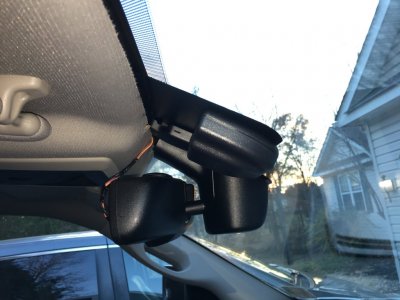
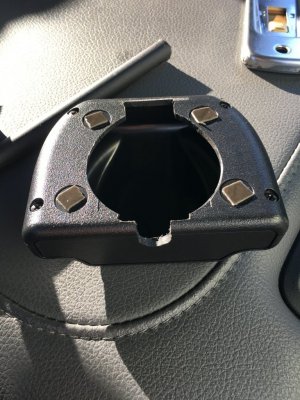
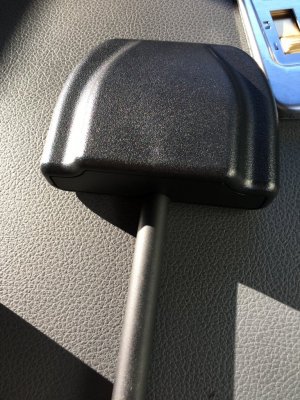
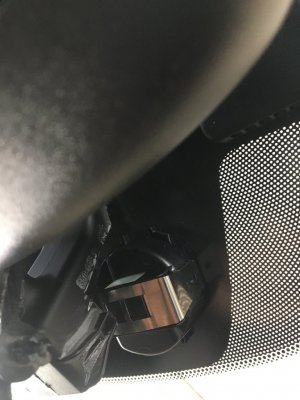
Got the cover in today and it looks like it will work. Just need a short section of wire mold for the harness. The new lens is supposed to be here in a couple days.


Little creative cutting on the bottom plate. 2 1/8" hole saw and file work to match the lens protrusions.

IMG-5722.JPG
IMG-5716.JPG IMG-5717.JPG IMG-5719.JPG
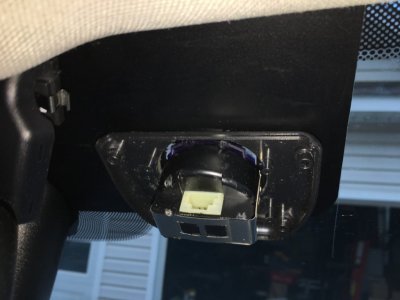
Don't mind how low the case is positioned. When the new lens is attached it will be about a 1/4" higher which should work perfectly with my vinyl job.

IMG-5721.JPG

The case just does fit over the sensor and barely touches the top of the cover. By the time I add a little 3M double sided tape to each corner there will be plenty of room. I really like how it matches the existing covers and mirror.
 
OP
OP
Ghost_RAM

Ghost_RAM

Senior Member
Joined
Jan 10, 2018
Posts
1,367
Reaction score
1,089
Location
VA
Ram Year
2016
Engine
Hemi 5.7
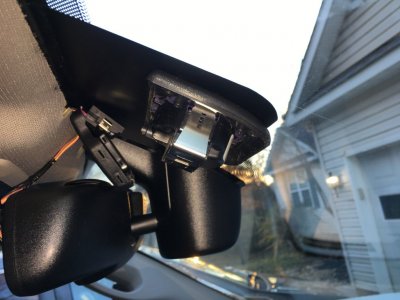
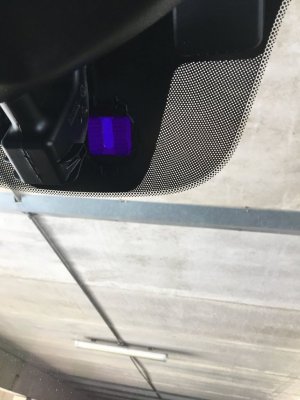
Finished up this morning. While it is working great for now, I ended up with 2 small bubbles on either side of the site lens. Hopefully it won't cause any issues but if it does I'll fix it in the spring when it's warmer. Next time I will not be using the primer as a way to help ensure there are no air bubbles. I think it dries way to quick and doesn't "stand off" the windshield enough. If need be, I will go with the tinters method of a drop of Dawn in a large squirt bottle.

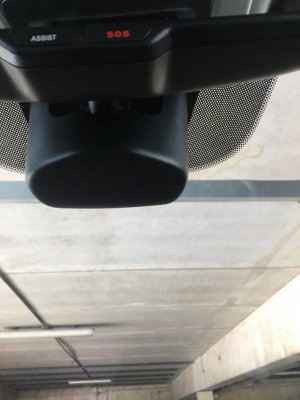
Here are the finished results. Thanks again for all who helped!!

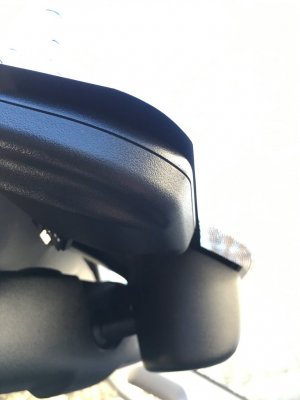
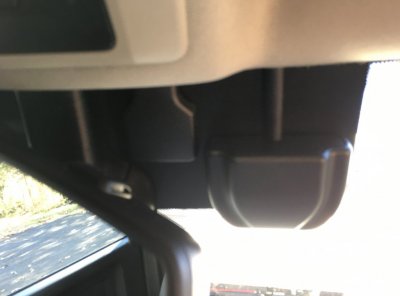
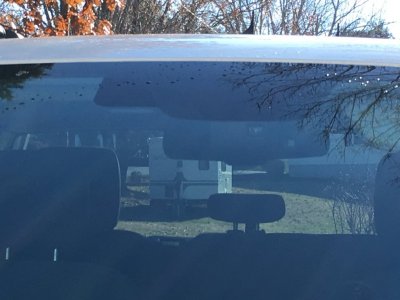
IMG-5740.JPG IMG-5742.JPG IMG-5744.JPG IMG-5748.JPG IMG-5755.JPG
 

chrisbh17

Senior Member
Joined
Oct 12, 2017
Posts
6,691
Reaction score
7,474
Ram Year
2017
Engine
Hemi 5.7
That probably looks better than factory, great job!

Personally I just would have used a piece of woven cloth wire loom to cover the wires (assuming you can stretch it over the connector), but your idea definitely looks more stock than that.
 
OP
OP
Ghost_RAM

Ghost_RAM

Senior Member
Joined
Jan 10, 2018
Posts
1,367
Reaction score
1,089
Location
VA
Ram Year
2016
Engine
Hemi 5.7
That probably looks better than factory, great job!

Personally I just would have used a piece of woven cloth wire loom to cover the wires (assuming you can stretch it over the connector), but your idea definitely looks more stock than that.
Personally I would much rather have it behind the lower mirror cover but I am pleased with how it looks. I just had some of the wire mold from work leftover from a job. Free!

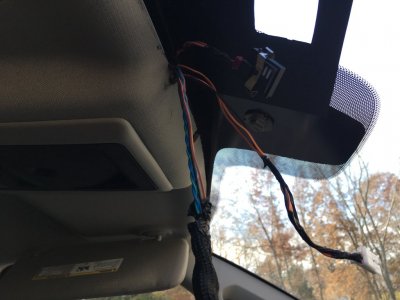
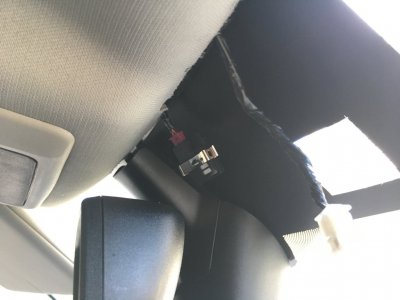
You have to drop the headliner a bit to remove the one tree fastener from the roof to free up the short section of harness for the rain sensor since it is too short to reach the new location.

IMG-5724.JPG IMG-5727.JPG

I wrapped the main harness as well. Just didn't get a pic.

Edit 12/9: With the snow that fell today I was able to get a chance to use them. They seem to be working pretty well so far even with my botched install.
 
Last edited:
OP
OP
Ghost_RAM

Ghost_RAM

Senior Member
Joined
Jan 10, 2018
Posts
1,367
Reaction score
1,089
Location
VA
Ram Year
2016
Engine
Hemi 5.7
Just a quick update on having rain sense for the past couple months. It would seem that the few random ghost wipes have gone away. I'm not sure if the BCM somehow calibrated the rain sensor and took in account for the two air bubbles I trapped behind the lens during installation? At any rate, all is well!
 

Roman217

Senior Member
Joined
Apr 13, 2018
Posts
366
Reaction score
333
Location
Metro Detroit, MI
Ram Year
2015
Engine
5.7
Even my OEM system from the factory gets ghost wipes once in a while. As long as it's not happening constantly, I wouldn't worry about it.

Sent from my SM-G965U using Tapatalk
 
Last edited:

skuppy069

Senior Member
Joined
Feb 26, 2017
Posts
795
Reaction score
362
Location
canada alberta
Ram Year
2018 1500 cc
Engine
hemi 5.7
So I had to replace my Windshield on 2018 ram 1500 due to a massive crack running across the whole windshield .
I ended up ordering the oem windshield with the rain sensor and humidity sensor .
My initial Windshield had the humidity sensor on it already .
So when the glass guys where installing the windshield they couldn’t get my existing miror back on the Windshield due to the rain sensor module mount .
So I came home and decided to see what I could do.
I ended up cutting a fair bit off my miror to make it fit .
When the trucks that come from the factory with rain sensor module they have the smart beam mirror and autodimming .

My mirror is only auto Dimming .
So my first step was to get my existing mirror to try and fit .
Here is some pics of what I did .
I know a lot of people would not cut like I did but i didn’t want to buy a 400 dollar mirror .
So you can see the one ear I cut off with a dremel and Zip disk as this is made out of aluminum .
Once cut I could get the mirror over the rain sensor .
And best of all my existing lower mirror cover covered all of it .

Then today I replaced the mirror header harness .
Was a pain in the a$$ .
Had to pull down the headligner to remove the all clips securing the harness and then install the new harness .
I just put the codes in 30 mins ago so will test later on today hopefully .

D5F36599-D555-499C-9A0F-2ABF219DF272.jpeg

72B29B90-DA11-4901-B89A-63B5DBA3B50B.jpeg

B5D8A5BA-622E-45DD-9336-E0E400E4560E.jpeg

35B27A55-F4AB-4481-8A0D-AA83D4B76ED4.jpeg
 
OP
OP
Ghost_RAM

Ghost_RAM

Senior Member
Joined
Jan 10, 2018
Posts
1,367
Reaction score
1,089
Location
VA
Ram Year
2016
Engine
Hemi 5.7
@skuppy069 Is it operable now? The codes on mine took almost immediately but did notice while they took right away, it appeared to function better after some time had went by.
 

skuppy069

Senior Member
Joined
Feb 26, 2017
Posts
795
Reaction score
362
Location
canada alberta
Ram Year
2018 1500 cc
Engine
hemi 5.7
@skuppy069 Is it operable now? The codes on mine took almost immediately but did notice while they took right away, it appeared to function better after some time had went by.
I haven’t tried it yet as the code still wasn’t in the radio .
UAQ takes a bit longer
Might not work if below zero C temp and its minis 4 here now so
I will try In a few mins here
 

skuppy069

Senior Member
Joined
Feb 26, 2017
Posts
795
Reaction score
362
Location
canada alberta
Ram Year
2018 1500 cc
Engine
hemi 5.7
Yep the rain sensor setup is working good .
Snow is melting and roads are wet and they where coming on automatically when the windshield was getting wet .
Changes speeds depending on how quick the Windshield is getting wet etc.
Pretty awesome mod .
Thanks everyone for figuring and helping out wish this mod .
Cheers
 

Lawsuit11

Senior Member
Joined
Sep 10, 2018
Posts
817
Reaction score
680
Location
Fort Worth, TX
Ram Year
2018 1500
Engine
Hemi 5.7
Finished up this morning. While it is working great for now, I ended up with 2 small bubbles on either side of the site lens. Hopefully it won't cause any issues but if it does I'll fix it in the spring when it's warmer. Next time I will not be using the primer as a way to help ensure there are no air bubbles. I think it dries way to quick and doesn't "stand off" the windshield enough. If need be, I will go with the tinters method of a drop of Dawn in a large squirt bottle.

Here are the finished results. Thanks again for all who helped!!

View attachment 148482 View attachment 148483 View attachment 148484 View attachment 148485 View attachment 148486

You still got some of that wire mold can’t seem to find anything like it.


—2018 Ram 1500—
 
OP
OP
Ghost_RAM

Ghost_RAM

Senior Member
Joined
Jan 10, 2018
Posts
1,367
Reaction score
1,089
Location
VA
Ram Year
2016
Engine
Hemi 5.7

Lawsuit11

Senior Member
Joined
Sep 10, 2018
Posts
817
Reaction score
680
Location
Fort Worth, TX
Ram Year
2018 1500
Engine
Hemi 5.7

Lawsuit11

Senior Member
Joined
Sep 10, 2018
Posts
817
Reaction score
680
Location
Fort Worth, TX
Ram Year
2018 1500
Engine
Hemi 5.7
Future use

Edit: Video to show operation


Edit: So I went ahead and took everything back off due to my poor measurements the other day. Also not liking the way the dot matrix part of the frit would show small air bubbles on the outside. When I was told it was a type of silicon pad I was a little leery in how well it would stay attached to the windshield. I can now tell you having taken one off....what a PIA!! The mess left behind was a little difficult to clean up. Perhaps once these get some age on them they might be a little easier to remove? You'll see in the pictures below that I nearly destroyed the lens cleaning it up. Isopropyl alcohol was a huge help.

View attachment 147874
View attachment 147875
View attachment 147876

I ended up going to the hobby store and getting some acrylic enamel black satin paint and using that with a business card to sort of trowel in those areas. After putting a heat lamp on the area for a while I went back over it again with the black vinyl. This time around the end result was much better.

View attachment 147878
View attachment 147880

The excess acrylic paint was easy enough to scrape off with a single sided razor (box cutter). Word of caution, DO NOT USE a regular razor knife. I accidentally scratched my windshield trimming some area on my vinyl. Oops... Going to attempt some resin to fix once it gets warmer. Live and learn

Just a couple of questions since all my stuff should arrive when I’m on vacation next week lol

So when you used the acrylic enamel paint did you only do it on the Frit area?

When applying the vinyl did you run it all the way to the mirror for even coverage or just over lapped it a inch or so?

Sorry for the questions just trying to get an idea on how I should run it before I start cutting lol


—2018 Ram 1500—
 
OP
OP
Ghost_RAM

Ghost_RAM

Senior Member
Joined
Jan 10, 2018
Posts
1,367
Reaction score
1,089
Location
VA
Ram Year
2016
Engine
Hemi 5.7
Just a couple of questions since all my stuff should arrive when I’m on vacation next week lol

So when you used the acrylic enamel paint did you only do it on the Frit area?

When applying the vinyl did you run it all the way to the mirror for even coverage or just over lapped it a inch or so?

Sorry for the questions just trying to get an idea on how I should run it before I start cutting lol


—2018 Ram 1500—

Yes sir, the main reason for the paint was to just cover in the missing areas of the frit because the vinyl wouldn’t (you could see air bubbles). I went the whole way to the mirror with the vinyl.


Sent from my iPhone using Tapatalk
 
Last edited:

Cesar592

Senior Member
Joined
Nov 14, 2016
Posts
398
Reaction score
53
Ram Year
2013
Engine
3.6 pentastar
what is the part number for the humidity sensor of a ram 1500 2013 I have the rain sensor and the harness for the daytime attenuation mirror I also have the atc that got some time with mpgrim of all this that I would need more to start this new mod
 
Top