Airlift 1000HD install shortcuts

Disclaimer: Links on this page pointing to Amazon, eBay and other sites may include affiliate code. If you click them and make a purchase, we may earn a small commission.

Shiva

Senior Member
Joined
Dec 6, 2018
Posts
239
Reaction score
205
Location
Fairport
Ram Year
2018
Engine
Hemi 5.7
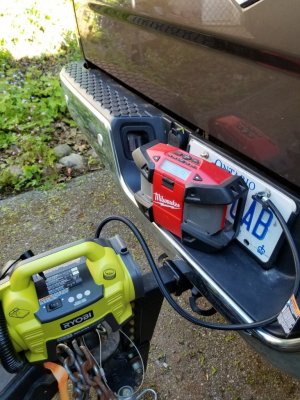
20190607_173828.jpg Pleased with end results. Told by service tech he weighed my tongue load at 900lb and yes even with properly adjusted WDH I had excessive tail end sag.
After this install hitched up tail drops 1/2" and front raises 1/2" at 40psi in bags. That's with the WDH set up.

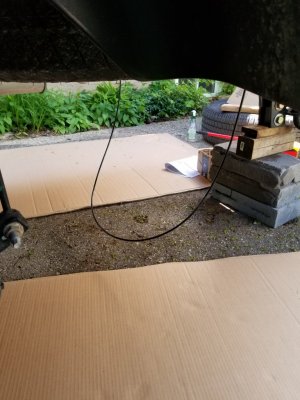
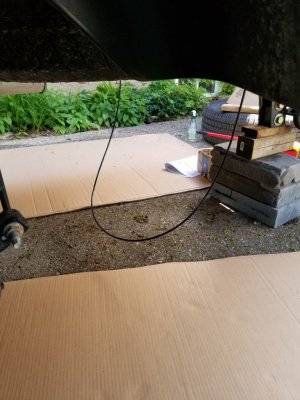
I hitched up my trailer and chocked in front of the truck front wheels then used the electric tongue Jack to lift rear wheels to just off the ground then cribbed up under hitch and lowered Jack for tongue to rest on wood

NEVER WORK UNDER A JACK OR SUSPENDED LOAD for safety..no blocks...get some.

I took off the rims and set up a padded stool to work comfortably in front of nicely decompressed springs. Didn't have to disconnect shocks or sway bar or springs.

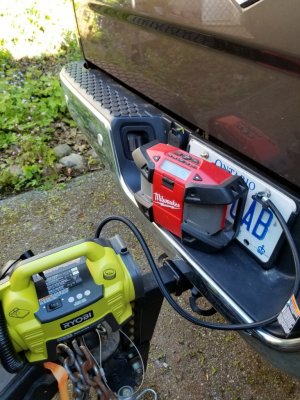
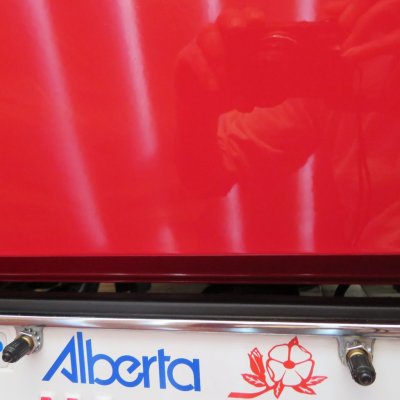
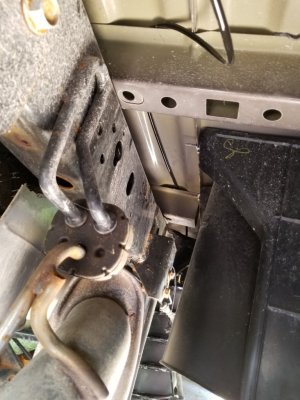
I chose to run 2 air lines the from rear plate location as shown above. The air fill valves now also hold on the licence plate bracket.20190607_143922.jpg Without cutting the supplied air tubing I ran it forward and fed ends inside springsfrom top opening.

Instructions said to deflate the bags and fold them like a hotdog bun. Then pry them in. YOU DON'T NEED TO PRY
Just remove the shipping caps and kneel on the bag to flatten it then put the caps back on. Leave them in the sun or gently warm anyway that works for you. They will expand as they warm.
Kneel on them again and remove the cap to get remaining expanded air out. Secure caps back on then fold and hold with your knees while you put a good heavy nylon cable tie around both ends to hold it in shape.
Now that bag installs through the bottom coil space of the spring and with one hand guiding the top of the bag up and the other hand feeding in it's as easy as sh.t and these are the thicker bags.
The excess tubing gets cut out of the center of the roll of tubing. No measuring required. You're already where you need to be at all ends.
Throw a cup of water in the microwave for 30 seconds or soak the tubing ends in your coffee or warm beer to help the tubing slide easily onto the barbed fittings.

The rest of the job is in the installation manual and operators manual.
20190607_143922.jpg

20190607_135639.jpg

20190607_173828.jpg
 
Last edited:

fprevos

Member
Military
Joined
Jul 17, 2020
Posts
67
Reaction score
77
Location
SWFL
Ram Year
2019
Engine
5.7
That looks awesome, looking to do the same on my new Ram.
 

Gixxer750

Senior Member
Joined
Jan 10, 2020
Posts
368
Reaction score
141
Location
N. Idaho
Ram Year
2015_2017
Engine
Hemi 5.7
That looks awesome, looking to do the same on my new Ram.
I'll tell you what NOT to do. Dish soap. Its not just on the "hotdogs bun" after a min. Lol. Want the onboard compressor and remote control unit. I still have it.
 

JayLuke

Member
Joined
Dec 11, 2019
Posts
59
Reaction score
19
Location
SO CA
Ram Year
2014
Engine
CTD 6.7L
I used the hotdog bun method with a zip tie and it worked well.
 

800steve

Junior Member
Joined
Aug 6, 2014
Posts
26
Reaction score
15
Ram Year
2018
Engine
hemi 5.7
Do your self a favor, unhook the lower shock mount and take the spring out. Just slide the bag in and reinstall, no fighting with a rolled up hotdog.
 

Wild one

Senior Member
Joined
Jan 17, 2016
Posts
13,933
Reaction score
23,929
Ram Year
14 Sport
Engine
5.7
View attachment 169057 Pleased with end results. Told by service tech he weighed my tongue load at 900lb and yes even with properly adjusted WDH I had excessive tail end sag.
After this install hitched up tail drops 1/2" and front raises 1/2" at 40psi in bags. That's with the WDH set up.

I hitched up my trailer and chocked in front of the truck front wheels then used the electric tongue Jack to lift rear wheels to just off the ground then cribbed up under hitch and lowered Jack for tongue to rest on wood

NEVER WORK UNDER A JACK OR SUSPENDED LOAD for safety..no blocks...get some.

I took off the rims and set up a padded stool to work comfortably in front of nicely decompressed springs. Didn't have to disconnect shocks or sway bar or springs.

I chose to run 2 air lines the from rear plate location as shown above. The air fill valves now also hold on the licence plate bracket.View attachment 169058 Without cutting the supplied air tubing I ran it forward and fed ends inside springsfrom top opening.

Instructions said to deflate the bags and fold them like a hotdog bun. Then pry them in. YOU DON'T NEED TO PRY
Just remove the shipping caps and kneel on the bag to flatten it then put the caps back on. Leave them in the sun or gently warm anyway that works for you. They will expand as they warm.
Kneel on them again and remove the cap to get remaining expanded air out. Secure caps back on then fold and hold with your knees while you put a good heavy nylon cable tie around both ends to hold it in shape.
Now that bag installs through the bottom coil space of the spring and with one hand guiding the top of the bag up and the other hand feeding in it's as easy as sh.t and these are the thicker bags.
The excess tubing gets cut out of the center of the roll of tubing. No measuring required. You're already where you need to be at all ends.
Throw a cup of water in the microwave for 30 seconds or soak the tubing ends in your coffee or warm beer to help the tubing slide easily onto the barbed fittings.

The rest of the job is in the installation manual and operators manual.
View attachment 169054

View attachment 169055

Nice install,and glad to see you ran them as seperate entities.I have mine set up the same way,with black caps on the fittings,they blend in nicely.I've also seen them mounted inside the gas tank door


View attachment 169056

IMG_1919.JPG
 
Top