How To: Bedside Utility Racks

Disclaimer: Links on this page pointing to Amazon, eBay and other sites may include affiliate code. If you click them and make a purchase, we may earn a small commission.

Moparfanatic21

U.S. Marine Vet - 0321, Now a Doctor...of Vehicles
Military
Joined
Apr 13, 2015
Posts
1,066
Reaction score
459
Ram Year
2006
Engine
Hemi 5.7
Well if you decide to take the project on, let me know if you have any questions!
Oh I definitely will! Easier to try on my second gen to see if it will interfer with what I haul, beds are easier and cheaper to find then my 4th gen lol
 
OP
OP
bryce88

bryce88

Senior Member
Joined
Jun 20, 2018
Posts
330
Reaction score
326
Location
Utah
Ram Year
2015
Engine
5.7L Hemi
I posted this in the exterior section but it probably fits better in the DIY, so sorry if you're seeing this twice.
I wanted a place to mount some tools and make it somewhat modular to adapt to my needs. So I picked up a 24"x48" piece of HDPE on eBay. I like the idea of polymer because it's just as easy to work with as wood but stands up to weather without any need for sealing or painting etc.

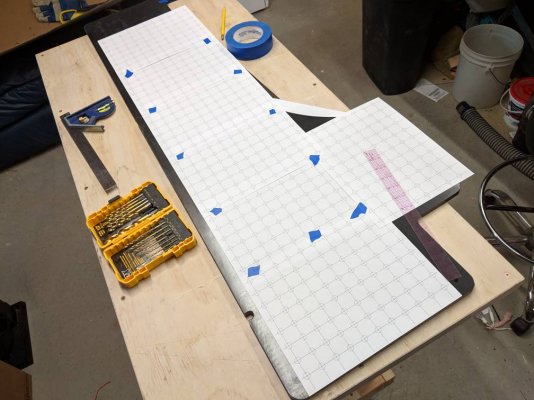
Transferring the template to the HDPE
b10e6a9c38109c98b816fbc26739560c.jpg

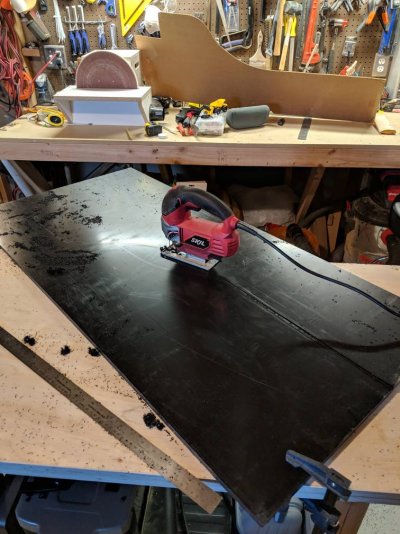
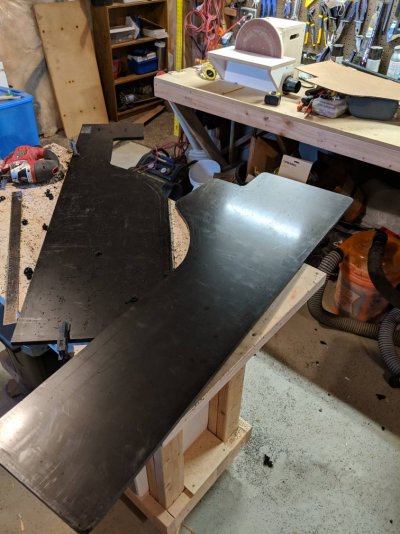
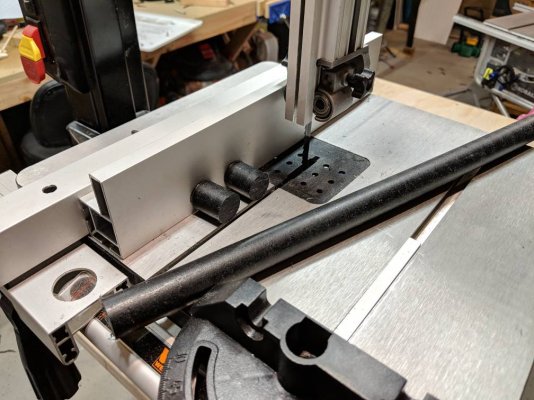
Cutting it out with a jigsaw
d614e483881e8b1ea73f638e9b94627b.jpg

df3f048924b8d23fdac43ebf9d624da4.jpg

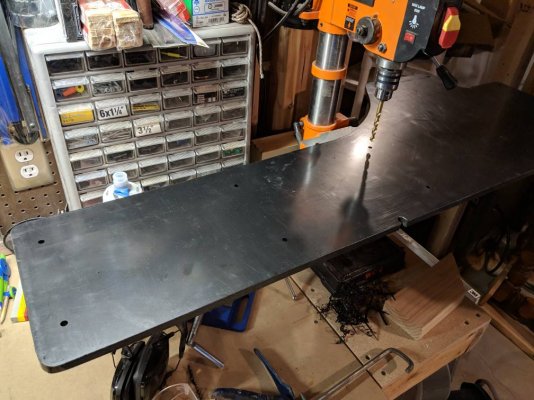
Drilling the mounting holes
e93b2fb74bea66c4d4ce24d38f11d528.jpg

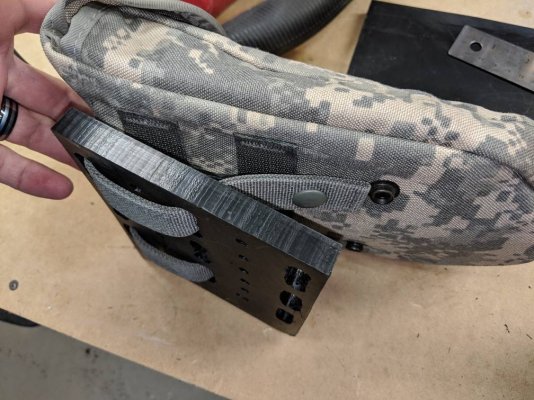
I did some experimenting with a molle pattern but because the material is so thick it's not going to work for a lot of pouches since they're designed to work on the thickness of nylon webbing. I'm glad I did some experimenting because it would have been a lot harder to cut a molle pattern and it wouldn't have even been useful!
92089ddf451a11248a406b74071df750.jpg

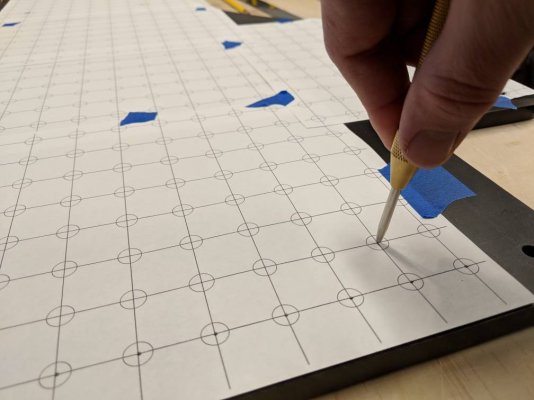
I decided to just do round holes. This is a 1" grid I printed off to use as a guide
1aba496d438ac17f6c8471a5af900413.jpg

Used a center punch to start all the holes and to transfer the pattern onto the panel
739fd4689db518f8fbd490f57e47f6ff.jpg

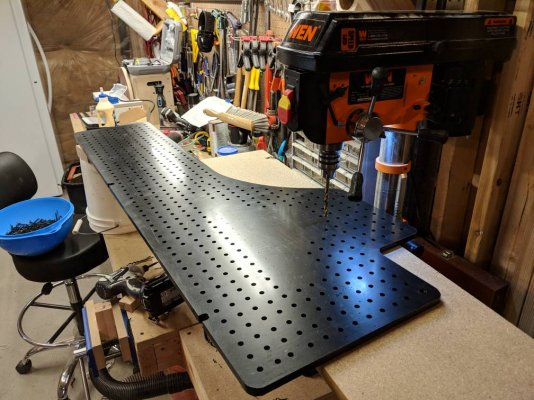
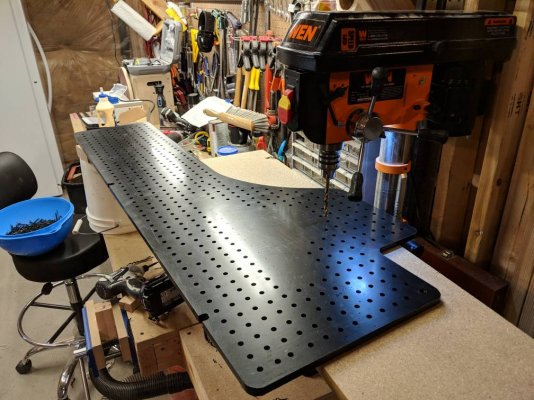
Drilling the holes. Over 500 of them... I'm glad I have drill press. The ones it couldn't reach I just finished up with a cordless drill.
59ab6182d9e1832425c3ac0da65a3603.jpg

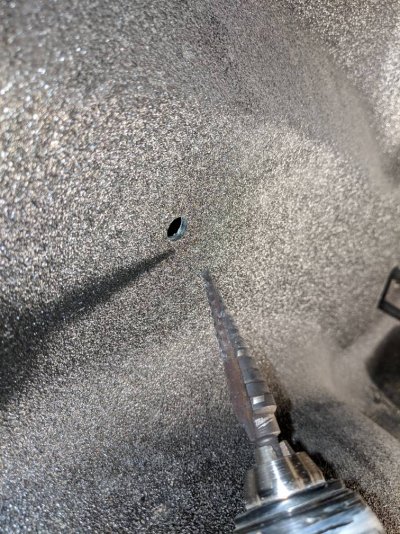
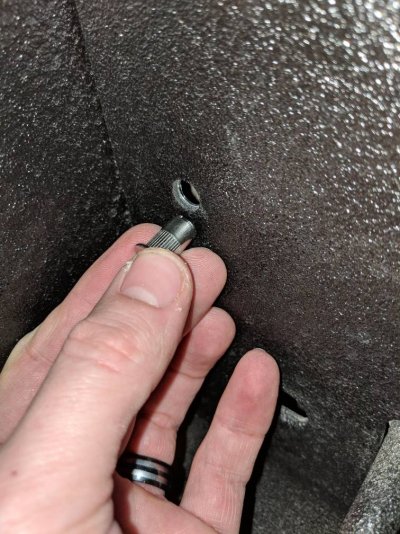
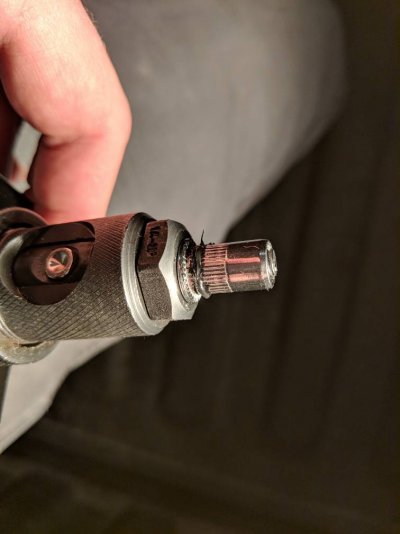
Ok, now the part where there's no turning back. Drilling into the bed of your truck. After using shims etc. to get the panel placed where I wanted it, I used a punch through the mounting holes to mark where to drill. Then, using a step bit, I drilled holes that were 11/32" wide which was perfect for the rivnuts I have. They need to be nice and snug to work correctly.
51c8a29dbe8642210c3b9e16ca89ee65.jpg
077e1b32f00f8d79eb24f3fc30790ee6.jpg

I used a little black silicone adhesive to kind of seal the hole to prevent water from getting behind there on the bare metal.
aa62a6d4cac22324d69e9a6b1774d225.jpg

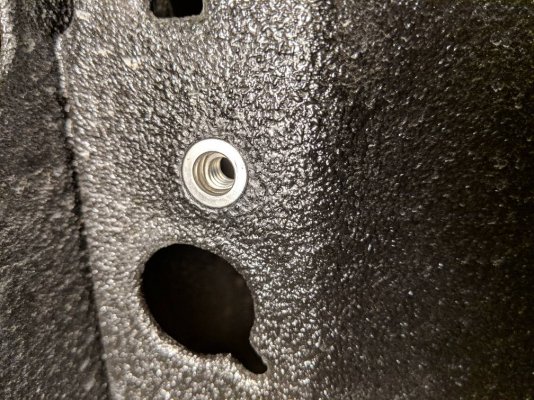
All mounted up they turned out looking pretty clean. *Pro Tip - run a tap into the rivnuts after mounting them to clean up the threads, sometimes they can get a little squished or bent and you'll get your bolt stuck and then if you crank on it, you'll spin the rivnut which is bad news. (Don't ask me how I know)
7ad29a322440b16160ee82cd22535ee0.jpg
ed669b67c3b6d63eec50d5b1f1a5386f.jpg

Now to cut the standoffs. I bought a nylon rod on eBay and cut two different sizes. A short and a long for the indentations on the side of the bed. That way everything ends up nice and flat.
5bc5663399f1f4401d9105f931325b04.jpg

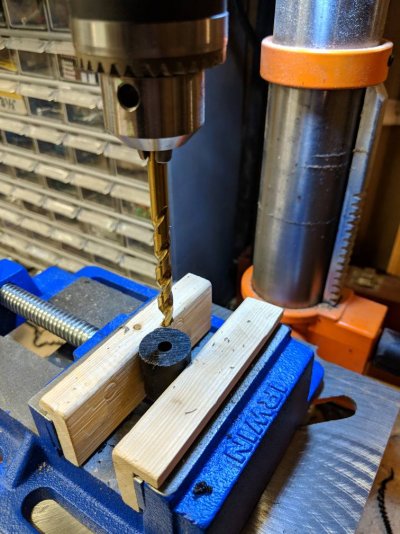
Drilled holes in them
14635148e3f5dd4206683ed730923d7c.jpg

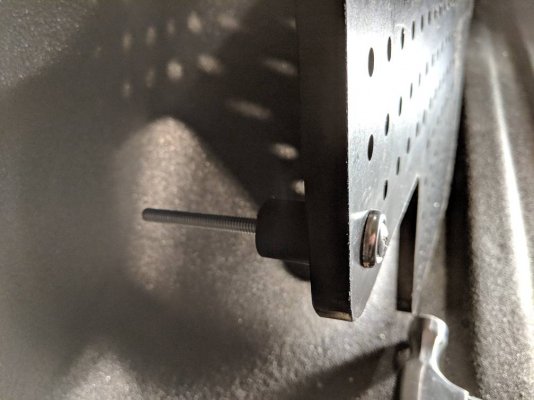
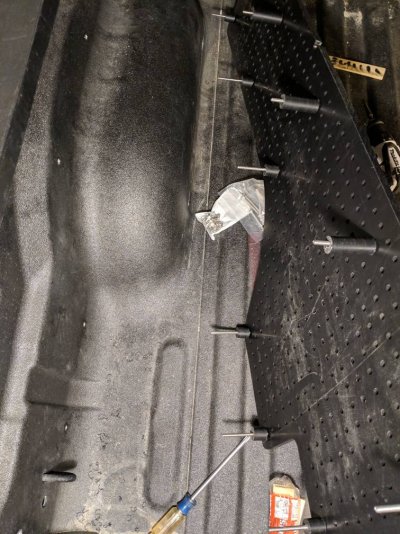
All the standoffs ready to go. You can kind of see how they work in these photos.
6532bccaa8a52082addcf7ee5bf552b6.jpg
756e2524cd2de9bf40cdb9631287c340.jpg

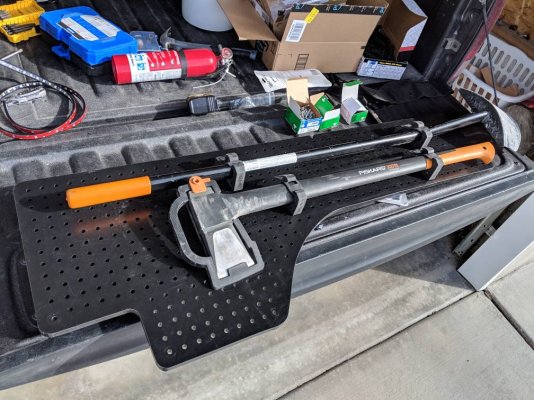
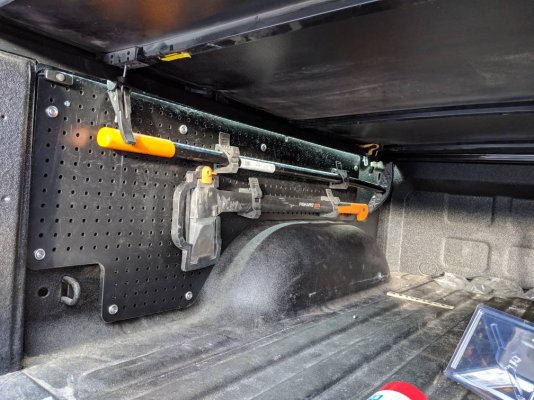
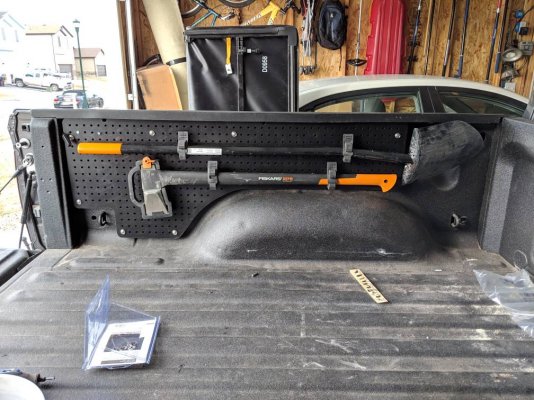
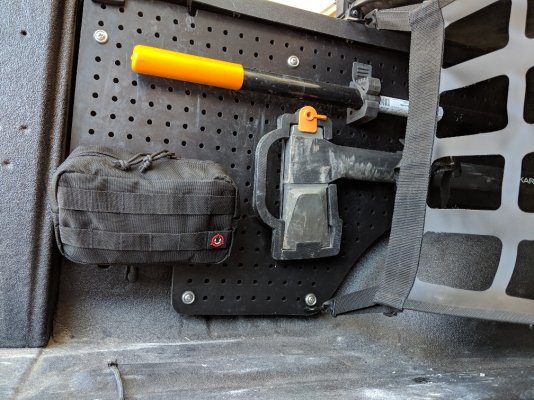
Now the fun part. I placed the tools where I wanted them and mounted the quickfists.
f2d0cb48cf252bd73d751a9084679916.jpg

All mounted up!
9c09a88ddf09edcf27c8b613a954a36f.jpg
ad37b0637e06fb7314847f23c488b0d2.jpg

I'm pretty happy with how it turned out. I'm still planning to mount a pouch in that leftover area for ratchet straps etc. So that is still to come.
 

Purplert

Senior Member
Joined
Sep 5, 2017
Posts
1,031
Reaction score
707
Ram Year
2014
Engine
5.7
Amazing ! Kudos !


Sent from my iPhone using Tapatalk Pro
 

Goose_1327

Senior Member
Joined
Sep 17, 2017
Posts
122
Reaction score
57
Ram Year
2013
Engine
5.7 Hemi
Anymore thought on starting to market these?


Sent from my iPhone using Tapatalk
 

konfuzed

Member
Joined
Aug 24, 2013
Posts
74
Reaction score
68
Location
Texarkana, Texas
Ram Year
2003
Engine
5.7 liter Hemi
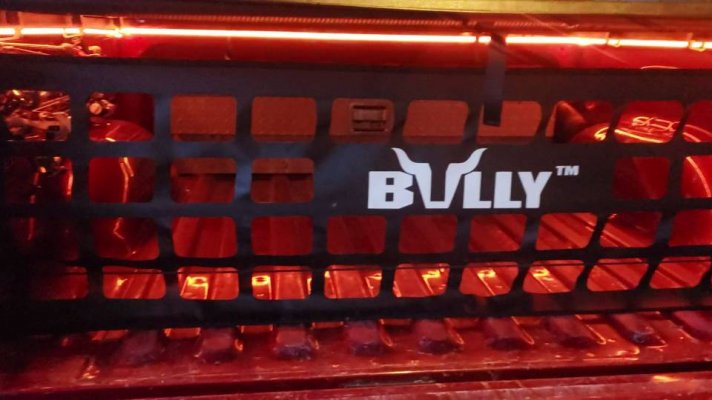
I did the same thing with a net my in laws got me for Christmas last year. I already had a bed cover so I figured I'd use it for a separator. I ran led strip lights down the top of the bed and wired it to a switch in the bed, along with 2 12v outputs. I have a inverter in my toolbox. I had pole holder for a boat that I mounted to the side of mine. So i always have a rod for any fishing hole i come across.
I really want a pegboard like you made. That's ******* awesome! Do you still have the dimensions? a1a7b28034598b443f81bbeca1bb79a3.jpgc0a39b2ba1ed2eab784421d203fa77d9.jpg

Sent from my SM-N960U using Tapatalk
 

McBroom

U.S.Marine Veteran Retired 88-2000
Military
Joined
May 25, 2017
Posts
5,860
Reaction score
7,396
Location
Denison Tx
Ram Year
2018
Engine
Hemi 6.4L
I posted this in the exterior section but it probably fits better in the DIY, so sorry if you're seeing this twice.
I wanted a place to mount some tools and make it somewhat modular to adapt to my needs. So I picked up a 24"x48" piece of HDPE on eBay. I like the idea of polymer because it's just as easy to work with as wood but stands up to weather without any need for sealing or painting etc.

Transferring the template to the HDPE
b10e6a9c38109c98b816fbc26739560c.jpg

Cutting it out with a jigsaw
d614e483881e8b1ea73f638e9b94627b.jpg

df3f048924b8d23fdac43ebf9d624da4.jpg

Drilling the mounting holes
e93b2fb74bea66c4d4ce24d38f11d528.jpg

I did some experimenting with a molle pattern but because the material is so thick it's not going to work for a lot of pouches since they're designed to work on the thickness of nylon webbing. I'm glad I did some experimenting because it would have been a lot harder to cut a molle pattern and it wouldn't have even been useful!
92089ddf451a11248a406b74071df750.jpg

I decided to just do round holes. This is a 1" grid I printed off to use as a guide
1aba496d438ac17f6c8471a5af900413.jpg

Used a center punch to start all the holes and to transfer the pattern onto the panel
739fd4689db518f8fbd490f57e47f6ff.jpg

Drilling the holes. Over 500 of them... I'm glad I have drill press. The ones it couldn't reach I just finished up with a cordless drill.
59ab6182d9e1832425c3ac0da65a3603.jpg

Ok, now the part where there's no turning back. Drilling into the bed of your truck. After using shims etc. to get the panel placed where I wanted it, I used a punch through the mounting holes to mark where to drill. Then, using a step bit, I drilled holes that were 11/32" wide which was perfect for the rivnuts I have. They need to be nice and snug to work correctly.
51c8a29dbe8642210c3b9e16ca89ee65.jpg
077e1b32f00f8d79eb24f3fc30790ee6.jpg

I used a little black silicone adhesive to kind of seal the hole to prevent water from getting behind there on the bare metal.
aa62a6d4cac22324d69e9a6b1774d225.jpg

All mounted up they turned out looking pretty clean. *Pro Tip - run a tap into the rivnuts after mounting them to clean up the threads, sometimes they can get a little squished or bent and you'll get your bolt stuck and then if you crank on it, you'll spin the rivnut which is bad news. (Don't ask me how I know)
7ad29a322440b16160ee82cd22535ee0.jpg
ed669b67c3b6d63eec50d5b1f1a5386f.jpg

Now to cut the standoffs. I bought a nylon rod on eBay and cut two different sizes. A short and a long for the indentations on the side of the bed. That way everything ends up nice and flat.
5bc5663399f1f4401d9105f931325b04.jpg

Drilled holes in them
14635148e3f5dd4206683ed730923d7c.jpg

All the standoffs ready to go. You can kind of see how they work in these photos.
6532bccaa8a52082addcf7ee5bf552b6.jpg
756e2524cd2de9bf40cdb9631287c340.jpg

Now the fun part. I placed the tools where I wanted them and mounted the quickfists.
f2d0cb48cf252bd73d751a9084679916.jpg

All mounted up!
9c09a88ddf09edcf27c8b613a954a36f.jpg
ad37b0637e06fb7314847f23c488b0d2.jpg

I'm pretty happy with how it turned out. I'm still planning to mount a pouch in that leftover area for ratchet straps etc. So that is still to come.
What size holes did you drill for the pegboard? 5/16" would be my guess??

Blue Mule
 

jpHemi3

Junior Member
Joined
Mar 15, 2019
Posts
28
Reaction score
14
Location
PA
Ram Year
2012
Engine
5.7 Hemi
That is a Professionally done Job dude! Nice!
 

LemmysDad

Chairman of the bored.
Joined
Sep 13, 2018
Posts
225
Reaction score
242
Location
Stirling Ontario
Ram Year
2022 RAM Rebel
Engine
Hemi 5.7
Love the rack, cringed a little at the drilling the bed wall, but it looks great. As a side note, that Fiskars splittin axe is the kitties *******. I love mine.
 

Leif_Ram2017

Junior Member
Joined
Jun 25, 2018
Posts
14
Reaction score
1
Location
Seattle
Ram Year
2017
Engine
Hemi 5.7
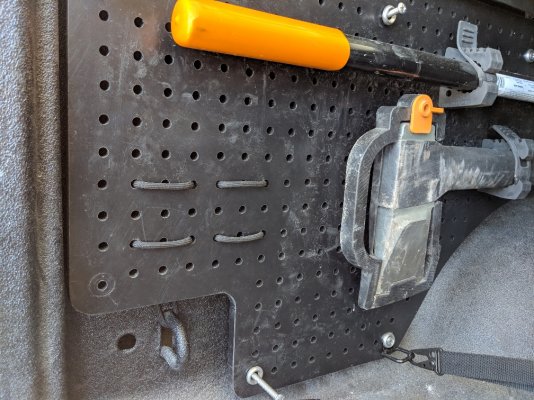
I've looked at this thread a few times. Looks like a lot of work! But I think I'm gonna get started on one this weekend.

A couple questions:
  1. The 1/2" HVPE looks like overkill to me. Do you think 3/8" or maybe even 1/4" HVPE would be rigid enough? I guess it would kind of depend on the # of mounting points. But it looks like you have plenty.
  2. What diameter hole did you use for your 'peg board'? And was there any logic behind that size?
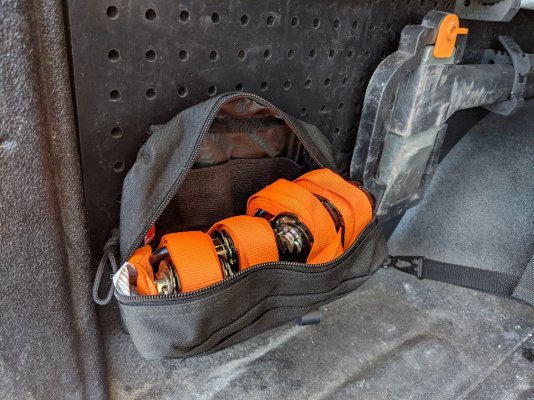
  3. I'd love to see what you ended up doing for your ratchet straps. Any pics?

Thanks,
Leif
 
OP
OP
bryce88

bryce88

Senior Member
Joined
Jun 20, 2018
Posts
330
Reaction score
326
Location
Utah
Ram Year
2015
Engine
5.7L Hemi
I've looked at this thread a few times. Looks like a lot of work! But I think I'm gonna get started on one this weekend.

A couple questions:
  1. The 1/2" HVPE looks like overkill to me. Do you think 3/8" or maybe even 1/4" HVPE would be rigid enough? I guess it would kind of depend on the # of mounting points. But it looks like you have plenty.
  2. What diameter hole did you use for your 'peg board'? And was there any logic behind that size?
  3. I'd love to see what you ended up doing for your ratchet straps. Any pics?

Thanks,
Leif
Yeah it just depends on how rigid you want the panel to be. It does have a little flex to it with the spacing I have between mounting points you could do thinner and I don't think it would break or anything but you'd just have more flex. So, just a personal preference thing.

I don't remember the diameter of the holes I drilled but the thought originally was to do a molle pattern so the holes were sized for that.

To be honest if I were to do it again, I don't know that I would even do the holes. It's too much of a hassle to unbolt everything to access the back of the panel to attach nuts so I think I'd let it remain solid and just screw directly to it with drywall screws to attach quickfists. Then you can move the quick fists around when you need to really easily but they'd still be really secure. In fact I did that to attach a hatchet and it works great. So, if you go that direction you're definitely going to want the 1/2" HDPE to give some meat for the screws to bite into.

I did end up attaching a pouch for ratchet straps I'll post some pictures of that for you.

335cddc07cf4ffd4364215f42a93f975.jpg

3c325da43c45cc02d9588806c6e0ad7d.jpg

08690d30ae449b6373d405eca93e8586.jpg

Sent from my Pixel 2 XL using Tapatalk
 

Toddbigboytruck

Senior Member
Joined
Jul 8, 2019
Posts
506
Reaction score
316
Location
Ontario
Ram Year
2018
Engine
5.7 Hemi
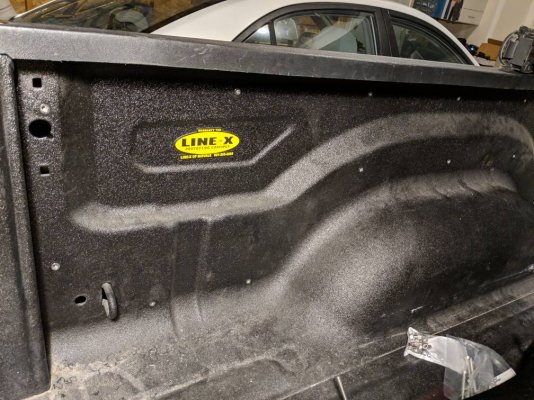
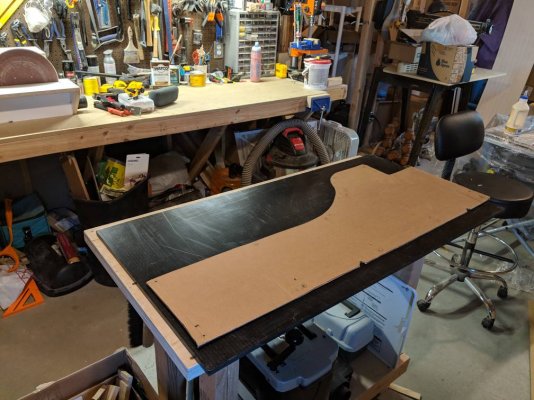
So I'm starting a project. I want to increase the utility off my bed by adding some bedside racks to the inside walls. I want to be able to mount a shovel, axe and other things in there under my tonneau cover to keep in there all the time. My plan is to use 1/2" HDPE and cut out holes in a molle pattern so I can use molle pouches or also mount quickfists for handled tools. I'm planning on using rivet nuts to attach it around the perimeter and I have a nylon cylinder with a 1" diameter that I'll use as standoffs at varying depths because the side of the bed has different depths in different places.

The piece of HDPE that I have is 24"x 48" so that's why it's not running the entire length of the bed. Which I'm fine with because the head of my shovel can hang off the end and that part of the rack is hard to access anyway.

I'm also planning to incorporate some bed lighting under the rail after the rack is in.

Let me know your thoughts! Any ideas or advice would be welcome. I'll keep posting and keep this thread updated as I make progress on the project.

but where did the fire extinguishers go?

Here are some pictures of the cardboard pattern that I've started.

8a90724d057ed699544bd3fb18ea70e0.jpg
090e35419ce030ea1a5ebcf3648b5b7a.jpg

Sent from my Pixel 2 XL using Tapatalk
I was just wondering what size bed do you have. Love it great work Two thumbs up
 
Last edited:

Socalramfan

Senior Member
Supporting Member
TOTM Winner
Joined
Feb 12, 2017
Posts
4,271
Reaction score
5,113
Location
Huntington Beach
Ram Year
2011 Big Horn
Engine
4.7
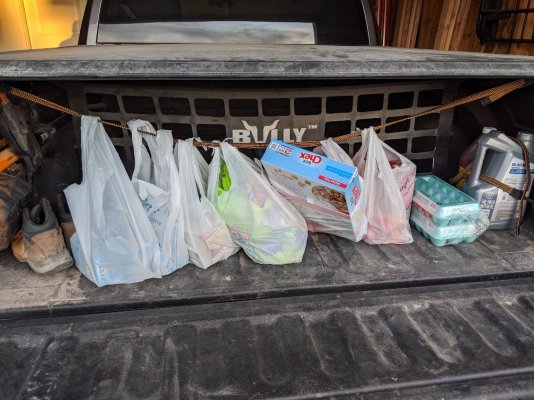
Did you ever do anything with the other side? Great inspiration and job !!!
 
OP
OP
bryce88

bryce88

Senior Member
Joined
Jun 20, 2018
Posts
330
Reaction score
326
Location
Utah
Ram Year
2015
Engine
5.7L Hemi
Did you ever do anything with the other side? Great inspiration and job !!!
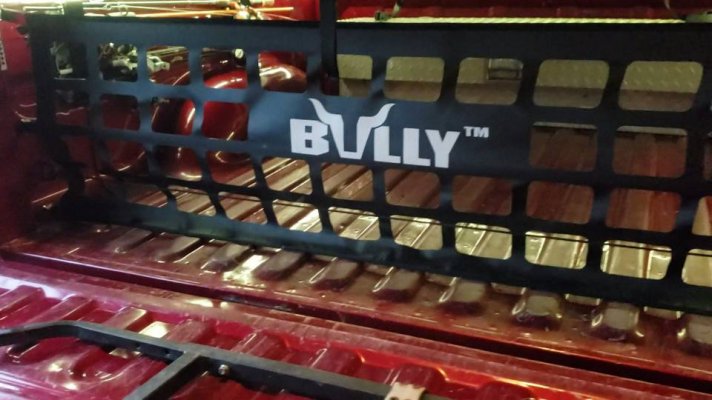
No I didn't. I haven't had a need to mount anything over there, but I did add a tailgate net set in about two feet that holds back things like duffle bags and coolers and I added some attachement points for an adjustable bungee that I use to secure groceries. The nice thing is it all folds up with my tonneau cover when need the whole bed. I can give more details about how this all works if people are interested but it works great! here's how it turned out:
b54174f7fe05ff492a19d2e672cae1ad.jpg

Sent from my Pixel 2 XL using Tapatalk
 

rzims

Member
Joined
Dec 11, 2019
Posts
43
Reaction score
27
Location
san jose
Ram Year
2019
Engine
hemi
very nice work! I've been looking at ideas for mounting a shovel, ax, maxtrax and hi-lift jack and this looks like a great idea.
I was thinking linex'd plywood but the plastic looks good.
Also thinking I didn't need the holes and would just screw the quick fists directly to the plywood.

Thanks for the inspiration and really nice job!
 

Leif_Ram2017

Junior Member
Joined
Jun 25, 2018
Posts
14
Reaction score
1
Location
Seattle
Ram Year
2017
Engine
Hemi 5.7
Any trick to tracing the profile of the wheel well? Did you do just do a little trial and error, eyeballing it, until it looked just right?
 
Top