OlDirtyJohn
Senior Member
- Joined
- Jun 26, 2010
- Posts
- 1,518
- Reaction score
- 50
- Location
- Naha-shi, Okinawa, Japan
- Ram Year
- 2004 Quad Cab 2500 *Sold*
- Engine
- Hemi 5.7
One of my Ball joints went out on me recently. It was popping and squeaking and the boot on the joint was torn. Pretty sure it may have been due to the fact that the coil spring was in there at a weird angle and causing all kinds of problems. So I thought that there couldnt be a better time to replace both ball joints with some aftermarket greaseable ones. Well, after a little digging, i found that my best option would be to just get an entire new upper control arm with balljoint already in it. So anyways, on to the Tutorial. How to replace an upper control arm on a 2WD Dodge Ram (shown is a 2500, should be just about the same for a 1500)
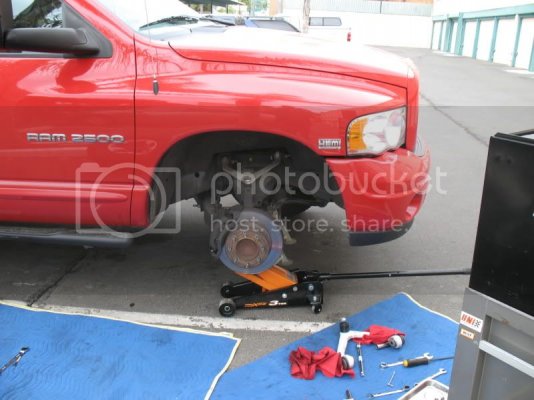
Step #1 - Jack up vehicle, place on stands and remove wheel.
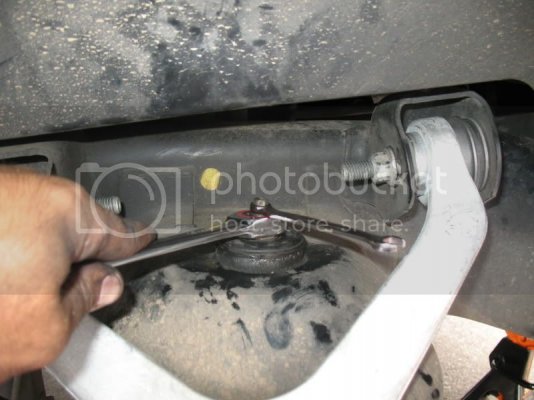
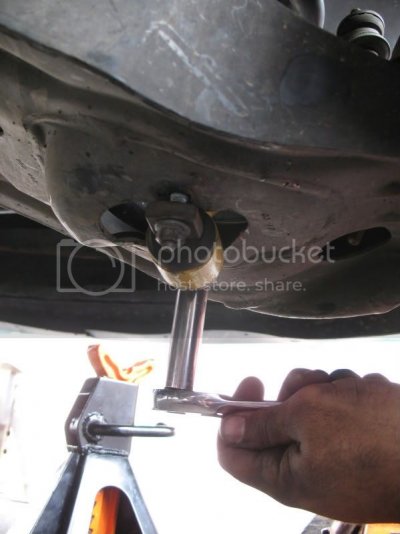
Step #2 - Remove Shock, there are 3 bolts, 1 at the top and 2 at the bottom.
Step #3 - Loosen but do not remove the nut that holds the ball joint in place.
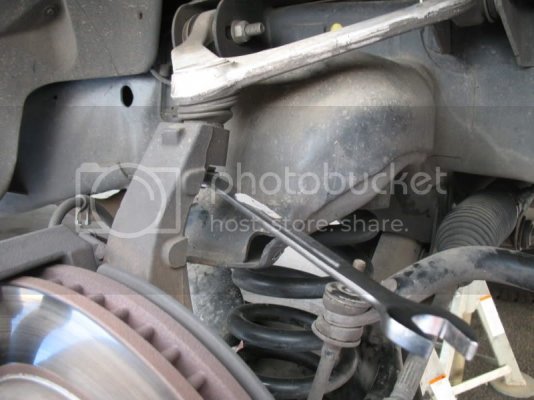
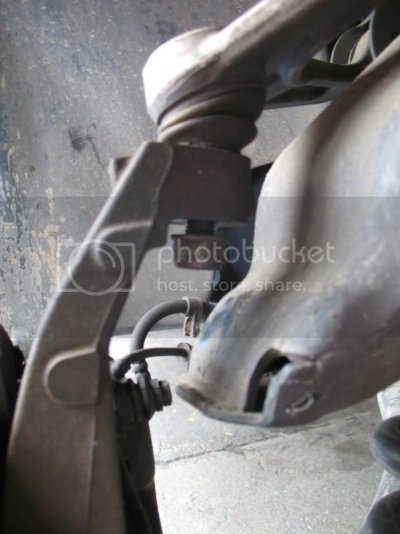
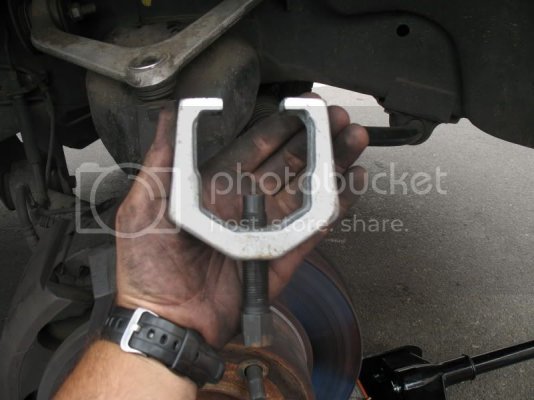
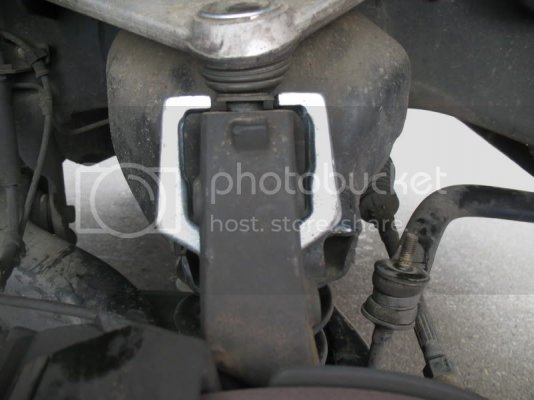
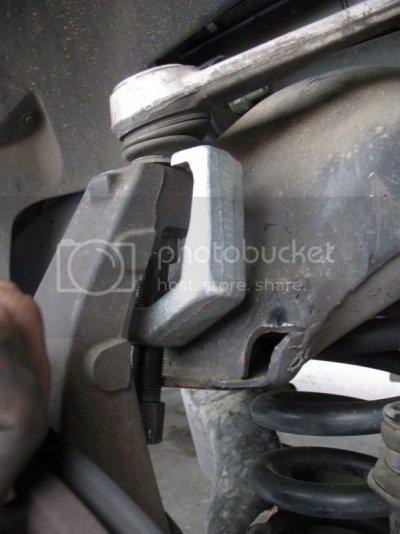
Step #4 - Take the ball joint off the spindle. (This can be done a couple different ways. I prefer to use a Pitman Arm Puller. It can be either purchased or rented from AutoZone for about $14. I never have problems with it even with my 2.5" spacer) To use the Pitman Arm Puller just unscrew the bolt in it most of the way, then place the 2 arms of the tool on top of the spindle, then tighten the bolt until it meets up with the ball joint nut, then just grab a wrench and keep tightening it until the ball joint pops out. trust me, youll know when the ball joint pops out.
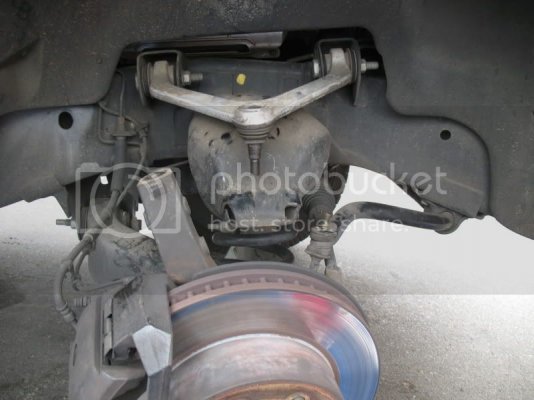
Step #5 - Remove the Control Arm from the vehicle. Keep in mind, the placement of the control arm is one of the things that affects your alignment. It may be wise to mark its location so you can get in the ball park when installing the new one. You may need to get an alignment after the job is done. Its bolted in there pretty tight, I used a cheater bar on the end of my wrench to get the leverage needed to loosen it. And lastly, the bolts are slotted, so dont worry about supporting them while loosening the nuts.
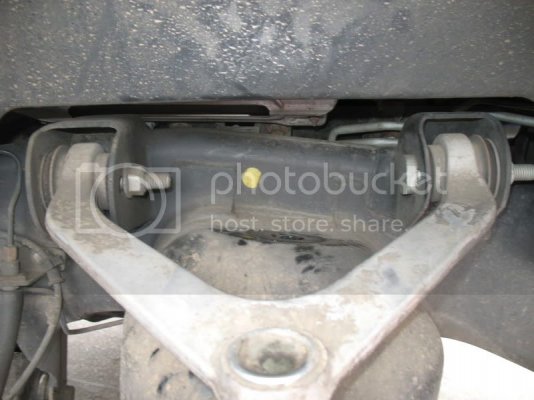
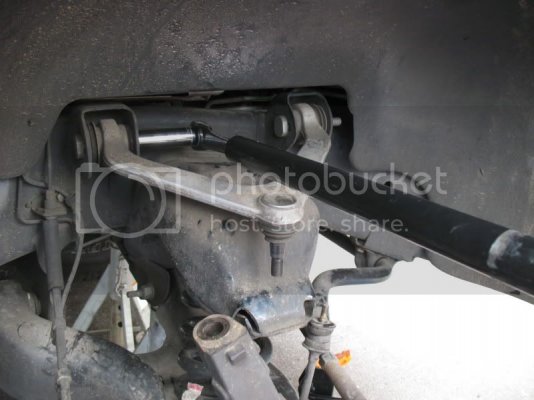
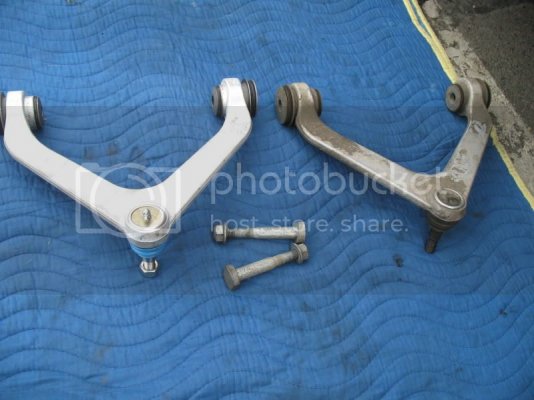
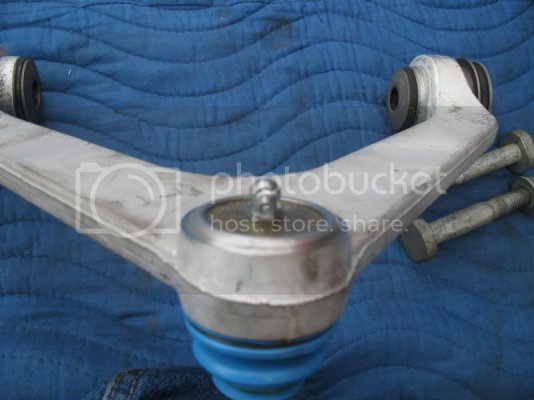
Here is a pic of the old and new arm side by side, and a pic of the new grease point. I got the arm from Rock Auto, it is a MEVOTECH arm with ball joint and grease point already installed. It cost me about $130 an arm, im sure the part is cheaper for those of you with 1500's.
Step #6 - Install the new Upper Control Arm. Its pretty easy, just do the exact opposite of the last step, only with the new arm. Use a grease gun to put some grease in the ball joint, and move it around to spread the grease around inside of it. Be sure to line it up with the marks you made so your alignment doesnt go way out of whack.
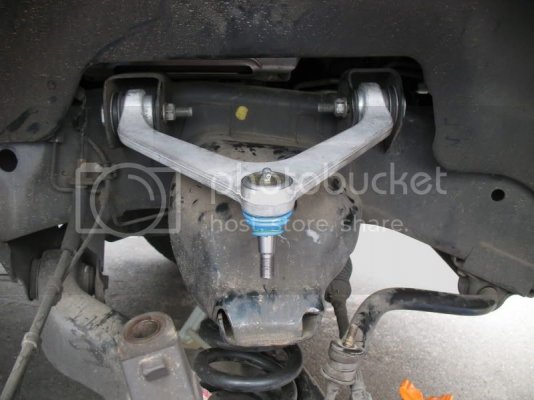
Step #7 - Attach your new Ball Joint to the Spindle. Its as easy as putting the bolt through the hole, then putting the nut on and tightening it. You might notice that the nut on the new arm is bigger than the stock one. I like that, seems like a very good quality part.
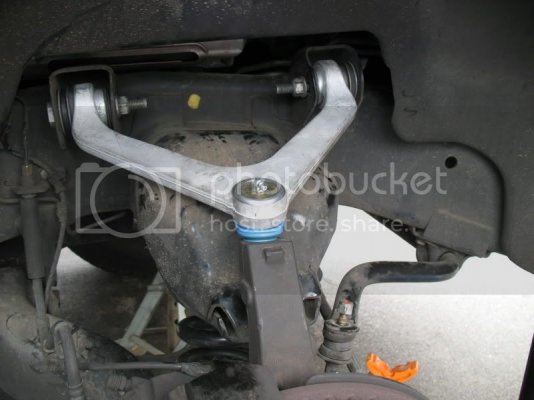
I added some more grease after I got it installed, just to be safe.
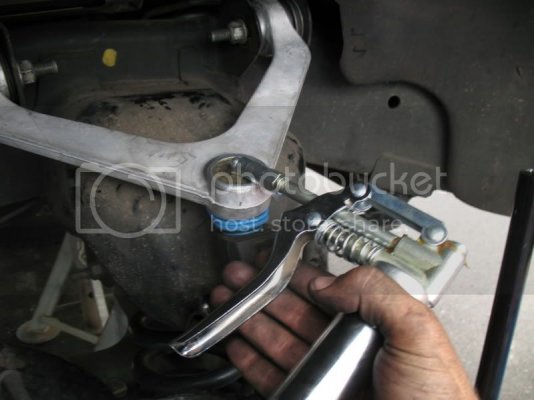
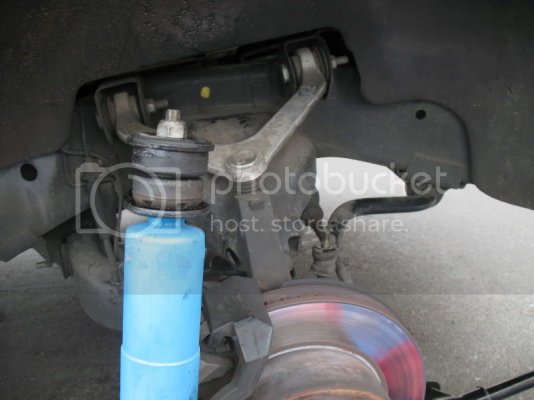
Step #8 - Reinstall the shock. Its just like taking it out, only backwards. There are still only 3 nuts, and they all go back to the same places they came from. Just in case you forgot here is where they are located again.
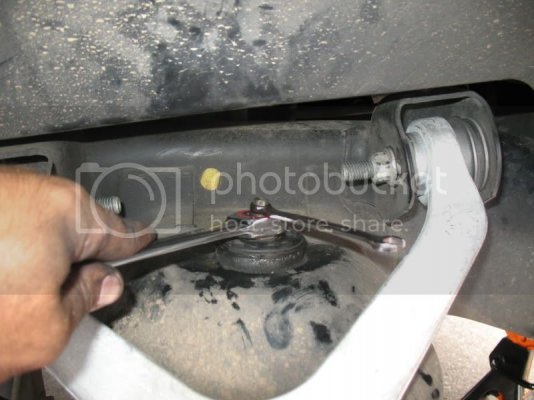
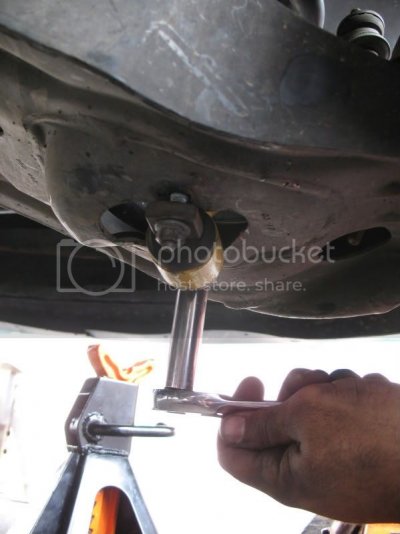
Step #9 - Put your wheel back on, take the vehicle off the stands, and clean up the mess you just made.
Step #10 - Repeat all the above steps for the other side then take it for a test drive. Maybe even go get an alignment done.
All in all, it was a fairly easy job to do. And I like the fact that i can now grease my ball joints. Ive never been too keen on the idea of components that are sealed with grease in them for life.
For you 1500 owners, Rock Auto has the same part for your truck, but it only costs around $50-$60. Lucky you.
-OlDirtyJohn
Step #1 - Jack up vehicle, place on stands and remove wheel.

Step #2 - Remove Shock, there are 3 bolts, 1 at the top and 2 at the bottom.


Step #3 - Loosen but do not remove the nut that holds the ball joint in place.


Step #4 - Take the ball joint off the spindle. (This can be done a couple different ways. I prefer to use a Pitman Arm Puller. It can be either purchased or rented from AutoZone for about $14. I never have problems with it even with my 2.5" spacer) To use the Pitman Arm Puller just unscrew the bolt in it most of the way, then place the 2 arms of the tool on top of the spindle, then tighten the bolt until it meets up with the ball joint nut, then just grab a wrench and keep tightening it until the ball joint pops out. trust me, youll know when the ball joint pops out.


Step #5 - Remove the Control Arm from the vehicle. Keep in mind, the placement of the control arm is one of the things that affects your alignment. It may be wise to mark its location so you can get in the ball park when installing the new one. You may need to get an alignment after the job is done. Its bolted in there pretty tight, I used a cheater bar on the end of my wrench to get the leverage needed to loosen it. And lastly, the bolts are slotted, so dont worry about supporting them while loosening the nuts.


Here is a pic of the old and new arm side by side, and a pic of the new grease point. I got the arm from Rock Auto, it is a MEVOTECH arm with ball joint and grease point already installed. It cost me about $130 an arm, im sure the part is cheaper for those of you with 1500's.


Step #6 - Install the new Upper Control Arm. Its pretty easy, just do the exact opposite of the last step, only with the new arm. Use a grease gun to put some grease in the ball joint, and move it around to spread the grease around inside of it. Be sure to line it up with the marks you made so your alignment doesnt go way out of whack.

Step #7 - Attach your new Ball Joint to the Spindle. Its as easy as putting the bolt through the hole, then putting the nut on and tightening it. You might notice that the nut on the new arm is bigger than the stock one. I like that, seems like a very good quality part.

I added some more grease after I got it installed, just to be safe.

Step #8 - Reinstall the shock. Its just like taking it out, only backwards. There are still only 3 nuts, and they all go back to the same places they came from. Just in case you forgot here is where they are located again.


Step #9 - Put your wheel back on, take the vehicle off the stands, and clean up the mess you just made.
Step #10 - Repeat all the above steps for the other side then take it for a test drive. Maybe even go get an alignment done.
All in all, it was a fairly easy job to do. And I like the fact that i can now grease my ball joints. Ive never been too keen on the idea of components that are sealed with grease in them for life.
For you 1500 owners, Rock Auto has the same part for your truck, but it only costs around $50-$60. Lucky you.
-OlDirtyJohn

