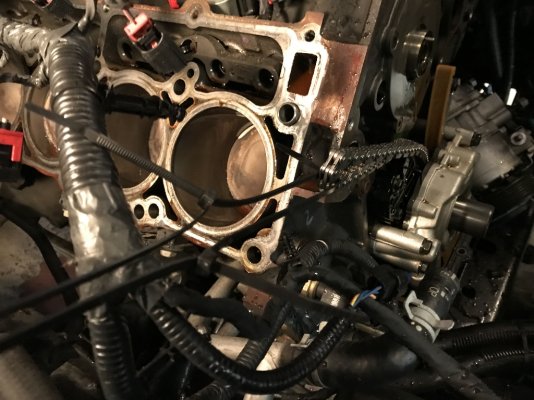
How-To: 4th gen hemi cam installation

Disclaimer: Links on this page pointing to Amazon, eBay and other sites may include affiliate code. If you click them and make a purchase, we may earn a small commission.

charonblk07

Senior Member
Joined
Mar 14, 2013
Posts
4,056
Reaction score
2,076
Location
Calgary, Ab
Ram Year
2009
Engine
F1-A forged 349ci
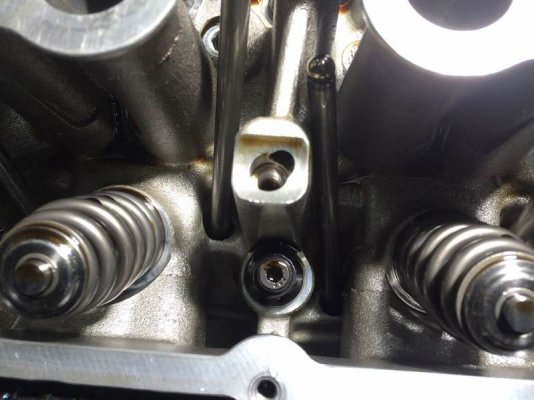
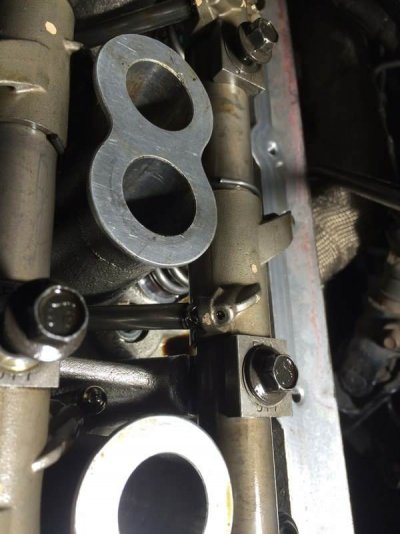
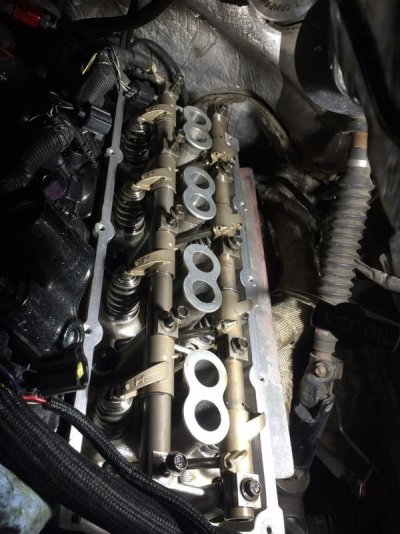
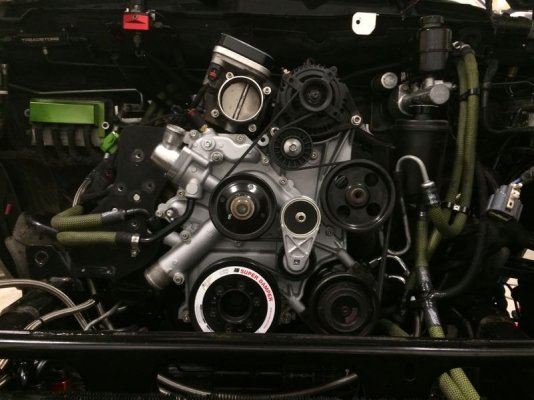
Since cams are becoming more available for the VVT hemi engine, regardless of whose cam you choose, here is the how-to of doing the cam swap for the 4th gen trucks. This is honestly a job that can be done by anyone with basic handtools and basic mechanical skills. I did my first cam swap using a similar guide from the LX cars on my 2007 and I did it in a friend's garage.


This How-to represents legally binding and technical advice, so anything you do that damages your engine will of course be entirely my fault and I will be entirely liable for the full cost of replacing your whole truck. [/sarcasm]

Tool requirements:
21, 18, 15, 13, 10, 8mm sockets
3-jaw pulley puller (can be rented from a parts store)
Air tools can make this easier but are not required; I don't use them myself.


New parts required: cam bolt, crankshaft bolt
While doing this swap it's a good time to do an underdrive pulley swap if you have the parts to do it, saves going back in and doing it again.

I have taken some liberty with this guide since I have done a 6.1L intake swap and use an ATI balancer since I will be running 18psi of boost on this engine, so some things will be slightly different or no photos to document. I will place a list of all the torque specs required in the very last post as I didn't have them in front of me while writing this and it will all be in one location for easy reference.


To get started you will disconnect the battery and the engine needs to be cool before starting. Remove the front grille by removing the 4 10mm bolts/screws holding it to the top of the radiator cross member. If you have active shutters, unplug the system, and pull the grille forward and down to unlatch the bottom of the grille from the lower mounts. Place rags or tape on the front bumper if it's painted to save the paint.


Drain the radiator by removing the radiator cap and then opening the petcock on the bottom of the radiator. Use an 18mm socket to open the petcock, slowly, you don't want to pull the petcock all the way out or you'll have a big mess on your hand. Drain this into a clean pan as you can reuse the coolant if it's still in good shape, just cover the container so no dirt/bugs end up in it.
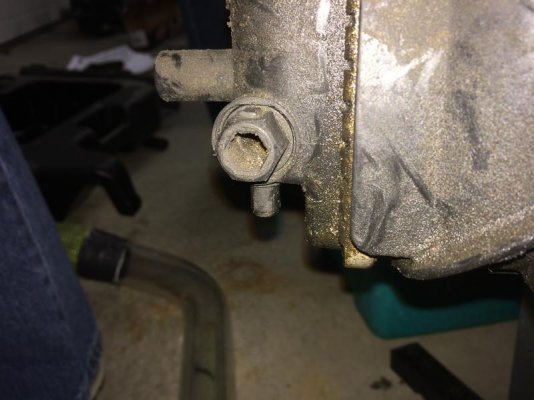
GUiADfp.jpg

Once the rad is drained as much as possible pull the upper and lower rad hoses using a pair of slip-joint pliers to make your life easier. Pull the hoses and drain the fluid left in them, more will come out of the lower rad hose, be ready to catch this. With the rad drained, disconnect the transmission cooler and pull the lines; use a 10mm to disconnect the hoses.
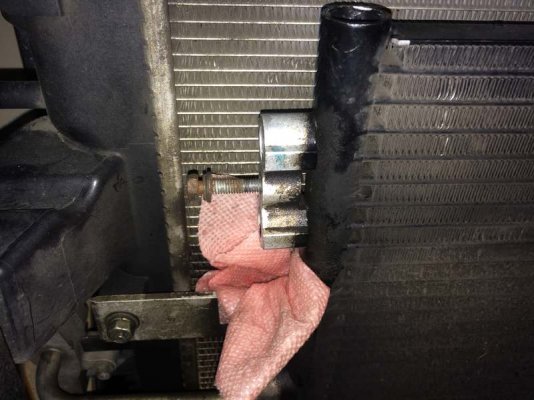
kDcEhbc.jpg

Depressurize the A/C lines if you have A/C. Keep in mind that the fluid is toxic, you can either have it recovered by a certified A/C facility, or be horrible to the environment and discharge to the atmosphere, just don't do it in an enclosed garage where you will be breathing the vapours, I encourage you to have the system discharged by a certified shop. My system has been depressurized for 2 years now so I just pulled it apart.
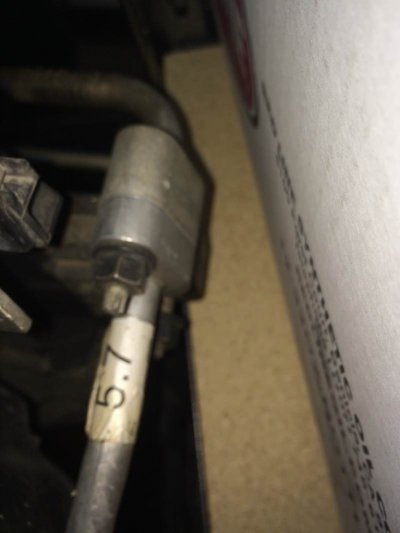
A2PgogO.jpg


If you still have the factory clutch fan you will need to remove the clutch fan assembly before you can remove the radiator, this is simple enough to do and there are lots of how-tos if you google it but here's a good one that shows the e-fan conversion with the required steps to remove the clutch fan and shroud. ** EDIT ** the photos in the link are broken until we find a photobucket work around.
http://www.ramforum.com/f75/how_v6_efan_conversion-17595/


With the coolant drained, A/C disconnected, and trans cooler lines disconnected you can now remove the radiator. There are 2 bolts that hold the rad in place, these use a 13mm socket on the upper crossmember, one on either side of the radiator, they are tucked into the radiator support but are fairly easily accessed with a short extension.
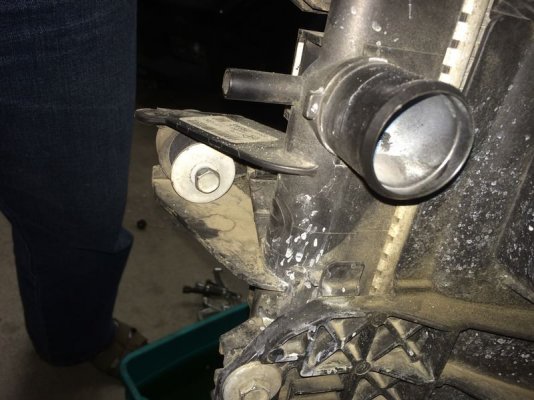
xXrLdoh.jpg

With the radiator disconnected it will lift straight up and out of the engine bay. More coolant and trans fluid will come out, so place the radiator on a flat surface so it doesn't leak out or into a container.
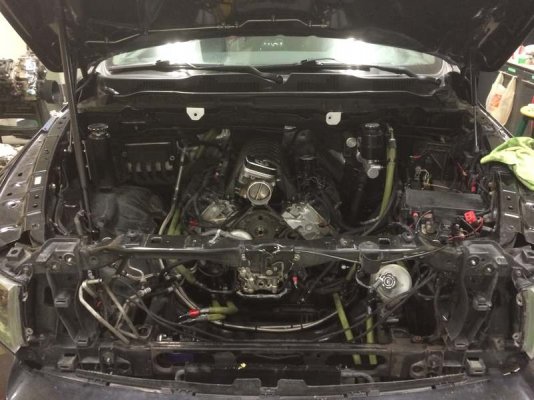
7jVTltL.jpg

With the rad removed you can now easily access and remove the water pump, timing cover, and harmonic balancer. Start by removing the harmonic balancer using a 3-jaw pulley puller. There are 3 lugs on the back of the inside of the pulley but my puller does not fit on those lugs so I just flipped the puller over and used it on the outside ring, I've done this on older trucks with no issue. I loosen the crank bolt first and unthread it several threads before I begin using the pulley puller and as I bottom the puller out just loosen it off and unthread the crank bolt more, repeat until the balancer comes off. If you have a puller with the tapered rotating end then remove the bolt completely and use the tapered end right on the crankshaft snout.
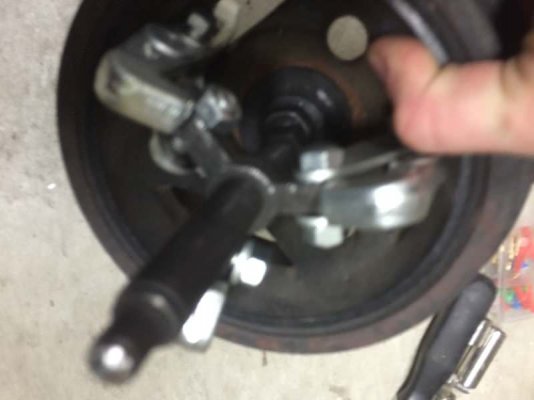
K20i3Tv.jpg

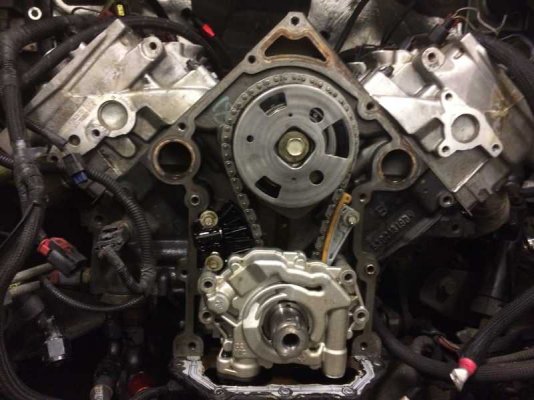
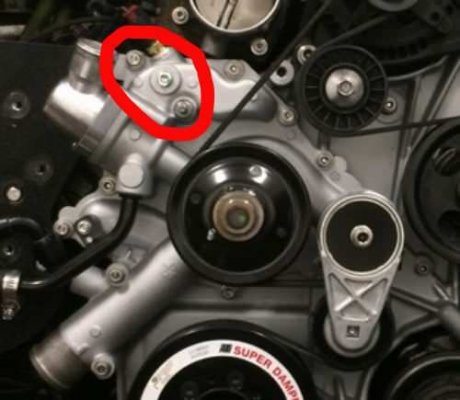
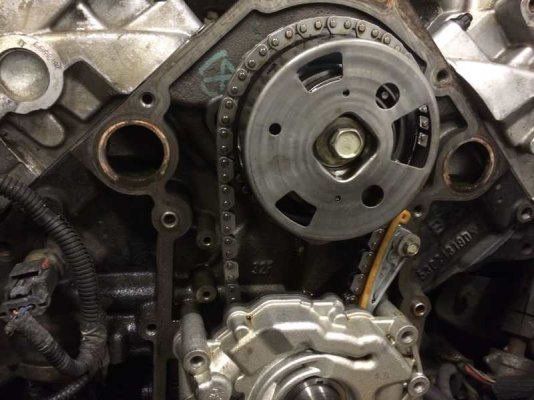
With the balancer off you can now remove the water pump and timing cover. Remove the alternator, power steering pump, and A/C compressor. All bolts are a 13mm socket. Remove the water pump first then the timing cover, you may need a pry bar to help get the timing cover off. Set the power steering pump (if equipped) off to the side, don't disconnect any hoses, just set it off to the side. If this is your first time ever doing this, mark the crankshaft position sensor, coolant temp sensor, and any other sensors you disconnect with masking tape. Use a matching number system, so write a 1 on the tape on the sensor and a 1 on the tape on the plug, this ensures you put everything back to where it needs to go. With the accessories, water pump and timing cover removed you will be looking at the timing set shown below.

**Note** there are several lengths of bolts used in the timing cover, if you don't have a good memory, mark these for which hole they go in, I believe there are 5 different lengths used: 1 common short length, 1 common long length, a single extra long bolt by the water pump, an extra long bolt with a threaded stud on it, and the long bolts used for the alternator and A/C compressor.
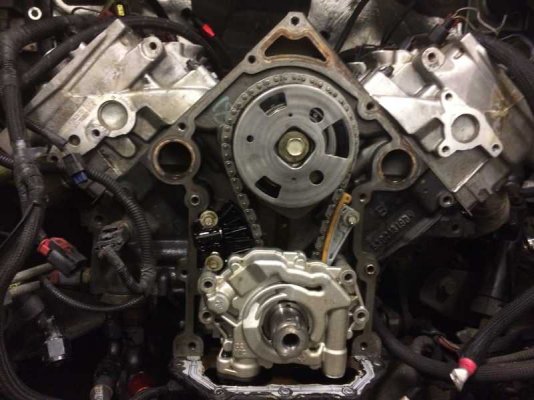

rsy4wVU.jpg

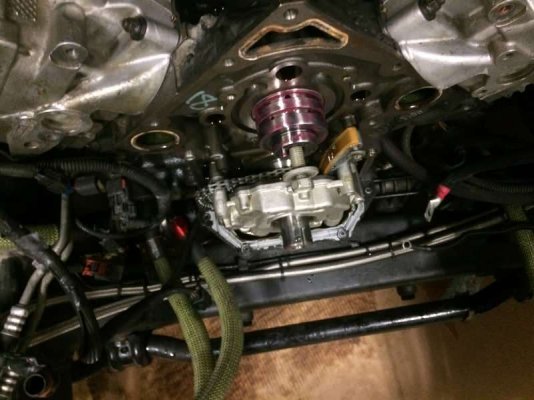
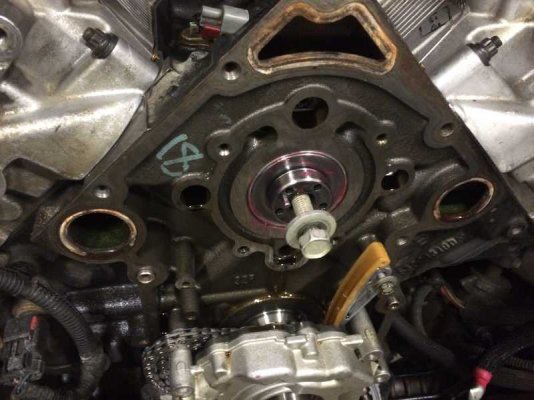
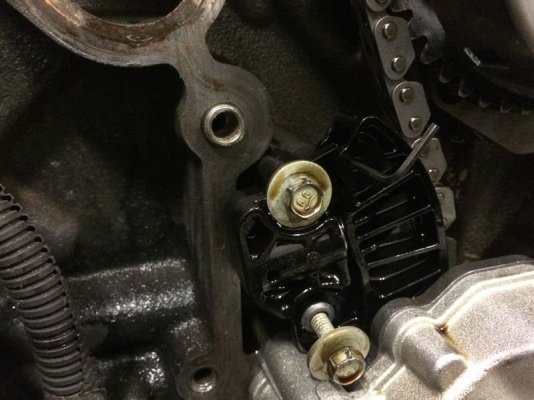
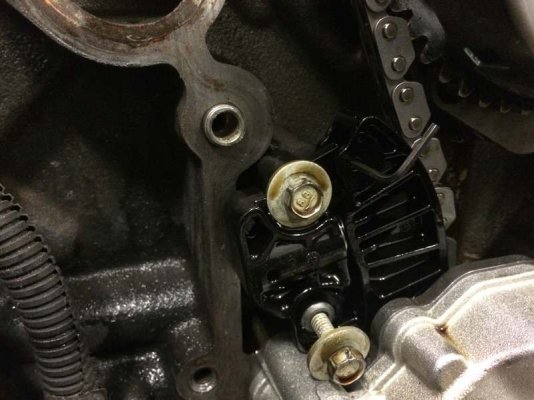
To remove the timing set you need to remove the cam phaser assembly, you first need to remove the tensioner; this can be done by pushing it back and putting a small allen key into the hole in the tensioner to hold it in place. Then unbolt it with a 10mm and set it aside.

See post #4 for the head removal and an alternative and BETTER way to maintain the timing without having to go through the headaches of trying to reset the timing set from scratch.
pfZv5pU.jpg

Mc0poL5.jpg

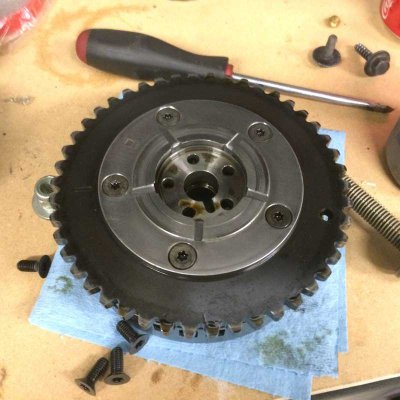
After the tensioner is removed you can now remove the phaser assembly. BE VERY CAREFUL with this, you do not want to drop it as it WILL explode into a bunch of pieces!!!! With the cam bolt removed, carefully remove the phaser assembly, it will pull right off with the chain, just let the chain hang down onto the oil pump.

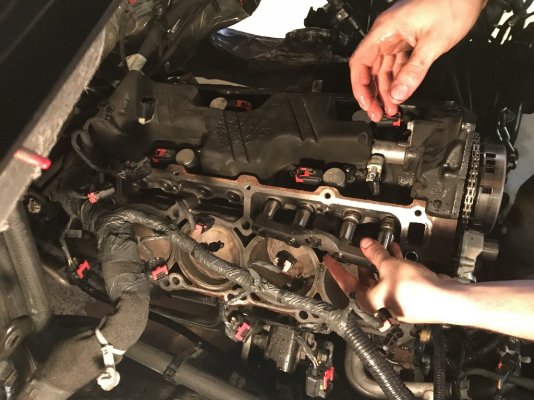
With the phaser assembly removed you can now move up to the heads to remove the rocker arms. I have always removed/installed cams with the heads installed and never have I had a lifter fall into the oil pan with the modern hemi engine. Pull the coil packs off using a 10mm socket and set them aside and remove the valve covers by removing the 10x 8mm bolts per cover. Once these are loose the cover will just pull off, the passenger side can be a bit of a pain because of the factory wiring harness but lift it up and the cover will pull out. Check the gaskets on the covers, there is the 4 around the spark plug towers and the main gasket, they must be fully seated in their grooves. I've never had issues with them, but you should always check them when you get the chance.
ZyqHJB0.jpg

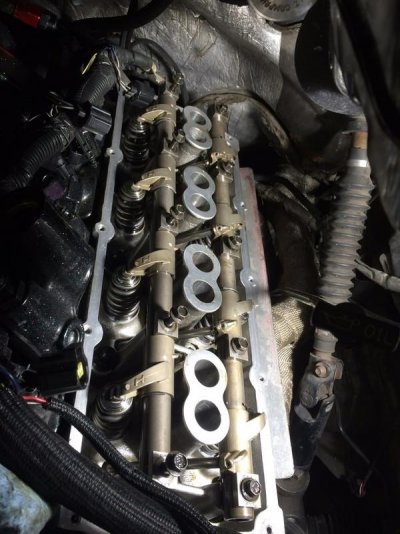
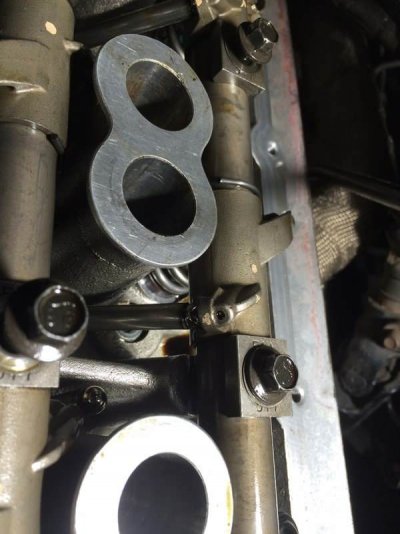
With the covers removed you are now looking at the valve train. You need to remove the rocker rails by removing the 5 bolts on each rail and you must do it without bending the rail, which is very simple to do: start in the middle and loosen the bolt slightly, then the middle two, then the outer two, repeat this process in stages until there is no tension left in the rocker bolts. When the bolts are loose remove the rocker arm and store it where it will stay clean, I flip the valve cover over and store the rails and push rods in it so I keep everything sorted for which head everything goes into.
uHuaBdM.jpg

With the rails off, remove the push rods, note, the longer rods are the exhaust and the shorter rods are the intake. If you want, store them in a way that you know exactly where they came from. I use a piece of card board with a hole in it and it notes which cylinder they came out of.
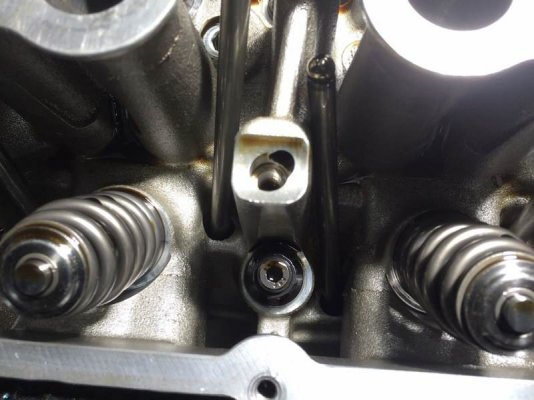
YxqWpCN.jpg

With the rocker arms and pushrods removed you can now begin the cam removal. You need to remove the thrust plate which covers the cam, remove the 4 torx bolts from the cover and remove the cover.
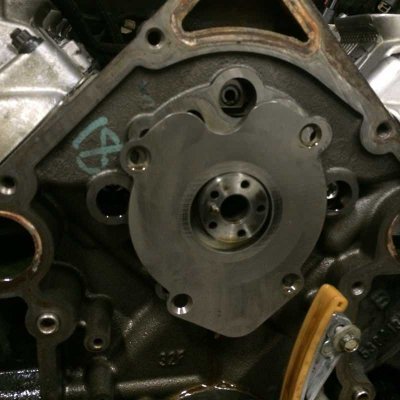
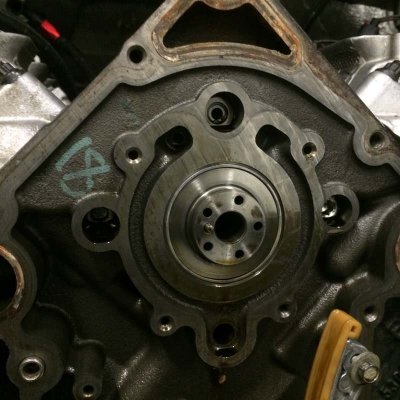
HyAqpVT.jpg

w3pUuFJ.jpg

Reinstall the cam bolt loosely to give you leverage and rotate the cam several times to allow the lifters to be pushed away from the cam's circle.
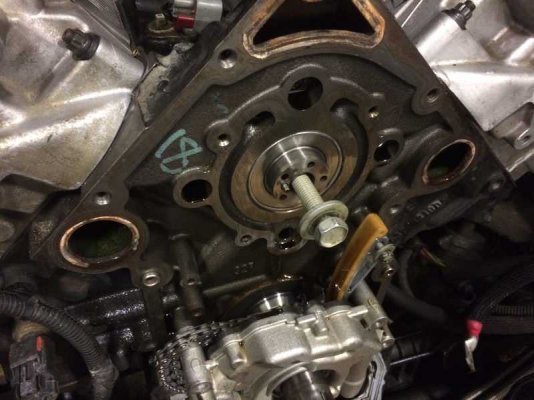
0Cny3g8.jpg
 
Last edited by a moderator:
OP
OP
charonblk07

charonblk07

Senior Member
Joined
Mar 14, 2013
Posts
4,056
Reaction score
2,076
Location
Calgary, Ab
Ram Year
2009
Engine
F1-A forged 349ci
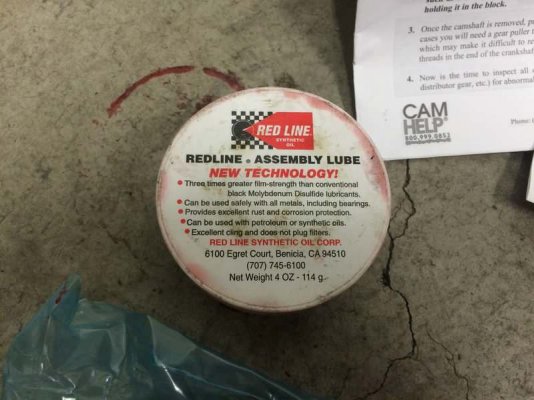
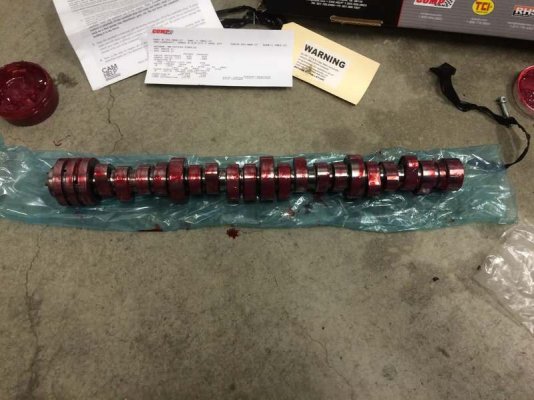
Prepare your new cam that’s going in by slathering assembly lube all over the cam, be generous, this is what protects the cam during installation and once you start firing up the engine from wearing the bearings.


z28BuNy.jpg


FjkxiO6.jpg


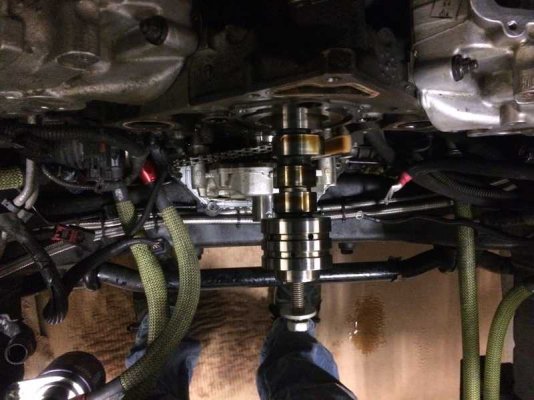
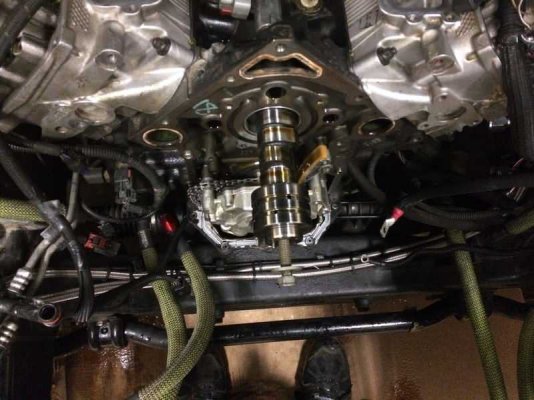
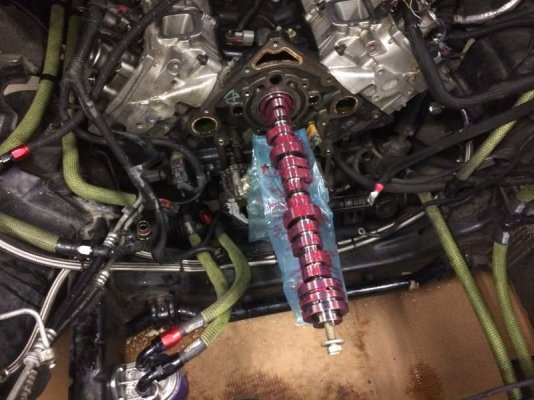
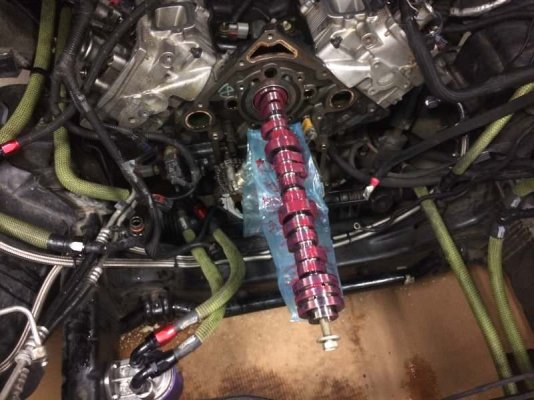
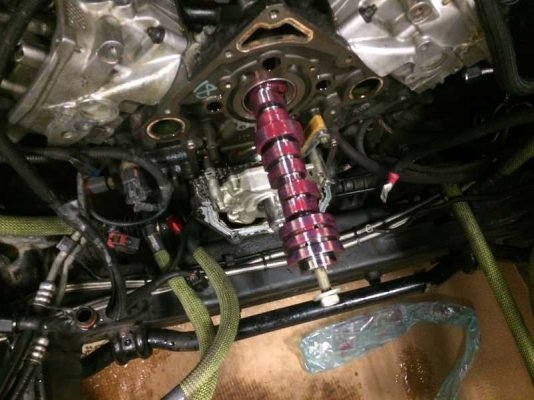
Once you’ve spun the cam several times, pull the cam out a little bit; it should come out several inches before a cam lobe contacts one of the cam bearings. Do this gently, but you do need to give a bit of tug to get started as the fluid barrier between the bearings and cam does need to be broken.


y7jz3je.jpg


After the first lobe has stopped against the bearing (that you can’t see) just rotate the cam while pulling gently back and the lobe will lift the cam over the bearing without damaging anything. Remember, this needs to be done gently, don’t get rammy or use any tools.


J04L8WR.jpg


Repeat these steps every time the cam stops until the cam is almost all the way out.


EXRlsnN.jpg


Once you reach this point, support the cam at both ends and remove it completely. And take your new cam and start installing it. The less time you spend with the lifters unsupported decreases the chance of one dropping out of the holder. It’s a very rare occurrence but it is possible if the holder is worn; if this happens you now have to drop the oil pan and remove the heads to get it out and reinstalled. One person I know bought a bunch of telescopic magnets and attached them to the lifters through the head so they couldn't drop out.


xPVc4sp.jpg


Reinstallation is the opposite of the removal. Push the cam in and use the cam bolt in the new camshaft to give you leverage. You need to push in, turn, and move the head of the cam around to get the lobes to move over the cam bearings. Be gentle. Have I said that enough yet? There are bearings you don't want to damage and if you have trouble getting it in do NOT get rammy and grab the hammer!


94glEcZ.jpg


Uy8cVXp.jpg


Once the cam is almost all the way into the block, push it gently all the way in until the cam’s head is flush with the block, you don’t want to shove it as far in as possible, and NEVER use a mallet, hammer, or deadblow to get it all the way in because you can push out the rear cam seal on the back of the engine, and that’s a royal PITA to fix, so do it gently and take your time. Reinstall the thrust plate with the tapered torx bolts and torque the bolts.


AdVcleA.jpg


The cam is now in and you can move to the cam phaser if you are installing the limiter or lock. If you do not need a limiter or lock then move right down to reinstalling the timing set. Place the phaser on a flat surface with the sprocket facing up and loosen one of the torx bolts at a time and snug it back up. All you are trying to do is loosen the bolt so it is easier to remove once the spring lock is installed. DO NOT REMOVE ANY BOLTS FROM THE PHASER just break the bolt’s tension and snug it back up.


7w8Qzvk.jpg


There is a great youtube video for the swap, I recommend watching it for this aa I’m not going to write anything else about this swap because the video does a great job. My only recommendation is to loosen the bolts first so you’re not trying to do it with the phaser balanced on the spring lock.


https://www.youtube.com/watch?v=QkiByq5Tv2A


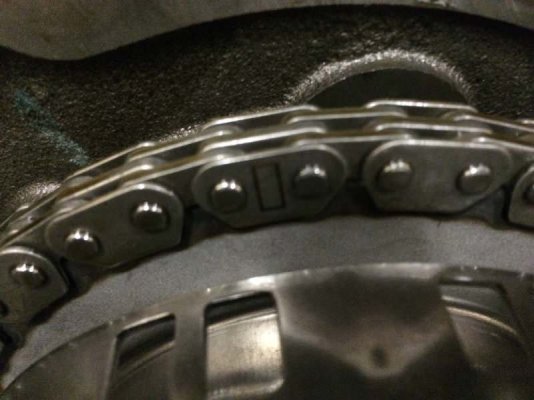
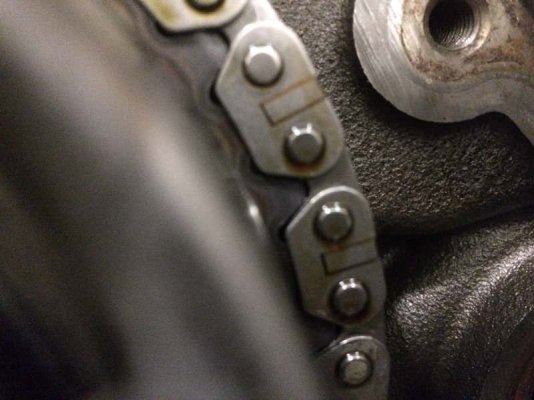
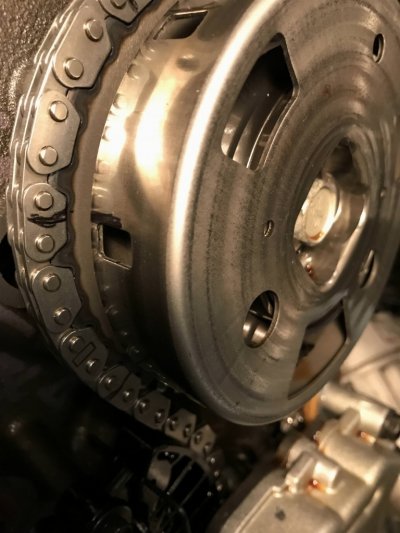
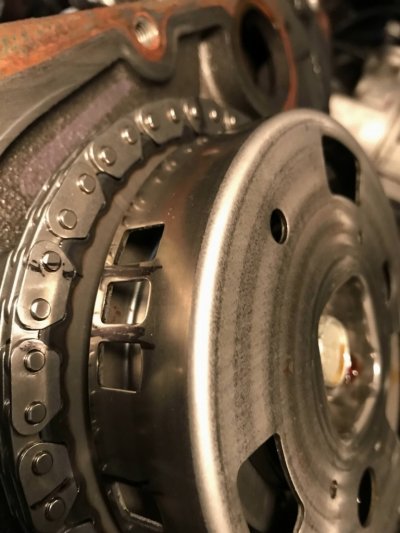
With the phaser complete you can start reassembling the timing set. The timing chain has 2 sets of markings, one link has a line on it, and the other end has 2 marked links. Here’s a decent link for some information


HEMI® 5.7L Engine Timing Chain Replacement


mQR0BDC.jpg


f8b0Wpu.jpg


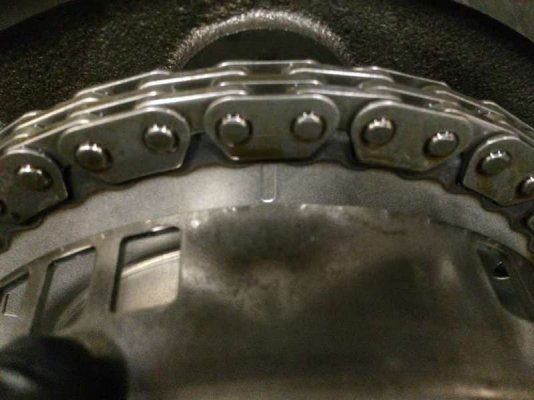
These links are used to mark the timing set on the gears. The phaser has a line on the sprocket which must be at the 12 o’clock position. The two markings on the chain go on either side of the cam sprocket’s mark.


GvEPx0H.jpg


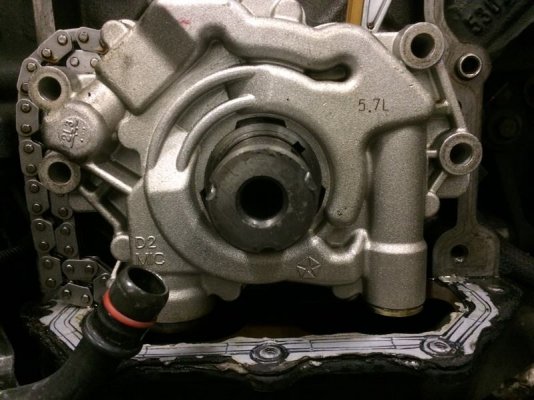
And since we didn’t remove the oil pump it will be hard to see the crank gear marking but it has one tooth with a dimple drilled into one tooth. That tooth must be at the 6 o’clock position however there’s a nice cheat and you can rotate the crankshaft over until the keyway is pointed at the 5.7L engraved on the oil pump. The marked single timing chain link goes onto the dimpled tooth.

If you have trouble lining up the lower timing mark because the oil pump is in the way, turn the crankshaft over until just before the 5.7L marking and place a long 1/4" extension into one of the #1 cylinder spark plug holes so it rests on the top of the piston then continue turning it over until the extension stops moving out of the hole and begins moving back into it. You just need to get the piston to top dead center which is right when the piston is at the highest point in its travel.


FAQDB6R.jpg
 
Last edited:
OP
OP
charonblk07

charonblk07

Senior Member
Joined
Mar 14, 2013
Posts
4,056
Reaction score
2,076
Location
Calgary, Ab
Ram Year
2009
Engine
F1-A forged 349ci
Once you have the timing gear all set in place with the double marked links on either side of the camshaft sprocket mark at the 12 o’clock position and the marked single chain link on the crankshaft marked tooth at the 6 o’clock position you can install the new camshaft bolt and torque it. I will place a table in the next post with all the required torque specs

rsy4wVU.jpg

With the cam phaser back in place you can reinstall the chain tensioner, torque it, then remove the allen wrench holding the tensioner off the timing chain and the chain should tighten up. You are now done with the internal work. Open a beer or a pop/soda and marvel at your handywork for a few minutes.

pfZv5pU.jpg

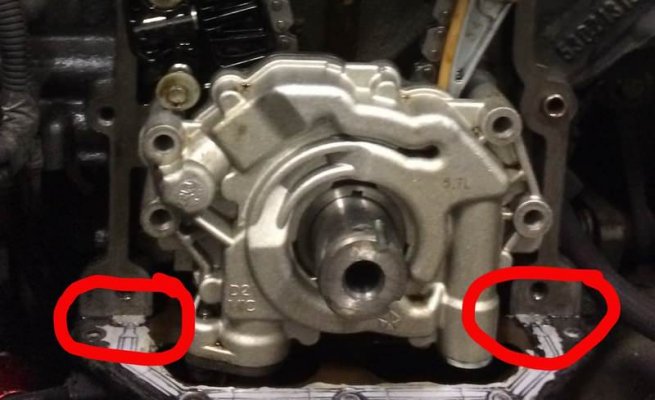
Reinstall the timing cover remembering to add a small amount of RTV to the corner where the block, oil pan, and timing cover meet. There are several different length bolts for the timing cover and if you didn't mark or remember where they are from then you will need to experiment a bit to get them back into place properly. The 2 very long bolts go into the holes by the water pump outlet, the short bolts are only for the water pump to timing cover holes; these won't thread into any other hole as they are too short, and the mid-length bolts are for the timing cover to block holes with some of them going through the water pump. There is one bolt with a 15mm head but has a threaded stud and this goes in the deep hole right below the allen key plug hole next to the thermostat housing.

F9GUdJM.jpg

With the timing cover back in place you can get the pushrods and rocker arms back in. The same cautions need to be taken when installing the rocker arms, you don’t want to bend a rod, and you definitely don’t want to put a push rod in an oil gallery hole, which is fairly easy to do if you’re not paying attention. Remember, the exhaust rods are the longer ones and the intake rods are the shorter ones.

Start by placing the pushrods into their holes. The exhaust holes are closer to the exhaust side of the head, the intake holes are closer to the intake side of the head.
They are close together so ensure you get them in the right hole and right below each hole is an oil gallery which the rod can easily slip into if you’re not careful. Remember, the exhaust rods are the longer ones and the intake rods are the shorter ones.

YxqWpCN.jpg

With the rods in place start with the exhaust rocker arm, it’s the easy one. A trick I have is to place a dollop of assembly lube on the end of the push rod to hold it against the rocker arm. Place the rail onto the towers and tuck the pushrod into the cup of the rocker arm. Luckily this side stays quite easily. Begin tightening down the rocker arm starting in the center until the bolt touches the retainer then the middle then the outside. You’ll notice one side of the rocker arm will most likely close right flat and the other will have resistance, this is normal. Just tighten down the rocker arm keeping in mind that you want to gradually get the whole arm down as in line as possible so don’t crank the easiest one down tight then go to the other end and bring it all the way tight; this is how you snap rocker arms when they start working under load.


I will note that you should make sure the flat part of the rocker arm is sitting directly on the top of the valve inside the spring while everything’s being set into place.

uHuaBdM.jpg


The intake arms are a bit more of a pain but if you take your time it takes no real hassle. The problem with these is the rocker arms don’t hold the rod in place all the time so they continuously drop out. If you have a helping set of hands to hold the rods in place great, but I’ve never had them so I just have to keep popping the rods back into the rocker arm cups. You follow the same procedure to get the rocker arms into place, just keep checking the rod hasn’t fallen out of the cup while the arm is being tightened into place.


I have an older set of rocker arms which is why mine have an "I" stamped into the intake arms but you can't get them backwards as they will not line up with the valves if you put the intake rocker onto the exhaust side.


With the rocker arms in place, loosen the bolts slightly and then torque everything into place. Loosen them just a bit so you get an even torque all the way across and to ensure you didn’t over tighten anything while you were loading the rocker arm.


ZyqHJB0.jpg


Reinstall the valve cover remembering to check the gaskets around the spark plug holes and the perimeter to ensure that everything’s in its proper groove. Tighten the valve cover into place with an 8mm socket, I've never torqued the valve covers as I just make sure they're snug using a 1/4" ratchet. I like to follow the same tightening pattern as the head bolts, I start with the center two then the middle four then the outside four. Torque to spec.
Replace the coil packs. You can add some dielectric grease to the top of the spark plug if you’ve never done it and tighten the coil packs down. I use a 1/4" ratchet and just go until snug, I've never torqued a coil pack cover.


To install the crankshaft pulley use the old bolt, heat up the snout of the pulley with a heat gun on high for 10-15 minutes and slide the pulley onto the crankshaft as far as it will go then using the old bolt thread it in as far as it will go. Use a ½” ratchet or breaker bar to turn the crank bolt into the snout of the crankshaft. Don’t use an impact or air tools to do this as you can cross thread the bolt and then you’re replacing the crankshaft. If the crankshaft starts to turn I stick a pry bar in the crank pulley and prop it against the front crossmember to stop the pulley from spinning. There are two flat spots on the back of the pulley and if you have a large enough spanner/crescent wrench you can use those and prop against the water pump pulley. When the pulley is fully seated remove the old crank bolt and install the new one, torque it down, propping the pulley as before.

Reinstall the water pump, and all other accessories. Check all hoses prior to continuing and replace any that are worn, cracked, show signs of leaks, or if you just want the engine to look all shiny and new again. Remember to plug all the labelled plugs back into the appropriately labelled sensors.


Here is the timing belt routing if you don’t remember.

NfddLnW.jpg

Place the radiator back into place making sure the rubber radiator mounts sit into the brackets on the front frame and tighten the two mounting bolts down. I’ve never torque these, I just tighten them with a 3/8” drive ratchet until there’s a little bit of tension and the rubber on the mounts start to squish, it’s not going anywhere at this point. Plug the fan back in.


Install the upper and lower rad hoses and fill the rad with fluid. Use the allen key hole on the water pump to let the air out of the water pump. Once coolant starts coming out of this hole, put the plug back in and tighten it. Always put either Teflon tape or paste on this before reinstalling.

tgTfAe5.jpg


Last edited:
OP
OP
charonblk07

charonblk07

Senior Member
Joined
Mar 14, 2013
Posts
4,056
Reaction score
2,076
Location
Calgary, Ab
Ram Year
2009
Engine
F1-A forged 349ci
Reinstall the air box, and any other accessories you removed.

***IMPORTANT***


Before starting or doing anything else!!!!


Do an oil change!!! Coolant will be in the oil pan from removing the timing cover.

After the oil change is done, pull the fuse for the fuel pump; use the lid of the fuse box to find which one it is. Reconnect the battery and start the engine. The starter will begin turning over the engine but since the fuel pump isn’t running the engine won’t start. Run the starter for 20-30 seconds, this will push oil through the entire engine so you don’t start it bone dry. After 20-30 seconds, turn the truck off, replace the fuel pump fuse.

Upload any cam tunes you have and then fire up the truck and enjoy your new power.


Run the engine for several minutes until the thermostat opens and follow the normal engine/radiator burping procedure to remove any trapped air and refill the coolant until everything's full.


Torque specs:


Cam bolt- 90ft-lb
Timing set tensioner/slider bolts- 21ft-lb
Rocker Shafts- 195 in-lb
Crankshaft bolt- 195ft-lb
Oil Pump bolts- 21ft-lb
Oil Pan bolts- 9 ft-lb/108in-lb
Timing Cover bolts- 21ft-lb

If you decide to remove the head to check/replace lifters here are some additional torque specs you'll need:

Main Cylinder Head bolts- 1) 25ft-lb 2) 40 ft-lb 3) 90*
Small Head bolts intake side- 1) 15ft-lb 2) 25ft-lb
Intake manifold bolts- 9 FT LBS
Lifter hold downs- 9 ft-lb/108in-lb

**UPDATE**

After doing another cam swap on a friend's truck where we replaced the lifters with the Hellcat ones, I was able to get pics of the head and lifter removal that I didn't get when I built this how-to as I didn't remove the heads.

Once you have the valve covers and rocker arms removed, following the directions above, you need to remove the heads from the block. There are 2 sets of bolts, 5x 10mm on the inside of the cylinder valley, and 10x 15mm head bolts. Now, some people will say you can reuse these head bolts, and if you're doing this on a budget then go far it, but you really should replace these with at least new OEM or even better use ARP head bolts or studs, it's your call.

Kurtis%20Image%201_zpso9nwgs3a.jpg


Kurtis%20Image%202_zpsq3tlc8nc.jpg


With all the head bolts removed, pull the head off the block. If you didn't pull the block plugs to drain the coolant out of the block then expect there to be coolant when you crack the head off the block. If there's coolant, just soak it up with rags or towels before reinstalling everything.

Remove the head gasket, you must replace this with a new one, either OEM or aftermarket. I like Cometic gaskets and it's what I used on my heads since I could get a thicker one and drop my compression ratio a bit more.

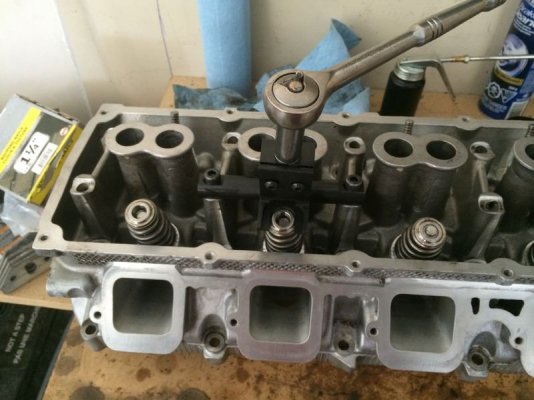
If you need to swap springs for your cam, I highly recommend getting the hemi-specific spring compressor, the CompCams one was about $125 but has been worth it for me. A tip, before putting the compressor on, hit all the springs with an 18mm socket and hammer (it should sit over the spring retainers but clear the valve stem and keepers) to loosen the keepers so they come out of the retainer easier. Install the spring compressor and replace the springs with whatever ones you will be using. I used the PSI 1511 with the locators on mine.

6SF78GN.jpg

MYwzR8C.jpg

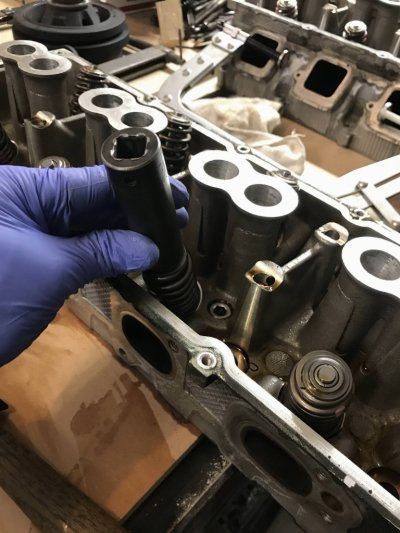
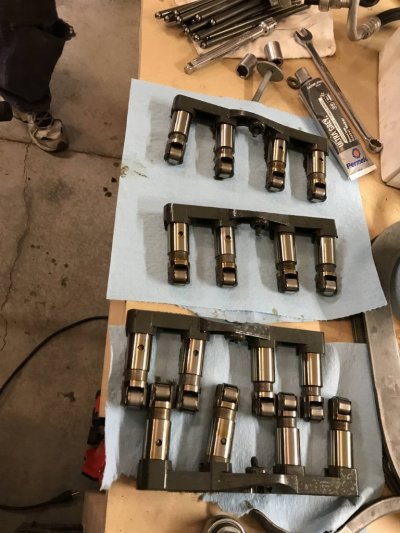
With any springs replaced, we can remove the lifters. Remove the lifters before you pull the camshaft out. They are held in place by an 8mm bolt IIRC. Just loosen the bolt and pull the lifter rail out. If any lifters get stuck they will just pull directly out, it's entertaining to watch this when you have oil all over your hands and they are slippery as hell.

A97yS8V.jpg

mdgddhr.jpg

With the lifters removed, replace them with your new lifters in the rail then reinstall these AFTER you have swapped the camshaft following the above steps.

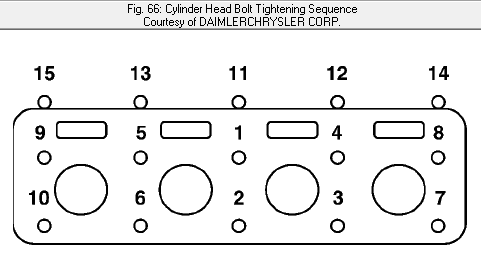
To reinstall the heads, place the NEW head gasket onto the block making sure you have the correct gasket for the side of the engine, they are specific to the side and if you put them on the wrong side you will block the coolant holes. Place the head onto the block and install the NEW head bolts or studs. Put all 10 bolts in loosely then the 5 small bolts in the valley. If you are using studs, torque these in the following stepped sequence:

FVQlaHI.png

Step 1: M12 bolts to 25ft-lb, and the M8 bolts to 15ft-lb
Step 2: M12 bolts to 40ft-lb, verify M8 bolts to 15ft-lb
Step 3: M12 bolts turn 90 degrees, M8 bolts to 25ft-lb

With the head in place and properly torqued you can carry on the rest of the swap.


***PRO TIP for the timing set.

Instead of dropping the timing chain like I did in my original how-to, here is a fast and very effective way to keep the timing set intact without having to try to reset the timing from scratch.

BEFORE pulling the chain tensioner, mark the phaser ring and timing chain in multiple places with a felt pen. Mark it so you can't accidentally put these on the wrong marks.

nw9vDbx.jpg

wzrH6FV.jpg

With the phaser and chain marked, you can remove the phaser from the cam but KEEP THE CHAIN TIGHT and remove the phaser from the chain. Pull the chain to the side and zip-tie it tight to the frame or somewhere semi-out of the way. Do this all without dropping the chain off the crank sprocket.

ymDd6PM.jpg

When it's time to put the phaser back on, cut the zip-ties and line up the marks on the phaser ring with the chain, keeping the chain tight on the crankshaft sprocket. Spin the cam so you can install the phaser onto it and mount with the bolt. IF you've kept the chain from moving on the crank sprocket your timing will stay perfect but if you let it slip, follow the timing instructions given above.

If there's anything that someone wants added to this let me know and I will get it done.
 
Last edited by a moderator:
68PowerWagon

Senior Member
Joined
Nov 26, 2015
Posts
1,684
Reaction score
999
Location
Dayton, Ohio
Ram Year
2022 Laramie 3500
Engine
6.7 CTD
Besides a little varnish on the old cam the inside of that engine looks really good. What kind of oil do you use?
 

kg93

Senior Member
Joined
Nov 7, 2014
Posts
1,633
Reaction score
495
Location
AZ
Ram Year
2018
Engine
Hemi 6.4
awesome write up! might just save me 1k+ on an install! now to just get a cam...:)
 
OP
OP
charonblk07

charonblk07

Senior Member
Joined
Mar 14, 2013
Posts
4,056
Reaction score
2,076
Location
Calgary, Ab
Ram Year
2009
Engine
F1-A forged 349ci
Besides a little varnish on the old cam the inside of that engine looks really good. What kind of oil do you use?


Redline 5W-30 with a Royal Purple filter. I'm very happy with the stuff but that engine also only has about 30,000kms on it. The original engine was in a lot worse shape from the previous owner.

awesome write up! might just save me 1k+ on an install! now to just get a cam...:)
Kinda why I did this, trying to help the community grow. A cam was the first major undertaking I did on my last truck but a great how-to was available on a related car forum that made life really easy.
 

jwheeler

Senior Member
Joined
Oct 11, 2014
Posts
1,537
Reaction score
419
Location
Washington
Ram Year
2010
Engine
Hemi 5.7
With that low of mileage, you are fine doing it that way. But if someone has any real mileage on the engine, I would recommend popping the heads off and doing the lifters. It's not that much more work and it could save your new expensive cam.


Sent from my iPhone using Tapatalk
 
OP
OP
charonblk07

charonblk07

Senior Member
Joined
Mar 14, 2013
Posts
4,056
Reaction score
2,076
Location
Calgary, Ab
Ram Year
2009
Engine
F1-A forged 349ci
With that low of mileage, you are fine doing it that way. But if someone has any real mileage on the engine, I would recommend popping the heads off and doing the lifters. It's not that much more work and it could save your new expensive cam.


Sent from my iPhone using Tapatalk

I've swapped 6 cams now on these engines, most with over 100,000 miles and never had a lifter fall; if you're really worried about it like one guy I helped, I just bought a bunch of the cheap magnetic pickup wands from the auto parts store and placed them on the lifters through the pushrod holes then taped the wands to the head; the magnet will hold the lifter in place and it can't fall. And saying that it's not that much more work to remove the head is just wrong, especially if you're already running long tube headers. There's a lot more work to do if you're removing the heads and a lot more that can go wrong. I can do a cam swap in an afternoon, a full head removal is a 2 day affair.
 

jwheeler

Senior Member
Joined
Oct 11, 2014
Posts
1,537
Reaction score
419
Location
Washington
Ram Year
2010
Engine
Hemi 5.7
I am not saying they they are going to fall in. I am saying that I have replaced a dozen camshafts due to failed lifters. They go bad.


Sent from my iPhone using Tapatalk
 

kg93

Senior Member
Joined
Nov 7, 2014
Posts
1,633
Reaction score
495
Location
AZ
Ram Year
2018
Engine
Hemi 6.4
now how do you feel about springs, shims, mds delete? all that good stuff.

I know i was looking at maybe a custom greene cam, most of his kits suggest those. How hard is that stuff to install/how needed is it?

basically everything listed in this
Premium kits, non HL- Your choice of a Stage 1 200/218, Stage 2 204/222, Stage 2.5 206/224, or Stage 3 208/226, .600 lift springs, chromoly retainers, custom locators, shims, hardened pushrods, and a MDS delete kit. $1700 shipped or $1550 shipped without hardened pushrods.
 
OP
OP
charonblk07

charonblk07

Senior Member
Joined
Mar 14, 2013
Posts
4,056
Reaction score
2,076
Location
Calgary, Ab
Ram Year
2009
Engine
F1-A forged 349ci
I am not saying they they are going to fall in. I am saying that I have replaced a dozen camshafts due to failed lifters. They go bad.


Sent from my iPhone using Tapatalk

Ah, I see what you're getting at now, yes they can go bad but it's a crap shoot with lifters as I've replaced a failed lifter after 20,000kms on one engine; I was just lucky it didn't take the camshaft out with it. I would agree that if you have any suspicions about lifter trouble then they should be swapped out and that would require removing the heads. Maintenance items need to be handled and if you're already halfway there then you should go all the way and do it right.

now how do you feel about springs, shims, mds delete? all that good stuff.

I know i was looking at maybe a custom greene cam, most of his kits suggest those. How hard is that stuff to install/how needed is it?

basically everything listed in this
Premium kits, non HL- Your choice of a Stage 1 200/218, Stage 2 204/222, Stage 2.5 206/224, or Stage 3 208/226, .600 lift springs, chromoly retainers, custom locators, shims, hardened pushrods, and a MDS delete kit. $1700 shipped or $1550 shipped without hardened pushrods.

Springs are completely dependent on the cam lift, if they're even recommended then I would do them. Shims are required if the replacement spring isn't long enough so you get the correct install height of 1.800" but there are good shims with centering rings and there are cheap shims that just lift the spring; get the good shims. The reputable cam providers will use the Manley shims with the PSI 1511 or 1515 springs.

For MDS delete you can swap out the MDS lifters and leave the solenoids in place or you can go all out and install the block plugs. I would always recommend doing the non-MDS lifters if the cam has a significant valve lift as you can collapse the hydraulic lifter with a big enough cam or if you plan on revving really high, the cam provider will be able to tell you if it's recommended or not.

As for installation, pick up the valve spring tool that bolts to the rocker arm towers then you can easily do all the springs either in or out of the vehicle. HHP and Crane sell similar tools and they are worth the cost with how easy they are to do the swap with.

This build has had the MDS deleted fully since day 1 and the heads have gone through 3 sets of springs (stock, 6.1L, and 1511s) so far. If I ever do the custom big valves with the sodium filled exhaust valves then I might go straight to a beehive spring with the Arrington roller rocker arm and really crank up the rpms.
 

kg93

Senior Member
Joined
Nov 7, 2014
Posts
1,633
Reaction score
495
Location
AZ
Ram Year
2018
Engine
Hemi 6.4
Springs are completely dependent on the cam lift, if they're even recommended then I would do them. Shims are required if the replacement spring isn't long enough so you get the correct install height of 1.800" but there are good shims with centering rings and there are cheap shims that just lift the spring; get the good shims. The reputable cam providers will use the Manley shims with the PSI 1511 or 1515 springs.

For MDS delete you can swap out the MDS lifters and leave the solenoids in place or you can go all out and install the block plugs. I would always recommend doing the non-MDS lifters if the cam has a significant valve lift as you can collapse the hydraulic lifter with a big enough cam or if you plan on revving really high, the cam provider will be able to tell you if it's recommended or not.

As for installation, pick up the valve spring tool that bolts to the rocker arm towers then you can easily do all the springs either in or out of the vehicle. HHP and Crane sell similar tools and they are worth the cost with how easy they are to do the swap with.

This build has had the MDS deleted fully since day 1 and the heads have gone through 3 sets of springs (stock, 6.1L, and 1511s) so far. If I ever do the custom big valves with the sodium filled exhaust valves then I might go straight to a beehive spring with the Arrington roller rocker arm and really crank up the rpms.


okay cool, so i wouldnt need to take off the heads for shims and springs right? just some extra tools and bolts to be taken out?

and for the mds delete, that's is under the intake manifold correct? i saw something about that in the video you posted

Edit: to replace the mds lifters do the heads need to come off? lifters are in the heads correct?
still trying to learn all the parts of the engine obviously lol
 
Last edited:
OP
OP
charonblk07

charonblk07

Senior Member
Joined
Mar 14, 2013
Posts
4,056
Reaction score
2,076
Location
Calgary, Ab
Ram Year
2009
Engine
F1-A forged 349ci
Lifters require the heads to be removed since they are under the heads and the MDS solenoid are under the intake manifold.

If you are just doing springs and shims then you don't need to remove the heads.


Sent from my iPhone using Tapatalk
 

kg93

Senior Member
Joined
Nov 7, 2014
Posts
1,633
Reaction score
495
Location
AZ
Ram Year
2018
Engine
Hemi 6.4
Lifters require the heads to be removed since they are under the heads and the MDS solenoid are under the intake manifold.

If you are just doing springs and shims then you don't need to remove the heads.


Sent from my iPhone using Tapatalk
Gotcha, so that would add a ton of work.

I'm guessing it's more personal opinion but would you say the extra gains you would see with a cam that requires mds delete isn't worth the extra work?

Sent from my LG-H900 using Tapatalk
 
OP
OP
charonblk07

charonblk07

Senior Member
Joined
Mar 14, 2013
Posts
4,056
Reaction score
2,076
Location
Calgary, Ab
Ram Year
2009
Engine
F1-A forged 349ci
Gotcha, so that would add a ton of work.

I'm guessing it's more personal opinion but would you say the extra gains you would see with a cam that requires mds delete isn't worth the extra work?

Sent from my LG-H900 using Tapatalk

The benefits of a larger cam are definitely worth it if you want the power but there's also a point where you go too far and lose your streetability and it turns into a full race cam but none of Jay's cams are that far gone. The right cam with a set of ported and shaved heads will easily get you 20-30 more hp over a mid-range cam grind so you just need to determine if it's worth the extra work and cost.
 

kg93

Senior Member
Joined
Nov 7, 2014
Posts
1,633
Reaction score
495
Location
AZ
Ram Year
2018
Engine
Hemi 6.4
The benefits of a larger cam are definitely worth it if you want the power but there's also a point where you go too far and lose your streetability and it turns into a full race cam but none of Jay's cams are that far gone. The right cam with a set of ported and shaved heads will easily get you 20-30 more hp over a mid-range cam grind so you just need to determine if it's worth the extra work and cost.
Well I've spoken to you about what I want to do before. Low end torque, for offroading.

So I probably wouldn't want a huge cam.
Idk if some moes ported heads are in the cards right now for 3+ grand.


Sent from my LG-H900 using Tapatalk
 
OP
OP
charonblk07

charonblk07

Senior Member
Joined
Mar 14, 2013
Posts
4,056
Reaction score
2,076
Location
Calgary, Ab
Ram Year
2009
Engine
F1-A forged 349ci
Most torque cams are not big lift cams which wouldn't require the MDS lifter swap.
 

68PowerWagon

Senior Member
Joined
Nov 26, 2015
Posts
1,684
Reaction score
999
Location
Dayton, Ohio
Ram Year
2022 Laramie 3500
Engine
6.7 CTD
With that low of mileage, you are fine doing it that way. But if someone has any real mileage on the engine, I would recommend popping the heads off and doing the lifters. It's not that much more work and it could save your new expensive cam.


Sent from my iPhone using Tapatalk

Yep! Made that mistake one time. Wasn't because of the extra time to do it right just didn't have the money to do it right. :Stupid Me:
 

PNUTLT1

Senior Member
Joined
Dec 17, 2014
Posts
688
Reaction score
250
Location
California
Ram Year
2014
Engine
Hemi 5.7
OP is it possible to reload the photos again?
The links are all broken.
 
Top