How to Install a wire boot or grommet in the clutch delete plate for running wires into the cab

Disclaimer: Links on this page pointing to Amazon, eBay and other sites may include affiliate code. If you click them and make a purchase, we may earn a small commission.

OP
OP
kad

kad

Senior Member
Supporting Member
Joined
Jul 10, 2017
Posts
2,781
Reaction score
2,299
Location
Hudson Valley, NY
Ram Year
2014
Engine
5.7L HEMI
This is amazing. I've done this on my 2010 Ram, 2015 and Now My 2016. So easy to do, amazing idea. Its awesome that ram left that plate in.

I wonder if it's still in the 2019s?

-K
 

Cillys

Senior Member
Joined
Dec 30, 2018
Posts
171
Reaction score
52
Location
Virginia
Ram Year
2017
Engine
6.7
This is amazing. I've done this on my 2010 Ram, 2015 and Now My 2016. So easy to do, amazing idea. Its awesome that ram left that plate in.

Yeah don't jinx it [emoji85][emoji2359]


Sent from my iPhone using Tapatalk
 

Matts175

Senior Member
Joined
Feb 10, 2019
Posts
299
Reaction score
225
Location
Michigan
Ram Year
2015
Engine
Hemi 5.7
Thank you for posting this. Received the Daystar grommet yesterday and I'm going to install it today.
 
  • Like
Reactions: JB1

Gibbs

Senior Member
Joined
Dec 22, 2017
Posts
241
Reaction score
131
Location
GA
Ram Year
2018
Engine
6.7L Cummins
I've been running wiring thru grommets in the clutch master cylinder plate since my first car in 1996. This was my preferred method for running amplifier wiring...however, the daystar boot is a much nicer way to run multiple wires and have it seal up much nicer. Plus it's a one-size-fits-all setup. Thanks for posting this, as I didn't know such a thing existed.
 

JimReed

Member
Joined
Sep 1, 2016
Posts
42
Reaction score
36
Location
US
Ram Year
2014 Laramie
Engine
Hemi 5.7
Out of curiosity, where did you mount the antenna for the HAM radio and how/where did you run the coax? I am just starting out in HAM. I have a 2014 1500 Crew. Anything is appreciated.

Thank you,

Tom
 

chrisbh17

Senior Member
Joined
Oct 12, 2017
Posts
6,691
Reaction score
7,475
Ram Year
2017
Engine
Hemi 5.7
I've been running wiring thru grommets in the clutch master cylinder plate since my first car in 1996. This was my preferred method for running amplifier wiring...however, the daystar boot is a much nicer way to run multiple wires and have it seal up much nicer. Plus it's a one-size-fits-all setup. Thanks for posting this, as I didn't know such a thing existed.
Someday I hope this won't work for me anymore because I bought a vehicle with a clutch [emoji2]

Until then, it's the easiest way. The daystar boot has come in handy for me too... So easy to add another few wires through it. I even stretched the opening to have a pass through of 3/8" split loom so I can easily pull more wires if necessary.

Sent from my Pixel 3 XL using Tapatalk
 

GeometryFletch

Senior Member
Joined
Feb 28, 2021
Posts
217
Reaction score
159
Location
Arkansas
Ram Year
2020
Engine
6.4L HEMI
Wow! The article I was looking for! Thanks! Clean pics and info. I have a 2020 so I'm hoping it's similar. Great write up!
 

Eduardo Wittmann

Junior Member
Joined
Oct 30, 2021
Posts
2
Reaction score
0
Location
Brazil
Ram Year
2019
Engine
6.7 diesel
Hi. I just drill a hole from inside to outside
 

Attachments

  • 82A05473-484D-4BC1-9942-B0D7DB298515.jpeg
    82A05473-484D-4BC1-9942-B0D7DB298515.jpeg
    81.2 KB · Views: 46
  • 196DD2EA-C771-4ACF-85A0-F9D7649C0E4E.jpeg
    196DD2EA-C771-4ACF-85A0-F9D7649C0E4E.jpeg
    91.5 KB · Views: 45
OP
OP
kad

kad

Senior Member
Supporting Member
Joined
Jul 10, 2017
Posts
2,781
Reaction score
2,299
Location
Hudson Valley, NY
Ram Year
2014
Engine
5.7L HEMI
Hi. I just drill a hole from inside to outside

Just a word of warning, the plastic the delete plate is made out of is hard and the edges of a plain drilled hole will eventually wear through the insulation on your wires allowing them to short together. You really do want a grommet of some sort in there.

-K
 

Eduardo Wittmann

Junior Member
Joined
Oct 30, 2021
Posts
2
Reaction score
0
Location
Brazil
Ram Year
2019
Engine
6.7 diesel
Just a word of warning, the plastic the delete plate is made out of is hard and the edges of a plain drilled hole will eventually wear through the insulation on your wires allowing them to short together. You really do want a grommet of some sort in there.

-K
Thanks for the warning. I will take care, it is really hard plastic, difficult to drill so
 

ANGLICO

Senior Member
Military
Joined
Oct 7, 2023
Posts
158
Reaction score
196
Location
Bay Area, CA
Ram Year
2022
Engine
6.4 L Hemi
How to install a wire boot or grommet in the clutch delete plate for running wires into the cab on a 4th Gen RAM truck

This isn't a complex thing to do, but I've seen a number of people lately asking where the clutch delete plate is and how to best get wires through it. Since I was doing just that I figured I'd photograph the process and do a quick write up. Because this method uses the clutch delete plate it will, of course, only work on a truck with an automatic transmission.


You will need:
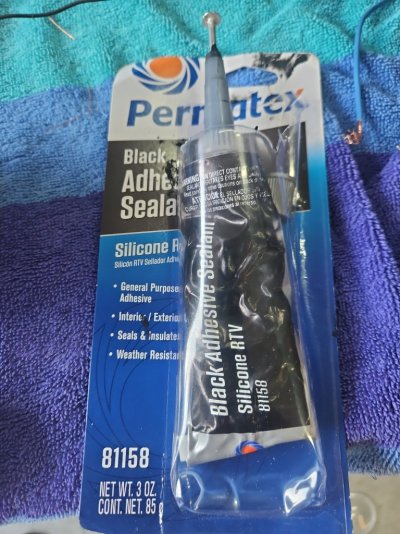
  • Rubber boot or grommet.
  • Appropriate size hole saw or drill bit for the above.
  • 15mm deep well socket
  • Ratchet, universal joint and a couple of extensions.
  • Utility knife
  • Optional: Cordless ratchet
  • Optional: Plastic trim removal tool

I used a Daystar Firewall Boot and a 1.25" Hole Saw. You can us a standard rubber grommet instead of the Daystar, but the Daystar gives you a lot more flexibility down the road for adding more wires.

View attachment 399655 View attachment 399656


Onward:

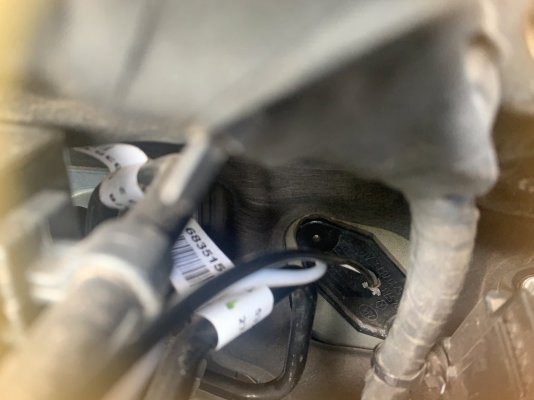
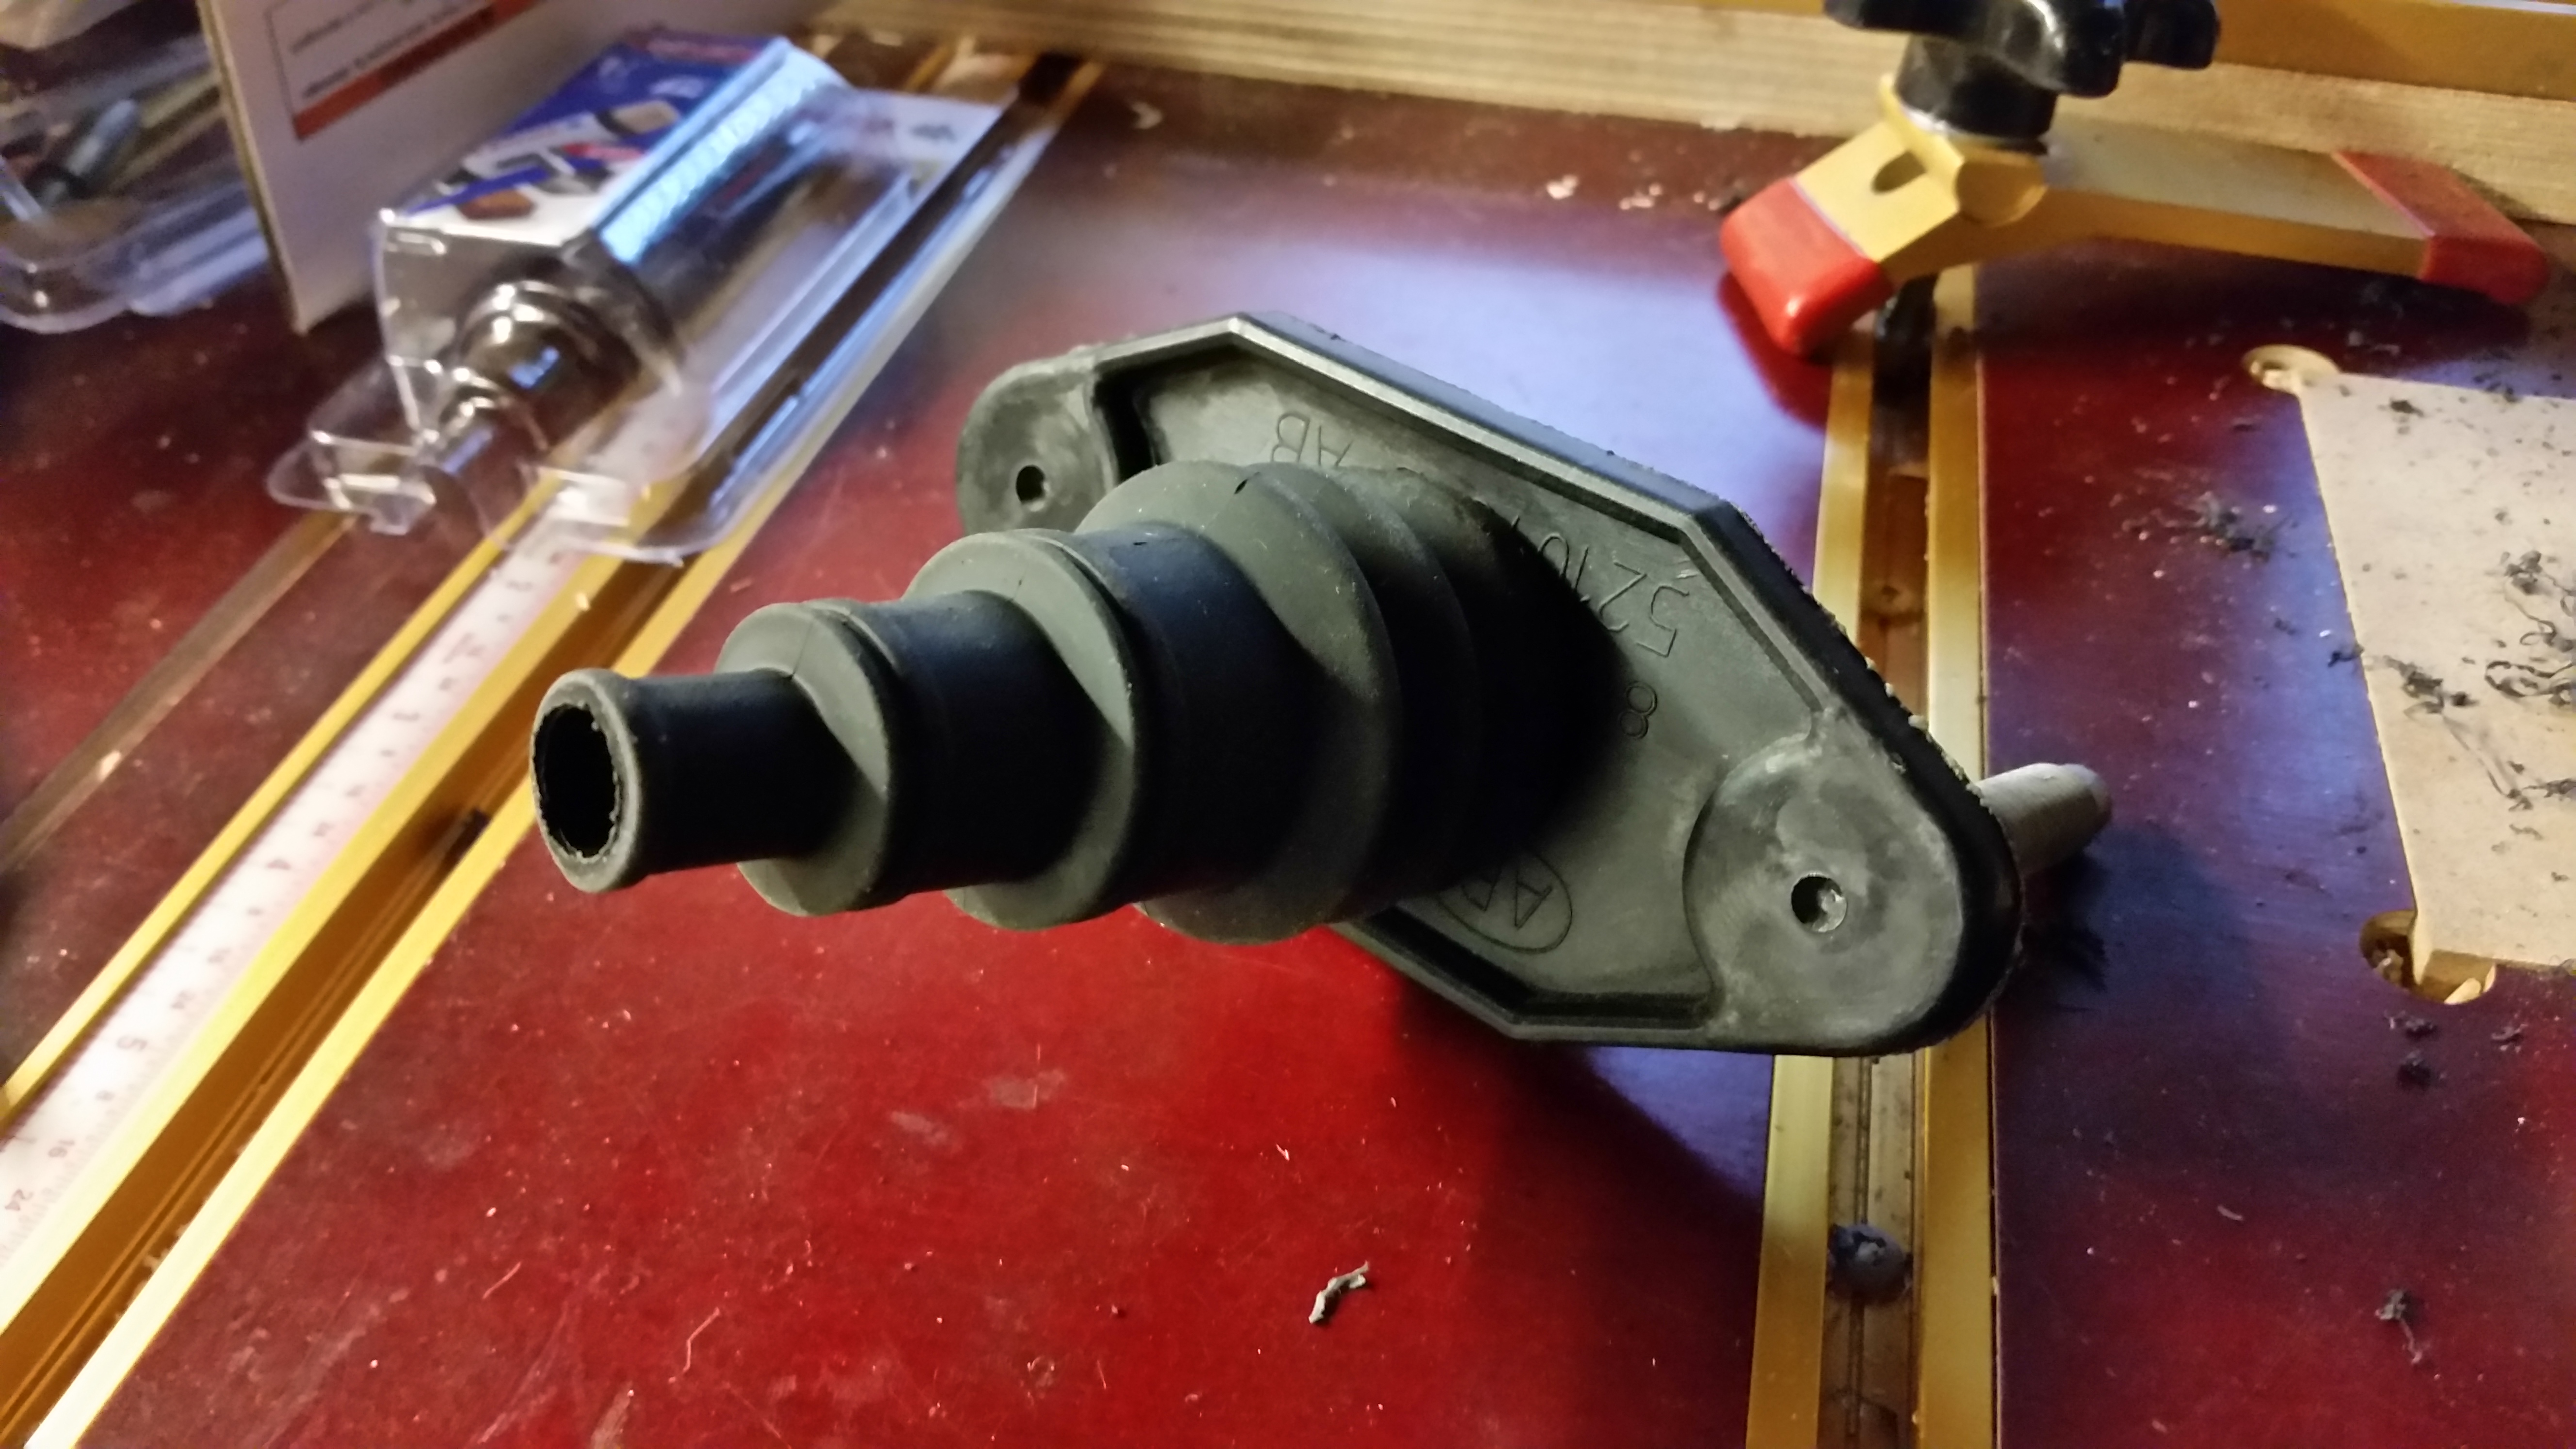
This is the clutch delete plate from under the hood. It's on the driver's side just to the right of the brake booster:

View attachment 399657


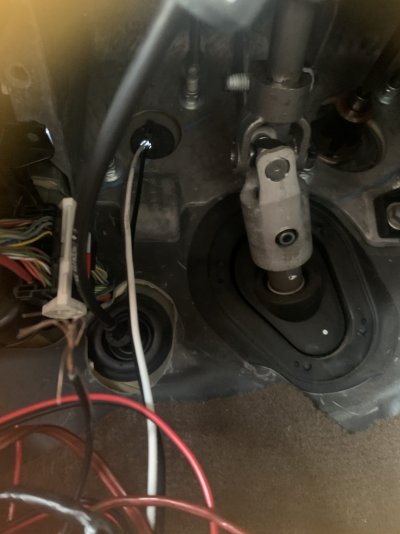
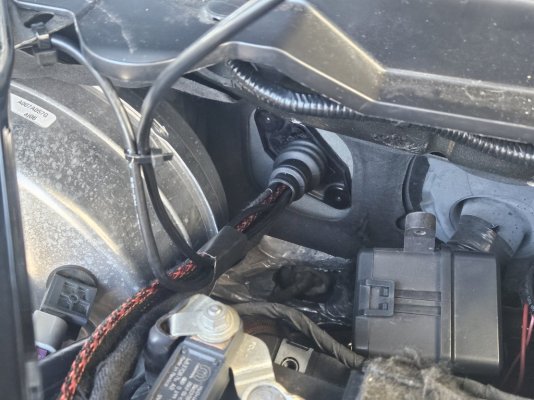
And this is from the inside, looking up from the driver's side footwell.

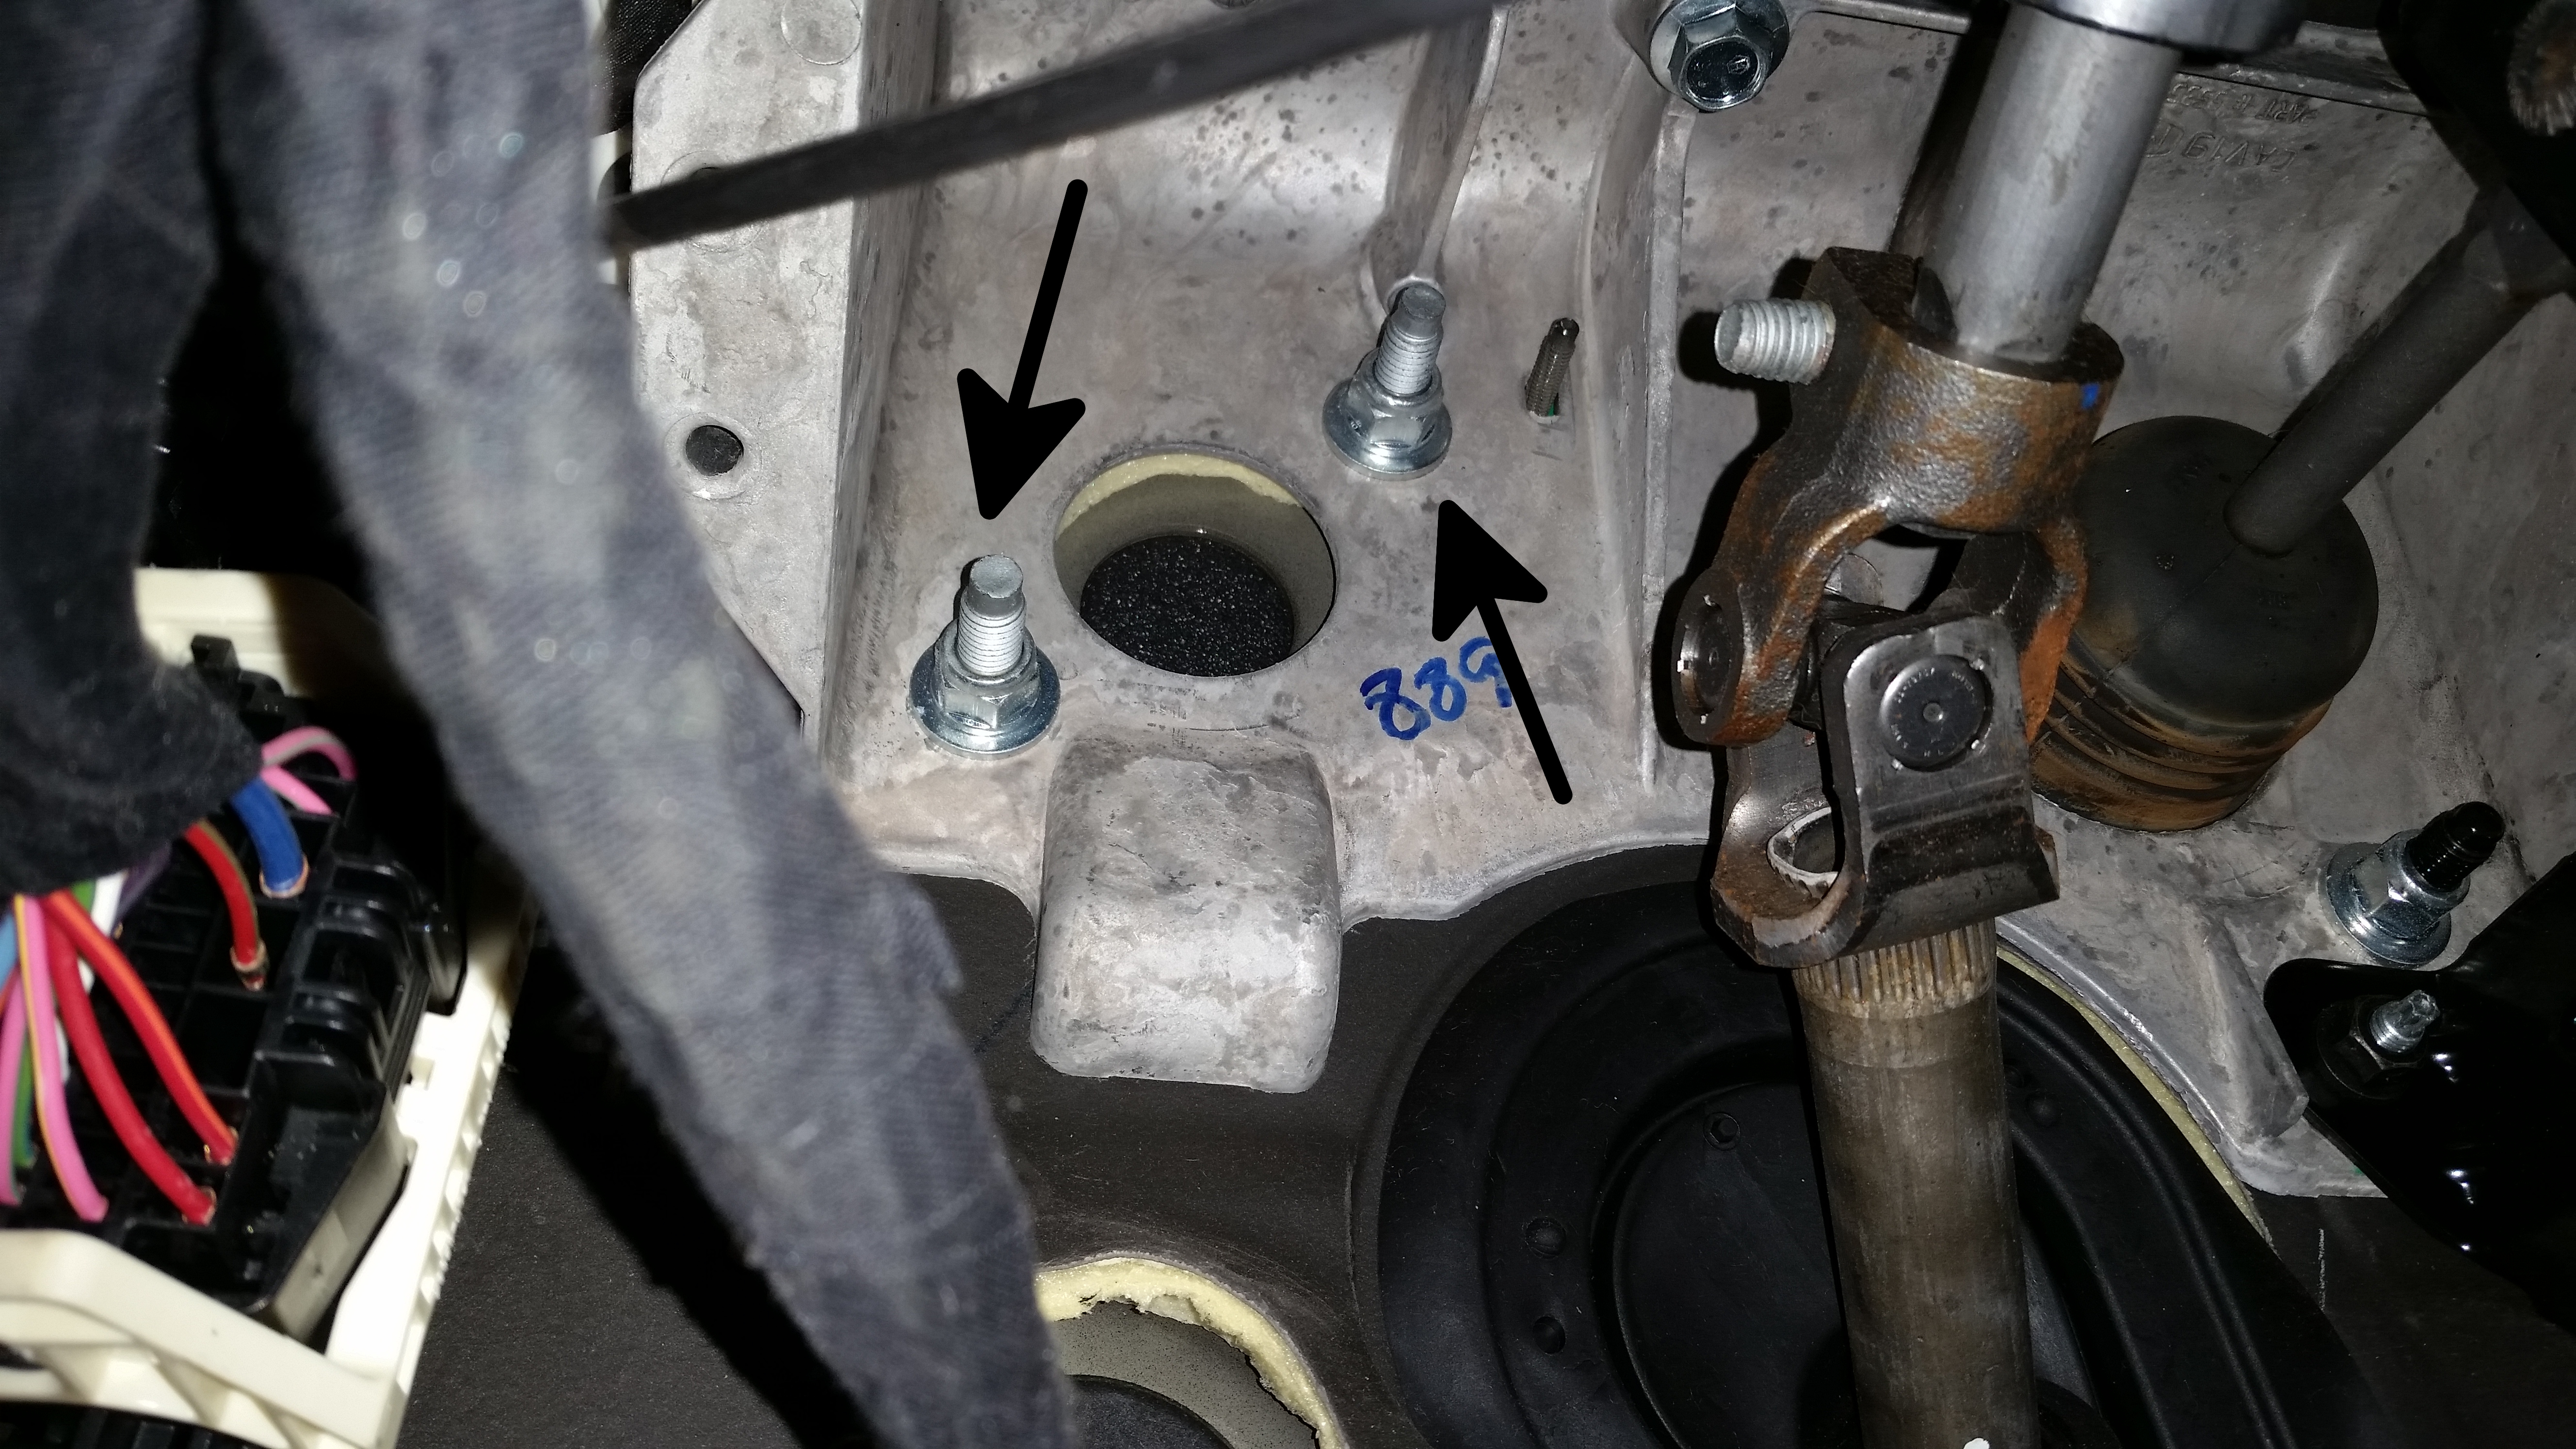
You'll need to remove the two nuts indicated by the arrows in the picture using the 15mm socket and your choice of u-joints, extensions and ratchet. If you're using a cordless ratchet you'll want to break them loose with the hand ratchet first.

20180328_174800.jpg


Once you have the nuts off the plate just pulls off from the outside. Due to the length of the bolts and how snugly they fit through their holes, you need to pull it straight out. Mine was trapped under the firewall material at one end (see picture below) so I used a plastic trim removal tool with a curved end to push the material away without damaging it.

View attachment 399658


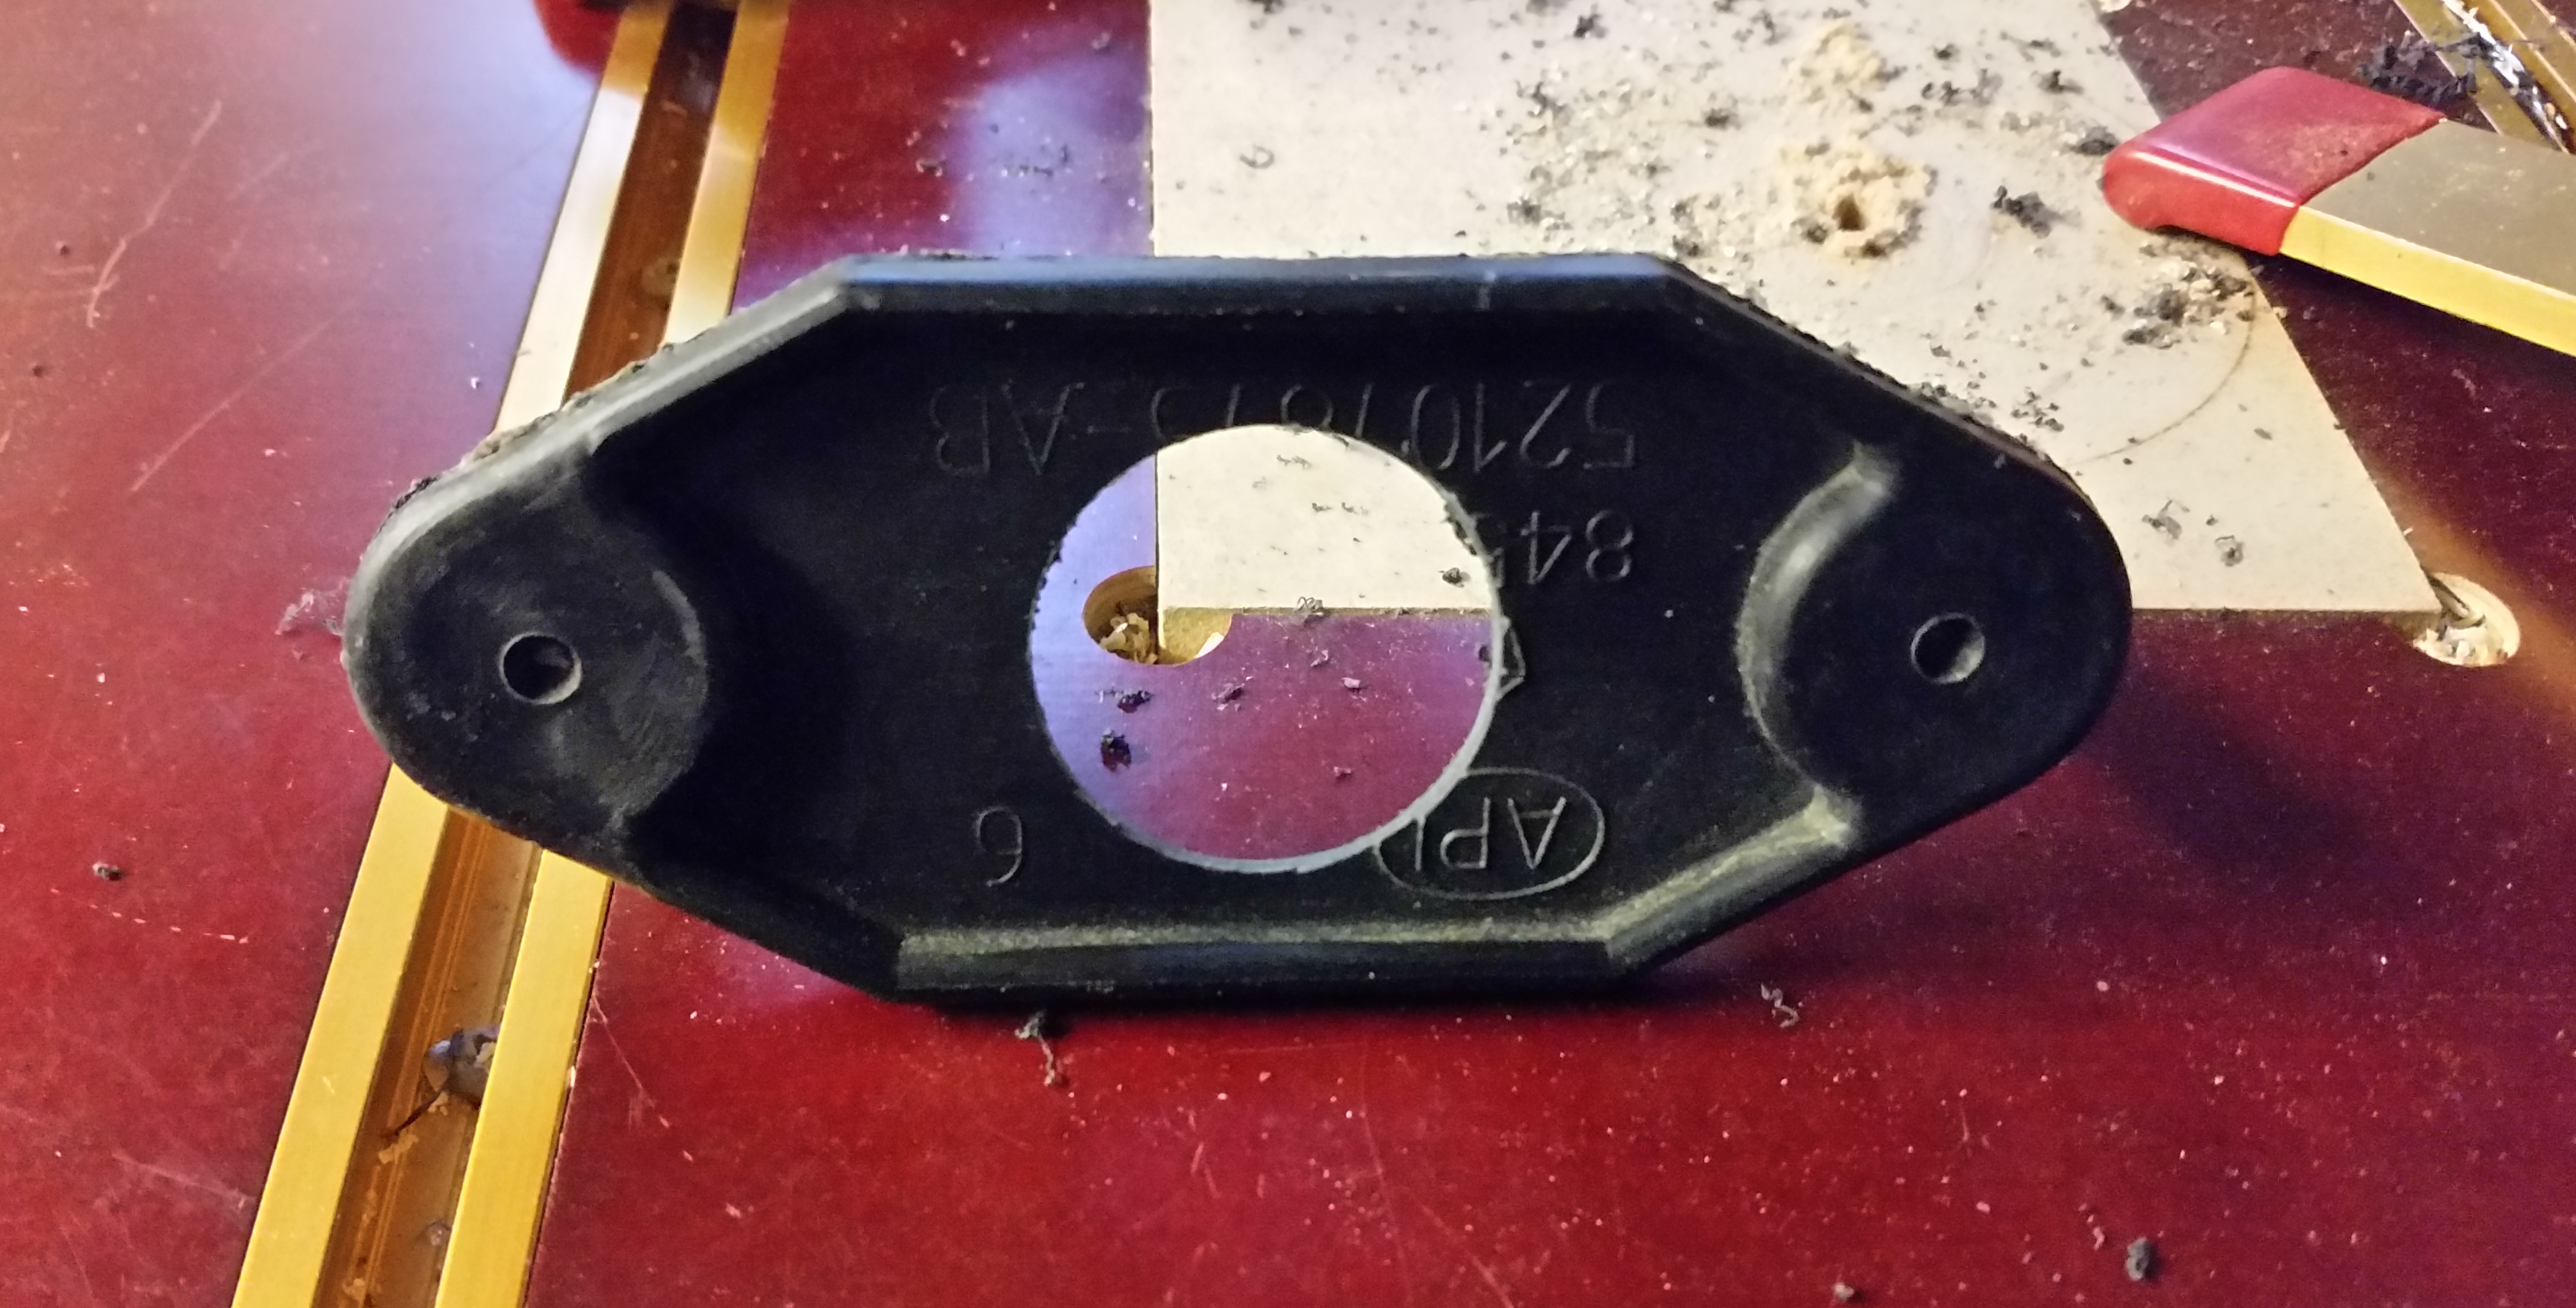
Once you've got the plate out get your drill and bit set up and clamp the plate down to a solid work surface that you don't mind drilling into. I used a drill press because, well, I have one. :) You want to drill your hole in the middle of the puffy area of foam. You can scrape the foam off first if you want to, but I didn't bother because the hole I was going to be drilling would be removing most of it anyway.

View attachment 399659


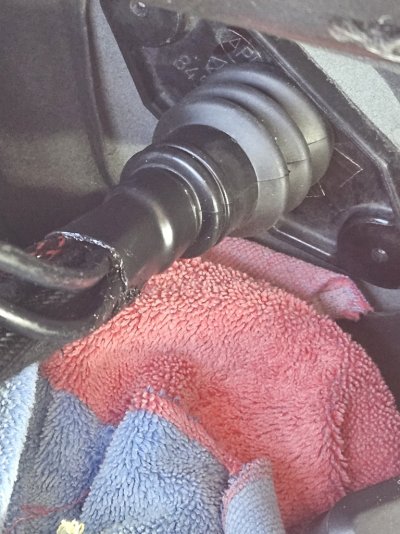
Once you've got the hole drilled, clean up any burs from drilling and any excess foam that would interfere with the boot/grommet with a utility knife.

20180328_181557.jpg


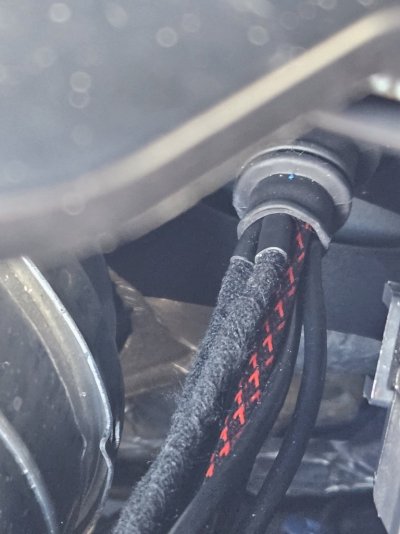
Insert the boot or grommet into the hole.

20180328_181714.jpg


Put the plate back in from the outside and secure it with the 15mm nuts from the inside.

View attachment 399660


I stuck a pen cap in the end of the boot as I knew I wasn't going to be able to get to the wiring for a bit.


-K


@kad .... Awesome. Thank you for posting this and my absolute complements on your attention to detail and presentation skills. Very nicely laid out with the photos and techicnal instructions/steps.

You saved me time getting to the solution I wanted and the way it needed to be done.

Im currently correcting some wire routing mistakes the previous owner made.

Thank you again. You and a bunch pf members and mods like you are why this forum is one of the best I've ever been a part of.
 
  • Like
Reactions: kad

ANGLICO

Senior Member
Military
Joined
Oct 7, 2023
Posts
158
Reaction score
196
Location
Bay Area, CA
Ram Year
2022
Engine
6.4 L Hemi
@kad .... Awesome. Thank you for posting this and my absolute complements on your attention to detail and presentation skills. Very nicely laid out with the photos and techicnal instructions/steps.

You saved me time getting to the solution I wanted and the way it needed to be done.

I'm currently correcting some wire routing mistakes the previous owner made.

Thank you again. You and a bunch pf members and mods like you are why this forum is one of the best I've ever been a part of.

I ended up running a whole lot of wiring through the grommet, using this advice to take advantage of the clutch delete plate.

What I learned working on beaters (though this Power Wagon is like new), always run EXTRA RESERVE WIRE PAIRS so you don't wish u had.

Why have to redo another firewall passthrough later? So now, none of my grommets will have poked holes.

Using this plate allows for a big hole. It could have handled more wires than I even ran through it.
One (1) 10 AWG positive wire for my new under the dash Painless auxiliary fuse block
Two (2) radio coax cables (one for CB and one for GMRS mobile 50 watt).
One (1) AuxBeam control panel wire (about the diameter of a coax).
PLUS: Homemade wire harness with 4 pair of 14 AWG auxiliary/reserve for future use through the firewall = I don't want to do this again for a simple air horn button or something equally stupid.
-----> one reserve pair will be for a PA speaker.

Wires, at the grommet, were coated in between with automotive adhesive, pulled into the grommet from the inside (goop in grommet), then I slid on heat shrink sleeve over it all. Heated and shrunk it to make it water resistant and near water proof.

Remember, when running attached wires from both sides, at the same time (both directions), the heat shrink sleeve needs to be passed through, along with the grommet.
 

Attachments

  • 20240101_154724.jpg
    20240101_154724.jpg
    169.1 KB · Views: 13
  • IMG_20240101_155057_01.jpg
    IMG_20240101_155057_01.jpg
    186.2 KB · Views: 14
  • 20240101_134058.jpg
    20240101_134058.jpg
    150.1 KB · Views: 13
  • 20240101_123156.jpg
    20240101_123156.jpg
    107.7 KB · Views: 14
Last edited:
Top