- Joined
- Feb 3, 2012
- Posts
- 1,623
- Reaction score
- 175
- Ram Year
- 2013
- Engine
- 5.7 Hemi
This DIY was performed on a quad cab without the alpine system and only showing the driver side, passenger side is the same. I cannot give any advice specifically related to regular/crew cabs or alpine equipped trucks as I don't know anything specifically related to them. None of the in work splicing is shown as I installed these about a month or so ago. My speakers are spliced in with the wire and connectors that came with the speakers since at the time of install, I did not know there were wiring harnesses available to make install so much easier and quicker. They are linked below and I do advice them as splicing your dash speakers will be a royal pita!
OEM Wiring Harness
Also, the speakers installed are Kicker KS35's in the dash and Kicker KS693's in all four doors.
Tools needed:
jewelers flat top screw driver
small flat tip screw driver
medium and large phillips screw drivers
pliers
if splicing, dikes and the splicer pliers (whatever they're call)
2 small sockets...sorry I don't know the size as I forgot to check when I pulled the cover of the dash speaker and the rear door shell to take pictures of the speakers. But I think they might be 1/4" or 5/16"
Speaker sizes:
- The dash takes 3.5" speakers, depth is not an issue because there is nothing below those suckers for a good little bit.
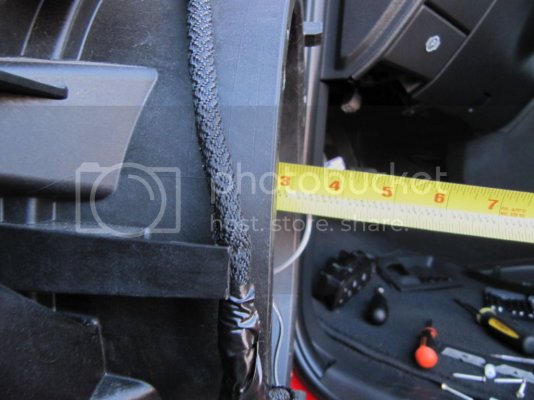
- Depending on the speakers you go with, you can fit 6x9's all around but your front doors might need spacers as you have a little less than 3" of depth to work with because of the window brace going down the middle of the opening. The kicker KS693's for example are 3 3/16" deep and without spacers the magnet rests on the window brace with approx a 1/4" gap between the speaker and the mount. The rear doors can pretty much take any 6x9 out there as I'm going to say you have about 5" of depth to work with, no I didn't measure it, I'm guessing since I didn't think to do that when I had the door shell off.
Speaker Wire Color's:
The dash and front door wire's are the same colors
Left Front Speaker Positive Wire (+): Gray/Violet
Left Front Speaker Negative Wire (-): Gray/Yellow
Right Front Speaker Positive Wire (+): Dark Green/Violet
Right Front Speaker Negative Wire (-): Dark Green/Yellow
Left Rear Speaker Positive Wire (+): Gray/Dark Green
Left Rear Speaker Negative Wire (-): Gray/Light Green
Right Rear Speaker Positive Wire (+): Dark Green/Gray
Right Rear Speaker Negative Wire (-): Dark Green/Light Green
First, the Dash speakers:
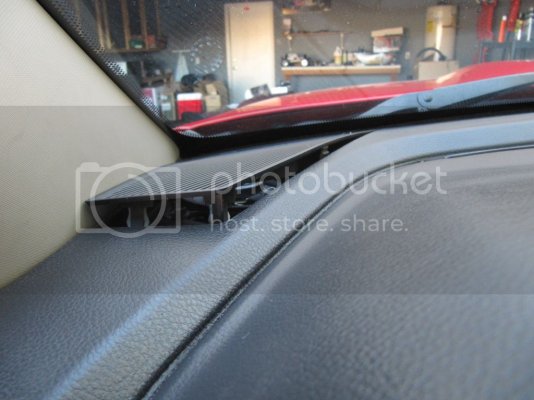
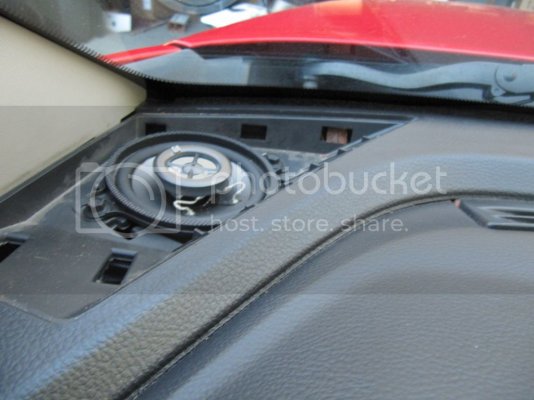
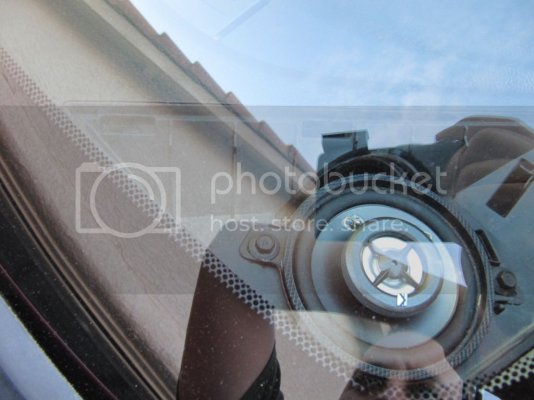
They are really easy to get to as all you need to do is lift the back of the grille up with a screw driver then grab it, lift, and pull. Then the speaker is exposed and it's held in by two small bolts. Remove the bolts, lift speaker, disconnect connector, then either splice on the new wires or if you buy those harness connectors, connect them, plug into new speaker, drop it in, install bolts, and replace the cover putting the front in first then pressing the back down.
Next, Front doors:
This is one area where there might be differences mainly between the reg cab and the crew/quad cabs. I say this because a regular cab was able to install the KS693's without spacers or any modification.
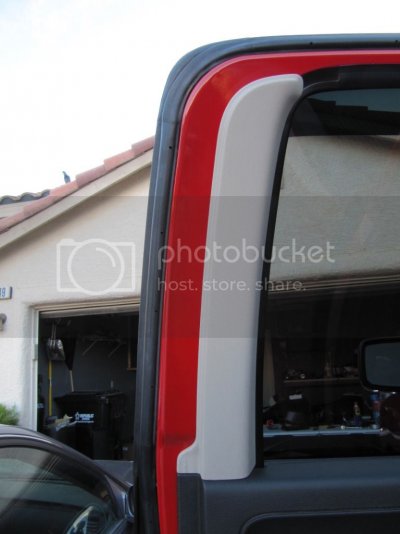
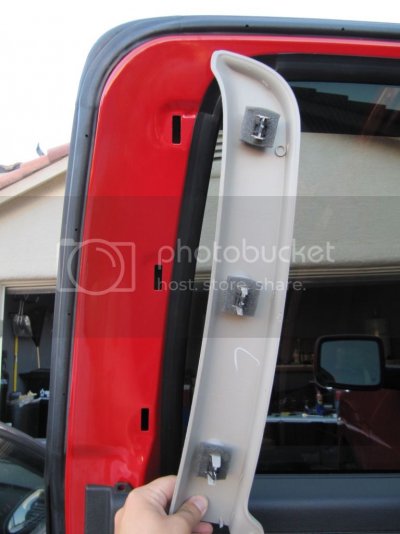
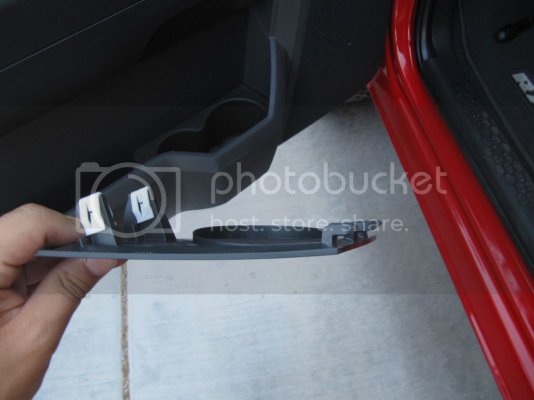
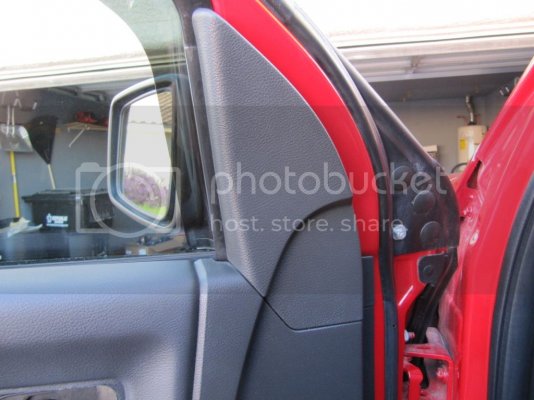
Start by pulling this cover off, all you need to do is get a good grip and pull straight out
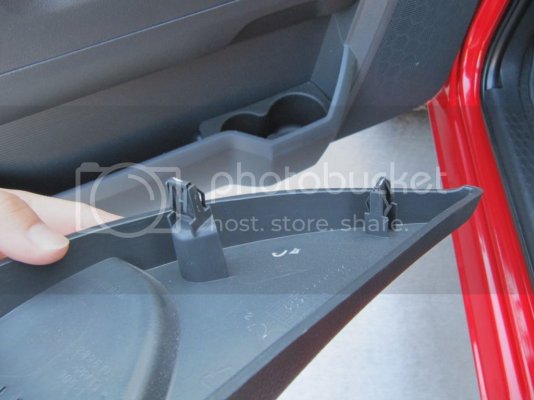
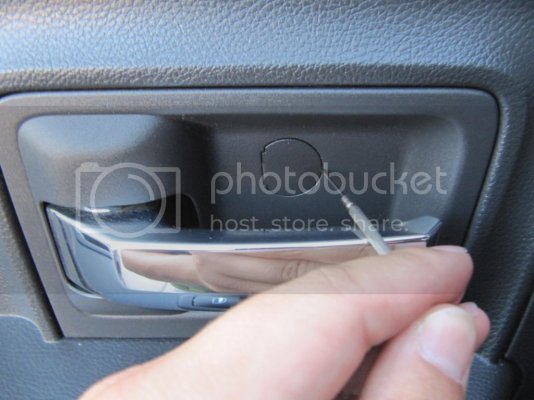
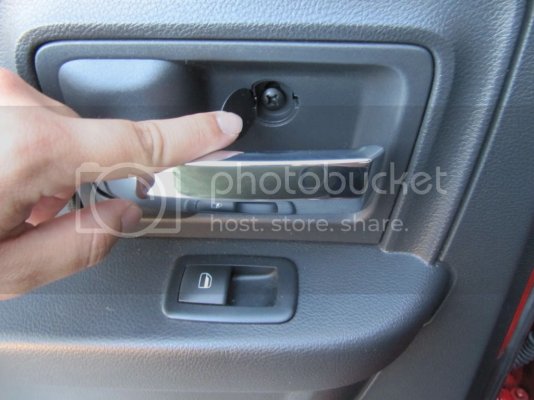
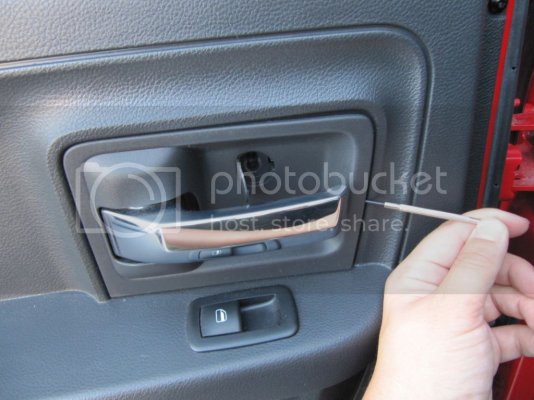
then using a small jewelers flat tip screw driver, pry the little circle cover behind the door handle open from the forward side to revel a large phillips screw. Remove the screw then using either a small flat tip or jewelers screw driver, pry the forward part of the door handle cover out then while holding the door handle out some, pull the cover out from behind the handle.
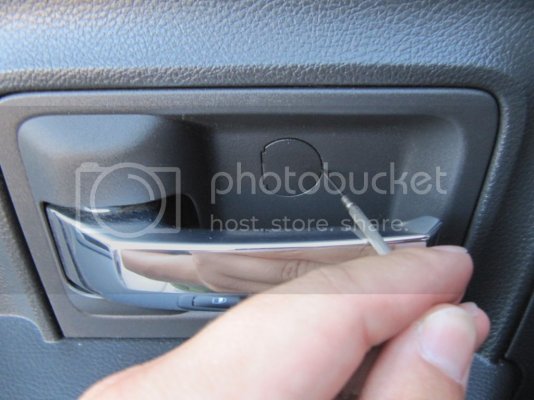
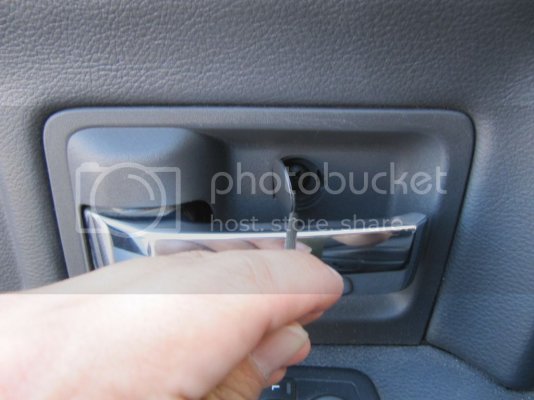
Yes this is from the rear door but same thing with the fronts, I just felt like I should show the pry spot and since I didn't take on of the front, this will do.
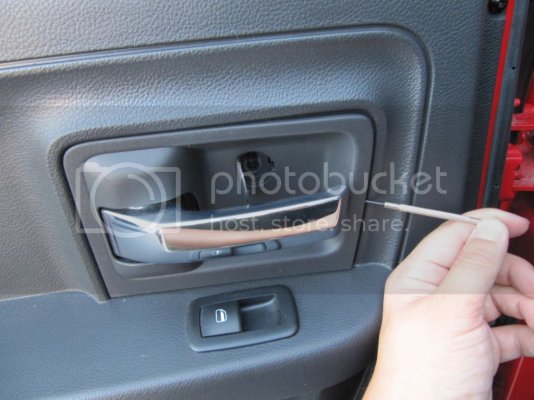
Now for the window/door lock control panel
The only difference on this step between driver and passenger besides the number of switches you have to play with is the drivers switchboard has 2 connectors and the passengers has 1.
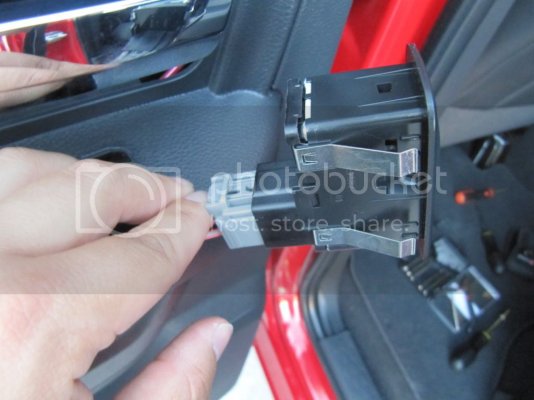
I had to use a combination of a jewelers flat tip screw driver and my finger nail to lift the panel up and hold it in place while I swapped over to a small flat tip screw driver. But however you get it to lift up enough to fit a flat tip under it, once you get one under it just push it straight up and pull it out. Once you have it out, remove the connector/s and set it aside.
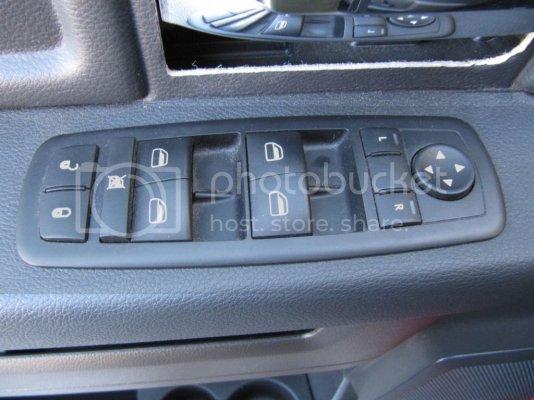

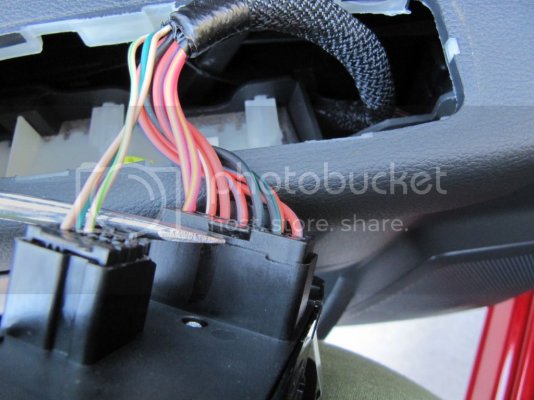
When it comes to the large connector on the drivers switch panel, I did need to use a flat tip in order to pry the connector out of the plug, that thing did not want to disconnect by hand at all. where the screw driver is, is a prefect pry spot if you need to do it as well, just set the tip in that gap and rotate it, the plug should pop right off.
now the only thing left is to remove 6 each (12 pieces total) of these plugs and pins.
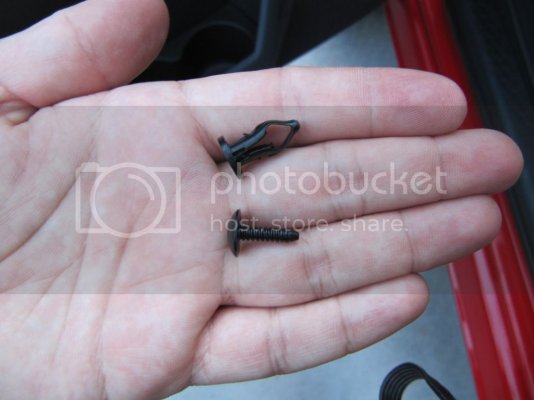
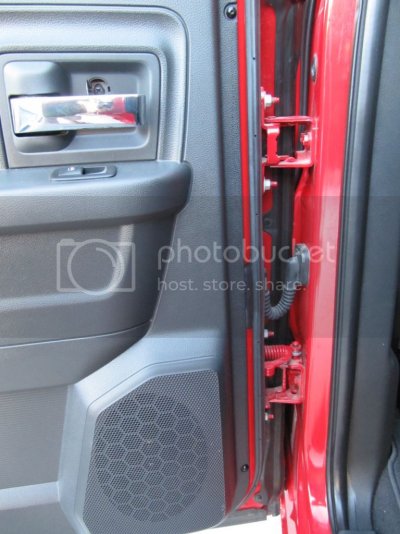
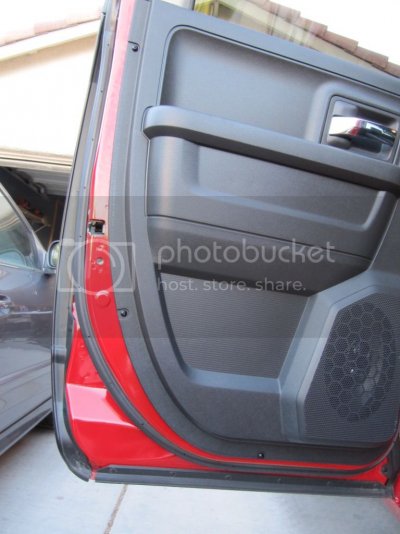
There are 2 located at the front, back, and bottom sides of the door. To pop these guys out I just used my thumb nails to get under the pin's cap and pull them out. Once all the pins are removed, I used a small pair of pliers to grab the plugs and pull them out. You can see the pins around the outer parts of the shell in these pictures.
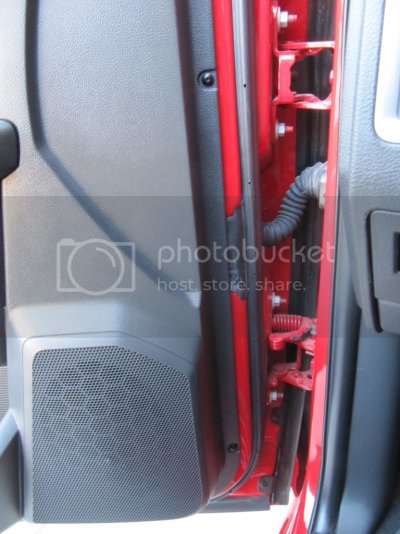
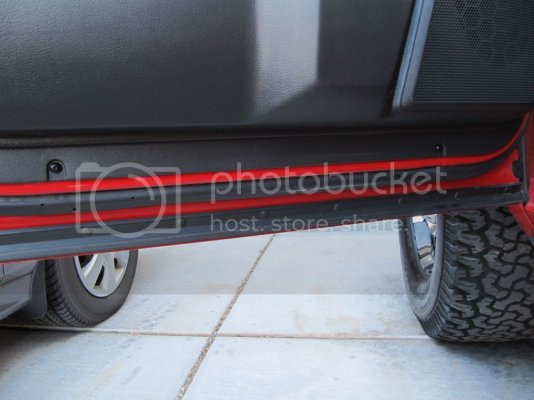
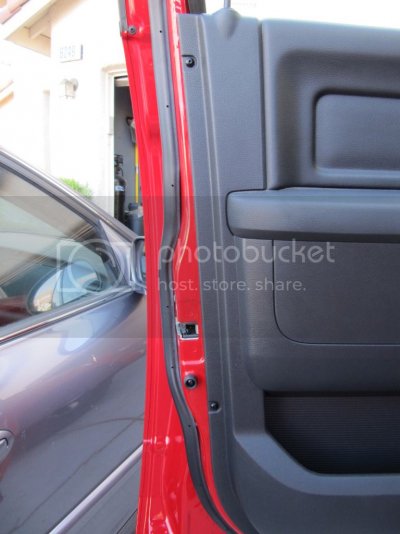
Once you have all 12 pins/plugs removed, all you need to do is lift the door straight up I'd say maybe 3-4", enough to clear the lock/unlock pin and pull away. you have now removed the door shell, yay.
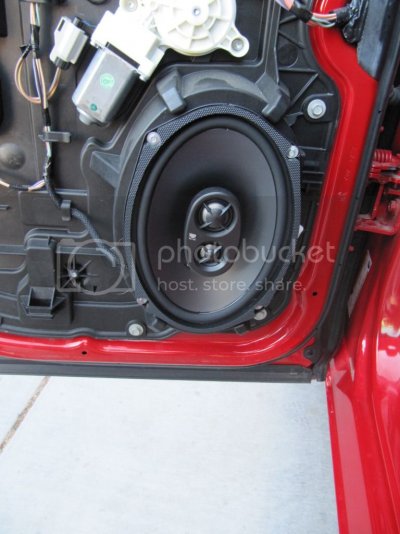
And this is your speaker once the shell is off...well actually it's my kicker but ya, you get the point
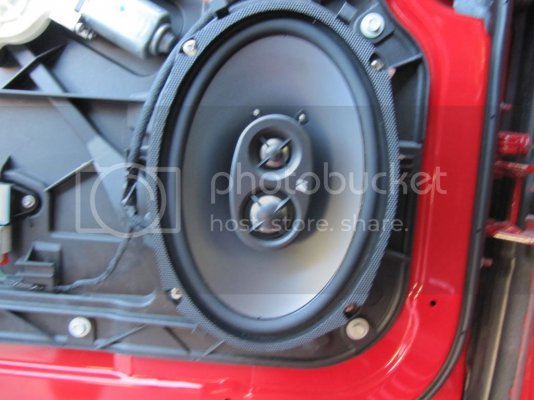
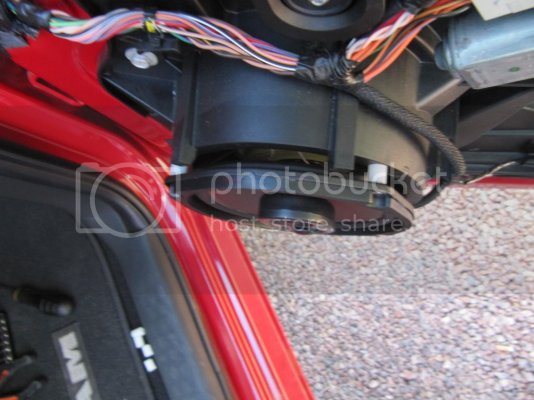
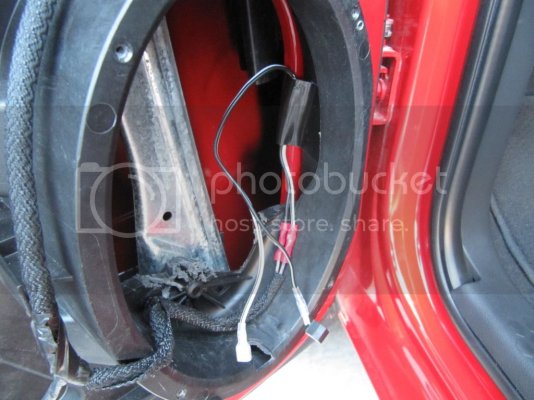
The oem speakers are held in but 4 bolts, size might be a 1/4" I'm not sure as I neglected to check the size when I had the cover off. But pull those four bolts and disconnect the plug on the speaker and it it'll looks something like this. Mine has had plastic removed as my buddy, my "audio expert", decided some needed to be removed in order for the speaker to have some space. However, some people did not need to do any trimming of the plastic with the same speakers I have so double check, test fit, before you do any trimming. Also make sure the speakers mount hole line up with the stock mount holes, depending on the speaker, you may need to drill some new ones. If you do need to do any trimming to the plastic, dikes work very well on that plastic if you do not have a dremel or, in my buddies case, one dremel takes a ****, and the other cuts through plastic like a butter knife through wood.
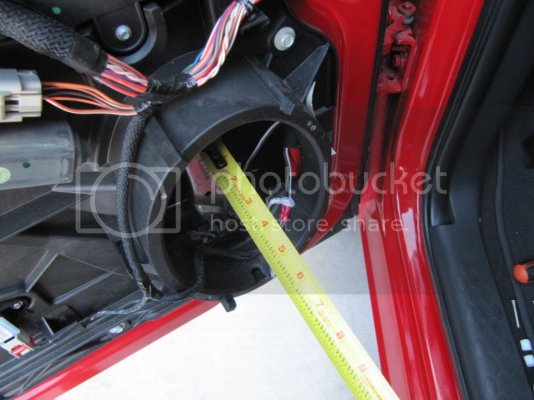
Also including these pictures with a tape measure showing you the depth of the front doors that you have to work with. As you can see, it's just short of 3".
Once you are done test fitting and have removed any material that needs to be removed or drilled any new holes that need to be drilled, now is the time to either plug in those connectors you bought from crutchfield or splice the connecters that came with your speakers. Once you are done with that go ahead and connect your speaker up and throw that bad boy in. Once your speaker is installed, go ahead and do a test run real quick to make sure it works. You don't want to wait until you are completely done with the whole install to test because if it doesn't work, you just wasted a ton of time. once your test is done, go ahead and reassemble the door in reverse order.
OEM Wiring Harness
Also, the speakers installed are Kicker KS35's in the dash and Kicker KS693's in all four doors.
Tools needed:
jewelers flat top screw driver
small flat tip screw driver
medium and large phillips screw drivers
pliers
if splicing, dikes and the splicer pliers (whatever they're call)
2 small sockets...sorry I don't know the size as I forgot to check when I pulled the cover of the dash speaker and the rear door shell to take pictures of the speakers. But I think they might be 1/4" or 5/16"
Speaker sizes:
- The dash takes 3.5" speakers, depth is not an issue because there is nothing below those suckers for a good little bit.
- Depending on the speakers you go with, you can fit 6x9's all around but your front doors might need spacers as you have a little less than 3" of depth to work with because of the window brace going down the middle of the opening. The kicker KS693's for example are 3 3/16" deep and without spacers the magnet rests on the window brace with approx a 1/4" gap between the speaker and the mount. The rear doors can pretty much take any 6x9 out there as I'm going to say you have about 5" of depth to work with, no I didn't measure it, I'm guessing since I didn't think to do that when I had the door shell off.
Speaker Wire Color's:
The dash and front door wire's are the same colors
Left Front Speaker Positive Wire (+): Gray/Violet
Left Front Speaker Negative Wire (-): Gray/Yellow
Right Front Speaker Positive Wire (+): Dark Green/Violet
Right Front Speaker Negative Wire (-): Dark Green/Yellow
Left Rear Speaker Positive Wire (+): Gray/Dark Green
Left Rear Speaker Negative Wire (-): Gray/Light Green
Right Rear Speaker Positive Wire (+): Dark Green/Gray
Right Rear Speaker Negative Wire (-): Dark Green/Light Green
First, the Dash speakers:
They are really easy to get to as all you need to do is lift the back of the grille up with a screw driver then grab it, lift, and pull. Then the speaker is exposed and it's held in by two small bolts. Remove the bolts, lift speaker, disconnect connector, then either splice on the new wires or if you buy those harness connectors, connect them, plug into new speaker, drop it in, install bolts, and replace the cover putting the front in first then pressing the back down.


Next, Front doors:
This is one area where there might be differences mainly between the reg cab and the crew/quad cabs. I say this because a regular cab was able to install the KS693's without spacers or any modification.
Start by pulling this cover off, all you need to do is get a good grip and pull straight out


then using a small jewelers flat tip screw driver, pry the little circle cover behind the door handle open from the forward side to revel a large phillips screw. Remove the screw then using either a small flat tip or jewelers screw driver, pry the forward part of the door handle cover out then while holding the door handle out some, pull the cover out from behind the handle.


Yes this is from the rear door but same thing with the fronts, I just felt like I should show the pry spot and since I didn't take on of the front, this will do.

Now for the window/door lock control panel
The only difference on this step between driver and passenger besides the number of switches you have to play with is the drivers switchboard has 2 connectors and the passengers has 1.
I had to use a combination of a jewelers flat tip screw driver and my finger nail to lift the panel up and hold it in place while I swapped over to a small flat tip screw driver. But however you get it to lift up enough to fit a flat tip under it, once you get one under it just push it straight up and pull it out. Once you have it out, remove the connector/s and set it aside.


When it comes to the large connector on the drivers switch panel, I did need to use a flat tip in order to pry the connector out of the plug, that thing did not want to disconnect by hand at all. where the screw driver is, is a prefect pry spot if you need to do it as well, just set the tip in that gap and rotate it, the plug should pop right off.

now the only thing left is to remove 6 each (12 pieces total) of these plugs and pins.

There are 2 located at the front, back, and bottom sides of the door. To pop these guys out I just used my thumb nails to get under the pin's cap and pull them out. Once all the pins are removed, I used a small pair of pliers to grab the plugs and pull them out. You can see the pins around the outer parts of the shell in these pictures.


Once you have all 12 pins/plugs removed, all you need to do is lift the door straight up I'd say maybe 3-4", enough to clear the lock/unlock pin and pull away. you have now removed the door shell, yay.
And this is your speaker once the shell is off...well actually it's my kicker but ya, you get the point

The oem speakers are held in but 4 bolts, size might be a 1/4" I'm not sure as I neglected to check the size when I had the cover off. But pull those four bolts and disconnect the plug on the speaker and it it'll looks something like this. Mine has had plastic removed as my buddy, my "audio expert", decided some needed to be removed in order for the speaker to have some space. However, some people did not need to do any trimming of the plastic with the same speakers I have so double check, test fit, before you do any trimming. Also make sure the speakers mount hole line up with the stock mount holes, depending on the speaker, you may need to drill some new ones. If you do need to do any trimming to the plastic, dikes work very well on that plastic if you do not have a dremel or, in my buddies case, one dremel takes a ****, and the other cuts through plastic like a butter knife through wood.

Also including these pictures with a tape measure showing you the depth of the front doors that you have to work with. As you can see, it's just short of 3".


Once you are done test fitting and have removed any material that needs to be removed or drilled any new holes that need to be drilled, now is the time to either plug in those connectors you bought from crutchfield or splice the connecters that came with your speakers. Once you are done with that go ahead and connect your speaker up and throw that bad boy in. Once your speaker is installed, go ahead and do a test run real quick to make sure it works. You don't want to wait until you are completely done with the whole install to test because if it doesn't work, you just wasted a ton of time. once your test is done, go ahead and reassemble the door in reverse order.


