- Joined
- Feb 3, 2012
- Posts
- 1,623
- Reaction score
- 175
- Ram Year
- 2013
- Engine
- 5.7 Hemi
Because I had to go to the dealer to have the clutch fan removed, the job only took me about 15-ish minutes to do. I am going to lay the steps out as if I removed the clutch fan myself so that way there is a whole sequence to follow and it should all go fairly easy.
Tools required for this job is a rechet, 13mm socket, screwdriver, and your hands.
Only part you need to order is the fan itself which can be bought from Amazon for a good cheap price here
Step 1: Remove lower fan shroud clip.
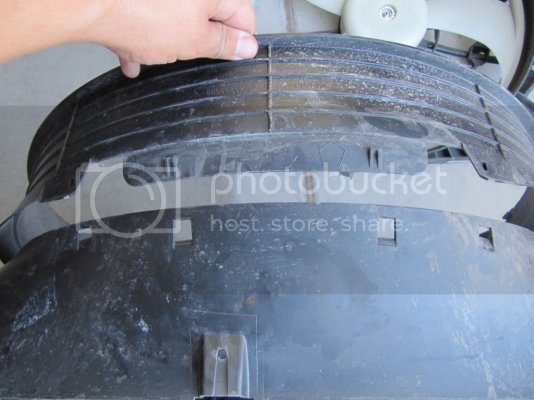
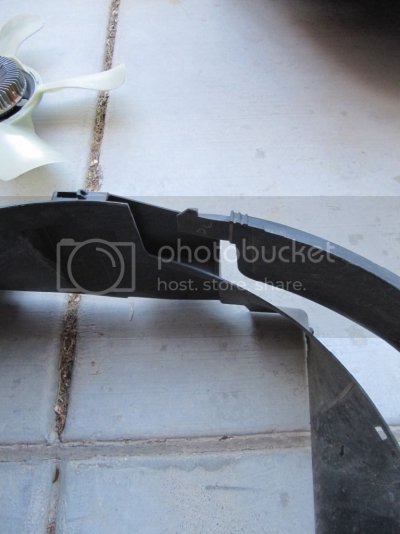
Referring to the picture below, I did not take a picture of the lower shroud inside the truck so here's one of it already separated outside of the truck. To take this piece off all you need to do is push the two grooved tabs on the center piece into the shroud with your thumbs and with your index fingers, pull the two off to the side down and pull the piece towards the back of the the truck and up towards the fan a bit. Once all 4 of the tabs are clear, pull down on the lower piece and it'll come right off.
Step 2: Remove the Clutch fan.
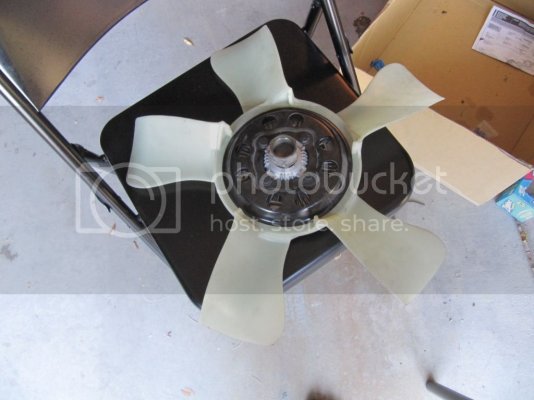
If you can remove the fan yourself, remember it is reverse threaded so it's lefty tighty, righty loosey. As stated, I went to the dealership to have it removed but I know most people that have access to a air tool and a chisel tap it a couple times and it'll break loose easy. Some other I guess have some good luck and can get it off with some good ol elbow grease.
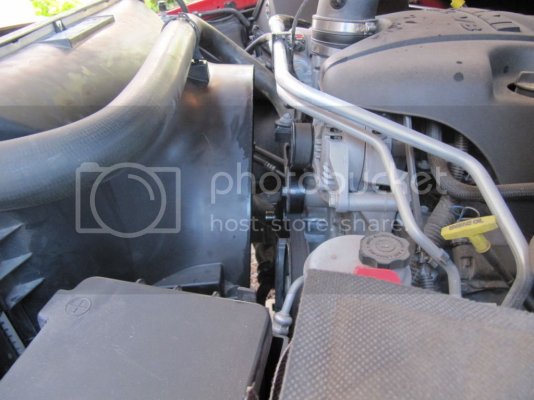
This is what it'll look like without a fan
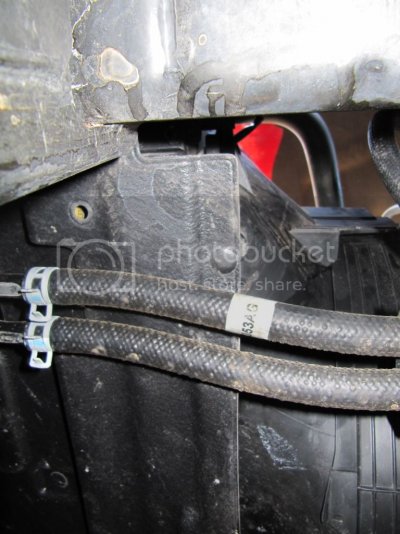
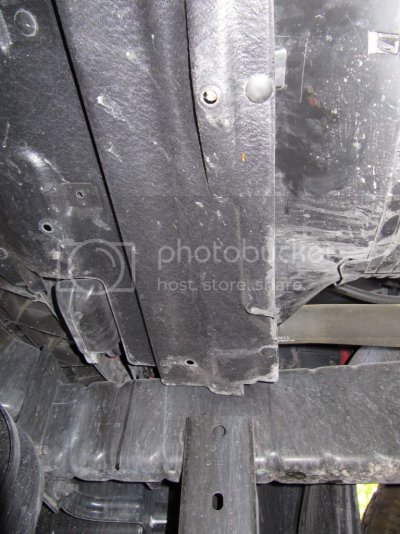
Step 3: Separate plastic sheet from bottom of shroud
While you're still under there, there is a sheet of plastic that goes from the forward part of the radiator to the forward part of the shroud, not sure what to call it but it's very simple to separate. Just pull down on the 3 push pins that connect it to the shroud and let it hang.
Driver side
Center and passenger side
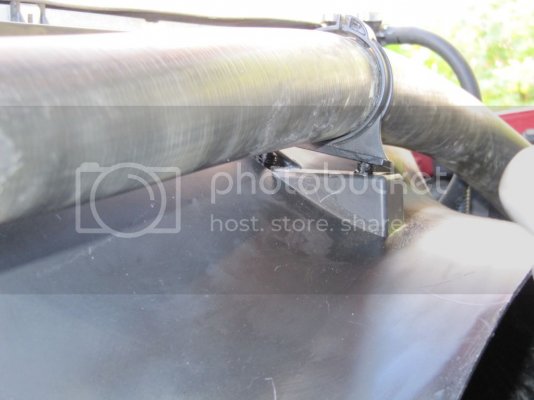
Step 4: Disconnect upper rad hose clamp from shroud
The clamp for the hose is held in by 2 push pins so just put a screwdriver under it and pop it up real fast.
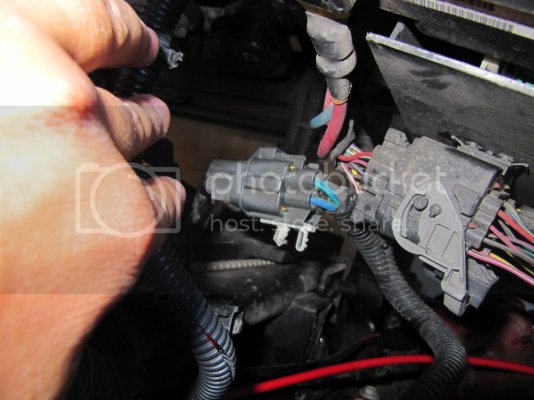
Step 5: Separate A/c fan plug from shroud
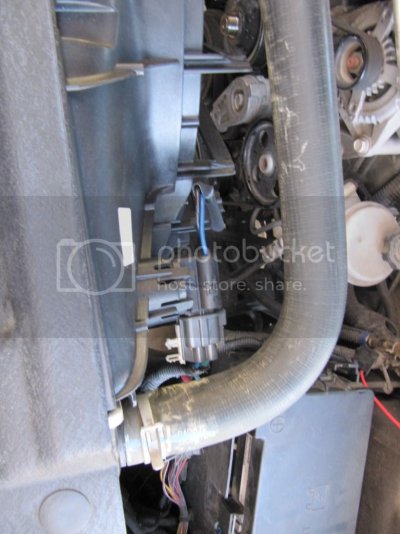
I do not have a picture of this on the shroud as the tech at the dealership never pushed this back on but oh well, he saved me a step, lol. But I'll use this one twice, the white pins on the side of the connecter go into the shroud's driver side, pull it out and let it hang.
Step 6: Unbolt the shroud
Use a 13mm socket to remove the two bolts on either side of the shroud
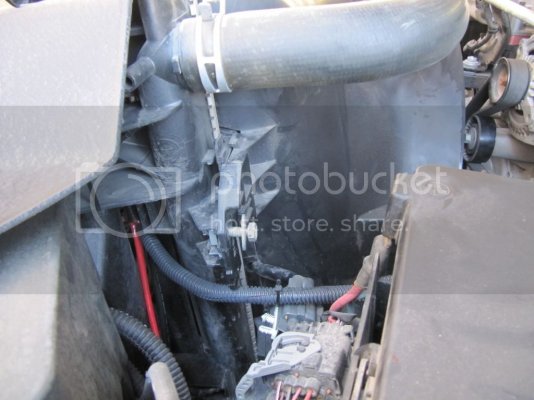
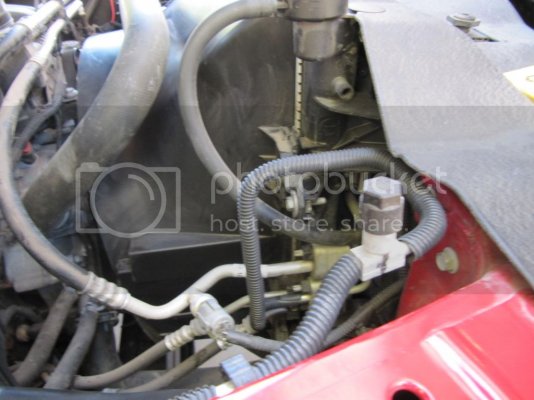
Step 7: Remove shroud
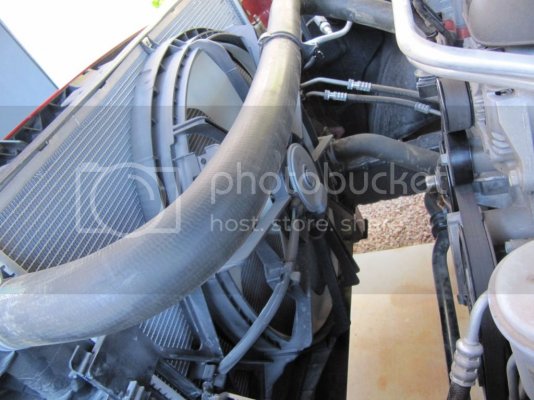
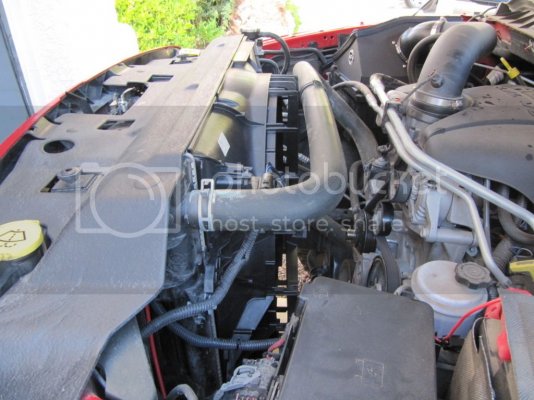
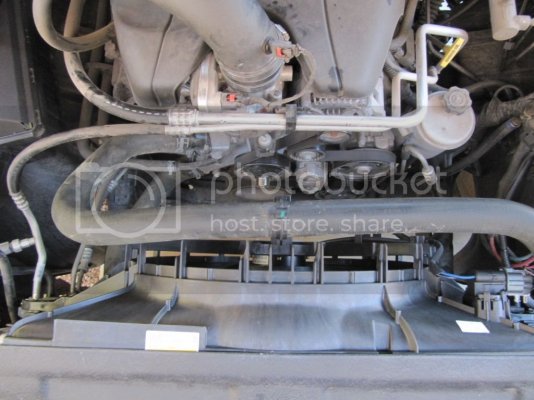
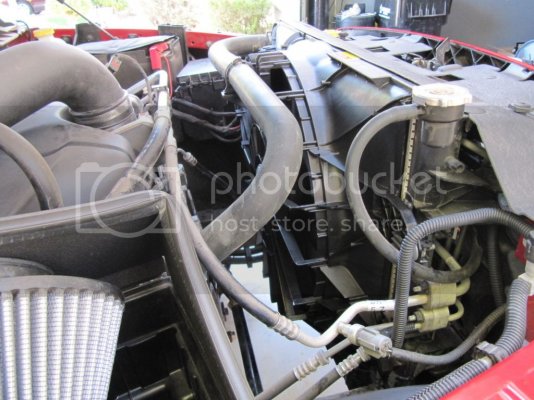
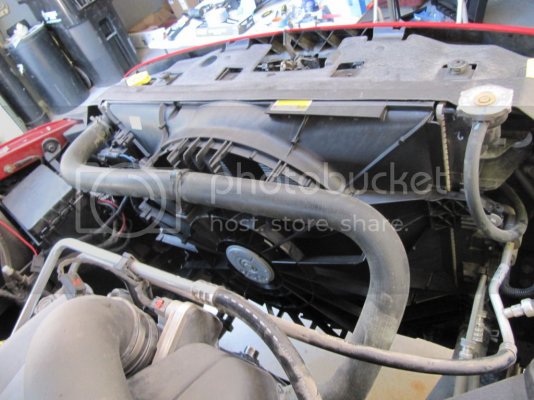
Once those two bolts are out, start lifting the shroud on out of there. It's a little tricky because you'll be rotating that shroud in a couple different directions as you are pulling it out, it is a pita btw. Once you have the shroud out, you're engine bay will look like this
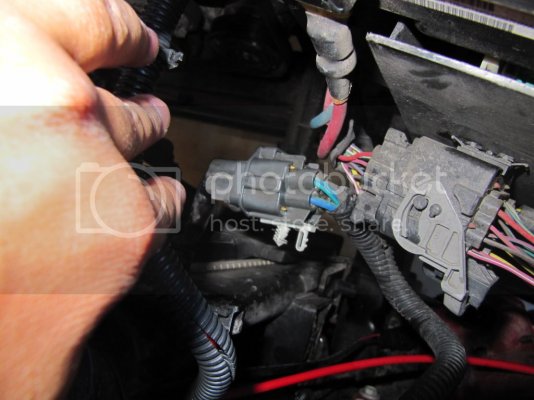
Step 8: Disconnect a/c fan
push the lever on this plug and separate
Step 9: Remove the A/c Fan
First, at the 6 and 12 o'clock position, there are 2 metal clips that hold the fan to the radiator, simply take a screwdriver and pry these clips off. No picture of the lower one as I forgot to take one.
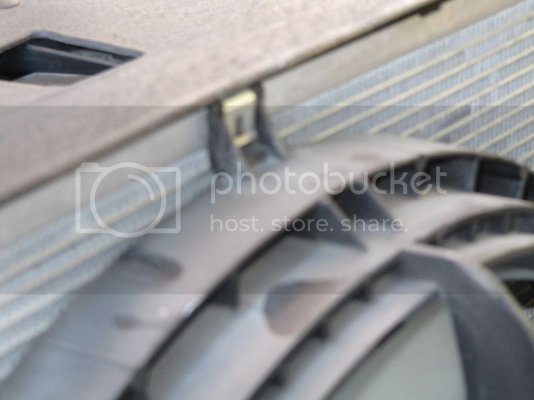
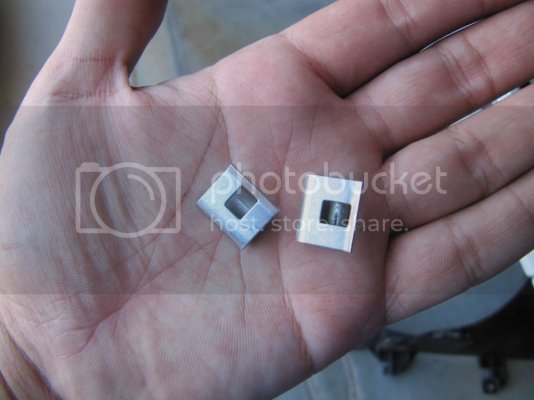
Second, There are two tabs on either side of the fan, push them forward and start lifting the fan out.
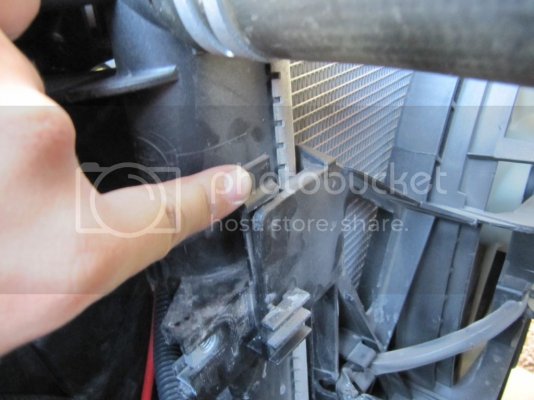
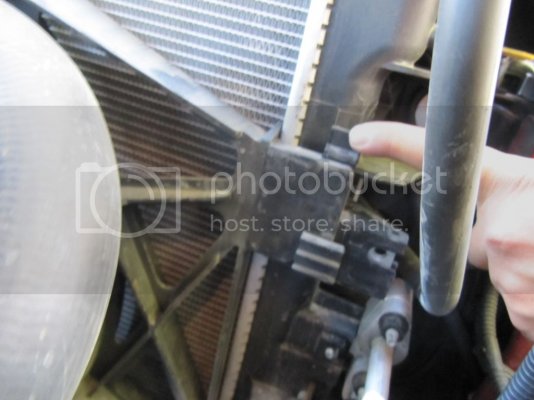
You will need to wiggle that fan around a bit to get it out because it's a little odd shaped.
And finally Step 10, install the V6 EFan
Pretty much just kick it into reverse. Take you're time lowering the fan in as it's a little more clumsy than the shroud and a/c fan. Once lowered into position, put the lower mount arms into the bracket that the a/c fan sat in and the upper mount arms in the push tabs at the top. Reinstall the two bolts, upper rad hose clamp, connect the connector, and don't forget to slide back under there and reattach that skirt to the new shroud.
A pretty quick and easy job, took me about 15-ish minutes not including clutch fan but if you're able to remove it yourself, I don't see it taking more then 20-25 minutes.
It has come recommended too that if you do this conversion to go ahead and replace your stock t-stat with a 180 t-stat.
If you are a 2009-2011 Ram then you have the luxury of being able to reprogram your fan to come on at a different temperature with either a Superchips, Bullydog, or Diablo tuner. I do believe bullydog now has 2012's available but Superchips and diablo are still working. The stock setting for the fan is set to 225 but since I went ahead and replaced my t-stat with a 180 one, I lowered mine down to 195.
Now here's some extra pictures of everything
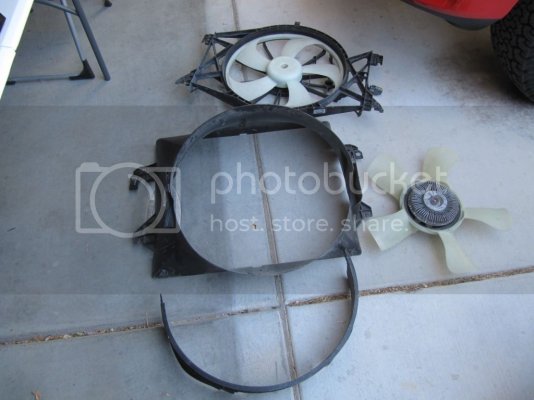
Old trash pieces
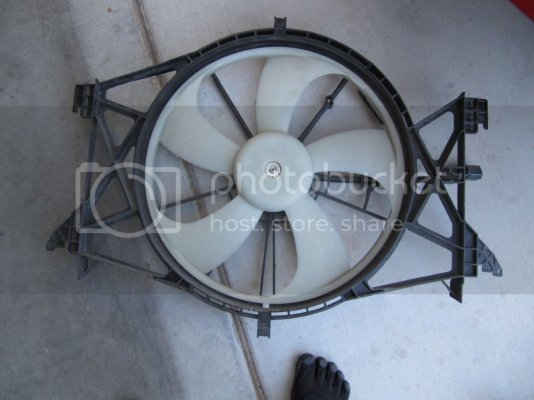
A/C fan
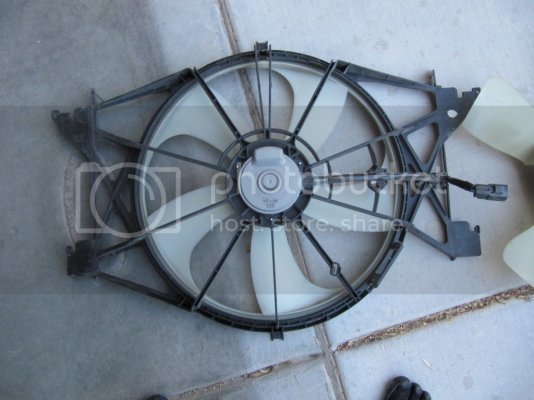
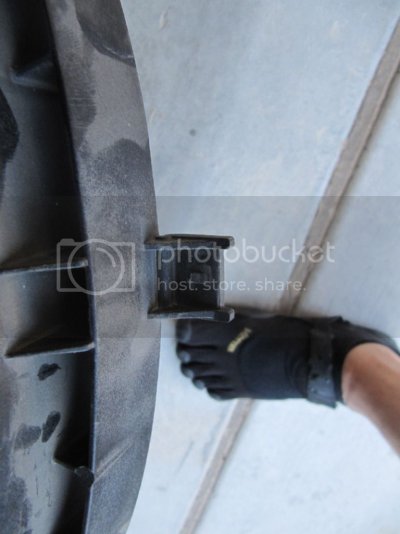
The little tab that holds the clips on the A/C fan to the radiator
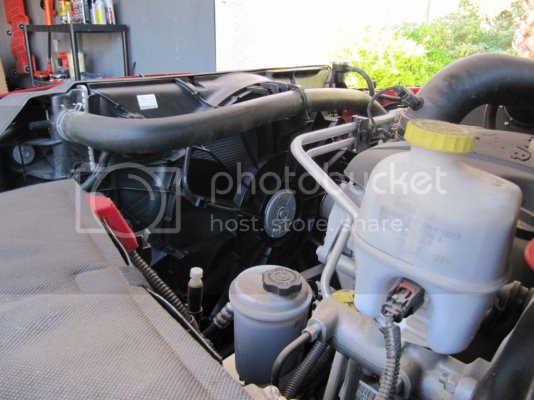
And the final product
Tools required for this job is a rechet, 13mm socket, screwdriver, and your hands.
Only part you need to order is the fan itself which can be bought from Amazon for a good cheap price here
Step 1: Remove lower fan shroud clip.
Referring to the picture below, I did not take a picture of the lower shroud inside the truck so here's one of it already separated outside of the truck. To take this piece off all you need to do is push the two grooved tabs on the center piece into the shroud with your thumbs and with your index fingers, pull the two off to the side down and pull the piece towards the back of the the truck and up towards the fan a bit. Once all 4 of the tabs are clear, pull down on the lower piece and it'll come right off.


Step 2: Remove the Clutch fan.
If you can remove the fan yourself, remember it is reverse threaded so it's lefty tighty, righty loosey. As stated, I went to the dealership to have it removed but I know most people that have access to a air tool and a chisel tap it a couple times and it'll break loose easy. Some other I guess have some good luck and can get it off with some good ol elbow grease.
This is what it'll look like without a fan


Step 3: Separate plastic sheet from bottom of shroud
While you're still under there, there is a sheet of plastic that goes from the forward part of the radiator to the forward part of the shroud, not sure what to call it but it's very simple to separate. Just pull down on the 3 push pins that connect it to the shroud and let it hang.
Driver side

Center and passenger side

Step 4: Disconnect upper rad hose clamp from shroud
The clamp for the hose is held in by 2 push pins so just put a screwdriver under it and pop it up real fast.

Step 5: Separate A/c fan plug from shroud
I do not have a picture of this on the shroud as the tech at the dealership never pushed this back on but oh well, he saved me a step, lol. But I'll use this one twice, the white pins on the side of the connecter go into the shroud's driver side, pull it out and let it hang.

Step 6: Unbolt the shroud
Use a 13mm socket to remove the two bolts on either side of the shroud


Step 7: Remove shroud
Once those two bolts are out, start lifting the shroud on out of there. It's a little tricky because you'll be rotating that shroud in a couple different directions as you are pulling it out, it is a pita btw. Once you have the shroud out, you're engine bay will look like this

Step 8: Disconnect a/c fan
push the lever on this plug and separate

Step 9: Remove the A/c Fan
First, at the 6 and 12 o'clock position, there are 2 metal clips that hold the fan to the radiator, simply take a screwdriver and pry these clips off. No picture of the lower one as I forgot to take one.


Second, There are two tabs on either side of the fan, push them forward and start lifting the fan out.


You will need to wiggle that fan around a bit to get it out because it's a little odd shaped.
And finally Step 10, install the V6 EFan
Pretty much just kick it into reverse. Take you're time lowering the fan in as it's a little more clumsy than the shroud and a/c fan. Once lowered into position, put the lower mount arms into the bracket that the a/c fan sat in and the upper mount arms in the push tabs at the top. Reinstall the two bolts, upper rad hose clamp, connect the connector, and don't forget to slide back under there and reattach that skirt to the new shroud.
A pretty quick and easy job, took me about 15-ish minutes not including clutch fan but if you're able to remove it yourself, I don't see it taking more then 20-25 minutes.
It has come recommended too that if you do this conversion to go ahead and replace your stock t-stat with a 180 t-stat.
If you are a 2009-2011 Ram then you have the luxury of being able to reprogram your fan to come on at a different temperature with either a Superchips, Bullydog, or Diablo tuner. I do believe bullydog now has 2012's available but Superchips and diablo are still working. The stock setting for the fan is set to 225 but since I went ahead and replaced my t-stat with a 180 one, I lowered mine down to 195.
Now here's some extra pictures of everything
Old trash pieces

A/C fan


The little tab that holds the clips on the A/C fan to the radiator

And the final product


Last edited:


