jgruberman
Senior Member
- Joined
- Oct 17, 2015
- Posts
- 636
- Reaction score
- 147
- Ram Year
- 2015
- Engine
- EcoDiesel 3.0L
Well I finished my install of an onboard air system with train horns and I feel like I did it really well and took all lot of pics... seemed only appropriate to share it and help others and answer questions... that's why we're all here, right? Feel free to ask questions here or PM me if you'd like... here we go!
Train Horn: Kleinn Train Horns - Train Horn | 4WheelParts.com
Onboard Air System: VIAIR - Medium-Duty Onboard Air System | 4WheelParts.com
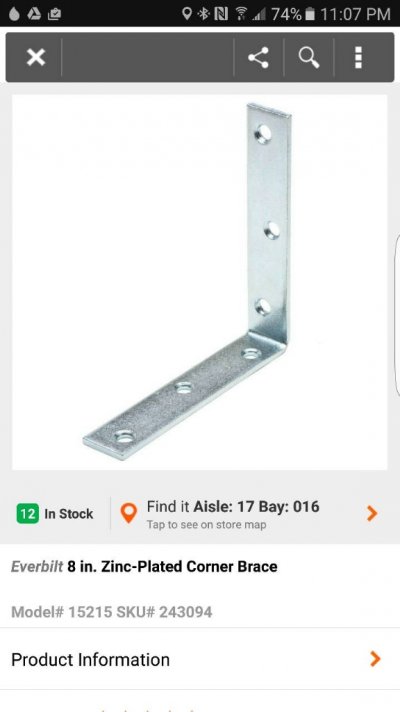
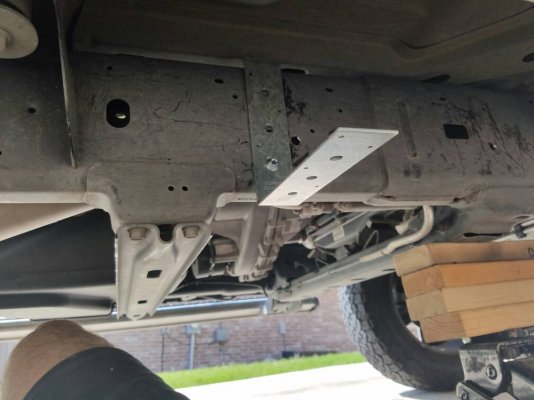
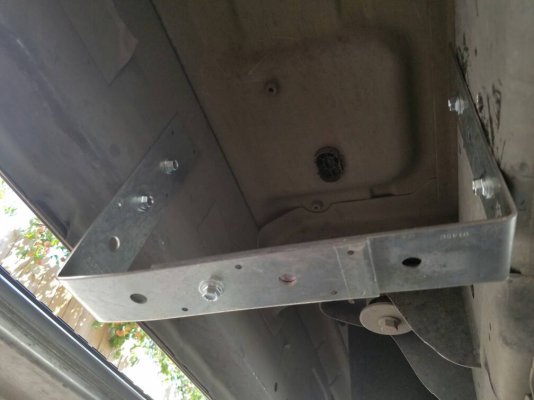
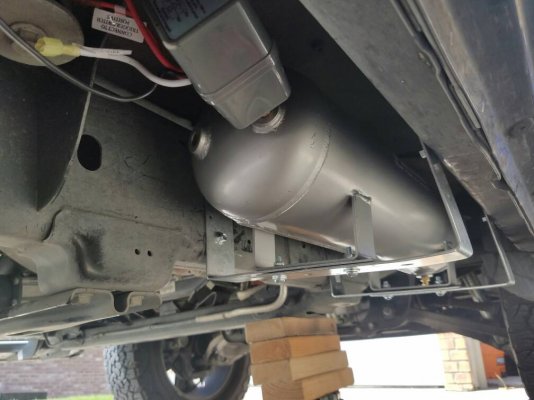
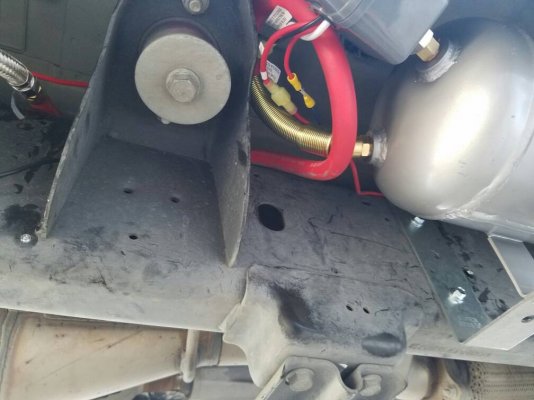
I struggled finding the right place to mount the tank but I ended up buying some pretty heavy duty L brackets from Home Depot and attached them to the underside of the passenger side of the truck with #10 1" Self tapping screws. Eventually I used a bolt, washer, the tank, another washer, a locking washer and finally the nut to attach the tank to the brackets. I used one of the bracket holes existing and drilled another for the other side of the tank.
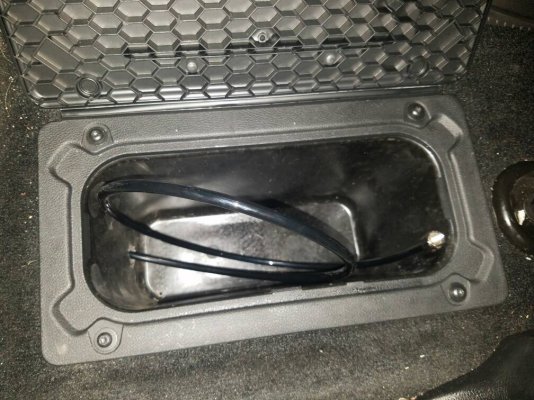
I decided to get crafty and use the storage bin under the rear floor mats for the compressor because I couldn't find a good location where it was close to the air tank and safe from a lot of water.
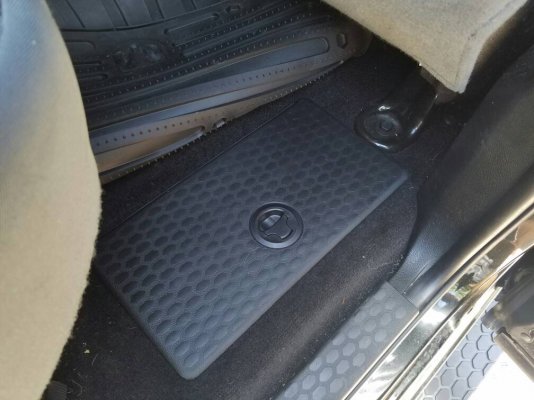
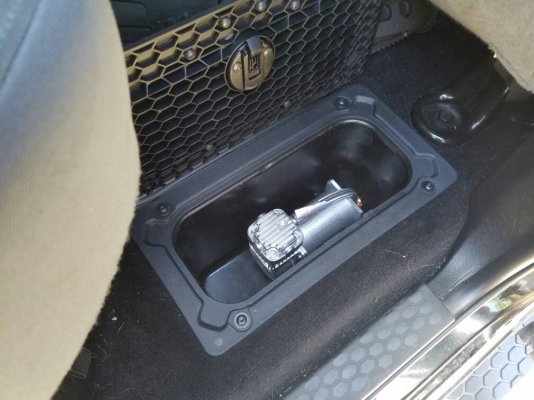
However it turns out that the compressor gets a little toasty and more importantly, the plastic bin acts as a sound amplifier and reverberates when the compressor is running and is somewhat uncomfortable when it runs, especially with the windows up and AC on. So the compressor got moved and I ended up using the extension tubing and flipped the compartment around and feeding the extension tubing in so the air filter will still be free from water and mounted the compressor further back on the frame with the same self tapping screws mentioned above. The only thing I may try to change is to add the provided bushings between the compressor and frame in perhaps preventing unnecessary vibration when the compressor is running, but I'm undecided in that... it's already much quieter on the outside. I used a flexi air hose to connect the extra distance and reach the compressor, also from Home Depot.
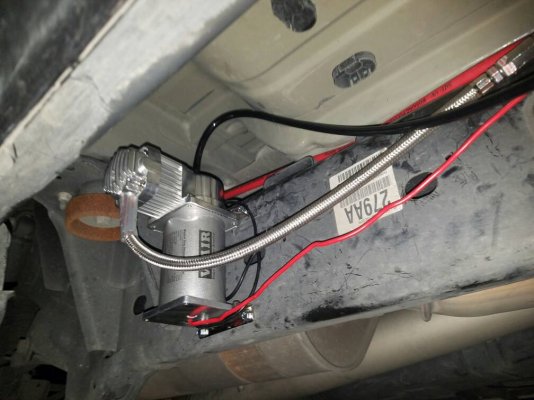
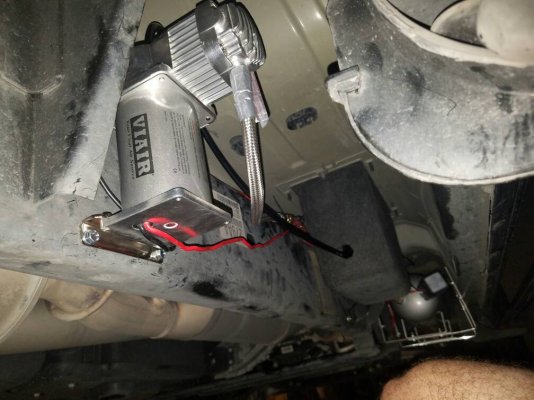
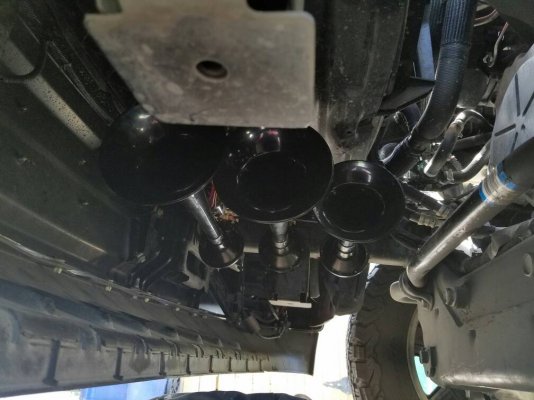
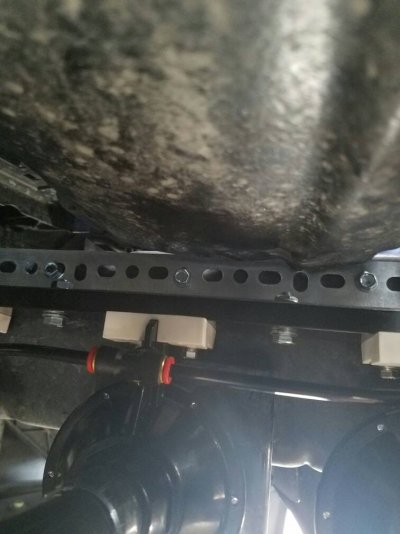
I used a corner bracket with the self tapping screws again and drilled it into the frame under the front of the truck. Then attached the horns to the bottom side of the corner brace. I didn't like the idea of the horns being too low or in the back because I felt they'd lose effectiveness or get damaged. This is a perfect spot IMO.
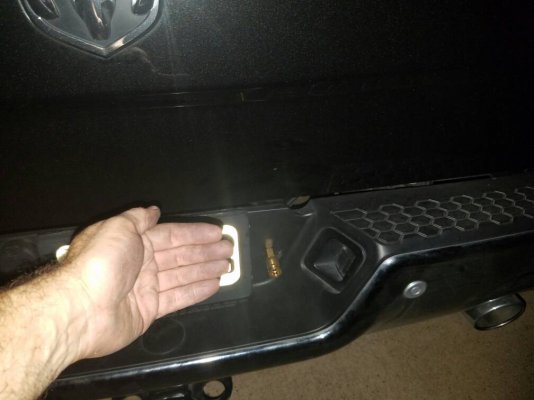
I ran a line from the air tank to a quick connect installed in the rear bumper for air tool connection, it's pretty handy to have IMO and pretty easy. I used a Universal connector from Home Depot that will allow automotive and industrial air tools connections.
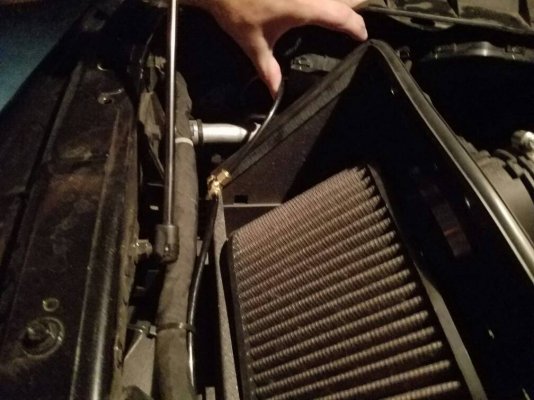
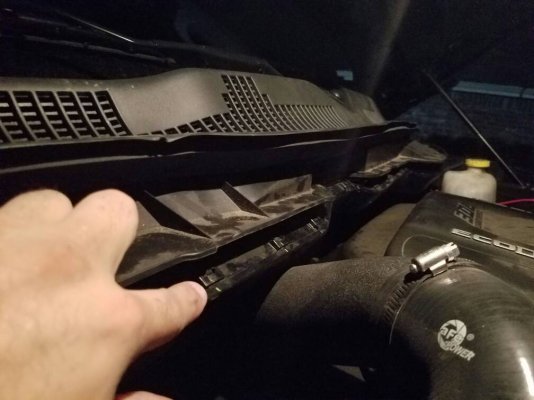
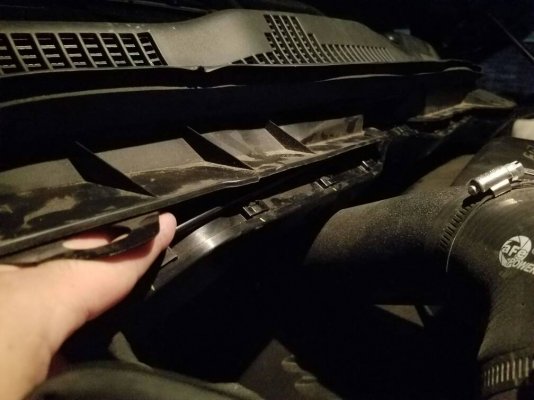
I installed the 1/4" tubing from the air tank into a brass T connector (from Home Depot). From that T connector, I ran one end to the train horns and the other end around the back of the engine compartment, the same place I ran the power wires. I actually was able to open the clips on the existing wire channel and ran the new wires in there and tucked in the air line. I ran that air line into the cab to the gauge provided in the kit.
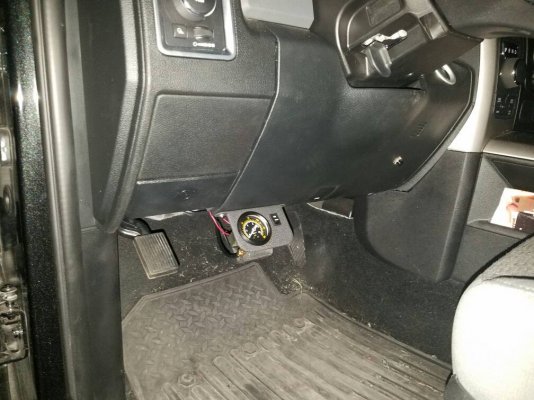
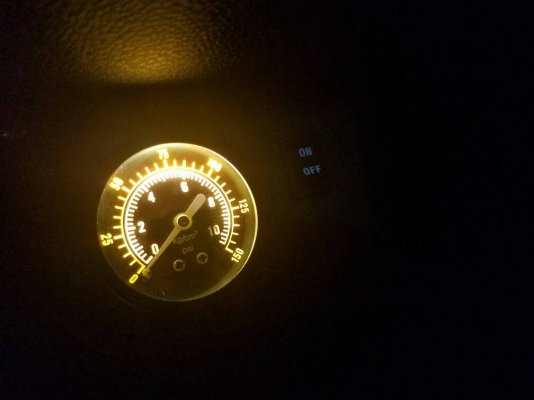
Inside the cab now, I connected the gauge(and compressor on/off switch) to the cigarette lighter line under the middle console because it's the easiest accessory line to tap into that I know of. I'm sure there are others but that's where I went. I also wired the momentary switch to on top of the steering column so it was within easy "smack it quick" reach but not going to hit it on accident. It's also wired to the cigarette circuit so when the truck is off, the horn won't work.
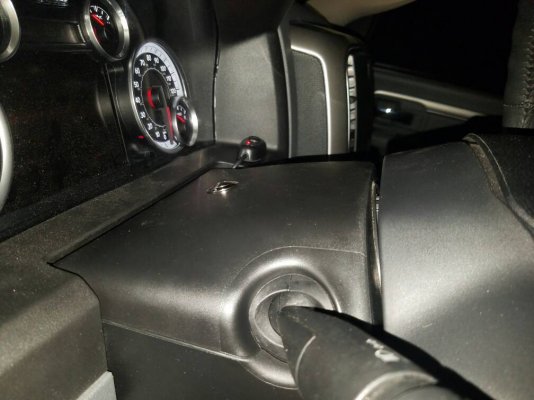
Overall, you need some #10x1" self tapping hex head screws, a few good brackets, and some spare wire. I used an impact driver for driving the screws into the frame. The overall project, trial and error for mounting points, trips back and forth to Home Depot.... honestly it probably took me 12 hours but I spent a LOT of time figuring out mounting solutions... here's to hoping that this thread helps you guys get it done faster. Overall, I'm very happy with the horn (haven't used it LEGITIMATELY yet for an idiot on the road, just testing it) and the entire air system. It's nice peace of mind to have the onboard air system. Pick up a tire plug kit from Harbor Freight for 10 bucks and you have your own roadside tire repair service [emoji1]
Good luck!
Sent from my SAMSUNG-SM-G935A using Tapatalk
Train Horn: Kleinn Train Horns - Train Horn | 4WheelParts.com
Onboard Air System: VIAIR - Medium-Duty Onboard Air System | 4WheelParts.com
I struggled finding the right place to mount the tank but I ended up buying some pretty heavy duty L brackets from Home Depot and attached them to the underside of the passenger side of the truck with #10 1" Self tapping screws. Eventually I used a bolt, washer, the tank, another washer, a locking washer and finally the nut to attach the tank to the brackets. I used one of the bracket holes existing and drilled another for the other side of the tank.


I decided to get crafty and use the storage bin under the rear floor mats for the compressor because I couldn't find a good location where it was close to the air tank and safe from a lot of water.


However it turns out that the compressor gets a little toasty and more importantly, the plastic bin acts as a sound amplifier and reverberates when the compressor is running and is somewhat uncomfortable when it runs, especially with the windows up and AC on. So the compressor got moved and I ended up using the extension tubing and flipped the compartment around and feeding the extension tubing in so the air filter will still be free from water and mounted the compressor further back on the frame with the same self tapping screws mentioned above. The only thing I may try to change is to add the provided bushings between the compressor and frame in perhaps preventing unnecessary vibration when the compressor is running, but I'm undecided in that... it's already much quieter on the outside. I used a flexi air hose to connect the extra distance and reach the compressor, also from Home Depot.


I used a corner bracket with the self tapping screws again and drilled it into the frame under the front of the truck. Then attached the horns to the bottom side of the corner brace. I didn't like the idea of the horns being too low or in the back because I felt they'd lose effectiveness or get damaged. This is a perfect spot IMO.


I ran a line from the air tank to a quick connect installed in the rear bumper for air tool connection, it's pretty handy to have IMO and pretty easy. I used a Universal connector from Home Depot that will allow automotive and industrial air tools connections.

I installed the 1/4" tubing from the air tank into a brass T connector (from Home Depot). From that T connector, I ran one end to the train horns and the other end around the back of the engine compartment, the same place I ran the power wires. I actually was able to open the clips on the existing wire channel and ran the new wires in there and tucked in the air line. I ran that air line into the cab to the gauge provided in the kit.


Inside the cab now, I connected the gauge(and compressor on/off switch) to the cigarette lighter line under the middle console because it's the easiest accessory line to tap into that I know of. I'm sure there are others but that's where I went. I also wired the momentary switch to on top of the steering column so it was within easy "smack it quick" reach but not going to hit it on accident. It's also wired to the cigarette circuit so when the truck is off, the horn won't work.

Overall, you need some #10x1" self tapping hex head screws, a few good brackets, and some spare wire. I used an impact driver for driving the screws into the frame. The overall project, trial and error for mounting points, trips back and forth to Home Depot.... honestly it probably took me 12 hours but I spent a LOT of time figuring out mounting solutions... here's to hoping that this thread helps you guys get it done faster. Overall, I'm very happy with the horn (haven't used it LEGITIMATELY yet for an idiot on the road, just testing it) and the entire air system. It's nice peace of mind to have the onboard air system. Pick up a tire plug kit from Harbor Freight for 10 bucks and you have your own roadside tire repair service [emoji1]
Good luck!
Sent from my SAMSUNG-SM-G935A using Tapatalk
Last edited:

