go to
LED Lights, Bulbs & Accessories - SUPER BRIGHT LEDS. Since you have some that are burned out you may as well have fun and switch colors up a bit. I changed all my interior lights blue in my old truck and it looked extremely nice.
Starting with the Cluster. Contrary to what i saw on other similar posts, my cluster only has 5 lights in it. I successfully used B8.5D LEDs from superbrightleds.com. No modification to the bases or cluster was required. This was a plug and play swap. No need to disassemble the cluster or needles either. There there is a small bit of hot-spotting, but it's not that noticable if you're not looking for it. I wish my cluster was more like the photos TCCCustoms posted in the above thread, 11 LEDs instead of my 5 would have definately smoothed out the light spread. But I'm happy nonetheless.
Next the HVAC control. There's 3 lights in this module. superbrightleds sells T1.5 Twistlock bulbs that fit perfectly in these sockets. However, when i used these bulbs, there was an obnoxious hot spot area. I couldn't live with that. I happened to have a few spare B8.5D LEDs from the cluster, I found that these fit the holes too. At first they kinda flickered intermittently when in the sockets. The only thing that I needed to do is slightly bend up the tabs on the flange side of the bulb housing. This made the contacts fit firmly against the contacts on the PCB of the HVAC control. Again, I'd still prefer a slightly more even light spread, but this is plenty acceptable for me.
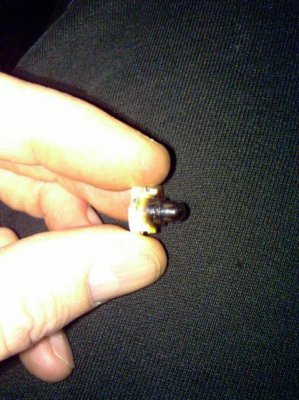
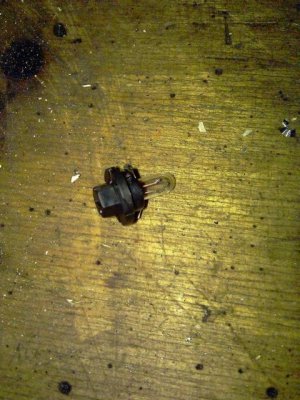
The procedure for both the 4x4 switch and headlight switch is very similar. Remove both of these from the dash and bring them to the bench. You'll need a electronics vise and good soldering iron for this part. First, remove the screws from the back side of the module. Then holding it with the buttons/knob facing down, remove the back of the assembly. You'll be left with the back half of the assembly with the circuit board in it all full of dielectric grease. On both modules you'll see a small bulb in a square white housing. This is the point of no return! Grab the white part with a pair of pliers and gently rock it back and forth until it breaks free. This will leave you with two solder pads underneath where the bulb housing was. I used WLED-X leds for this part. You need to remove the LED, resistor, and diode from the base. You'll take this WLED bulb and straighten the leads out. Then using a pair of pliers, gently squeeze the base where it meets the LED itself. Do this a few times, from all sides, and it'll break the glue holding it together. Then you can grab the LED and pull it straight out of the base. Leave the resistor and diode attached to the LED, but trim the leads to about 3/16". bend the remaining tails 90 degrees toward each side. you'll solder these tails to the pads on the PCB that you exposed earlier from under the old lamp housing. Polarity does matter. I can't remember which way each was supposed to be. If you get it backwards, just pull it back apart and reverse the contacts.
The rear sliding window switch was the hardest. I had a hard time getting the switch out of it's bezel, and then again, to get the switch itself apart. it's just a matter of wedging in little screwdrivers until you get it to pop out. then again to get the switch itself open. Once it's open you'll see a bulb soldered to two contacts in the center of the switch. First you'll have to unsolder this bulb. the WLED-x is too big for this application. I used a #74 bulb removed from it's base. Removing this LED from the base is the same as with the WLED-x from the previous steps. once it's out, shorten the leads and solder it where the original bulb was. Again, polarity matters, so make sure you have it right before you reassemble the whole switch. You can plug it in to the harness and see if the LED lights with the running lights on without assembling the switch.
Here's the parts list for what I got so far. These are all from superbrightLEDs.com
8 B8.5D Cluster and HVAC
3 NEO4 (overhead console homelink and computer buttons)
2 WLED-X the single led type (4x4 switch and headlight switch)
1 #74 (rear sliding window switch)
3 4210-CWHP6 (dome light and map lights)
1 strip of WFLS-B300 which is waterproof flexible cuttable LED strips. Most of that went under the truck for running board lights, but 6" or so is over the cupholders.
#74 RoscoLux gel from a local theatrical lighting company. That's gonna go over the 3 VFDs (Odometer, radio display, and overhead display) to make them match.
To do the filter film over the cluster VFD (Vaccum Florescent Display, the odometer and gear indicator) here's what I did.
Order a single sheet of RoscoLux #94 "Night Blue" This will match Blue LED lights.
Pull out the cluster and get it on your workbench.
Place it face down and take out all of the torx screws around the edges. I think they're T10.
Seperate the bezel/lens assembly from the electronics. put the bezel/lens aside.
Now there'll be plastic clips holding the face to the plastic housing. release these clips and seperate the plastic from the gauge assembly.
Cut yourself a strip of the filter material that's just a bit wider than the odometer window, and is long enough to go from the top of the odometer window and protrude out the botom beyond the edge of the cluster edge. make it longer than you need, you'll trim it later.
the actual gauge face is a screenprinted overlay. you'd need to take the needles off to seperate it completely, but I found that I didn't have to get it off completely to do what i needed to do. The face is attached with spray adhesive or something similar. You can very carefully peel away the gauge face from the plastic in the area right around the clear window for the odometer. Use a putty knife or something similar to pry but not poke thru or dent the gauge face. You'll find a stringy glue clinging between the two parts. i used an X-acto knife to cut at the adhesive to make a path. I used two post-it notes folded in half to combat the stickyness. put the post-its in the opening you have, and let one of em stick to each half of the opening. now you'll have a non-sticky slot to slide in the filter. Slide it in and make sure the whole odometer window is covered. Then pull out the post-it notes and push it all back together, it should just stick together.