clifford15
Senior Member
- Joined
- Sep 4, 2015
- Posts
- 859
- Reaction score
- 453
- Ram Year
- 2015
- Engine
- CTD
2015 RAM Tradesman 4X4
Center drawer retrofit project
Completed 4/7/19 Started 1/21/17
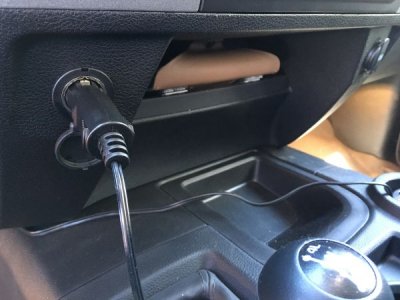
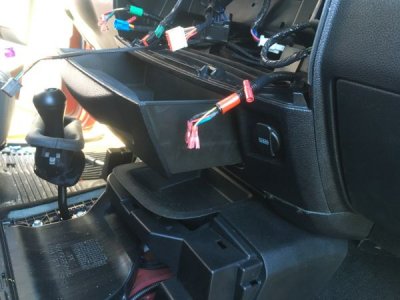
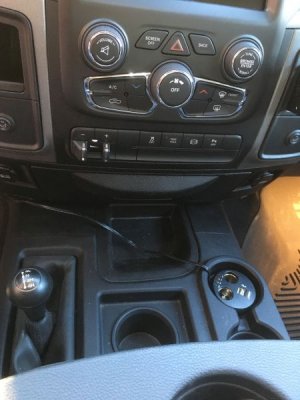
PIC- Original shelf
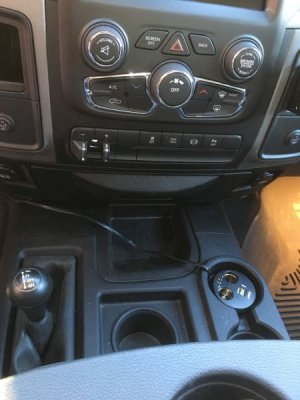
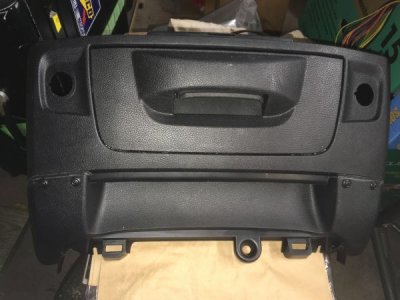
PIC- Modified drawer installed
This project is to add the center drawer and replace the shelf closeout panel on a 2015
RAM 3500 4X4 Tradesman with manual transfer case floor shift. I picked up the center
drawer and some other dash parts on eBay for a decent price. Upon initial attempts to
install the drawer it was discovered that the lower portion of the drawer molding is
completely different than the lower portion of the shelf closeout panel. The second issue
was that the USB charge port was not immediately obvious on how to disconnect from the
wiring harness as the wire disappeared into the dash. After that initial attempt, the
stock parts were reinstalled and further installation options were contemplated.
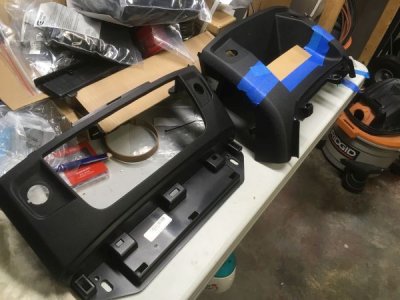
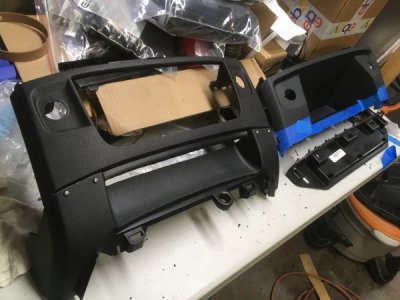
PIC- Drawer bezel and shelf side by side
After a long while I came up with an idea that maybe the lower part of the shelf closeout
could be grafted to the lower part of the center drawer. I contacted Benny at
AllMopartParts and he got me the part number and good price on the shelf panel. I did not
want to hack up my original in case this turned out to be a huge fail. After I had all
parts in hand I compared the two and found that in-fact the lower portion of each could
be cut off and the lower shelf could be attached to the upper drawer. This is where the
project stopped for another long time as other things cropped up.
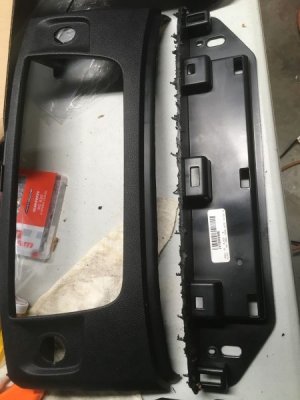
PIC- Drawer bezel cut
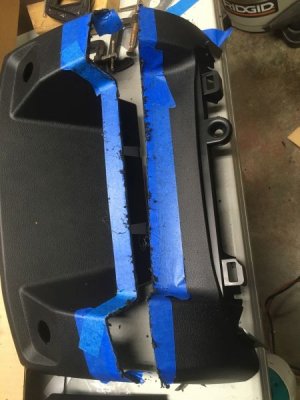
PIC- Shelf panel cut
Fast forward to late last year I had the shelf panel marked out with blue tape. The drawer bezel is cut along a bend to leave a flange so no tape was required. The necessary cuts were made. The pieces were assembled and they actually lined
up pretty well. To fasten the 2 parts together I initially intended to use ABS cement but
this plastic is poly or nylon and is impervious to ABS cement. I assumed as much and ran
some test globs inside the discard parts and confirmed my suspicions. I decided to
purchase some black trim screws from Advance Auto as there was a nice overlapping flange
that would be used to hold the two parts together. As a filler I used some black epoxy to
fill in the crack between parts. After that was completed the modified drawer sat
throughout the winter waiting for warm weather to install.
Continued in next entry.
Center drawer retrofit project
Completed 4/7/19 Started 1/21/17

PIC- Original shelf

PIC- Modified drawer installed
This project is to add the center drawer and replace the shelf closeout panel on a 2015
RAM 3500 4X4 Tradesman with manual transfer case floor shift. I picked up the center
drawer and some other dash parts on eBay for a decent price. Upon initial attempts to
install the drawer it was discovered that the lower portion of the drawer molding is
completely different than the lower portion of the shelf closeout panel. The second issue
was that the USB charge port was not immediately obvious on how to disconnect from the
wiring harness as the wire disappeared into the dash. After that initial attempt, the
stock parts were reinstalled and further installation options were contemplated.

PIC- Drawer bezel and shelf side by side
After a long while I came up with an idea that maybe the lower part of the shelf closeout
could be grafted to the lower part of the center drawer. I contacted Benny at
AllMopartParts and he got me the part number and good price on the shelf panel. I did not
want to hack up my original in case this turned out to be a huge fail. After I had all
parts in hand I compared the two and found that in-fact the lower portion of each could
be cut off and the lower shelf could be attached to the upper drawer. This is where the
project stopped for another long time as other things cropped up.

PIC- Drawer bezel cut

PIC- Shelf panel cut
Fast forward to late last year I had the shelf panel marked out with blue tape. The drawer bezel is cut along a bend to leave a flange so no tape was required. The necessary cuts were made. The pieces were assembled and they actually lined
up pretty well. To fasten the 2 parts together I initially intended to use ABS cement but
this plastic is poly or nylon and is impervious to ABS cement. I assumed as much and ran
some test globs inside the discard parts and confirmed my suspicions. I decided to
purchase some black trim screws from Advance Auto as there was a nice overlapping flange
that would be used to hold the two parts together. As a filler I used some black epoxy to
fill in the crack between parts. After that was completed the modified drawer sat
throughout the winter waiting for warm weather to install.
Continued in next entry.
Last edited:


