brandonjansen - 2012 Ram 3500 Laramie Limited Build Thread

Disclaimer: Links on this page pointing to Amazon, eBay and other sites may include affiliate code. If you click them and make a purchase, we may earn a small commission.

OP
OP
brandonjansen

brandonjansen

Senior Member
Joined
Feb 14, 2013
Posts
1,701
Reaction score
1,013
Location
Abbotsford, BC, Canada
Ram Year
2012 Ram 3500 Laramie Limited
Engine
6.7 Cummins - Tuned and Deleted
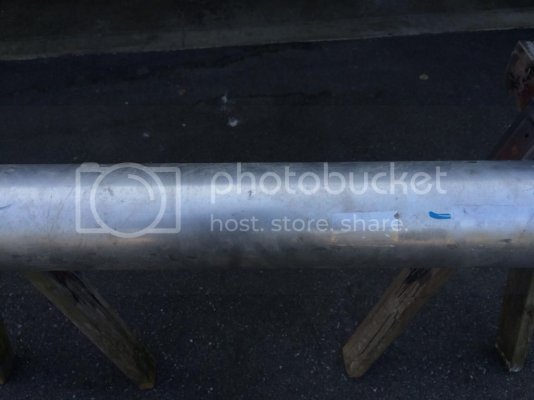
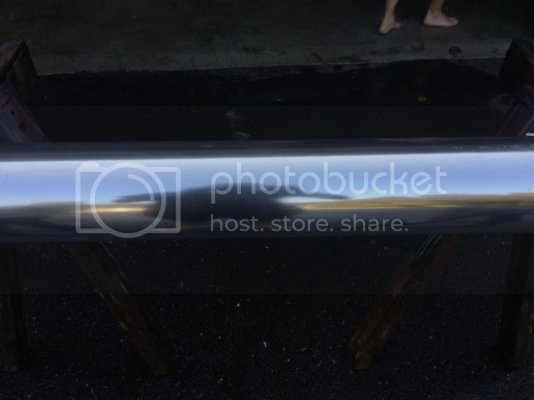
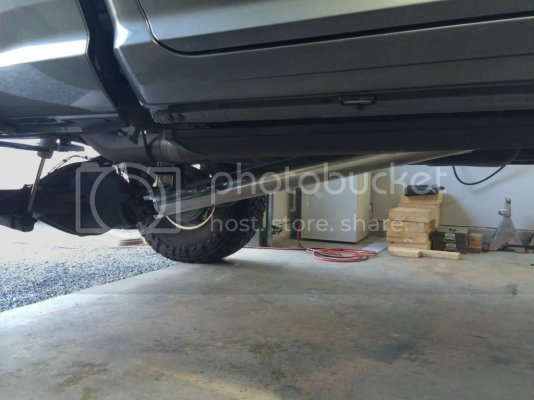
Polished Driveshaft – 8-25-14

Last night I decided to pull my drive shaft out of the truck last night, clean it up, and polish it a bit. Figured making something shinier for free is always a good thing. I used SOS pads to really clean it all up (which actually made it pretty shiny already) and then just hand polished it with some really good liquid polish we have for polishing my Dad's semi truck. Forget the name of it off the top of my head....

Before:
101D66C8-9232-428C-80DD-E4395A4A3CE8_zps3qqpy7ju.jpg

After:
06954F18-7CF4-4353-B609-F5A785258D09_zpstgfik0lm.jpg

Back in the truck:
87EEC5A2-B129-4032-922A-07D9D2D1EB29_zps76apu1jn.jpg


I also have some stuff in the works for the next big mod. Just need to sort out a few details before fully pulling the trigger on it. But hopefully I'll get it all sorted out this week and then have it done in the next 3-4 weeks.
 
OP
OP
brandonjansen

brandonjansen

Senior Member
Joined
Feb 14, 2013
Posts
1,701
Reaction score
1,013
Location
Abbotsford, BC, Canada
Ram Year
2012 Ram 3500 Laramie Limited
Engine
6.7 Cummins - Tuned and Deleted
One Year of Ownership – 8-27-14

Well boys, it's be exactly 1 year since I brought the Cummins home from the dealership. I figured I'd put a bit of a post together for that.

Here's the mods list I posted for the truck in the very original post of this thread:

Short Term:
Remove mud flaps - complete
AntennaX 7" billet antenna - completed
Remove running boards - within a few days - completed
Remove intake baffle - within a few days - completed
LED license plate, reverse, and cargo lights - within a few days - completed
Bakflip G2 Tonneau Cover - will be ordered right away - completed
Rough Country Leveling Kit - within a few months - skipped
Boost and Pyro Gauges in A-pillar mount - within a few months - completed
S&B intake - within a few months - completed

Long Term: (at the moment)
8" or 10" lift, not sure what brand yet - completed. 8" BDS Long arm with Fox 2.0 shocks
22x11 Fuel Krank wheels - Won't be Fuel Kranks, by my plan is for 22x12 wheels next spring
40x15.5 Toyo MT's - 37x13.5 Toyo MT's at the moment. I am still considering 40's for the new wheels but 37's or 38's are more likely
H&S Performance Tuner - Completed with custom tuning
EGR delete - completed
DPF delete - completed
4" MBRP turbo back exhaust - completed. Flo Pro 4" turbo back instead

Overall this build has definitely gone fast than I had originally planned. I definitely didn't expect to have it lifted by this point let alone do all the extra stuff I've done that's not shown on that list. But it's funny how things change and happen to make life differ from what we plan out in our head. With the exception of going faster than planned I'd say I've stuck to the mods list pretty well though.

Future mods:
As far as the next round of mods go I definitely have ideas in my head and have some of them in the works right now. Here's the list of what's planned at the moment:

- 4.56 Yukon Gears - Currently talking to Randy's Ring and Pinion about getting this done
- AFE Rear diff cover
- BD Diesel adjustable track bar
- Colour matched grille shell
- Colour matched headlight shrouds (may turn into a full headlight build - need to talk to some guys to determine what I want to do)
- 5000K HID's for lows and fogs
- 22x12 wheels - not totally sure of the brand yet but possibly American Force Independants
- 37x13.5, 38x15.5, or 40x15.5 Toyo MT's - again, not sure what direction I'm going to go with that yet. 40's would require another 2.5" leveling spacers for the front and 2" lift shackles for the rear (to level it out)
- Upgraded subwoofer - Probably a JL Audio sub (Tw3 maybe) in a custom box​

There's a few other little things that I'm toying with in the back of my head as well but I'm not sure if they'll actually happen or not.

- Projector fog lights (only if I end up doing projector headlights)
- LED taillights (probably 2013 Sport ones)
- Grid heater delete/relocate
- Intake horn
- Revmax valve body
- Truck air horn kit
- MyGig lockpick​

Review:
Overall I still love the truck and look forward to driving it pretty much every day. It has lived up to every expectation I had for it comfort and performance wise. Being deleted and with the custom tunes I have right now it's running better than it ever has. Once the 4.56 gear swap is complete I'm sure I will have no complaints about it at all. It's only going to get better from here :waytogo:

The first picture I took of it the day I brought it home from the dealership compared to this morning:
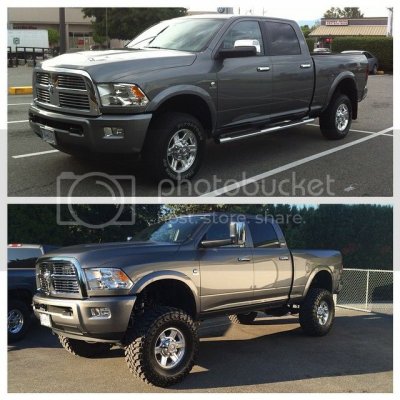
0152225603335064_4352867978957496824_n_zpse31a4085.jpg

Current mod list:
Performance
H&S Performance MiniMaxx with Custom tuning
Sinister EGR and cooler delete
Flo Pro 4" turbo back stainless straight pipe exhaust
5" dual walled stainless exhaust tip
K&N crankcase breather
ARP 425 head studs
S&B Intake with Scoop
Turbo silencer ring removed

Exterior
Removed mud flaps
AntennaX 7" Billet Stubby Antenna
White LED's in cargo, reverse, and license plate lights
Removed B-pillar vinyl
Bakflip G2 Tonneau
DeeZee Tailgate Assist
AMP Research Powersteps
8" BDS Long Arm Lift with Fox 2.0 Shocks
Fox 2.0 Dual Steering Stabilizer
Hell Bent Steel Steering Box Brace
37x13.5r17 Toyo MT's
AMP Research Bedstep

Interior
Removed dash center speaker
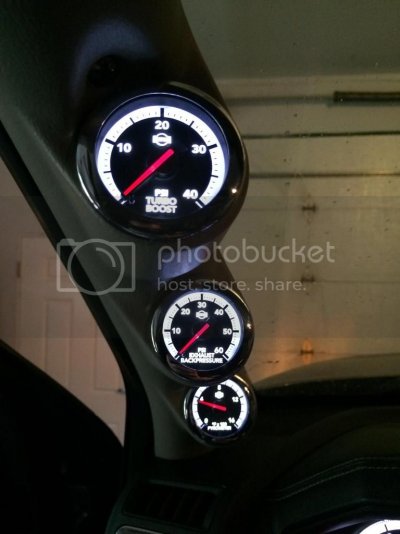
ISSPRO EV2 4th Gen Factory Match Gauges - Boost, exhaust back pressure, pyrometer
Cabin air filter​
 
Last edited:
OP
OP
brandonjansen

brandonjansen

Senior Member
Joined
Feb 14, 2013
Posts
1,701
Reaction score
1,013
Location
Abbotsford, BC, Canada
Ram Year
2012 Ram 3500 Laramie Limited
Engine
6.7 Cummins - Tuned and Deleted
Updated Exhaust and Walk Around Video – 9-06-14

As promised I put together a new exhaust video of the truck. This one includes a start up, high idle, and a few revs just like the last one and then a walk around and a few drive bys as well.

https://www.youtube.com/watch?v=YBwV4Zy45Po&feature=youtu.be


I officially had a neighbour complain about my "effin noisy truck" as he so nicely put it. I've been living in this house for 8 months now and actually expected someone to say something sooner. Guess he's going to be in for a big surprise when we take my Dad's racecar down the road. :gy:
 
OP
OP
brandonjansen

brandonjansen

Senior Member
Joined
Feb 14, 2013
Posts
1,701
Reaction score
1,013
Location
Abbotsford, BC, Canada
Ram Year
2012 Ram 3500 Laramie Limited
Engine
6.7 Cummins - Tuned and Deleted
4.56 Gears Installed – 9-17-14

I finally got the 4.56 gears installed in the truck. This is the first mod done to this truck completed by someone other than me... At first I had planned to install them myself but for any of you that know the install process in AAM differentials it's not something I was looking forward too. For one I don't have all the proper tools to complete the job so I would have to buy a few of them, go to my Uncle's shop for others, and do more trial and error checking than should be necessary. Plus I had no desire to take the front end apart to change out those gears. For those reasons along with the fact that if you screw up setting up gears they're shot I decided to let the pros take care of this one. That way I have a full parts and labour warranty on the work as well.

After talking with about 4 or 5 different shops I ended up having IWE Rear Ends Only in Burnaby, BC complete the work. They supplied all the parts as well since that was a requirement for them to offer full warranty on parts and labour. As usual I didn't cheap out on parts. They installed AAM 4.56 gears in the rear diff and Yukon 4.56 gears in the front diff. The cage for one of the rear pinion bearings ended up getting stretched out too much during removal so they replaced it with a new Timken bearing. The rest of the pinion and carrier bearings all looked good and didn't need to be replaced.
I also ordered a Mag-Hytec rear diff cover a couple weeks ago and had IWE install it when they did the swap. Both diffs were then topped up with oil - 75/90 full synthetic in the rear diff and 80/90 GL5 in the front diff.

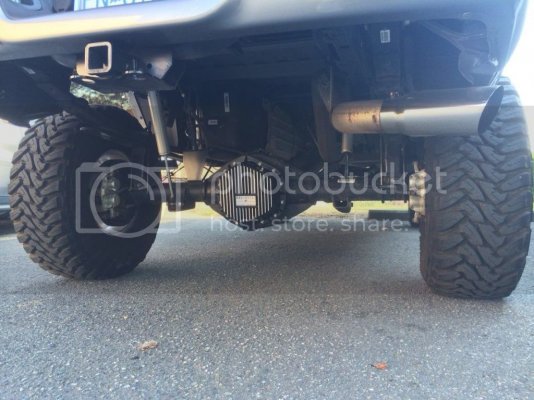
Obviously I don't have any pictures of the install since I didn't do it. And we all know what a ring and pinion look like so there's no need to post that. But here's what the rear end looks like now.

10679846_10152267423335064_5156137692682725302_o.jpg

Overall I am 100% satisfied with the outcome of the gear swap; it has met my expectations and then some. It takes about half a much fuel to get the truck moving from a dead stop and feels much more peppy all around. There's quite a bit less load on the engine (roughly a 10% average) throughout all driving conditions which in turn makes the exhaust temps about 200° lower and runs lower boost which means less fuel. I have to get my tuner to tweak a few of the shift points now as they're off but overall the truck shifts better, the torque converter locks up sooner and it's not lagging along at too low of an rpm. Driving at 55km/h I'm around 1600 rpm in 4th gear with the converter locked. At 100 km/h I'm around 1650 rpm in 6th. Both right at the peak torque for the engine which is perfect. The exhaust brake is also a lot more effective now as it works better at the higher rpm and pulls the truck down to a slower speed.
I'm hoping to get slightly better fuel mileage with the gears since there is less load on the engine and it takes a lot less fuel to get it moving... but only time will tell how it actually reacts to the swap. I'll keep the thread updated over the next couple months as I run a few tanks through it.
 
OP
OP
brandonjansen

brandonjansen

Senior Member
Joined
Feb 14, 2013
Posts
1,701
Reaction score
1,013
Location
Abbotsford, BC, Canada
Ram Year
2012 Ram 3500 Laramie Limited
Engine
6.7 Cummins - Tuned and Deleted
Gear Update and Pictures – 10-05-14

Gear Update

Since I had the gears installed I've noticed a few small things with the truck that I don't like. The first being that I now have a driveline vibration when coasting on the highway. I thought at first that maybe the driveshaft wasn't installed correctly or was out of balance but after checking that doesn't seem to be the problem. The second is that I have a clunking sound from the rear end when making left turns at relatively slow speeds. I checked all the hub bearings thinking they may be the problem but they're still nice and solid. So my next check was snugging up the U-bolts but the problem still persists. The other thing I noticed while underneath the truck checking this stuff is that the front pinion seal is leaking. I've emailed IWE Rear Ends about all the issues so I'm hoping to hear back from them tomorrow about getting them resolved. I have a feeling it will be going back to their shop for a day or two to have the issues resolved.

As far as mileage goes I don't really have enough information to make an accurate conclusion on how it was effected. But if I had to guess right now I'd say I maybe lost 0.5 mpg max. At the same time that could be because it's way more fun stomping on the skinny pedal with these gears. :pepper: Once I've run them for a few more fill ups I'll report back.​
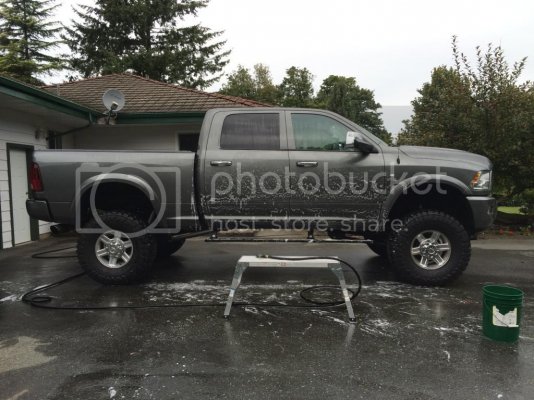
Pictures

Here are a few pictures of the truck from over the weekend. Saturday I decided to give it a good wash job. I hadn't done it in about 3 weeks so it was well overdue. Especially since we've had our first few good rainstorms here in BC over the last 2 weeks so all the road grime that was sitting on the road from over the summer got all over everything.

0EE64175-BB8A-4C98-A13C-39A7D9F1B309_zpssk1v01xl.jpg

I've concluded that wash day is the one day where I hate how big my truck is. Definitely not the easiest vehicle to wash.

Then last night I didn't really have much going on so I decided to pull the truck into the shop and give it a good coat of wax before the real ugly months hit.

C1B5C638-A5D6-46BE-B3D4-B4B3EBBFD928_zps7bceglcs.jpg
709430AB-87D4-4700-9745-4E00404C3995_zpsajsk4tiu.jpg

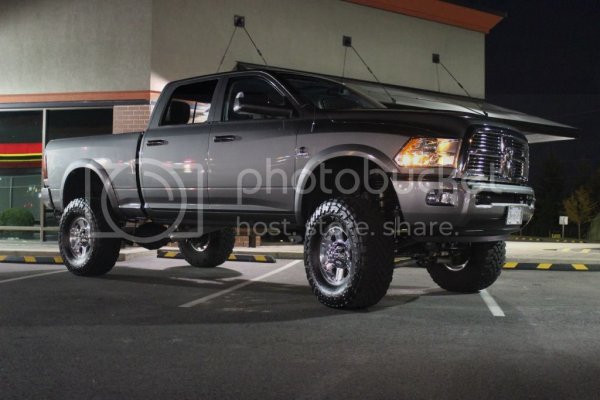
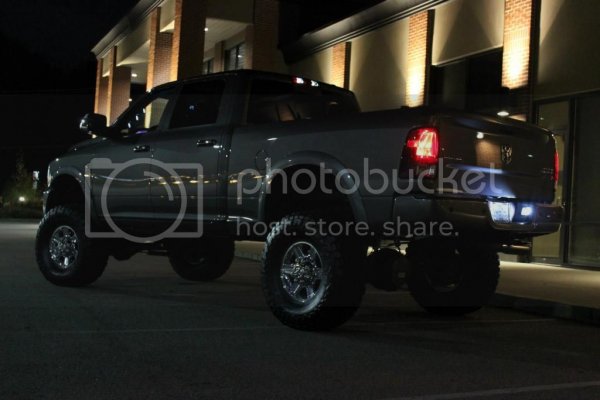
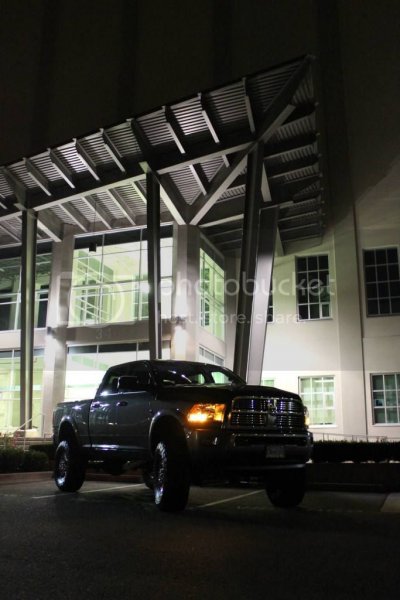
Because it was so clean I couldn't go without getting a few good pictures of the truck. So when I went out tonight I took my T3i with me to snap a few good night shots of the truck. I didn't have a whole bunch of time to play around with the settings on my camera so they didn't turn out quite as great as I had hoped but a few of them are still pretty good in my book.

10285181_10152301859545064_1224810395081149249_o.jpg
10629287_10152301859515064_1034441122703521730_o.jpg
10628720_10152301859950064_6816646016659012371_o.jpg
 
OP
OP
brandonjansen

brandonjansen

Senior Member
Joined
Feb 14, 2013
Posts
1,701
Reaction score
1,013
Location
Abbotsford, BC, Canada
Ram Year
2012 Ram 3500 Laramie Limited
Engine
6.7 Cummins - Tuned and Deleted
Gear Update/Lengthened Front Driveshaft – 10-17-14

Update on the gear/vibration issues:

I took the truck back to IWE Rear Ends last week and had them check over everything that they did. Everything looks good on their part so it's nothing to do with the gears themselves. So this past weekend I decided to pull the front driveshaft out to see if it was the issue. I definitely noticed the truck being smoother overall with the front driveshaft removed so it was a part of the problem but I'm still getting the same vibration while coasting from the rear driveline. I know it's not the transmission-driveshaft and driveshaft-pinion angles because I checked all those and they're good. IWE checked them as well and agreed that there's no issues with them. What I'm thinking now is that either the U-joints are shot on the rear driveshaft or the slip yoke isn't going into the transfer case far enough causing a vibration when there's no load on it. Neither of those really should be a problem but I don't see what else it could be.... I'm going to crawl back under there again tomorrow and see how much play the yoke has in it at ride height.
Today the front driveshaft is in the shop getting lengthened. Figured since I had it out and determined it was giving me a bit of a vibration I might as well get it lengthened properly and get rid of the spacer that came with the BDS kit. When I get it back (should be this afternoon) I plan on cleaning it up properly and then painting it cast iron grey so that it stays nice and clean looking rather than rusted.

I haven't been able to figure out what the clunk in the back end of the truck is when I'm making left turns... I'm not yet convinced that it isn't coming from the rear differential but at the same time it sounds like it's further up in the truck. Possibly a leaf spring bushing? I may have to start ripping things apart to find it and fix it properly.
 
OP
OP
brandonjansen

brandonjansen

Senior Member
Joined
Feb 14, 2013
Posts
1,701
Reaction score
1,013
Location
Abbotsford, BC, Canada
Ram Year
2012 Ram 3500 Laramie Limited
Engine
6.7 Cummins - Tuned and Deleted
More Lift and Front Driveshaft Lengthening – 10-22-14

More Lift:

Well.... the Cummins is going slightly higher...

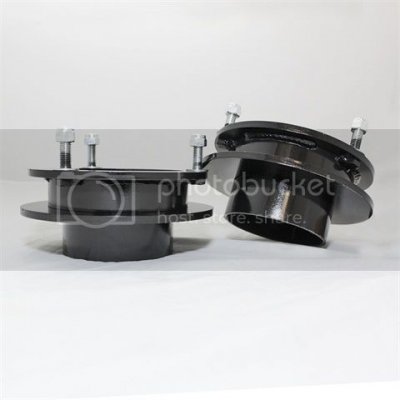
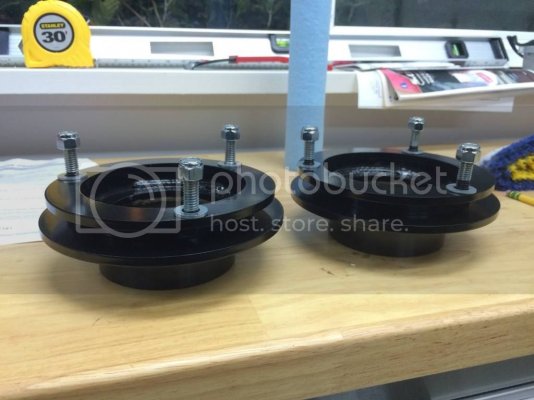
When I installed the BDS lift it obviously removed quite a bit of the rake but still had about 7/8" of rake. At first it wasn't too noticeable and didn't really bug me much. Since then the front springs have sagged about 1/8" so it's sitting at almost exactly 1" of rake. More and more I've started to notice the rake and it's really bugging me. So I decided it's time to take care of it. I ordered up some 1" front spacers from Top Gun Customz this morning. Hopefully they'll be here in a week or so and I'll be able to slap them onto the truck to get it sitting up and dead level.

6693_zps84440d2a.jpg

This will also help give me the bit of extra clearance I may need to run the 22x12 -44 offsets with 37x13.5's that I plan on buying in the late winter/early spring.
I should be up to about a 50" fender height all the way around with these spacers on now.​

Driveline:

I got my front driveshaft back from the shop Friday afternoon and threw it back on the truck Saturday. Everything seems good with it, no vibration issues at all and overall the truck feels smoother than it did when I was running the BDS front driveshaft spacer. The shop that lengthened it ended up throwing a coat of black paint on it as well so I didn't even have to paint it myself.
I forgot to snap a picture of it before I threw it back in. But it's pretty basic... just a Ram 3500 that's 2 inches longer than stock and painted black.
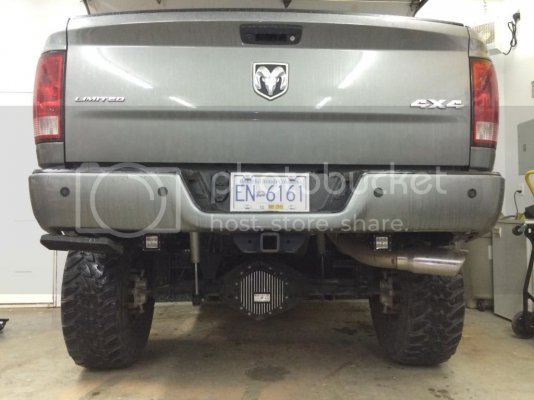
As far as the rear driveshaft vibration goes I'm fairly sure it's the fact that the slip yoke isn't far enough into the transmission. It only has a slight amount of movement but in 6th gear at 1800 rpm that can be enough to make it vibrate. I can see myself pulling the rear driveshaft and getting it lengthened as well just so that everything is as good as I can make it driveline wise.​
 
Last edited:
OP
OP
brandonjansen

brandonjansen

Senior Member
Joined
Feb 14, 2013
Posts
1,701
Reaction score
1,013
Location
Abbotsford, BC, Canada
Ram Year
2012 Ram 3500 Laramie Limited
Engine
6.7 Cummins - Tuned and Deleted
Lift Check and More Front End Lift – 11-03-14

Lift Check/Rear Clunking Sound:

Last weekend I decided to check over the entire lift on the truck for one, to verify that it wasn't the cause of the clunking sound I was having; and two, to make sure everything was still good and tight since there's about 17,000 km (10,625 miles) on it now. I started by going over the front end and re torquing everything that was pulled apart for the lift install. The loosest bolts I found were on the longarm brackets and transmission cross member. Everything else was pretty good. I also tightened up the upper track bar bolt a bit as it wasn't quite up to spec.
I then decided to pull apart the entire rear lift to verify that nothing back there was moving around. I ended up pulling out the stock urethane pins that were in the leaf springs lining up the blocks and put the steel ones that came with the lift kit in instead. That should keep everything a little more firm back there. I also cut 1" off all the U-bolts so that I could actually get a deep socket onto them and torque them to spec rather than going as tight as I could with a wrench. Those are definitely a whole lot tighter now that I could get my big torque wrench on them. The upper bolts on the rear shocks were slightly loose as well so I tightened them up good and proper.

10749961_10152357043440064_3943792241380712925_o.jpg
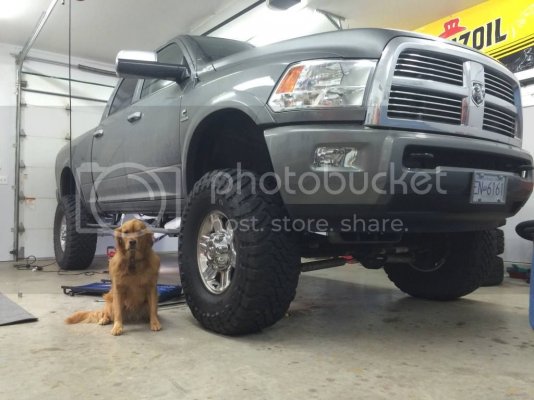
Had a little shop buddy while I was working on it.

10704197_10152357043640064_2693802639348365166_o.jpg
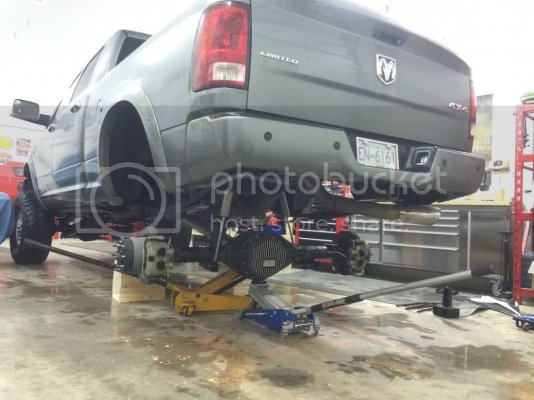
Rear lift disassembled.

After all that I took it out for a drive and still had a clunking sound coming from somewhere in the truck. I had ruled out anything to do with the lift itself and at this point was convinced it was either something in the truck or something in the rear differential. I decided to eliminate the easy possibility first so I pulled out every single thing out of the back of the truck (hitch/shank, hitch pins and chains, rachet straps, hard hat etc.) As soon as I pulled out one of my hitch pins I had a sneaking suspicion that it may have been the problem. As most of you will know the majority of hitch pins have a 45° bend at one end so they can't roll around. But I have one locking hitch pin that is a perfect cylinder. Sure enough, I took the truck out for a ride and no sound. That pin must have had just enough room to move and hit the side of the plastic bin in the floor. :doh: When this problem first came up I checked everything in that bin and thought I had moved it all into positions where nothing could move around but obviously that one slipped through the cracks. Needless to say I felt pretty stupid about that but at least there's no real problem with the truck.​
More Front End Lift:

I picked up my 1" Top Gun Customz front coil spacers on Friday and decided to go right ahead and throw them in the truck.
10548720_10152357043645064_3964280040006061765_o.jpg

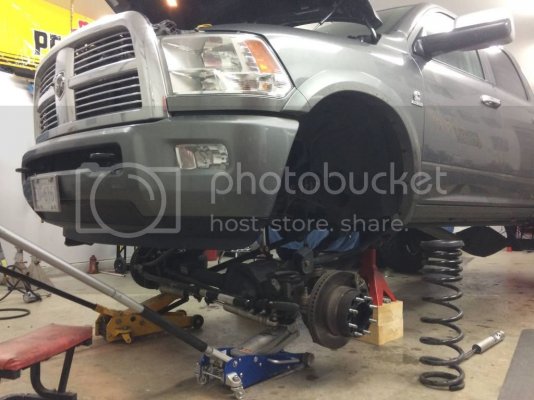
With a solid axle it's pretty easy to drop the entire front differential right down to install them. Removed the upper track bar bolt track bar, unbolted the sway bar links, brake line brackets, and lower shock bolts (after removing the wheels/tires and putting the frame on jackstands of course) and it dropped right down. From there I removed the upper shock nut and pulled out the shocks and springs and then removed the shock tower nuts and ring.
10005908_10152357043635064_164019406191063053_o.jpg

The TGC spacers just get bolted up in place of the stock ring through the shock tower and everything is thrown back together the same way it came apart. Overall it probably took around 2 hours by the time I had the truck sitting back on all fours and cleaned up the shop.

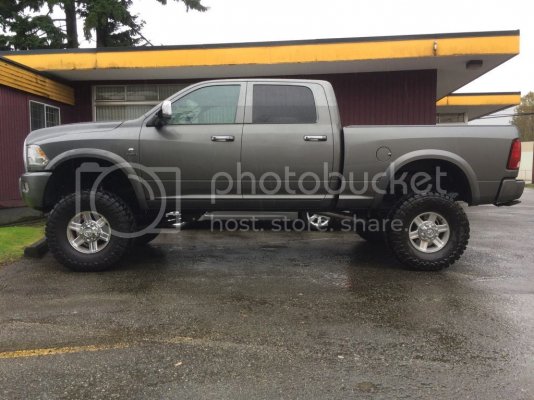
I haven't actually measured it now that I installed the 1" spacers but according to my before measurements it should be sitting dead level now. It definitely looks like it.

10620238_10152357142120064_4799647137717633241_o.jpg

Dwarfing 1500's:

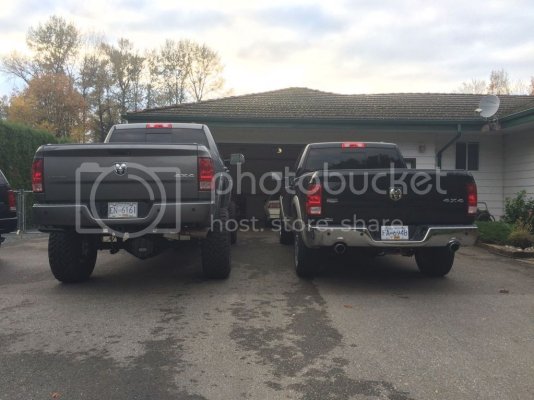
To all of you with stock height 1500's.... this is how much bigger my truck is than yours :gy: :spinning:

10644642_10152357043650064_7556317343625227648_o.jpg

My brother came over with his 2009 1500 Laramie on Saturday and parked beside my truck. When I went out front I thought it was a good photo op.​
 
OP
OP
brandonjansen

brandonjansen

Senior Member
Joined
Feb 14, 2013
Posts
1,701
Reaction score
1,013
Location
Abbotsford, BC, Canada
Ram Year
2012 Ram 3500 Laramie Limited
Engine
6.7 Cummins - Tuned and Deleted
Headlight Adjustment and Wash – 11-13-14

Headlight Adjustment:

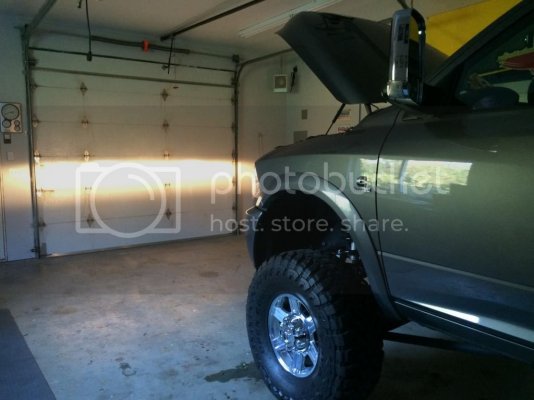
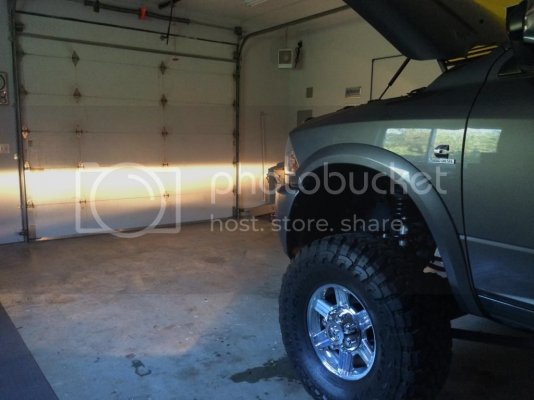
Figured it was about time I got around to adjusting my head and fog lights again since I added the 1" spacers to the front. Especially because I followed my friend home the other night and she advised me of being "that guy that's constantly high beaming everyone". Didn't want to be that guy plus the amount of light hitting the road was very minimal with them pointed up so high.

Low beams:
A95B8F9D-C386-4EF0-B11E-B08D1BC92407_zpsgo6jncxc.jpg

Fogs:
24EA785F-D7BC-4494-836A-128D52526DBC_zpsqmpslpir.jpg

I don't know about you guys but those look light pretty nice cut off lines for non-projector lights to me.

I've been thinking about putting some 5000K or 6000K Retro Shop HID's in them shortly so I have some better light output for over the winter. Just haven't decided which ones I want to go with. I want a good crystal white light but don't want a blue tinge that I see on a lot of 6000K bulbs. If any one has pictures of their Retro Shop HID's I'd be interested in seeing them.​

November Bath: (just cause everyone likes pictures)

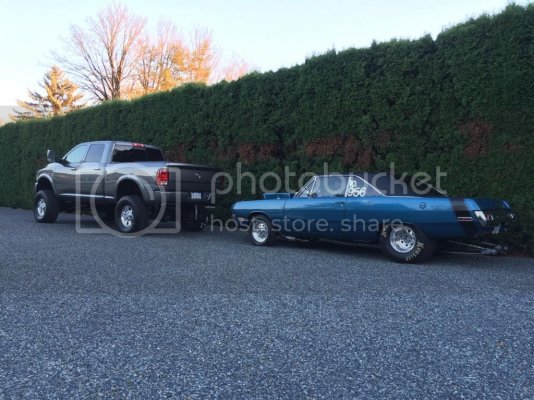
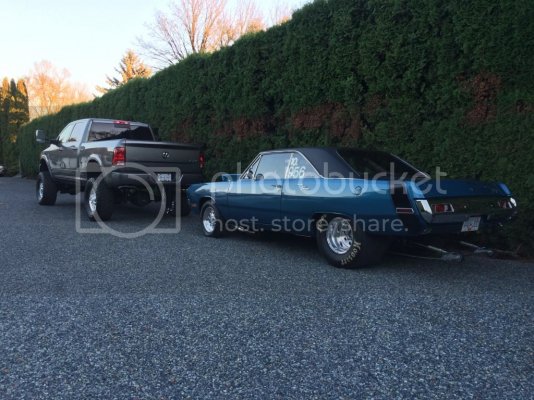
I also finally had some time and good weather on Tuesday to give the truck a good bath. It was definitely long over due. Both the exterior and interior were a mess. After I cleaned it up I had it sitting in front of my Dad's Dart that I pulled out of the shop. Figured it was a good photo op.

1E882FEB-4D4B-49E3-9A54-883D48731215_zps9dy0lnzj.jpg
4327F0CC-F060-4F1A-AB27-42161CC8CD1A_zps7zovlgpp.jpg

The two Dodges of the family look pretty good beside each other. :waytogo:

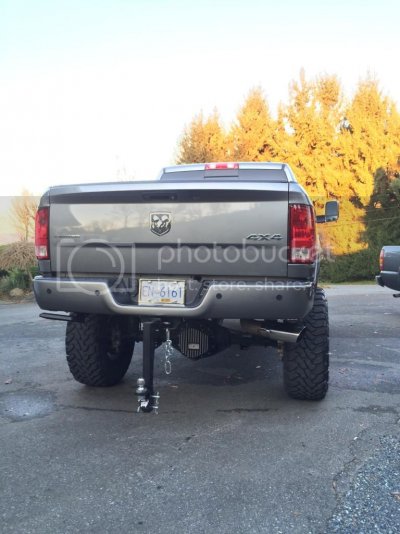
I had thrown my hitch and extended chains on my truck to tow a trailer for my friend the other day as well and we both agreed that it looked pretty bad ass from behind with my massive drop shank on and chains dangling. So I decided to flip the tow mirrors back up and rock that look for a while.

B4633538-A2C0-42FE-AAFA-01A0FBE67B69_zpsf4xqdkaa.jpg
 
Last edited:
OP
OP
brandonjansen

brandonjansen

Senior Member
Joined
Feb 14, 2013
Posts
1,701
Reaction score
1,013
Location
Abbotsford, BC, Canada
Ram Year
2012 Ram 3500 Laramie Limited
Engine
6.7 Cummins - Tuned and Deleted
Retro Shop HID’s – 11-29-14

Introduction:
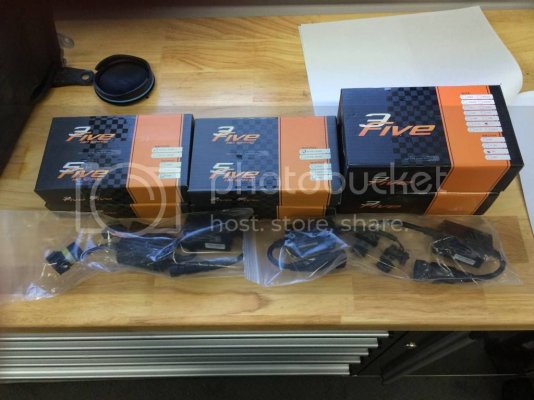
I finally ordered some HID's for the lows and fogs from Jeremy at Retro Shop. Decided to go with the 5000K 35W kits with canbus adapters for both. Shipping was good and quick; they actually showed up 2 business days ahead of the estimated delivery date, only 3 days after ordering them. Very happy with Jeremy's service.

10712634_10152405193710064_1904152413241548144_o.jpg


Installation:
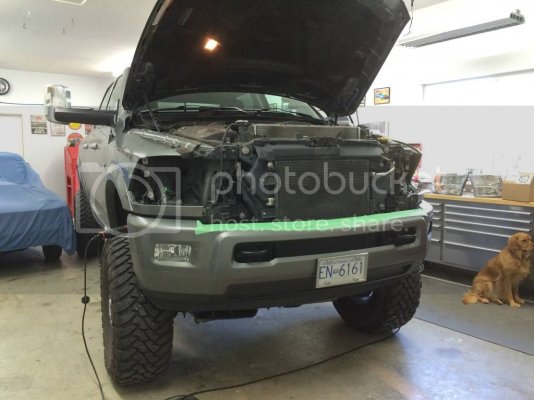
Started off the install by taping the top of the front bumper to avoid scratching it while removing the grille and then removed it from the truck completely. Removing the headlights was fairly simple... the only thing that gave me a bit of a tough time was the sliding white tab that locks the top of the headlight in on the back side. None of the write ups I read mentioned anything about that and it was kind of hard to see exactly how it worked to release it through the little hole in the fender well. For all of you who may end up pulling the headlights out, push the white tab up to release the headlight.

10683632_10152405193700064_3735763443139419506_o.jpg

When unboxing the HID kits the first thing that I found is that it was missing two of the plastic connectors that are supposed to be installed on the wires and plug into the OEM low beam connector within the headlight. I emailed Jeremy and had a response fairly quick that they aren't really needed and he often just installs the spades into the connector within the headlight. I didn't take a picture to explain what I'm talking about but if you have any questions download the instructions from Retro Shop and you'll see what I'm talking about. The rest of the install into the headlight housing was straight forward and simple.
I mounted the ballasts for the lows to the metal surface just inside the headlight opening below the headlight with 3M double sided tape. 1500's may have a different setup than the HD trucks... not sure if that same metal support would be there because of the different front end design. Everything else was then plug and play and I reinstalled the headlights.
For the fog lights I mounted the ballasts on the metal bracing on the backside of the bumper with a couple strips of 3M tape and then everything was plug and play again. Again, the setup on a 3500 is probably different than the 1500's. I then cleaned up a bunch of the wiring with zip strips and called it a day.​


Review/Conclusion:
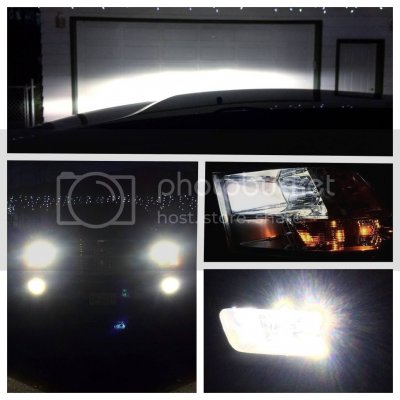
Overall I'm very happy with the quality of the kits, the light output, and the colour of the lights. They're pretty much exactly what I wanted. The only thing I would have liked is a bulb cap for the fog lights so the bulb itself wasn't so bright in the fog light housing. I may talk to Jeremy to see if that's still an option. It wasn't on their website when I ordered.
I may adjust my heads and fogs down a little more now that the HID's are installed because I definitely don't want to be that guy blinding everyone going down the road. But the cut off for non-projector lights is pretty good IMO.

1980024_10152405193705064_391804132365279235_o.jpg


Future Front End Lighting Mods:
I'd like to do something to the high beams yet as well but obviously HID's aren't the best option there because of how long they take to warm up. I may look into LED's for the high beams but need to do a little more research first to see how they work as DRL's in case I decide to turn mine back on. I'm also looking into putting a 30" curved light bar in between my tow hooks recessed in the front bumper. That would definitely be the ultimate high beam.​
 
OP
OP
brandonjansen

brandonjansen

Senior Member
Joined
Feb 14, 2013
Posts
1,701
Reaction score
1,013
Location
Abbotsford, BC, Canada
Ram Year
2012 Ram 3500 Laramie Limited
Engine
6.7 Cummins - Tuned and Deleted
A Couple Pictures and Build Update – 12-08-14

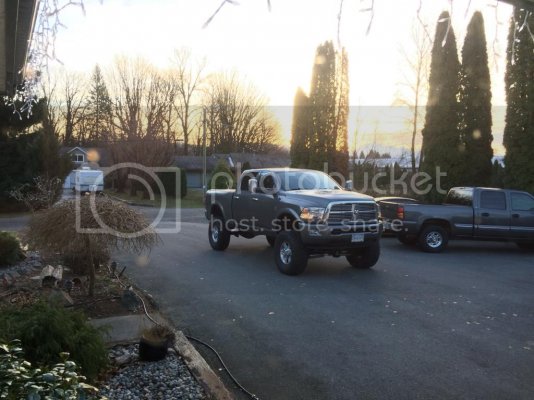
Looked out the window the other morning when I remote started my truck and couldn't not take this picture. Thought it looked pretty cool with the lights on and the sun coming up in the background.

63FA7148-288F-4E56-9A6D-02A4B1371200_zpsmdt5ed1c.jpg

Sure is nice having remote start on some of these cold mornings (cold for western BC at least) that we've been getting the past few weeks.

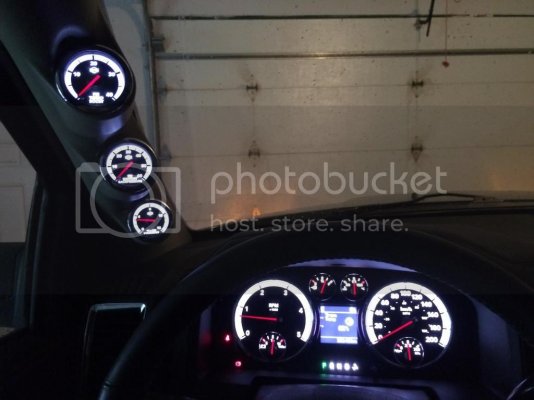
Gauge Lighting:

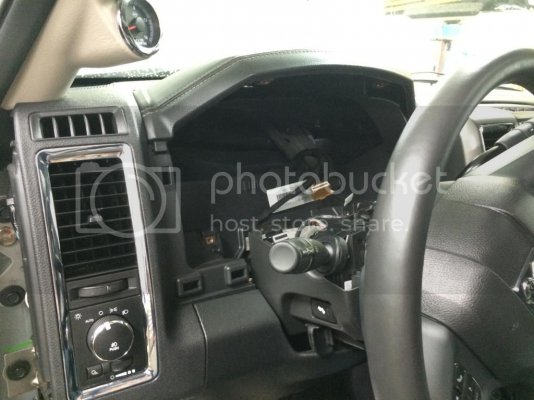
Ever since I put my pillar gauges in I haven't been happy with how they light up. Right now they're only on when the headlights are on and do not dim exactly like the cluster does. I'd like to change that to have them light up exactly like the cluster, be on all the time, and dim at the same rate as the cluster. I finally decided to do some testing last week to see if I could find a wire that feeds the cluster and dash lights. I had no luck underneath the dash so I ended up pulling the cluster right out and testing all the wires and connections in and out of it. No luck.... I honestly have no idea what makes the cluster do what it does. But it sure does **** me off that I can find the right wire to tap in to. lol.

6520C81B-04AB-4A30-AD13-FB27B0309EA5_zps0wmmmdak.jpg

I think my next go at it will be pulling the center bezel and radio out and seeing if I can find a wire that either feeds the cluster or the climate control lights that does what I want. I honestly don't have my hopes up very high right now. It will be a little bit before I can get at that and test it out as I pulled my gauges out this weekend and sent them back to ISSPRO. They've come out with a new gauge pointer that matches the factory ones perfectly and offered to replace mine for free if I shipped them down. They're also going to set the warning lights on the gauges for me while they have them apart. For the cost of shipping something so small you can't really say no to that. I'm hoping to have them back in 2-3 weeks.

Headlight Build:

I've been toying with the idea of a headlight build for a long time. Originally I thought 2013 projectors would be the way to go but honestly that's all anyone does now and to be honest I'm not a huge fan of the look of them (never have been). For now bought a set of stock quad headlights cheap and I'm going to bake them apart, colour match the shroud, and get rid of the orange reflector. There's another Cummins on instagram (@project_fidelity) running a similar setup and it looks awesome IMO. Very nice and clean looking and more aggressive than the projectors. Plus it's super cheap and easy to do for now. Down the road I still may end up doing something more elaborate but at least for now these will really change the look of the front end combined with a colour matched grille.
 
OP
OP
brandonjansen

brandonjansen

Senior Member
Joined
Feb 14, 2013
Posts
1,701
Reaction score
1,013
Location
Abbotsford, BC, Canada
Ram Year
2012 Ram 3500 Laramie Limited
Engine
6.7 Cummins - Tuned and Deleted
New Gauge Pointers and Headlight Build – 12-22-14

New Gauge Pointers:

A number of months ago ISSPRO teamed up with the company that builds the OEM gauge pointers for Ram and are now offering them in their new gauges. ISSPRO is a sponsor on another forum that I'm a member of and ended up posting a thread stating that any member that has gauges with the old pointers can ship them in and get the new pointers for free. Couldn't say no to that. So I got in contact with Michael at ISSPRO to find out some more details and he said he would message me when to send them in so that he could get them done right away and they wouldn't end up sitting around forever if they were short on the pointers. I ended up shipping them in a couple weeks ago and now just got them back on Saturday. The new pointers look great; identical to OEM. So overall the gauges match perfectly now and I'm very happy with the setup. Michael also offered to set the warning lights in my gauges (the entire face turns red if you hit those) free of charge while they had the gauges so that was done as well. (Boost: 36 psi, Exhaust back pressure: 60 psi, Pyro: 1450 °F)

10869688_10152448787395064_883746081047900607_o.jpg
10517645_10152448787380064_6300073444718612541_o.jpg

Headlight Build:

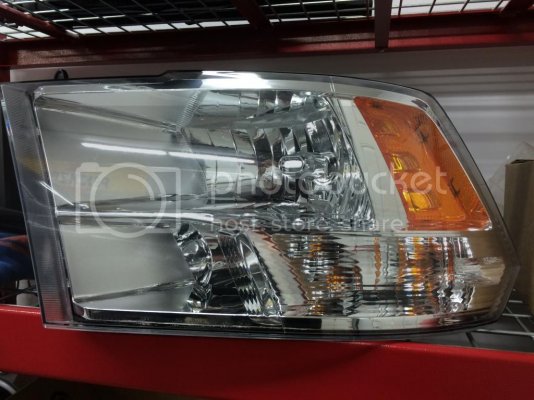
As I've mentioned a few times before I want to colour match the front end of my truck which will include the grille and headlights. I ended up buying a used set of quad headlights that I got pretty cheap that I can bake apart and paint. Eventually I may do a full custom build but for now I think it will just be a matter of painting the shroud and removing the reflector. However I have already been looking at stuff on The Retrofit Source so this does have the potential to snowball quickly. lol.
Anyways... I got my new set of quads last week and finally brought them into the shop this weekend and held them up beside my truck and to my surprise they're different than what's in my truck now. I thought that all quad headlights were the same but apparently I was wrong. The quads in my truck have a slightly different design than any other quad headlight I've seen. I'm wondering if it's because it's a Limited. Anyone else that has a 09-12 Limited, take a look at your headlights. I'm wondering if they're the same as mine.
So now the question is... which set to I bake apart and paint? I have an idea in my head of which ones I want to do but I'm open to your opinions to see what you guys think. I'm also gonna shoot Jeremy at Retroshop a quick email and see if he's every customized a set like what's in my truck.

DB3DC2E2-0DEF-41AF-BDD8-11324066AA36_zpsl2a4ucqh.jpg
A7E6B7B5-E715-45E5-A35C-667BCEC79A50_zpsx9mnzgb6.jpg
 
OP
OP
brandonjansen

brandonjansen

Senior Member
Joined
Feb 14, 2013
Posts
1,701
Reaction score
1,013
Location
Abbotsford, BC, Canada
Ram Year
2012 Ram 3500 Laramie Limited
Engine
6.7 Cummins - Tuned and Deleted
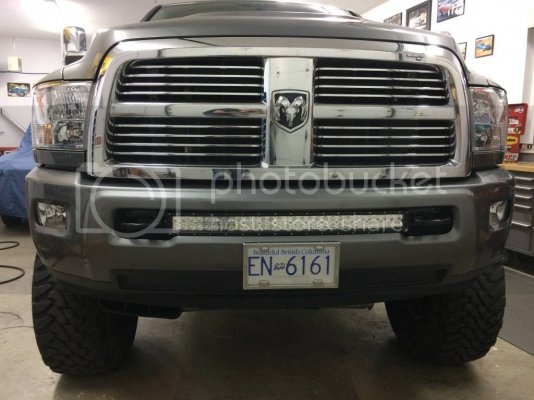
30” Curved LED Light Bar Installed – 12-30-14

Introduction:
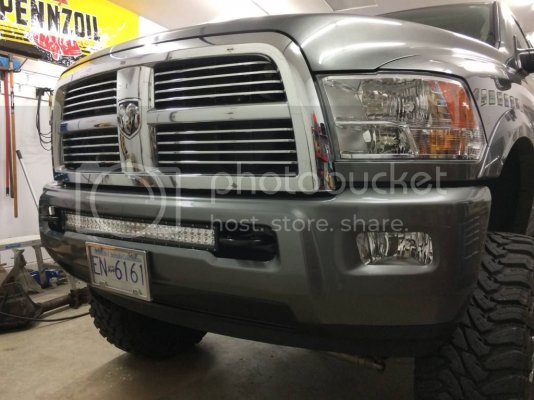
I've had the thought of installing a light bar on my truck for a couple months now. Of course my main concern was being able to install it as cleanly as possible and make it look like it's meant to be there just like most of the other mods on my truck. I wasn't at all interested in roof light bars or having it stick out of the bumper 4 inches... nothing like that. I determined that the only way I wanted to do it is if I could fit a 30" curved bar in between the tow hooks. I want to keep the tow hooks just in case something happens where I do need them. Whether that be someone pulling me out or me pulling someone else out.
All the initial research I had done was full of guys saying you can't fit a curved 30" bar in between the tow hooks, it's too wide. Finally I found a post where I guy notched his tow hooks and bolted the bar directly do it. That was the exact option I was looking for.
I also wasn't at all interested in spending $1200 for a Rigid bar. IMO those are completely over priced and in no way worth that kind of money. I ended up talking to a truck builder I know down in Texas who's running a number of off brand LED light bars and asked him what his opinion on them was VS Rigid. He straight up told me that if you took name off the Rigid bar you would not be able to tell the difference between it and the off brand. That combined with some other research I had done finding posts where they had been standing up very well had me sold. So a bar became the number one thing on my Christmas list and I was fortunate enough to get it.​

Installation:

Tow hooks
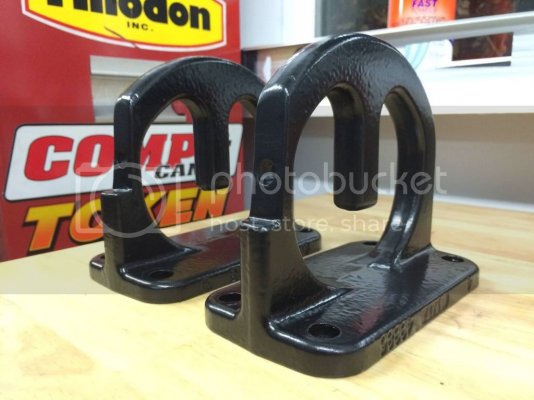
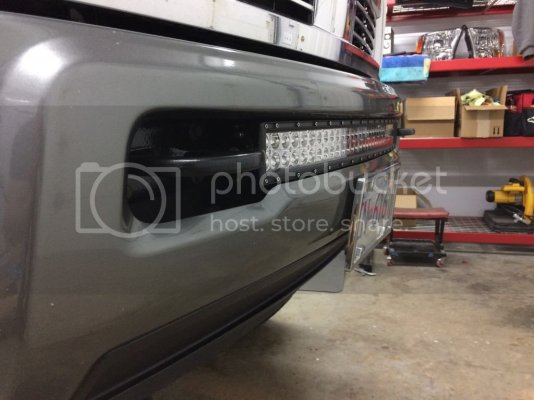
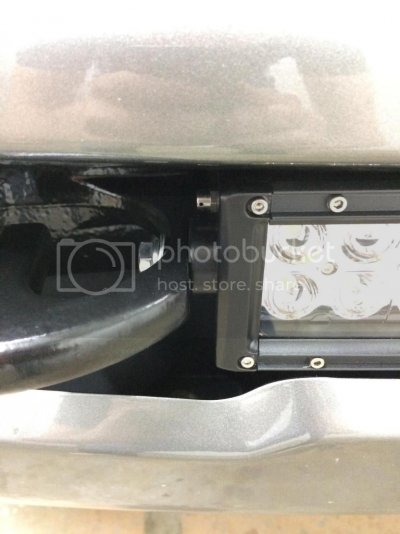
I started off by taking some exact measurements of the distance between the tow hooks in the location I wanted to mount the bar and the overall width of the bar at the mounting points. I then removed 1 tow hook and slid the bar into the bumper to find what my mounting depth needed to be to determine where I needed to notch the tow hook and drill the hole. For my particular light bar I determined that I needed to remove 7/16" from each tow hook and drill the hole 2 1/4" forward of the flat surface of the hook. I then made a template giving me the rough angle of the mounting point on the light bar and started drawing my cut lines on the tow hook.
To cut the main pieces out of the tow hook I used a pneumatic die grinder with a cut off wheel on it. Once I had the main piece cut off I marked where my whole needed to be drilled and center punched it. I attempted to drill through with a hand held drill but there was no way that was going to happen. I broke 3 drill bits in about 5 minutes of trying and then determined I needed a drill press. I whipped down to my Uncle's shop and through it on his press to do it. Worked like a charm; a drill press will definitely be my next investment as far as shop equipment goes. I drilled the hole about 4 sizes bigger than it actually needed to be for the bolt to give me some adjustability and movement to get the light bar sitting straight when I installed it.
Back at my shop I began to test fit everything together on my workbench and found out that I needed to grind the mounting surface of each tow hook slightly to match the angle of the light bar mounting point better. After about 15 minutes I had it sitting about perfect so I cleaned up all the edges with a small grinding wheel and the main modification was done. From there I just threw a couple coats of primer on them and then a few coats epoxy based paint.

10828147_10152467204090064_4485726755003313133_o.jpg

Light bar
After that the installation of the light bar itself was fairly straight forward. Bolted the tow hooks back onto the truck and then put the light bar right in place and bolted it up. It's sitting pretty much exactly where I wanted it to and almost matches the curve of the bumper perfectly. I'm very happy with the look and fitment of it.

10869323_10152467204110064_5765166045692086060_o.jpg
10835070_10152467204095064_6495297308477259396_o.jpg
10887131_10152467204100064_5548414979089004803_o.jpg
1511776_10152467223445064_7669987348381627836_o.jpg

Wiring
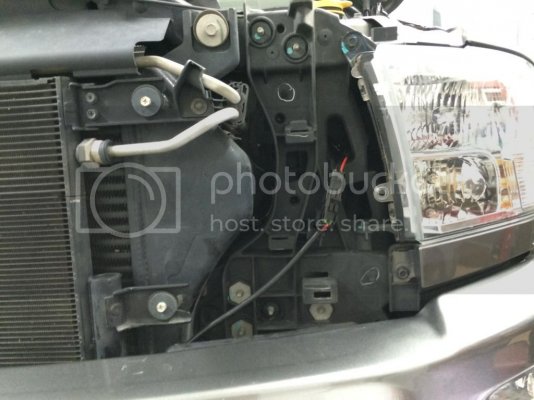
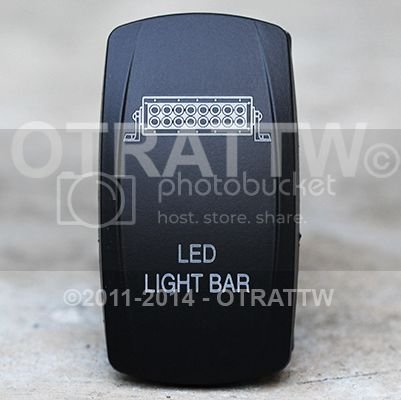
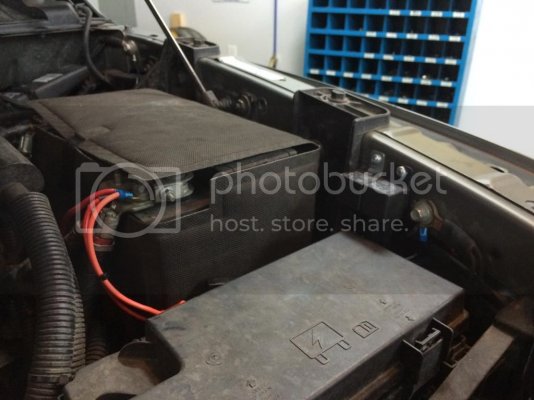
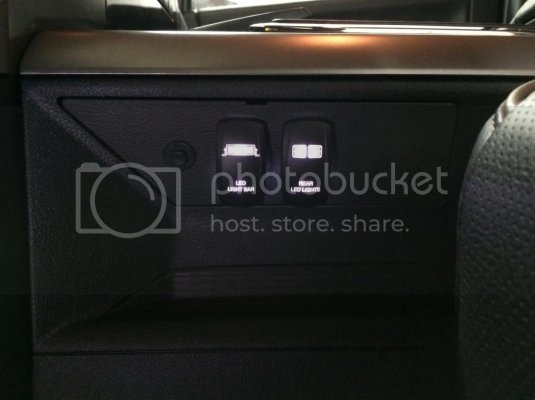
To wire it up I used a good chunk of the relay harness that came with the light bar. I modified it slightly and put a weather proof connector just behind the grill incase I never need to remove the light bar. I mounted the relay right beside the TIPM and ran the power directly to the battery and then ran the wiring nicely along the inside of the fender and through a grommet in the clutch pedal block off plate into the truck. For now I just have it hooked up with the push button switch that came with it but I have ordered a few switches from Otrattw, one of which will be for the light bar. When I get that I'll be installing the switch right on the side of my console for easy access.

96B88518-EDA8-4ED2-9D7B-9CDBDDB42C07_zpsrw5icpas.jpg
125LB-01_zpsd290c1af.jpg

Review:
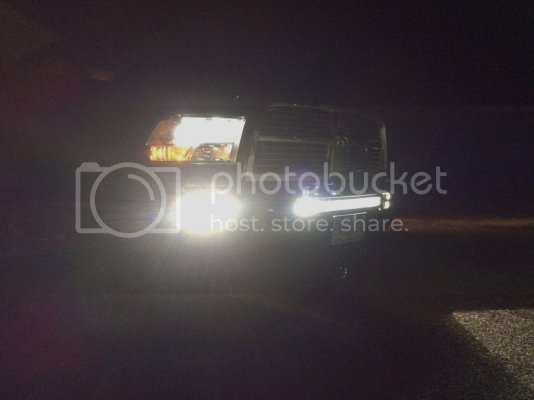
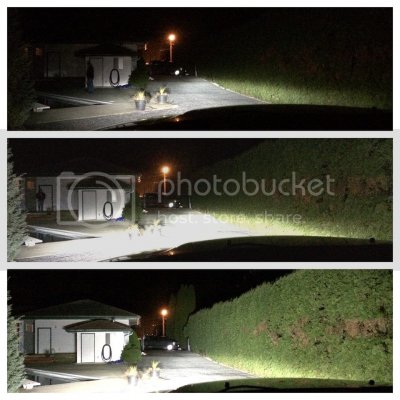
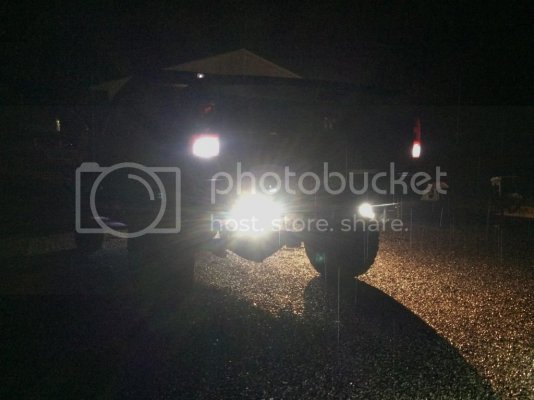
The light output of this bar is phenomenal! It has met all my expectations and then some. When I pulled my truck out of the shop last night with all the lights off and then turned on the bar my Dad and I just started laughing at how bright it is. It lights up everything from the ground 3 feet in front of the truck to the tops of the trees. When I came home last night I turned it on when I first turned onto my street and lit up the yellow caution sign at the end of the street approximately 2150ft (650m) away. Pictures don't do it justice but here's a couple that I took.

10896414_10152467204240064_8185029005795750662_o.jpg

Top: low beams only (5000K HID)
Middle: low beams and fog lights (5000K HID)
Bottom: low beams, fog lights, and light bar.
10906279_10152467223435064_4954853397298428090_n.jpg

Obviously that last one is just in back backyard outside the shop. I'll get some more comparison shots on the open road when I get a chance. Seeing the output of this light bar as definitely convinced me to put some LED pods on the back end to use as backup lights or load lights in dark areas. I ordered the switch for them already and will hopefully be looking to get a set shortly once I determine how and where I'm going to install them.​
 
OP
OP
brandonjansen

brandonjansen

Senior Member
Joined
Feb 14, 2013
Posts
1,701
Reaction score
1,013
Location
Abbotsford, BC, Canada
Ram Year
2012 Ram 3500 Laramie Limited
Engine
6.7 Cummins - Tuned and Deleted
3” LED Flood Light Pods Installed for Backup / Load Lights – 1/12/15

Introduction:

I've toyed with the idea of putting some sort of backup lights on my truck for almost a year now as the stock reverse lights are practically useless when backing up in completely dark places. It was one of those things that I always had in my head by never actually got around to doing. After seeing the light output from my front LED light bar I was convinced I needed to do something on the back end as well.
I've looked at both flush mounts and regular pods as an option and decided to go with regular pods for a couple of reasons. First, I wanted to keep them a little more hidden if possible and figured I could do so by installing them back a little further under the truck so they aren't right in your face. And second, it's much easier to take off these pods and go to flush mounts if I decided I want to do that then it is to go the other way. I wasn't really a huge fan of cutting the bumper out for flush mounts either and would rather keep the clean look of it as it is now.​

Installation:

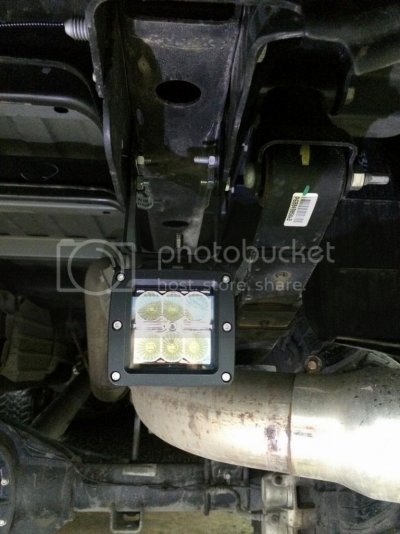
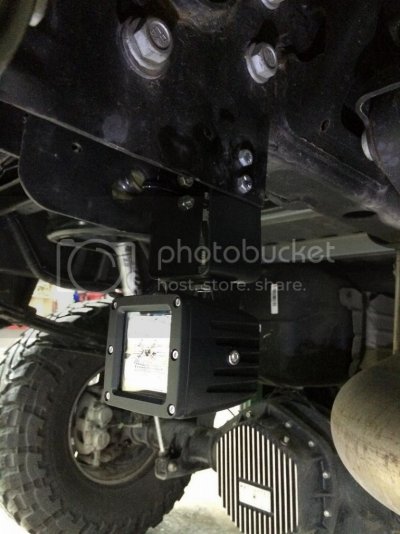
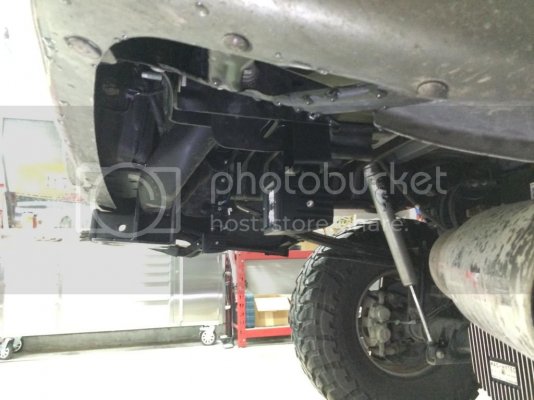
Brackets
Once I had the LED pods in hand and started holding them up under the truck I decided that I wanted them tucked back a ways so that they didn't look so in your face and hanging down like they did when they were right up to the bumper. I also wanted them evenly spaced to the outside of the truck to get a good spread of light. The width of the frame rails on the truck was about exactly where I wanted the lights and where the bumper brackets bolt to the frame provided a great spot to bolt a bracket for the light pods. So I took a few measurements and got a piece of 2" wide by 1/16" thick flat steel and started marking where I needed to bend it and drill the holes. From there I bent it with a hydraulic press and fine tuned them with a hammer in the vice to get the bends exactly right. Drilled the holes, ground down the edges, through them in the sand blaster to clean off the oils and roughen up the surface and then through some primer and paint on them. I didn't take any pictures of the brackets off the truck... but they're pretty basic. U-shaped with 5 holes drilled in them.
I then drilled the 8 holes in the bumper brackets (4 per side) for the brackets to bolt to and bolted everything up.

88728F80-74DD-4790-AC3F-85D9D72448FA_zpskba0dtnh.jpg
F56B6549-ACD0-4FE9-A178-91387EC767BA_zpskmoamjrl.jpg
F74A209B-95A0-43AE-A802-0B08423D7D57_zps0f4qpxie.jpg
72AF986E-3F64-4E55-97E6-777F731638A9_zpszjez7eud.jpg

Wiring
Wiring these lights was very straight forward as I already had the switch wired up within the truck. Once again I used the weatherproof connectors for each light to keep the water out of the connection and simply because the finished product looks great. I ran a power and ground wire (wrapped in 1/4" lume) from the passenger side light over to the drivers side and connected the two lights together. I then ran the ground directly to one of the bolts holding the bracket on. From there I ran the power wire up the main harness of the truck on the drivers side right up to the fender side of the fuse box where my relays are located. Wired up the relay for the lights directly to the battery and to the switch already inside the cab and called it done.

2B1E5EC3-298D-4FA7-A873-FAA7EC1483B2_zps2gzbmynx.jpg
0120749A-4D55-4B92-97A1-EB7EEB9E11A8_zpsoiokd2qk.jpg

Review:

Once again I am very impressed with the light output of these pods. They're definitely what I needed on the truck since I back into a number of places with no light at night. I am very happy with the install as well as they are well hidden under the truck but still function just as well as they should. At this point I have no plans to swap them out for flush mounts unless I notice a real problem with them.

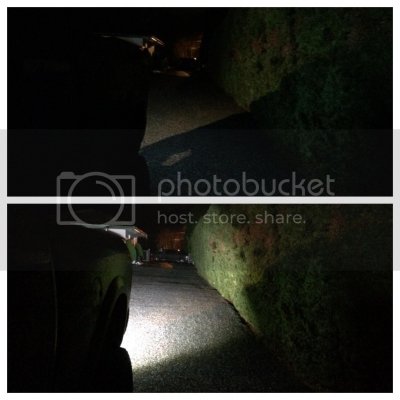
7BAFAA70-499A-4059-B06D-2941F1305AD8_zpsnfuwpqvu.jpg

Top: Reverse lights only (LED replacement bulb)
Bottom: Reverse lights and LED pods
4E658199-7D1B-4D70-A01C-8EE402B0B5FA_zpslqhuqdzk.jpg

I will get some better comparison shots on an open road when I get the ones for the light bar as well. That will really show how bright they are.​
 
OP
OP
brandonjansen

brandonjansen

Senior Member
Joined
Feb 14, 2013
Posts
1,701
Reaction score
1,013
Location
Abbotsford, BC, Canada
Ram Year
2012 Ram 3500 Laramie Limited
Engine
6.7 Cummins - Tuned and Deleted
Wheel Photoshop – Vote – 1/23/15

So this has got to be the biggest teaser I've posted in a long time... I've been going back and forth between Hero SS8's and Independence SS8's for the truck. I decided to photoshop a couple pictures quick to give me a better idea of what they will look like on the truck. Here they are:

Hero SS8's
607F3E5E-4192-4E2A-B020-FC06785B9064_zpspip86nqq.jpg

Independence SS8's
B2948A7B-A3E8-4B12-9F7C-EF728D9153E1_zpswskhhxjc.jpg

Obviously the back wheel looks a little messed up because of how I had to flatten it to line up with the truck. But the front is pretty spot on to how it will look. Either setup will be 22x12's with 37x13.5 Toyo MT's.

So put in your votes. I have a good idea of which one's I want already but I'm open to hearing everyone else's thoughts.
 
OP
OP
brandonjansen

brandonjansen

Senior Member
Joined
Feb 14, 2013
Posts
1,701
Reaction score
1,013
Location
Abbotsford, BC, Canada
Ram Year
2012 Ram 3500 Laramie Limited
Engine
6.7 Cummins - Tuned and Deleted
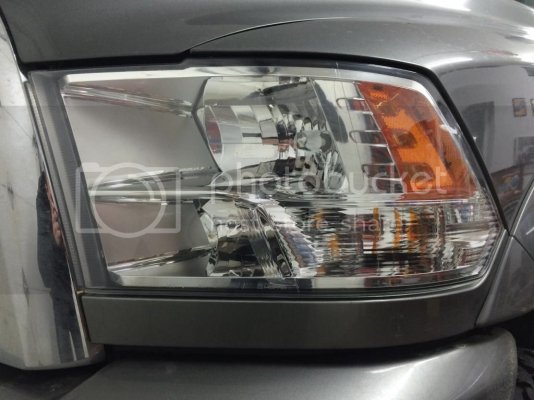
Colour Matched OEM Quad Headlights – 2/13/15

Introduction:

I've planned on colour matching more of my truck for quite a while now and finally got around to doing the OEM quad headlights. After reading a number of posts on baking headlights apart and painting them I figured it should be simple enough to do myself. That though was definitely proven wrong through the process. They did end up looking alright (not quite up to the standard I wanted) but doing this mod was definitely a huge learning experience for me. So I'll try to outline some of the key points I learned in this for anyone else who wants to attempt it.​

Baking Headlight Apart:

A number of posts I read stated to place the lights in the oven at 275° F for approx. 18 minutes. So that's what I did for the first round.... that was the first mistake. First off, 275° is too hot (at least it was in my oven) and 18 minutes is too long. It ended up slightly melting the corner of the front lens on the passenger side headlight. Already a frustrating start to this project. I then started to pry them apart. Again, a far more difficult task than most make it out to be. Don't expect to make very much progress at a time and you are going to make a mangled mess of your housing doing it. Long story short, they ended up having to go back in the oven 4 or 5 more times with lots of prying in between before they would finally come apart and the housings looked pretty rough. I put them in a 225° F for 8-10 minutes all the following times which seemed to work better for me.

The second mistake I made was putting the headlights on a flipped cookie sheet the first time (which I should have realized was a bad idea). It slightly melted the bottom of the housing where it was in direct contact. After the first round I put them on a couple pieces of 2x4 which worked much better.

The third mistake I made once I had them baked apart was not being careful enough when I removed the OEM reflector. I didn't realize how easily the chrome surface on the shrouds scratched and I ended up scratching a few areas that I originally wanted to leave chrome. So be very careful when you are handle the shrouds if you plan to leave certain areas chrome.

The second light came apart a fair bit quicker as I had figured out a few little tricks but the housing was still a mangled mess by the time I was done.​

Shroud Prep:

I wanted to keep a few areas of the shroud chrome; one being the turn signal reflector. So I got out the masking tape and started taping off the area I wanted to leave chrome and then used an exacto knife to cut the lights exactly right. A bit time consuming but you can get fairly nice lines if you take your time and do it right. Plus if it's not perfect it's not 100% noticeable as that part of the lens is rippled and distorts the shroud slightly. From there I gave all the chrome a quick sand with 1000 grit sand paper and called it good.​

Painting:

I used Duplicolour automotive paint from Canadian Tire for all the paint work. I started with 2 good coats of primer followed by 4 or 5 light coats of colour match grey, and topped it off with 3 coats of clear. FYI - for any of you Canadians looking for colour match paint for a Mineral Grey Metallic truck, the Chrysler Charcoal Grey Metallic at Canadian tire is a direct match even though it has a different name. I sprayed a test piece the week before to verify.

Another small issue I had when removing the tape on the reflector is the paint sticking to it. On the interior corners that were 90° or less the paint liked to stick to the tape better than the primer for some reason. It ended up taking a few pieces of paint off and forced me to re-tape, and repaint a small section of the light. For the second shroud I scored the edge of the tape with an exacto knife which solved the problem.

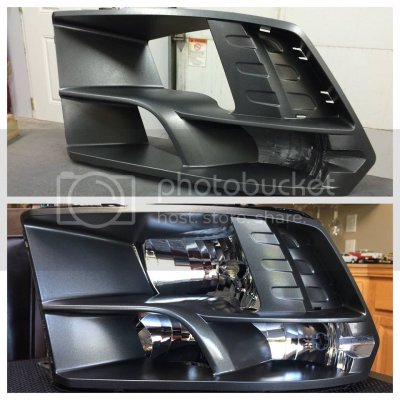
10958557_10152570025540064_4371786693575889340_n.jpg
Top: Colour matched OEM grey (no clear coat yet)
Bottom: Clear coated, tape removed, and ready to be baked back together

Baking Back Together:

The first thing you'll want to do is make sure you've removed all the old sealant from the housing and lens. I ended up putting each piece in the oven another 2 times while working all the sealant out after each heat up (at 225° for 8 minutes again). I managed to get almost all of it out.
I bought butyl tape from a local RV shop to reseal the headlights with. Unfortunately they only had grey, no black so that's what I had to go with. I didn't think it would be that big of a deal but also was proven wrong on that though. You do see more of the sealant once the headlight is in the truck than you would think. You can notice the grey on mine if you're right up to the headlight. Luckily the headlights and truck are grey so it somewhat blends in.

The next step is to obviously do a really good job cleaning the inside of the lens and the chrome reflectors in the housing to make sure no debris or streaks are on them. I then placed the butyl tape in the gap around the entire housing. On the first light I then installed the shroud into the housing and placed the lens over top. That was the next mistake I made... Because everything is such a tight fit I knicked a few spots on the shroud with clips on the lens that are now visible if you look close enough. Install the shroud into the lens first and then place the whole unit into the housing.
Once everything was in place I pressed it all together as much as I could and placed the light back in the oven for 8 minutes to heat up the tape. I then pressed it all together as much as I could again. I managed to get the majority of the clips back in but couldn't get the ones on the inside of the light (closest to the grille). They're really close but wouldn't quite go. However the lens is held on there very well by the butyl tape so it won't separate. To finish each light up I filled in all the gaps between the lens and the housing with butyl tape and tooled the edge to give it a good seal all the way around.

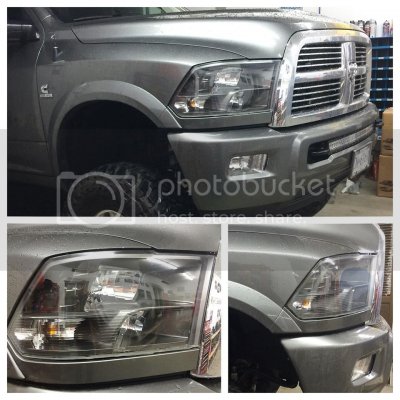
Here's what the final product looked like installed back in the truck.

10451896_10152570025525064_842252014595276146_n.jpg

So far they've been through 4 days of rain here in Canada and I haven't had any leaks or fog in them yet so I think they're good as far as sealing goes.​

Conclusion:

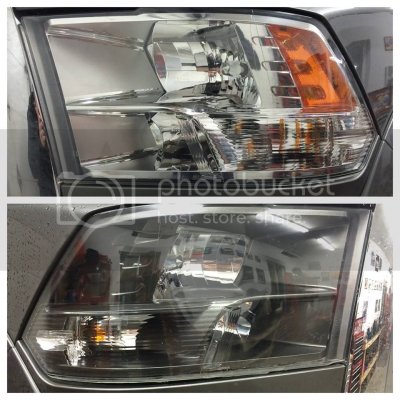
As I said above this was a huge learning process for me and because of that the lights aren't quite as good as I wanted them to be. However they still look a whole lot better than the stock chrome shrouds. In my opinion they give the front end a much meaner look and I'm happy with them overall. These lights are only temporary for me anyways as I already have a set of '13 projector headlights sitting at Retro Shop ready to be built. They will be a full on build by Jeremy once I replenish my mod fund.
Next on the list will be a colour matched out grille shell to finish off the truck.

Here's a quick before and after shot I put together showing chrome VS grey

10959898_10152570025530064_1686059082151788747_n.jpg

I'll try to get some better pictures of the headlights/truck once it's we have some better weather and it's cleaned up a bit.​
 
OP
OP
brandonjansen

brandonjansen

Senior Member
Joined
Feb 14, 2013
Posts
1,701
Reaction score
1,013
Location
Abbotsford, BC, Canada
Ram Year
2012 Ram 3500 Laramie Limited
Engine
6.7 Cummins - Tuned and Deleted
A few more pictures to share of the truck – 3/2/15

No new mods to update yet... Wheels and tires are on order the only thing holding them up is the backorder on the Toyo MT's unfortunately. There will be a few other minor things to accompany the wheels/tires when they come. Other than that the headlight build I've referred to before will be happening in the next couple months. Hopefully a colour matched grille not too long afterwards.

Since everyone likes pictures here are a few to share from the last few weeks:

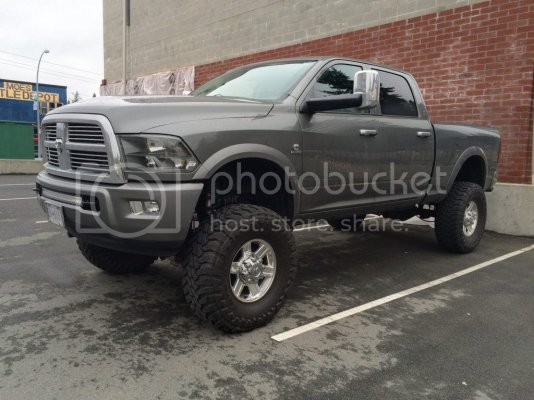
A better picture showing the colour matched quad headlights on the truck:
10986682_10152610382660064_6963456405241275823_o.jpg

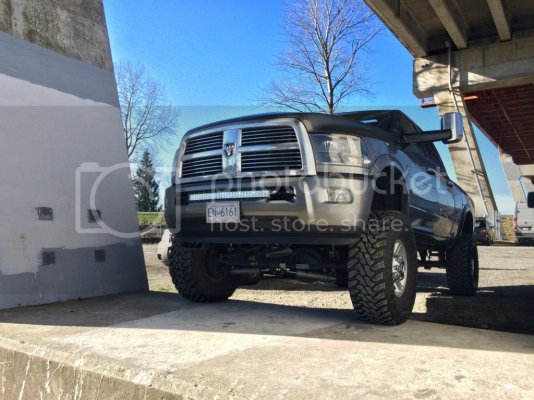
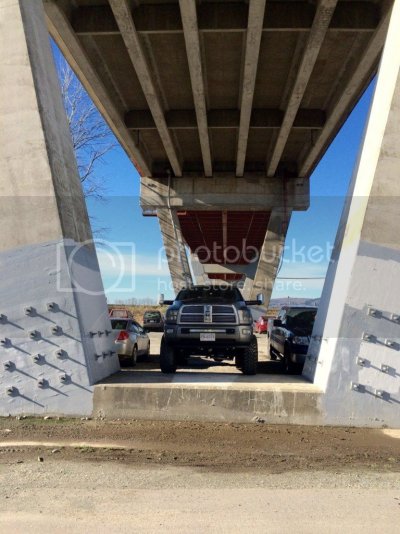
Went down to a local park to take my dog for a walk one sunny Sunday and pulled up in front of a bridge foundation in the parking lot. Figured I might as well park on top of it so I threw it in 4x4 and crawled up it.
10379462_10152610373960064_8173441268982028894_o.jpg
10661815_10152610373950064_9150778807076952010_o.jpg

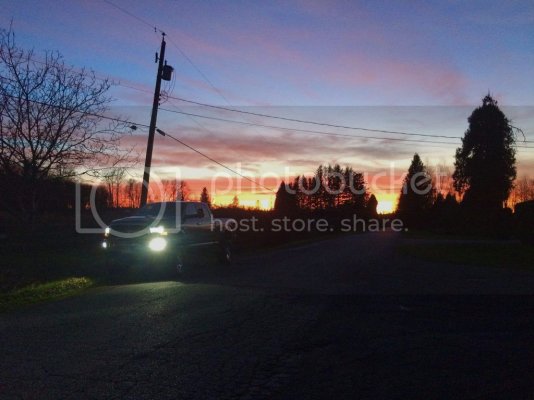
We've had a few super nice sunrises/sunsets out here on the west coast the past few weeks. Here's a quick one I snapped of the truck in front of one of the sunsets that I thought was worth sharing.
10988308_10152610373970064_3101609255216915247_o.jpg

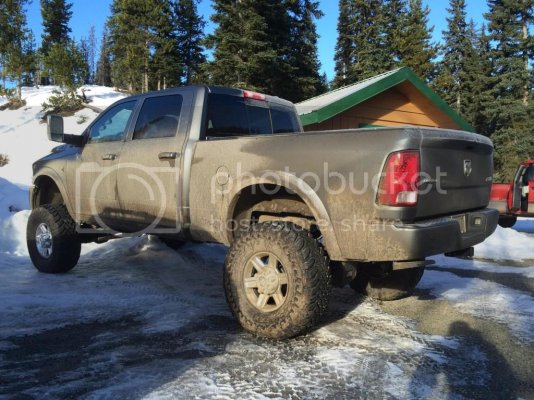
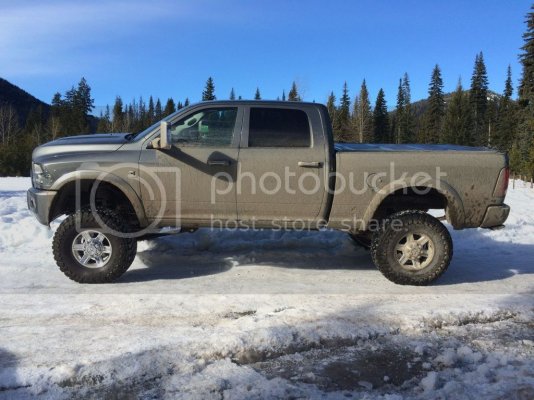
Was up in Manning Park, BC for a retreat last weekend. The truck got dirty enough on the drive up there that I figured I might as well have some fun in the mud while I was there. We found a few different spots to play in. Unfortunately I didn't get any action shots or video but this was the aftermath.
11021479_10152610373955064_7469475723642899060_o.jpg
11024683_10152610373965064_2353749169580033653_o.jpg
Not a pavement princess ;)

Had some time yesterday to give the truck a good wash and ended up throwing a quick spray wax on it as well as we're supposed to have nice weather for the next week. Turned out pretty flippin good for a quick spray wax without any detailing work (clay bar, polish, etc.)
10922314_10152610374155064_1819788417589085345_o.jpg
 
OP
OP
brandonjansen

brandonjansen

Senior Member
Joined
Feb 14, 2013
Posts
1,701
Reaction score
1,013
Location
Abbotsford, BC, Canada
Ram Year
2012 Ram 3500 Laramie Limited
Engine
6.7 Cummins - Tuned and Deleted
Wheel/Tire Update & Pictures – 3/16/15

I finally managed to fit a set of 37x13.5r22 Toyo MT's available locally in Abbotsford, BC. So I have the wheels being shipped up here as we speak. Hoping to get them by the end of the week if everything goes well. Then on the truck within the next week or so.

In the mean time I've got a few more pictures to share.

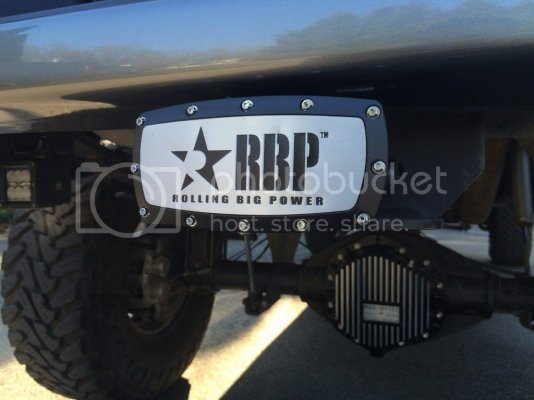
I was in a local truck accessory shop the other day and found this RBP hitch cover. Thought it would be cool to have something that says "Rolling Big Power" on the truck so the people behind me know what's up ;) The colour and design of it suit the truck really well too.
10986838_10152638300160064_1789138075206869134_o.jpg

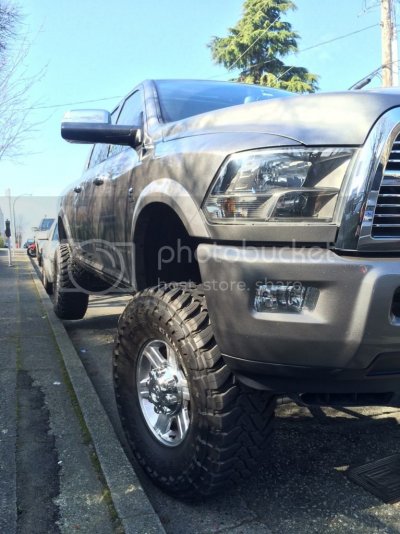
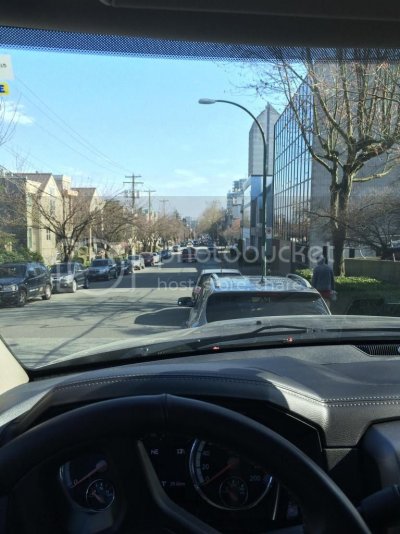
Had to go into downtown Vancouver, BC for a meeting last week and there was only parallel parking available. Even with the truck partially up on the curb it sticks out 2 feet further than the other vehicles. Definitely not ideal.
11034436_10152638300150064_3777598944555602056_o.jpg
10507027_10152638300145064_7549739758765781779_o.jpg

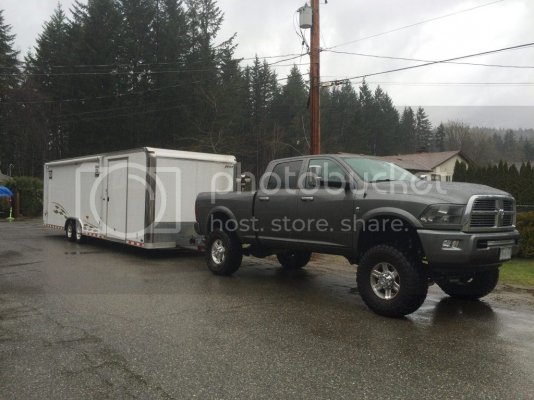
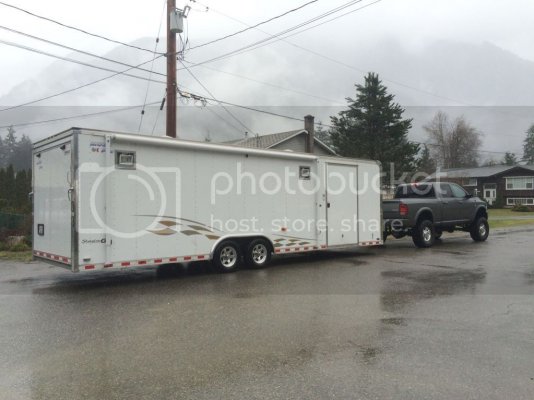
My Dad and I finally found an enclosed race trailer for sale locally that is perfect for our needs. We ended up making the deal and went out to Hope, BC on Saturday to pick it up. It's a 28' Pace Shadow GT race trailer fully finished with flooring, cabinets, wall tie downs for tool boxes etc. 100W solar panel to two 6 volt batteries and a 1750W inverter, electric winch, electric tongue jack, exterior work lights, 20 foot awning. Everything we'd ever ask for in a trailer. For the ride home we didn't use the equalizer bars which is why the truck is squatting so much. The trailer weighs around 5000 lbs empty and of course the truck pulled it like a dream. Had no issues pulling it with my 120 hp tune from Double R Diesel the whole way home.
10984575_10152638300165064_525064311374493898_o.jpg
1926022_10152638300155064_5544847109569953053_o.jpg
 
OP
OP
brandonjansen

brandonjansen

Senior Member
Joined
Feb 14, 2013
Posts
1,701
Reaction score
1,013
Location
Abbotsford, BC, Canada
Ram Year
2012 Ram 3500 Laramie Limited
Engine
6.7 Cummins - Tuned and Deleted
Look what showed up – 3/23/15

Well these finally showed up today :waytogo:

FBFC4ECF-4891-46F7-8C2B-05B494187D32_zpswyibsxoe.jpg
 
Last edited:
OP
OP
brandonjansen

brandonjansen

Senior Member
Joined
Feb 14, 2013
Posts
1,701
Reaction score
1,013
Location
Abbotsford, BC, Canada
Ram Year
2012 Ram 3500 Laramie Limited
Engine
6.7 Cummins - Tuned and Deleted
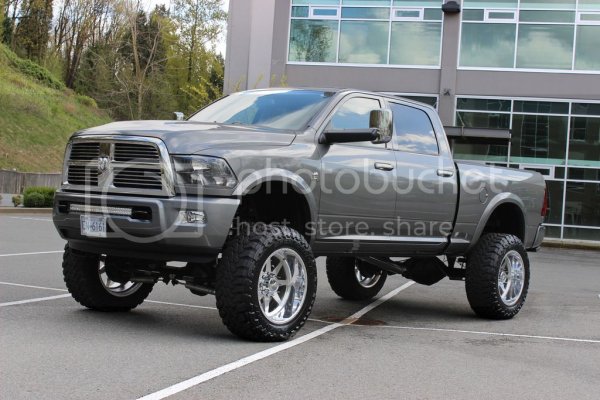
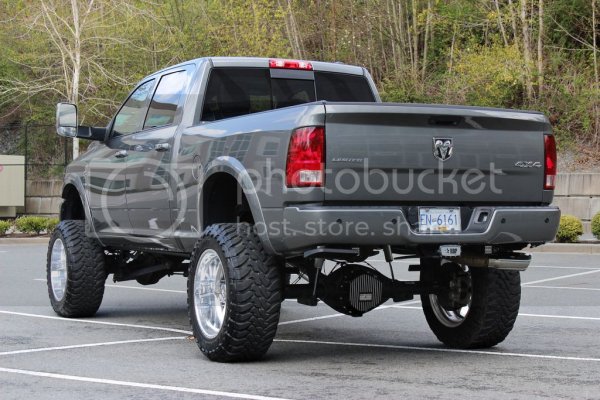
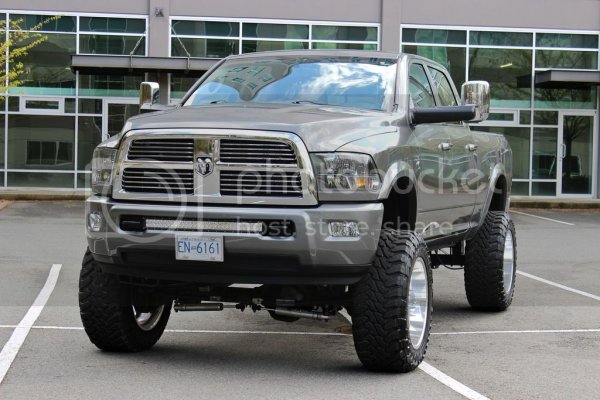
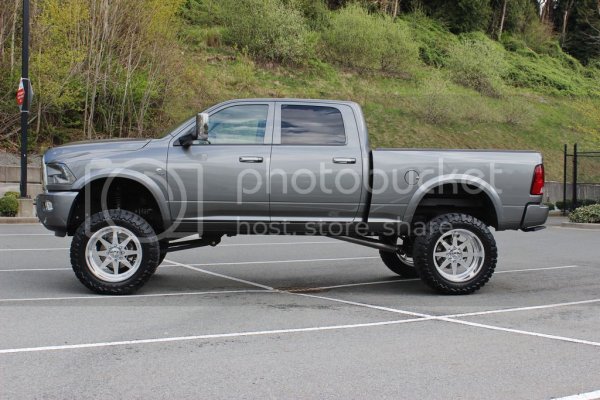
22x12 American Force Wheels & 37x13.5 Toyo Mt’s – 4/4/15

As promised here's a full post on the new wheels and tires on the truck.

Specs:

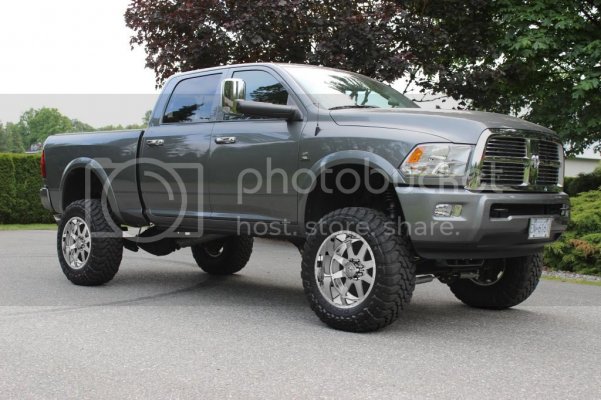
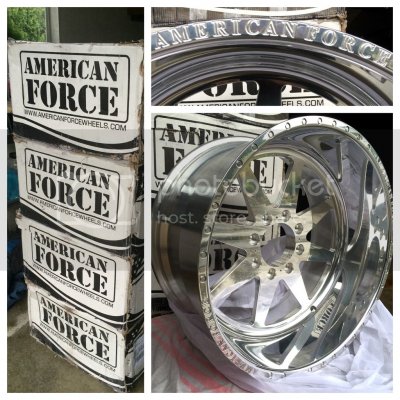
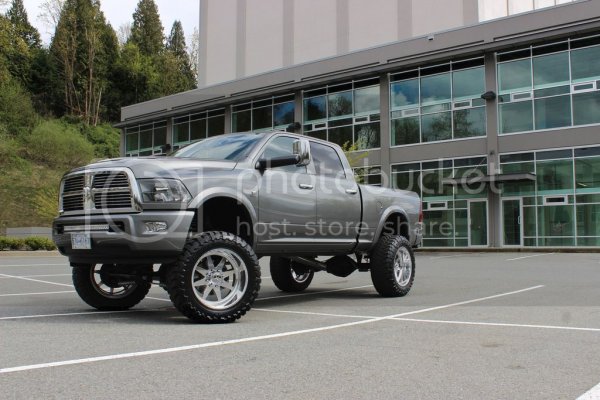
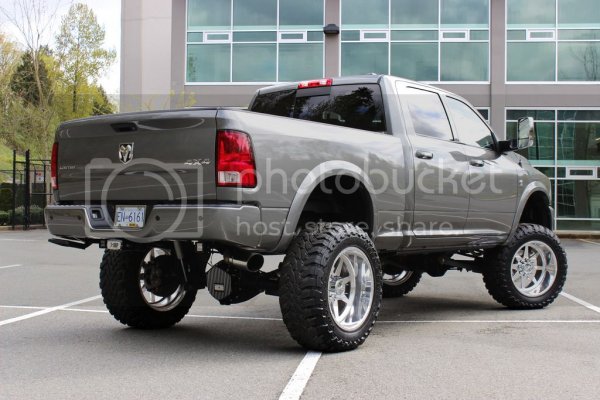
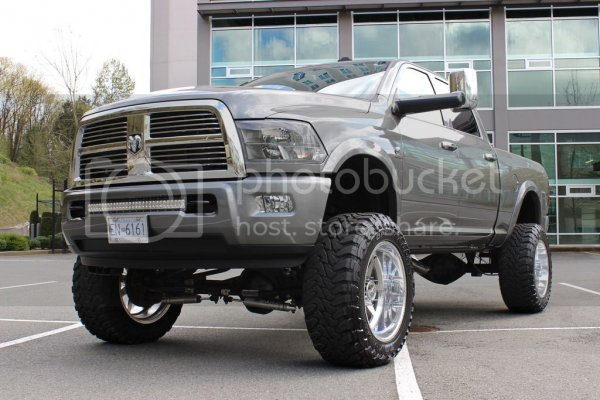
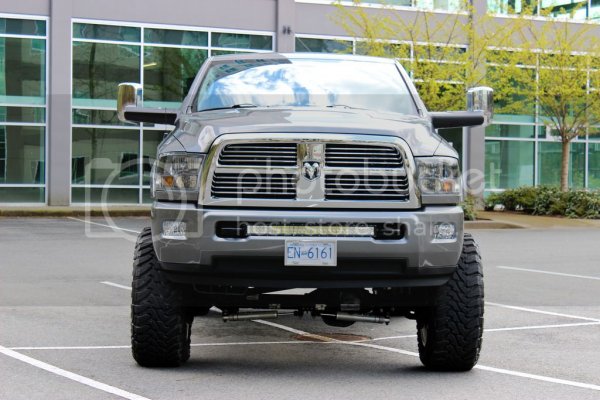
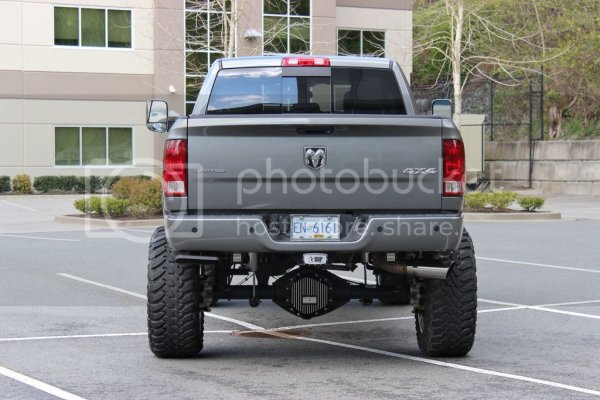
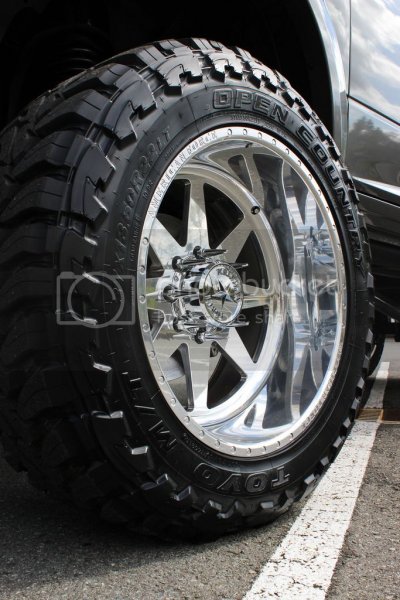
22x12 - 40 offset American Force Independence SS8's
37x13.5r22 Toyo MT's
Metal Lugz spiked lug nuts

I bought the wheels through Bully's Performance which is a company I'm sponsored by. Got them for a very good deal through them. The tires I bought locally at OK Tire in Abbotsford, BC as they actually had them in stock (unlike any supplier in the States) and were priced very well. The lug nuts were ordered from Rimzone as they were the first place I found that had them in stock for a good price as well.​

Rubbing/Trimming:

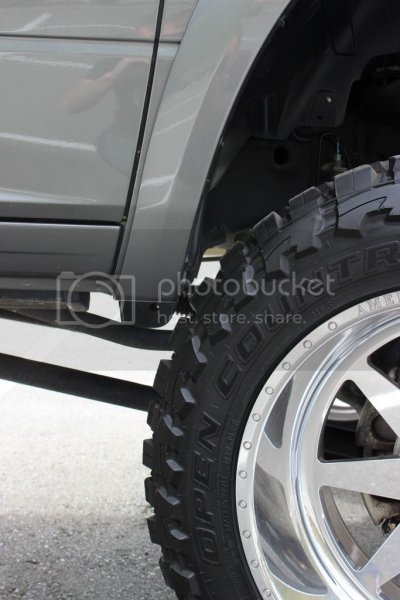
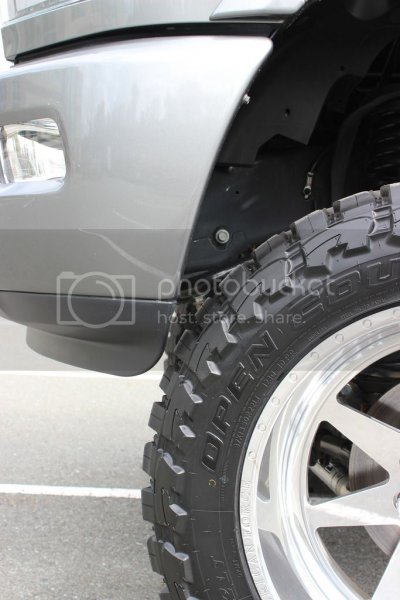
To my surprise I do have rubbing issues with this setup. Both tires were rubbing the little tab on the fender flare that returns over the pinch weld on the back of the inner fender near full lock. I cut both those pieces off so now I generally don't have any issues unless I hit a bump while turning sharp. Other than that there's no fitment issues whatsoever.​

Impression:

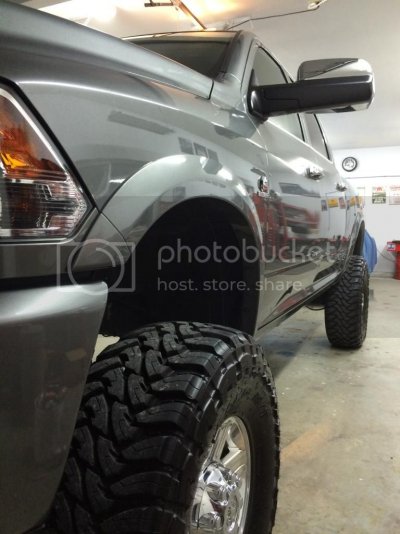
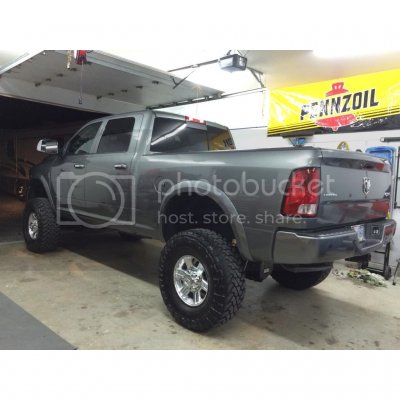
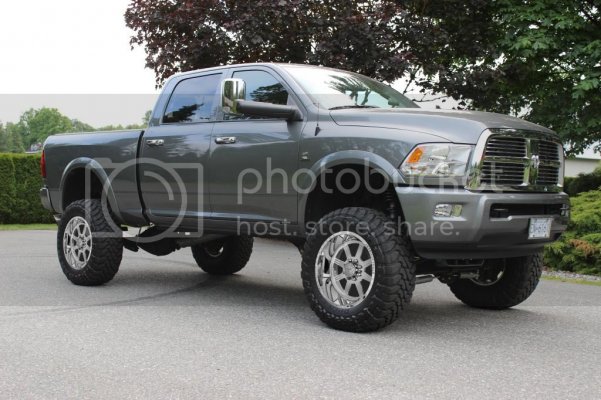
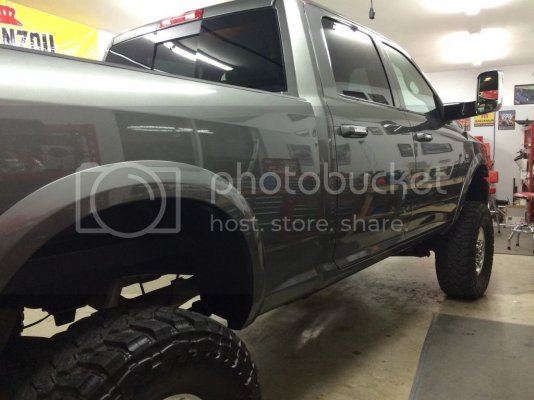
I'm very happy with everything involving these wheels/tires. I think they suit the truck perfectly and completely change the look of the truck. Gives is the stance I wanted and the great look of having a big, deep lip, polished wheel on a mineral grey truck. I also love the look of the Metal Lugz spiked lug nutz with these wheels. I think they go together perfectly.

The one thing I was a little disappointed in was the packaging of the wheels for shipment. They were drop shipped directly from American Force to me and were only in a thin cardboard box. When I received them the boxes were in terrible shape and I was already having visions of the wheels being completely scratched and gouged from shipping. Luckily there weren't any issues with the wheels themselves. You'd think that when you're buying such an expensive set of wheels that are being shipped clear across the country that American Force could put a little more padding/protection around the wheel.​

Pictures:

IMG_3526_zpsoazst1c2.jpg
IMG_3518_zpsiqldkzuz.jpg
IMG_3507_zps6ahehzhh.jpg
IMG_3483_zpsqvs1y2bc.jpg
IMG_3491_zpsnccqk2i1.jpg
IMG_3482_zpstryyw7gg.jpg
IMG_3486_zpslscaekwn.jpg
IMG_3481_zpsw4u88mpe.jpg
IMG_3492_zpsgoazwjqn.jpg
IMG_3509_zpsjhzqbyxn.jpg
IMG_3530_zpsptoaxjdu.jpg
IMG_3529_zpstnpbq8w2.jpg

Next Mods in Line:

Jeremy at Retro Shop is going to be building me a set of '13 projector headlights very shortly. They'll be fully done up with all the bells and whistles. Should have them in 4-6 weeks depending on his schedule. At that same time I plan to put a colour matched grille shell on the truck and that should pretty much complete the exterior look of the truck for now. Next step will be a bit of sound system work but that will be a ways down the road.​
 
Top