Charonblk07's build thread

Disclaimer: Links on this page pointing to Amazon, eBay and other sites may include affiliate code. If you click them and make a purchase, we may earn a small commission.

MR.REMBERT

Senior Member
Joined
Feb 10, 2014
Posts
418
Reaction score
145
Location
Santa Barbara County, CA
Ram Year
2013
Engine
Hemi 5.7
Dude your headlights are sick. I Def don't have skills like that. I'll wait til i can afford to let JJ do it for me.
 
OP
OP
charonblk07

charonblk07

Senior Member
Joined
Mar 14, 2013
Posts
4,056
Reaction score
2,072
Location
Calgary, Ab
Ram Year
2009
Engine
F1-A forged 349ci
I finally got home from a very long stretch of work and being out of town, and today's weather was beautiful so as soon as I got back from the airport I dropped my stuff off at the house and grabbed my keys. Took it for its first spirited drive since we got the tune sorted out and... WOW, I couldn't keep the tires planted off the line, so I started feathering it out of the hole (no 4wd for now) and kicking it in hard past 3200 rpm and then I would lose traction in a hard 1-2 shift. The 2-3 shift is almost non existent it's so fast with the trans. I'm going to be having some fun with this thing I know it.

I took it up to 160kph on the highway for a very short blast before bringing it back down quickly, but it has zero hesitation getting up that high and and does it pretty darned fast too. I have a driveline vibration above 140kph that I'll need to sort out and the belt's slipping above 5100 but I have new delrin bushings and a carbanite coated pulley coming to cure those two issues. I even gave the thing a bath too, which has been long overdue.

After all the headaches I've gone through I had one big ass smile on my face when I planted it, was worth it all. I even made an appointment to get another muffler installed next week so I can keep my wife happy and it not be as obnoxiously loud at anything above idle.
 
OP
OP
charonblk07

charonblk07

Senior Member
Joined
Mar 14, 2013
Posts
4,056
Reaction score
2,072
Location
Calgary, Ab
Ram Year
2009
Engine
F1-A forged 349ci
So I went down to the border today to pick up some more gear so got a 6hr round trip drive to test out the truck. Well, the bad news is my throttle body is acting up worse than it has been in the past. I had several times where in the change from cruising to acceleration or deceleration it would throw the red lightning bolt and throttle blade position would be very erratic. It began happening even during slight uphill grades while using cruise control. I will be replacing the throttle body now, just debating whether to go back to a stock TB or order another BBK 85mm. Since it's forced induction the TB diameter won't make any real difference I just have to port match the back end of it matched to my ported 6.1L manifold.

I picked up the new Delrin bushings and del-sphere joints to replace the urethane bushings on my Spohn control arms that are creaking and groaning like crazy right now. I need to get them in ASAP to see if it's going to be the solution to my driveline vibration that's developed since the dyno tune. The drive today has revealed a clunk from the rear end that got worse as I got closer to home but it only happened from a stop so I'm certain it's due to a pinion angle conflict since i swapped the air bags out for the springs.

And last and most importantly for now, I picked up my MS-8 and the new ZR 525 speakers so I can get the audio system going.
 
OP
OP
charonblk07

charonblk07

Senior Member
Joined
Mar 14, 2013
Posts
4,056
Reaction score
2,072
Location
Calgary, Ab
Ram Year
2009
Engine
F1-A forged 349ci
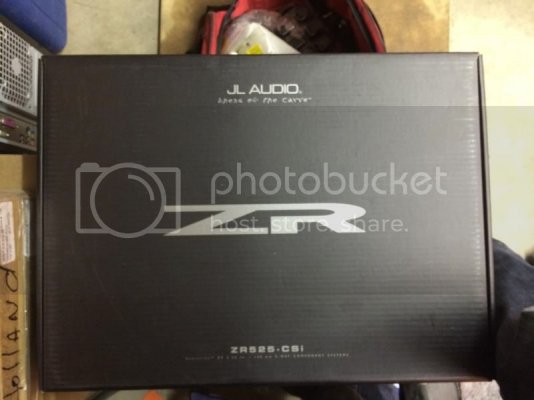
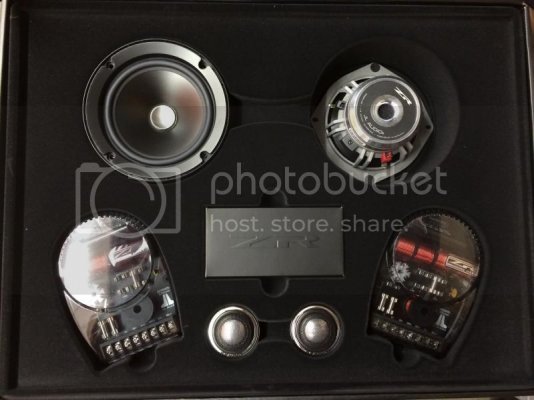
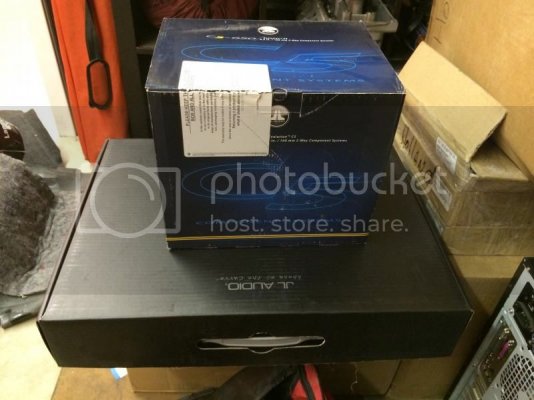
JL apparently loves their ZR line of speakers since it's their flagship line. They are a gorgeous set of speakers and while they are expensive compared to other similar performance lines from other brands the brand recognition is important at shows and such. They come in a felt-like lined case, and compared to the C5 line it's a night and day difference even with the next line down.

IMG_0207_zps0e166a41.jpg

IMG_0210_zps15fb9cdf.jpg

IMG_0211_zps7f38dae0.jpg

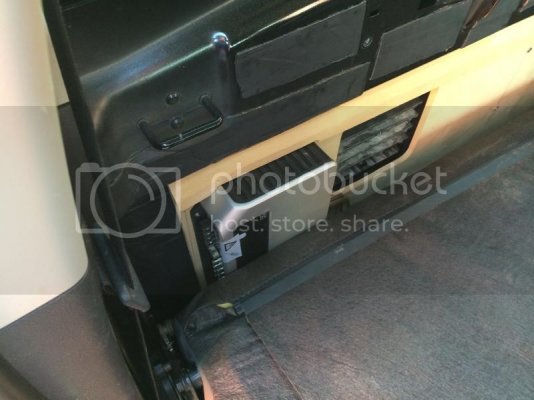
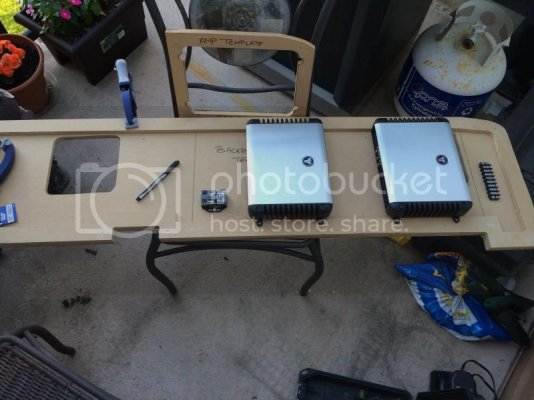
I started working on the back wall of my audio build, it's going to be a rear mounted amp rack. Here's the back wall as it sits right now with the JL HD900/5 amps

IMG_0212_zpse26db73e.jpg

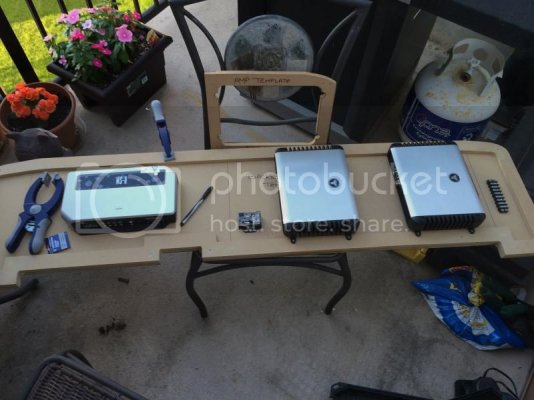
Then I pulled out the MS-8 and got that placed

IMG_0213_zpsae4f7093.jpg
 

Cruizer

Senior Member
Joined
Sep 16, 2013
Posts
6,816
Reaction score
2,426
Location
Ohio
Ram Year
2010 Sport 4x4 QC
Engine
5.7L Hemi
Just curious, is the plan to paint the roof the same color as the hood? That's just how it looks in your sig pic.
 
OP
OP
charonblk07

charonblk07

Senior Member
Joined
Mar 14, 2013
Posts
4,056
Reaction score
2,072
Location
Calgary, Ab
Ram Year
2009
Engine
F1-A forged 349ci
Wow, they are nice! You have a bunch of cool projects ahead of you, kinda jealous! ;)


The problem is never enough time to do them all.

Just curious, is the plan to paint the roof the same color as the hood? That's just how it looks in your sig pic.


The truck will receive a two tone paint job, other things are taking priority though, like getting it running properly for the track and the audio build so the funds are ******* in those. I'm now hoping for next spring to get the paint done.


Sent from my iPhone using Tapatalk
 
OP
OP
charonblk07

charonblk07

Senior Member
Joined
Mar 14, 2013
Posts
4,056
Reaction score
2,072
Location
Calgary, Ab
Ram Year
2009
Engine
F1-A forged 349ci
Getting started on my audio build this week. The equipment list is as follows:

Processing:
JBL MS-8

Amps:
2x JL HD 900/5
1x JL HD 600/4

Speakers
2x JL w6v3 woofers - passive crossover via 900/5 amp from bridged rear input from MS-8
1x JL ZR800 midbass in front door pods - active crossover vis the MS-8
1x JL ZR525 component in front door pods - active crossover via the MS-8
1x C5 625 component in rear door - passive crossover via the MS-8

The ZR800s will be bridged from the front channel of the 900/5s, the C5 650s will be bridged from the rear channels of the 900/5s, and the W6v3s will be on the sub output with input from a split channel from the ZR800s which will receive a 20hz-400Hz signal from the MS-8 and the 900/5 will use its built in crossovers to split the signal. The ZR525s will run active crossover through the MS-8 and powered by the 600/4 so each component will be getting 150W, should be pretty sweet.

I had originally planned a rear wall build but I couldn't get the HD amps and the MS-8 all onto the back wall without them preventing the seat from even bolting into place...so I modified slightly. The MS-8 will be on the back wall along with all the wiring plus a few other electronic devices used in the vehicle that can now be out of sight like my RGB LED controller so I don't have to find a hiding spot for it anymore.

Here was the original idea, with only 2 of the amps installed:
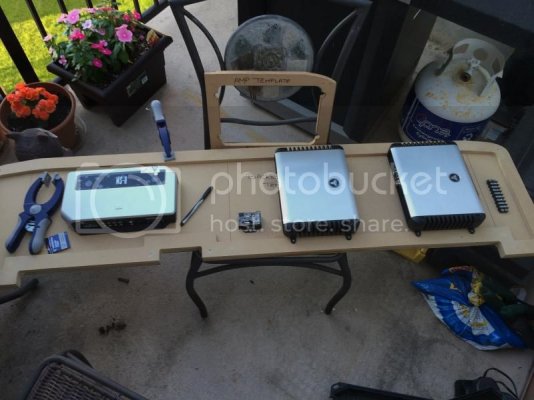
IMG_0213_zpsae4f7093.jpg

Made some changes to the layout and it's now the 3 HD amps on the floor angled so I can now play with the crossovers and filters as required without having to pull the seats like I would have had to before.
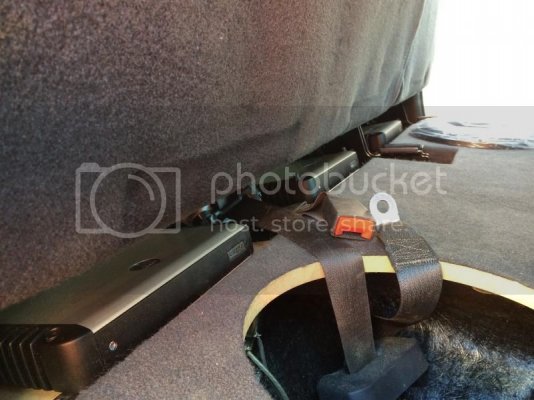
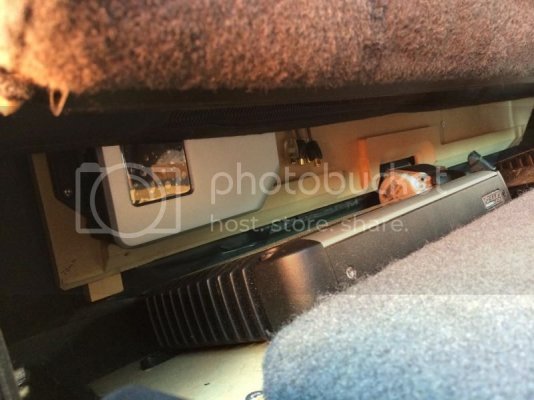
IMG_0214_zps85fd64ed.jpg

IMG_0215_zps4d2777df.jpg

IMG_0216_zpsc8cefbd4.jpg

Now that the test fits are done I'll be starting the fiberglass work to smooth everything out and make it look presentable. That will happen tomorrow.

Started making a place for the MS-8's remote display. I'd already smoothed out the area under the center stack so I just trimmed out a hole big enough for the display and then began fiberglassing the remote into place.
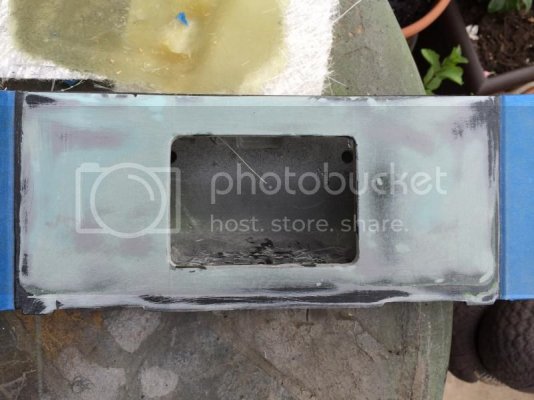
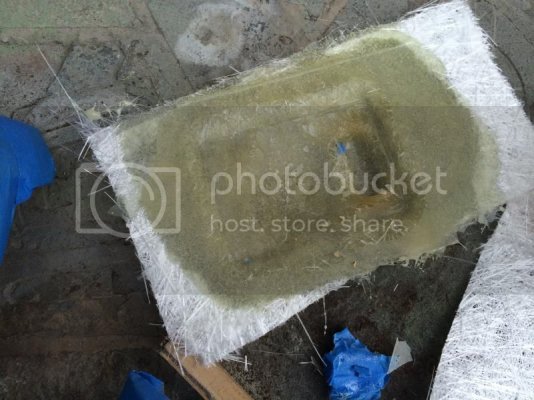
IMG_0221_zps8ceedb29.jpg

IMG_0222_zps3addb726.jpg

That's it for tonight. Tomorrow will be continuing on the center stack that I'm also fabricating in a few gauge pods as well as potentially getting going on the door pods while the truck's in for some exhaust work.
 
OP
OP
charonblk07

charonblk07

Senior Member
Joined
Mar 14, 2013
Posts
4,056
Reaction score
2,072
Location
Calgary, Ab
Ram Year
2009
Engine
F1-A forged 349ci
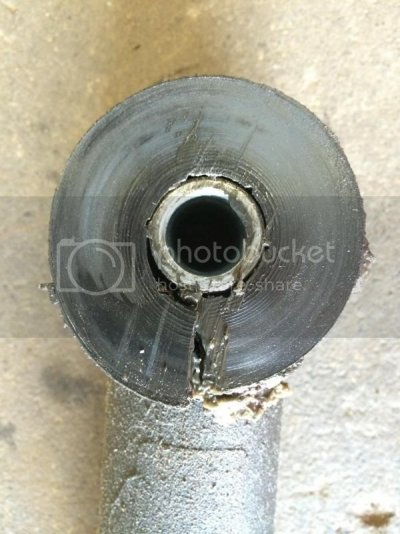
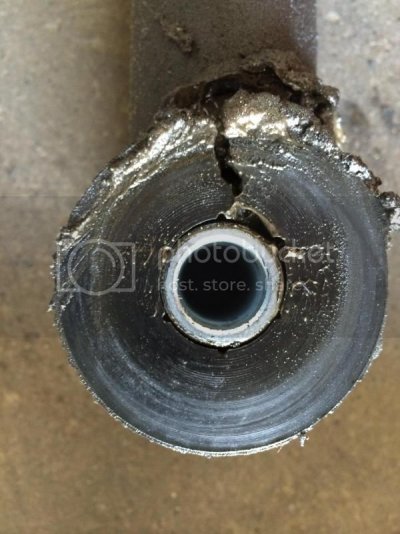
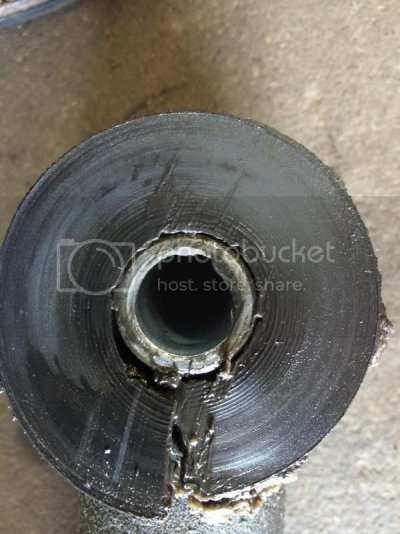
Did a few things today. Upgraded the Spohn urethane bushings to Delrin ones. Delrin is a MUCH harder material than the urethane and shouldn't have the same issues with deflection and warpage like the urethane ones did. Mine were groaning and creaking just driving down the road so they had to go. After I pulled them I was amazed at the state they were in. The center steel bushing fell out of each and every one of them and a few were so abused they had fallen apart inside.
IMG_0218_zps79590505.jpg

IMG_0217_zps54ceb663.jpg

IMG_0219_zpsd97087d4.jpg

After that I did a much needed oil change and am trying out the Redline synthetic oil and while I was under there I started taking measurements for an aftermarket power steering cooler since I am upgrading the vacuum booster to the diesel's hydrobooster and will likely be generating additional heat in the power steering system.

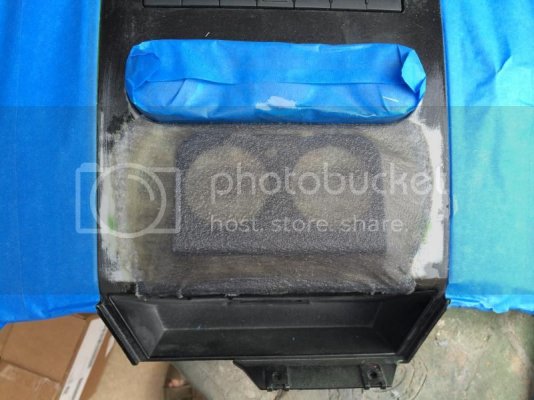
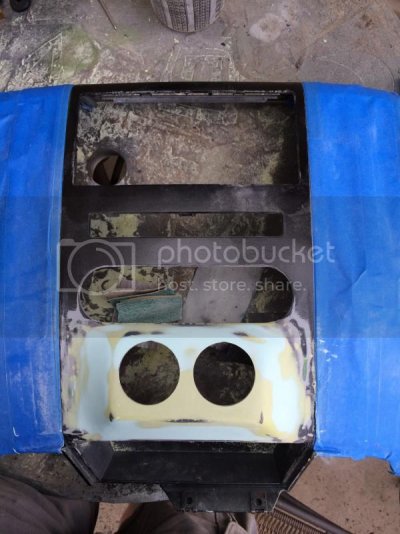
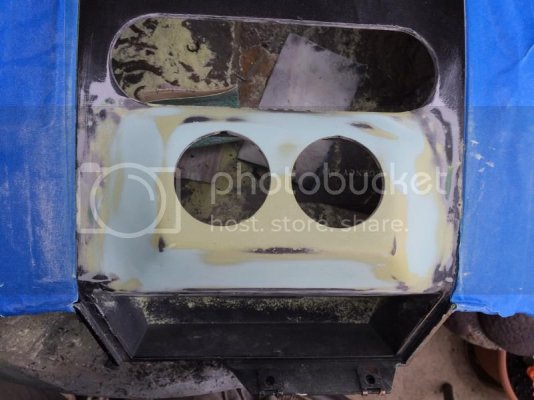
I decided to also start fabricating a few gauge pods in the center stack, I need a few extra gauges for my system and the triple pillar pod isn't cutting it, I honestly need another 4 gauges.

IMG_0220_zps8187cc10.jpg
 

DavidRam

Senior Member
Joined
Feb 19, 2014
Posts
9,094
Reaction score
3,920
Location
SoCal - Redondo Beach
Ram Year
2012 RCSB
Engine
Hemi 5.7
Crazy how bad those bushings are! How long have those been in use???

Believe it or not, when I swapped mine for the delrins, they were pretty stretched out after only about 1,000 miles, and same as you, the center just fell out...
 
OP
OP
charonblk07

charonblk07

Senior Member
Joined
Mar 14, 2013
Posts
4,056
Reaction score
2,072
Location
Calgary, Ab
Ram Year
2009
Engine
F1-A forged 349ci
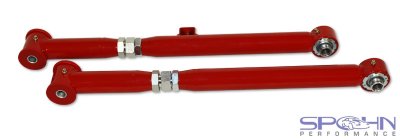
Mine had been in place for a year, almost to the day. It's a wonder they even sell the urethane bushings now given the state of those, but it does sound like at least the delspheres are standard now which should take a lot of the side loads off the bushings when the suspension cycles along the panhard bar's arc.

3 of the 8 zerks fittings were toast as well which is pretty sad and I wish they came with a set of caps to keep them protected; I'm going to see if I can get a set through work since we have zerks fittings everywhere!
 

DavidRam

Senior Member
Joined
Feb 19, 2014
Posts
9,094
Reaction score
3,920
Location
SoCal - Redondo Beach
Ram Year
2012 RCSB
Engine
Hemi 5.7
Mine had been in place for a year, almost to the day. It's a wonder they even sell the urethane bushings now given the state of those, but it does sound like at least the delspheres are standard now which should take a lot of the side loads off the bushings when the suspension cycles along the panhard bar's arc.

3 of the 8 zerks fittings were toast as well which is pretty sad and I wish they came with a set of caps to keep them protected; I'm going to see if I can get a set through work since we have zerks fittings everywhere!

A year is not long... some great quality arms with some ****** bushings.

Yep mine have the delsperes. With the delrin bushings you don't need the zerks for greasing, maybe just plug the hole?? :) I installed mine dry as a bone and I will not be greasing them at all.
 

Attachments

  • Adjustable-Rear-Lower-Control-Arms-2009-2012-Dodge-Ram-1500-4x2-4x4-1.jpg
    Adjustable-Rear-Lower-Control-Arms-2009-2012-Dodge-Ram-1500-4x2-4x4-1.jpg
    39.1 KB · Views: 74
Last edited:
OP
OP
charonblk07

charonblk07

Senior Member
Joined
Mar 14, 2013
Posts
4,056
Reaction score
2,072
Location
Calgary, Ab
Ram Year
2009
Engine
F1-A forged 349ci
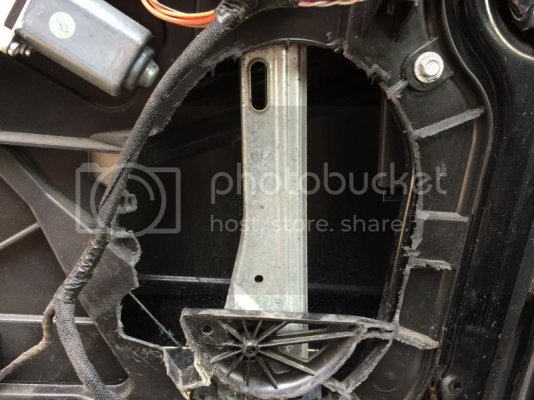
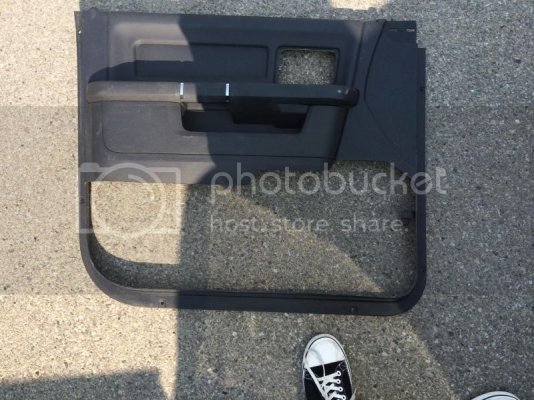
Cut the door panels apart today... there's no going back now. Since I know I'll need the room behind the door panel to fit the 8s and 5.25s I've gone ahead and trimmed out the stock speaker pod as well

IMG_0224_zps47d3158b.jpg

IMG_0225_zps5708d00a.jpg

Been working on the center stack for the gauge pods mostly today, lower pod is complete and the upper is wrapped and going to be glassed tomorrow.

IMG_0227_zpsd634c8ec.jpg

IMG_0228_zps293d9415.jpg
 
OP
OP
charonblk07

charonblk07

Senior Member
Joined
Mar 14, 2013
Posts
4,056
Reaction score
2,072
Location
Calgary, Ab
Ram Year
2009
Engine
F1-A forged 349ci
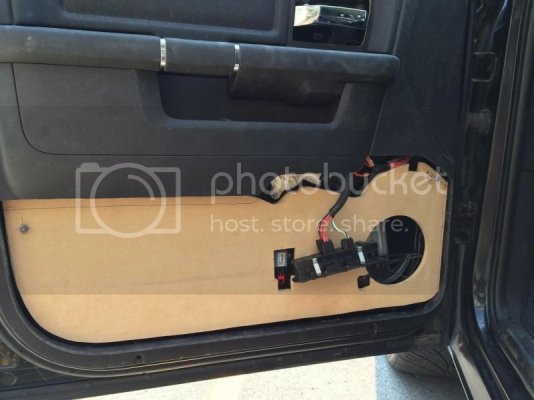
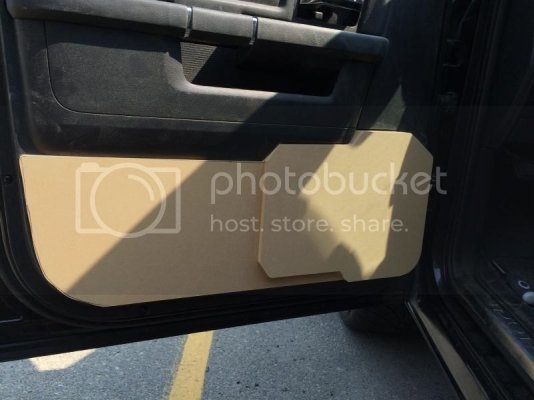
Continued on the door pods today. I now have both door skins trimmed down and the door panels all ready.

Inner door pod mounting plates.
IMG_0235_zps94b01837.jpg

Main door pod
IMG_0237_zps557c68e1.jpg

Potential mounting locations of the 8s and 5.25s.
IMG_0238_zpsa4d417b9.jpg
 
OP
OP
charonblk07

charonblk07

Senior Member
Joined
Mar 14, 2013
Posts
4,056
Reaction score
2,072
Location
Calgary, Ab
Ram Year
2009
Engine
F1-A forged 349ci
I have been working on this, I swear I have, but progress has just been very slow. I finished up all my templates so now progress can speed up in a big way... except now I have to go back to work for 2 weeks so I only have a day left to work on it and the wifey's getting annoyed I've spent so much time on the truck these days off. *Sigh* I can't win.

I now have the inner door mounting panels in place, bolt heads are counter sunk and are using the factory inner door skin bolt locations so they are 100% secure to the door itself.

IMG_0241_zpsfd414920.jpg


The main door panels will be mounted using standard threaded insert hardware from the local carpentry store so it will all mount up nice a tight. Here's the final look before I do the final mounting and trimming out for the speaker locations.

IMG_0245_zps07c36a9e.jpg


Here's the clearances I was talking about between the speaker mounting box and the seat. It's close to the e-brake pedal but doesn't interfere, the only interference is between the e-brake release handle and the top of the box, so I'll just have to open the door to disengage the e-brake, which is fine since I use it so rarely.

IMG_0242_zps50a206e0.jpg


IMG_0243_zpsd2eb01d6.jpg


IMG_0244_zps037c11c4.jpg
 
OP
OP
charonblk07

charonblk07

Senior Member
Joined
Mar 14, 2013
Posts
4,056
Reaction score
2,072
Location
Calgary, Ab
Ram Year
2009
Engine
F1-A forged 349ci
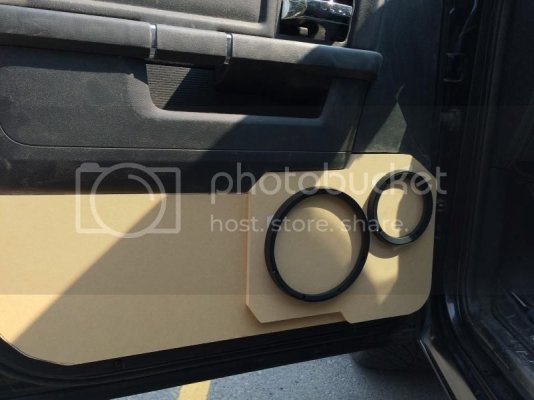
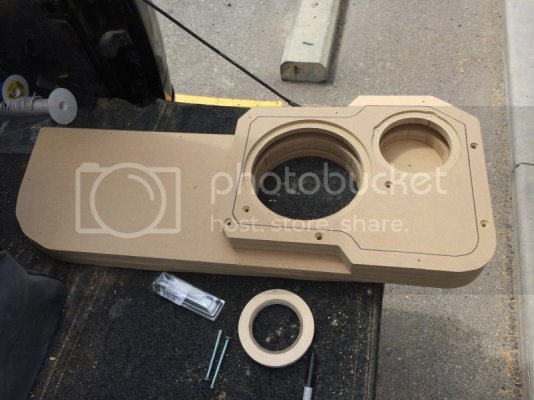
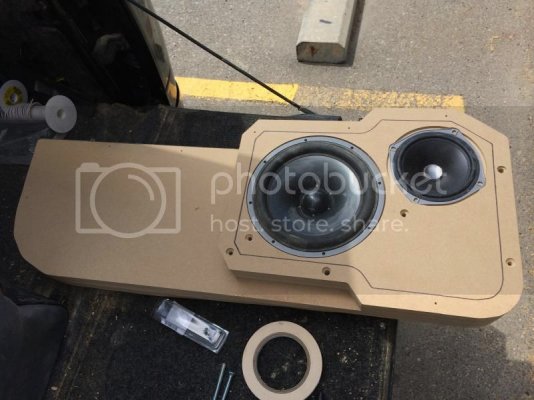
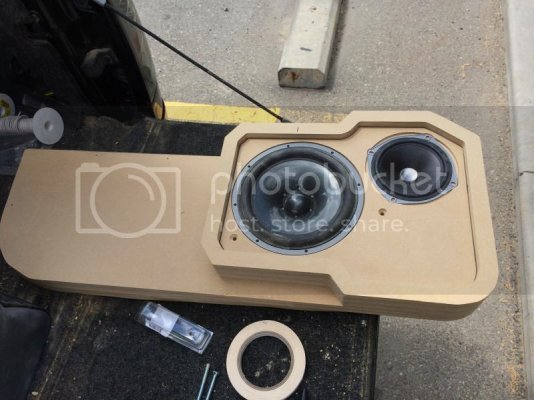
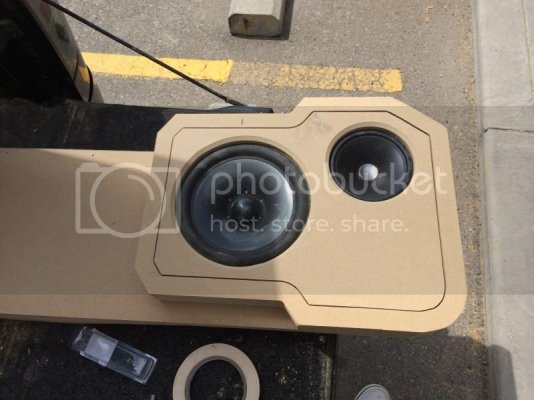
Door pod fabrication is now complete. I still need to sand, add a few things to them, some body filler work to smooth everything out prior to paint, but everything's constructed at least.

IMG_0247_zps4b8eb3ef.jpg

Here's with the speakers placed

IMG_0250_zps186128f4.jpg

Outer trim ring installed

IMG_0251_zps7ad431ed.jpg

Inner cover in place now. This piece will be wrapped in vinyl with a plexi inner ring to edge light the speakers. I'm thinking I want to do something with plexiglass in the bottom corner to match the piece I'll be putting into the main panel where all the empty space currently is.

IMG_0252_zps597ade7e.jpg
 
OP
OP
charonblk07

charonblk07

Senior Member
Joined
Mar 14, 2013
Posts
4,056
Reaction score
2,072
Location
Calgary, Ab
Ram Year
2009
Engine
F1-A forged 349ci
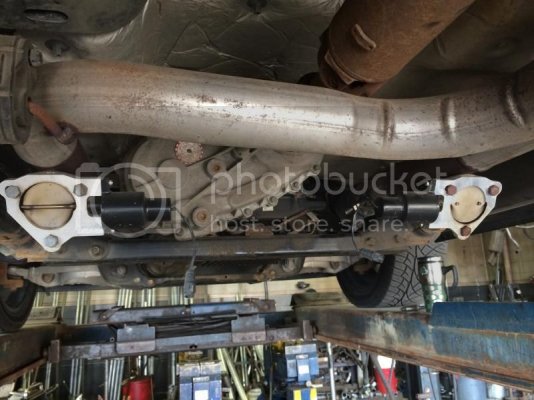
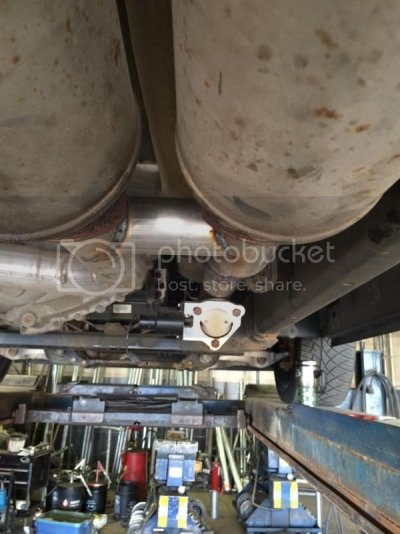
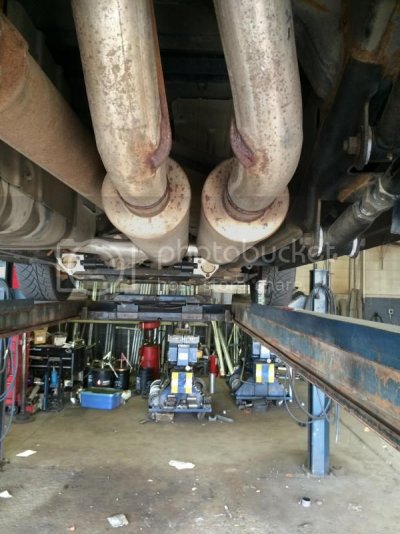
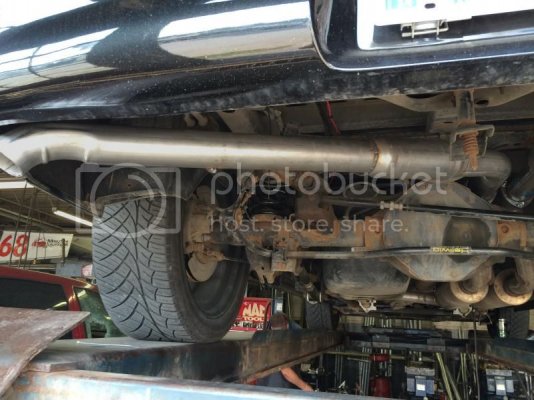
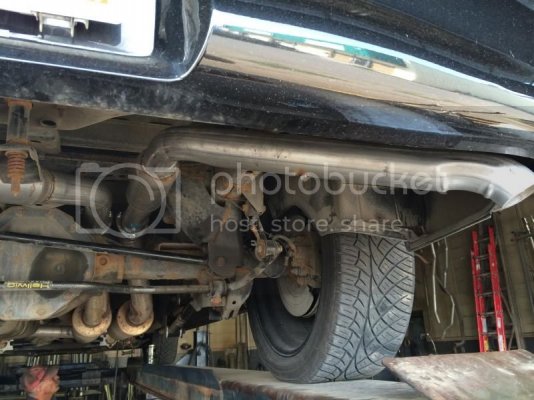
I had the exhaust shop do a bit more work on mine truck this week in attempts to quiet down the exhaust, I know it's the opposite of what most people do but I want my wife to be willing to ride with me when we go on cruises and to hear the quality of music that I'm expecting from my audio build; plus, if I want a loud exhaust that's what the e-cutouts are for. When I first picked up the truck I was almost appalled by how quiet it was but I think it's grown on me now, there's no more raspiness above 3300rpm and I can go WOT without waking the dead.

Exhaust I think is complete and will stay this way: 1 7/8" primary ARH headers, 3" QTP cutouts, 2.5" H-pipe, twin 30" magnaflow mufflers, twin 12" baffled Dynomax Bullets. The exhaust is completely modular so I can drop the center section to remove the transmission which I wish would come as an option from the factory rather than their slip joints which are garbage. I'm happy with the set up and will probably get the entire exhaust powder coated now to keep it in good shape.

IMG_0268_zps722c55e4.jpg

IMG_0269_zpsbe614e36.jpg

IMG_0267_zpsc2ee0746.jpg

IMG_0266_zps38b39855.jpg

IMG_0265_zps0edabe5e.jpg

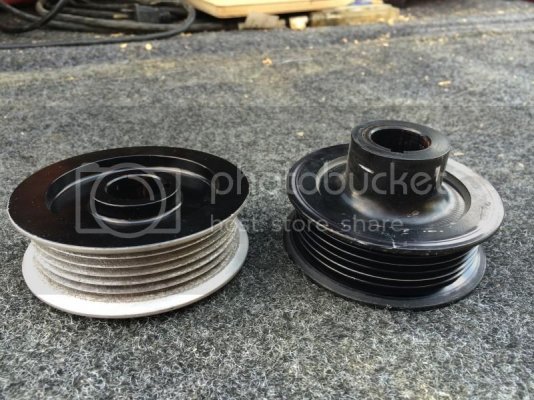
I also swapped supercharger pulleys from the 3.05" pulley I was running to a 3.35" pulley so I can get the 3.05" pulley sandblasted to try to get proper grip at WOT where I'm having serious belt slippage. I ordered a carbinite coated 3.20" pulley from HHP but they didn't realize that the pulleys are different on the truck blowers compared to the car series. Josh figures Procharger is using a Paxton pulley on the truck blowers because of the required length of the pulley snout. The Procharger pulley is on the left with the Paxton pulley on the right for a reference.

IMG_02571_zps5be7febe.jpg
 
Top