

ZCarramrod1
Junior Member
lost cold A/C
determined it to be the evaporator
tried to replace the refrigerant (yf-1234) first myself and it didnt work
found dye-color refrigerant leaking from the A/C-condenser at the front. Thought: "great now I don't need these actuators, evap and heater core or these aluminum blend doors from blend-door USA. so ill return them and replace the A/C-condenser" WRONG!
after two months of cold A/C the refrigerant came down to (idk what the unit of measurement was but I remember 2...is it Kpa? idk whatever. you get it.)
from there I spent the time reordering the parts I returned minus the heater core and blend doors.
now the job starts:
I first tore out the drivers side seat and disconnected any wiring
then shifted to the interior engine bay to disconnect the A/C line (1 nut for me but others might need A/C line disconnect tools)
then I disconnected the heater hoses (no you don't need to drain your coolant)
I made sure to wrap both the A/C line and heater core hoses with sandwich bags to make sure no bugs or debris make there way in. (had to remove the engine cover and air intake hose)
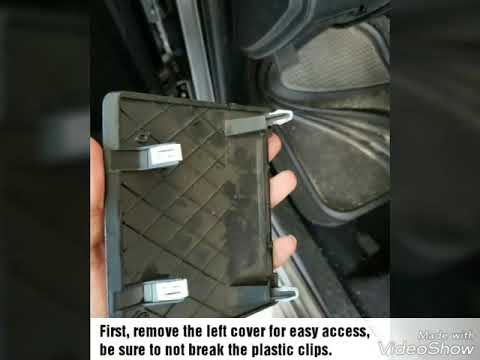
next we shift focus back to the inside of the truck where we start popping off trim pieces starting with the sides of the dash (next to the dash vents) then the floor trim along the weather strip then the A-pillars.
This will reveal the bolts holding part of the dash to the firewall. (3 bolts and one nut (this nut is under the dash to the left of the e brake) on the drivers side and 3 nuts on the pass.)
on the drivers side as far as wiring there are 2 big white wiring harness connections, a green wiring connection and an e brake the needs to be disconnected and some special magic orange pull lever thing that I noted as "no touchy handle"
from here we can focus on the center console removal
pop rear trim panel from the back seat and you'll get a better sight picture of WTF is going on, two bolts in the back some trim panels in the front side and top. a couple baby screws and you're free. (honestly its pretty simple) ill try and find a video and post it.
next lets talk about the passenger side wiring disconnection for dash removal. there are approximately 3 wiring connections that need to be disconnected. they are located just under the glovebox on the side wall of the passenger side. From lowest mounted to highest grey block, white block and then grey block. (one of the greys is the wiring harness to your entire HVAC system, I think its the highest one)
so here we should have the center console out, trim pieces off the sides and above and below the dash, the seat out and a basic understanding of like I said earlier... wtf is going on. now in addition to the bolts on the pass and drivers side holding the dash in, there are also 6 more bolts keeping that bad boy secure
two up top on either side of your center radio speaker at the base of the windshield (you should see two plastic tabs, pop those off and there should be a 10mm bolt) yeah that angle is a ***** and you should plan accordingly careful not to scratch the windshield I had to use one of those angle socket adapters...and a towel...the second time.
the next set of bolts will be at the base of where you just took the center console from one on each side 10mm I believe.
and finally where the steering column mounts.....lets pause here and go into the steering column removal...
Here we need to drop this guy which means popping of the cover that has your hood latch as well as unscrewing the steering column covers T-20 I believe.
no screws needed for the hood latch cover...maybe 2 idk just don't go grippin and rippin
the T-20 I was referring to is in regards to the column covers where the turn signals are that's 3 screws that use a T-20 bit. (two black and one short silver).
with those covers out of the way we can take a look at the wiring harness around the steering column (take pictures dude) note what plugs in where.
unplug unwrap and let dangle....much like what you did in Vegas that one year but lets not talk about that...
...now all that's holding the steering wheel and the steering column in should be 4 nuts up top and a bolt in the shaft...dear penthouse... note which direction the bolt is in and maybe take a picture for good measure because I didn't AND PUT IN IN BACKWARDS...I know...I suck. I would do this after the 4 nuts are removed and you safely drop the steering wheel to the ground. DO NOT LET THE STEERING WHEEL MOVE AROUND FREELY YOU WILL BREAK THE CLOCK SPRING!!
Remove this bolt and slide out the steering wheel column and place it somewhere where it wont get accidentally turned.
Now we can pick up from where we left off the last remaining two bolts that attach the dash to the fire wall. they are in the same vicinity of the 4 nuts that attach the steering wheel column. once all 13 bolts or nuts are removed now we can go down to the floor carpet on the drivers side and pull back and trace the wiring harness that leads to a center module, disconnect and pull out so when we pivot the dash we don't put un needed stress on that wiring harness. (there is a ground nut and a yellow plug)
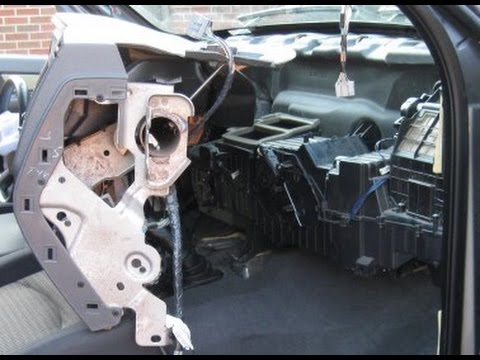
once that is done and the dash is pulled back you should see the HVAC box
there are 5 secure points not just 3...(4 nuts and 1 bolt)
from inside the cab:
2 nuts up top
1 bolt on the center bottom
from the engine bay:
2 nuts one behind the PCM (Yes you have to remove the PCM but not unplug it, 3 bolts)
well one nut behind the PCM and the other just to the right of it from the head on position.
Now at this point we should be able to remove the HVAC box from the firewall.
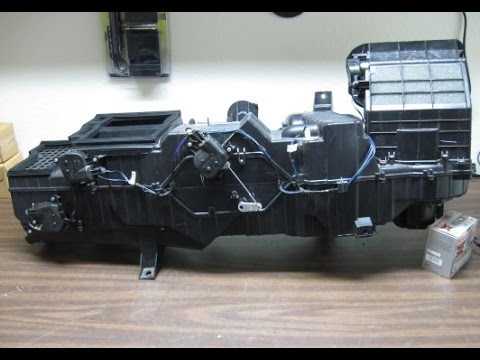
carefully set the magic box somewhere where you can first take pictures of the wiring harness so you know how to snake it when you put it back. careful of these black tabs they will snap on you if you're not careful.
Take out a series of metal clips a few screws and carefully break the seal of the HVAC box to gain access to the evap core. from here its pretty simple plug n play.
I didn't do the blend doors but I might have to as to where I am now. My HVAC is blowing how ever it wants. I replaced the actuators and I may not have calibrated them to what I was supposed to... could be **** wiring..could be broken blend doors...could be a faulty HVAC control module...idk
I did see some post on another forum about a fuse reset when replacing actuators but idk
it was for a corolla
in addition to that I'm getting a "service electronic breaking system" code p0572 x3
and a solenoid check engine code p1046.
not sure if all this disconnecting and connecting wiring harnesses tripped something
I've got my local shop dudes I trust looking at the codes more in depth on Friday.
I really need to get that damn OBDMX+ but its like $130 now...
i hope this helps someone, sorry about the pic had more but they got deleted somehow
this pic should be of other wires not mentioned in my post that need to be disconnected on the passengers side for dash removal
youtube videos used:
https://youtu.be/CFt5V-Ky3WY?si=zFt03958Px9duQSE
 youtu.be
 youtu.be
 youtu.be
 youtu.be
 youtu.be
determined it to be the evaporator
tried to replace the refrigerant (yf-1234) first myself and it didnt work
found dye-color refrigerant leaking from the A/C-condenser at the front. Thought: "great now I don't need these actuators, evap and heater core or these aluminum blend doors from blend-door USA. so ill return them and replace the A/C-condenser" WRONG!
after two months of cold A/C the refrigerant came down to (idk what the unit of measurement was but I remember 2...is it Kpa? idk whatever. you get it.)
from there I spent the time reordering the parts I returned minus the heater core and blend doors.
now the job starts:
I first tore out the drivers side seat and disconnected any wiring
then shifted to the interior engine bay to disconnect the A/C line (1 nut for me but others might need A/C line disconnect tools)
then I disconnected the heater hoses (no you don't need to drain your coolant)
I made sure to wrap both the A/C line and heater core hoses with sandwich bags to make sure no bugs or debris make there way in. (had to remove the engine cover and air intake hose)
next we shift focus back to the inside of the truck where we start popping off trim pieces starting with the sides of the dash (next to the dash vents) then the floor trim along the weather strip then the A-pillars.
This will reveal the bolts holding part of the dash to the firewall. (3 bolts and one nut (this nut is under the dash to the left of the e brake) on the drivers side and 3 nuts on the pass.)
on the drivers side as far as wiring there are 2 big white wiring harness connections, a green wiring connection and an e brake the needs to be disconnected and some special magic orange pull lever thing that I noted as "no touchy handle"
from here we can focus on the center console removal
pop rear trim panel from the back seat and you'll get a better sight picture of WTF is going on, two bolts in the back some trim panels in the front side and top. a couple baby screws and you're free. (honestly its pretty simple) ill try and find a video and post it.
next lets talk about the passenger side wiring disconnection for dash removal. there are approximately 3 wiring connections that need to be disconnected. they are located just under the glovebox on the side wall of the passenger side. From lowest mounted to highest grey block, white block and then grey block. (one of the greys is the wiring harness to your entire HVAC system, I think its the highest one)
so here we should have the center console out, trim pieces off the sides and above and below the dash, the seat out and a basic understanding of like I said earlier... wtf is going on. now in addition to the bolts on the pass and drivers side holding the dash in, there are also 6 more bolts keeping that bad boy secure
two up top on either side of your center radio speaker at the base of the windshield (you should see two plastic tabs, pop those off and there should be a 10mm bolt) yeah that angle is a ***** and you should plan accordingly careful not to scratch the windshield I had to use one of those angle socket adapters...and a towel...the second time.
the next set of bolts will be at the base of where you just took the center console from one on each side 10mm I believe.
and finally where the steering column mounts.....lets pause here and go into the steering column removal...
Here we need to drop this guy which means popping of the cover that has your hood latch as well as unscrewing the steering column covers T-20 I believe.
no screws needed for the hood latch cover...maybe 2 idk just don't go grippin and rippin
the T-20 I was referring to is in regards to the column covers where the turn signals are that's 3 screws that use a T-20 bit. (two black and one short silver).
with those covers out of the way we can take a look at the wiring harness around the steering column (take pictures dude) note what plugs in where.
unplug unwrap and let dangle....much like what you did in Vegas that one year but lets not talk about that...
...now all that's holding the steering wheel and the steering column in should be 4 nuts up top and a bolt in the shaft...dear penthouse... note which direction the bolt is in and maybe take a picture for good measure because I didn't AND PUT IN IN BACKWARDS...I know...I suck. I would do this after the 4 nuts are removed and you safely drop the steering wheel to the ground. DO NOT LET THE STEERING WHEEL MOVE AROUND FREELY YOU WILL BREAK THE CLOCK SPRING!!
Remove this bolt and slide out the steering wheel column and place it somewhere where it wont get accidentally turned.
Now we can pick up from where we left off the last remaining two bolts that attach the dash to the fire wall. they are in the same vicinity of the 4 nuts that attach the steering wheel column. once all 13 bolts or nuts are removed now we can go down to the floor carpet on the drivers side and pull back and trace the wiring harness that leads to a center module, disconnect and pull out so when we pivot the dash we don't put un needed stress on that wiring harness. (there is a ground nut and a yellow plug)
once that is done and the dash is pulled back you should see the HVAC box
there are 5 secure points not just 3...(4 nuts and 1 bolt)
from inside the cab:
2 nuts up top
1 bolt on the center bottom
from the engine bay:
2 nuts one behind the PCM (Yes you have to remove the PCM but not unplug it, 3 bolts)
well one nut behind the PCM and the other just to the right of it from the head on position.
Now at this point we should be able to remove the HVAC box from the firewall.
carefully set the magic box somewhere where you can first take pictures of the wiring harness so you know how to snake it when you put it back. careful of these black tabs they will snap on you if you're not careful.
Take out a series of metal clips a few screws and carefully break the seal of the HVAC box to gain access to the evap core. from here its pretty simple plug n play.
I didn't do the blend doors but I might have to as to where I am now. My HVAC is blowing how ever it wants. I replaced the actuators and I may not have calibrated them to what I was supposed to... could be **** wiring..could be broken blend doors...could be a faulty HVAC control module...idk
I did see some post on another forum about a fuse reset when replacing actuators but idk
it was for a corolla
in addition to that I'm getting a "service electronic breaking system" code p0572 x3
and a solenoid check engine code p1046.
not sure if all this disconnecting and connecting wiring harnesses tripped something
I've got my local shop dudes I trust looking at the codes more in depth on Friday.
I really need to get that damn OBDMX+ but its like $130 now...
i hope this helps someone, sorry about the pic had more but they got deleted somehow
this pic should be of other wires not mentioned in my post that need to be disconnected on the passengers side for dash removal
youtube videos used:
https://youtu.be/CFt5V-Ky3WY?si=zFt03958Px9duQSE
Blend Doors and Evaporator Replacement - Part 1, Removal
Part 1 (Removal) of a 3 part series detailing the process to properly rebuild the HVAC system of a 3rd generation (2003-2009) Dodge Ram with a new evaporator...
youtu.be
Blend Doors and Evaporator Replacement - Part 2, Rebuild
Part 2 (Rebuild) of a 3 part series detailing the process to properly rebuild the HVAC system of a 3rd generation (2003-2009) Dodge Ram with a new evaporator...
youtu.be
How to: Ram 1500 parking brake handle replacement.
How to replace your parking brake handle.
youtu.be
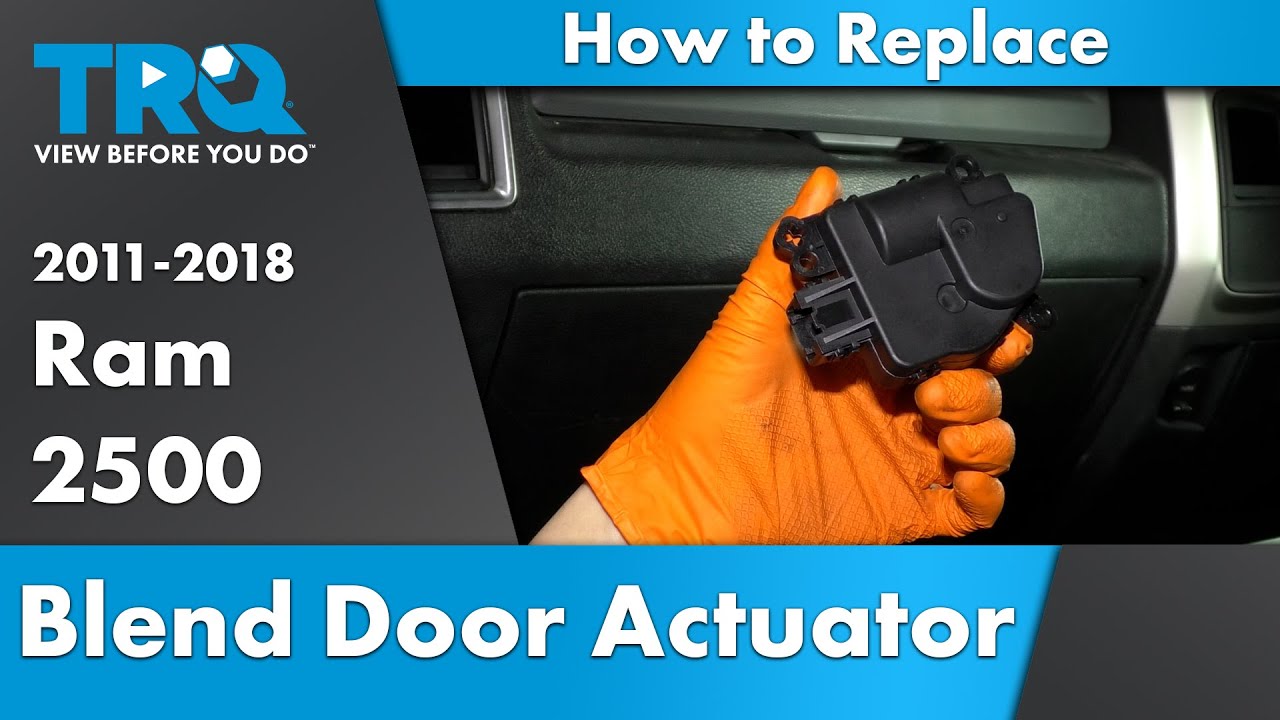
How to Replace Blend Door Actuator 2011-2018 RAM 2500
Buy Now!New Defroster Door Actuator from 1AAuto.com http://1aau.to/ia/1AZMX00204Watch this video to learn how to install a brand new TRQ blend door actuator ...
youtu.be
Replace Ram 4th gen HVAC Panel
Replace Ram 4th gen HVAC PanelLink to my Amazon Affiliate Shop: https://www.amazon.com/shop/aaronrose
youtu.be