LilRamie 2015 Laramie Build Thread :)

Disclaimer: Links on this page pointing to Amazon, eBay and other sites may include affiliate code. If you click them and make a purchase, we may earn a small commission.

LilRamie

Senior Member
Joined
Jun 20, 2015
Posts
237
Reaction score
24
Location
Atlanta GA
Ram Year
2015
Engine
Hemi 5.7L
Hi all, I think it's about time I start a build thread given I've got a decent start on things done to my truck thus far with more to come in the near future. That and this seems like the perfect place to call home and document the progression. :D

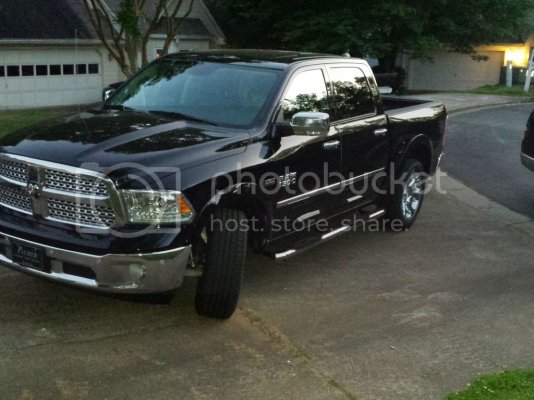
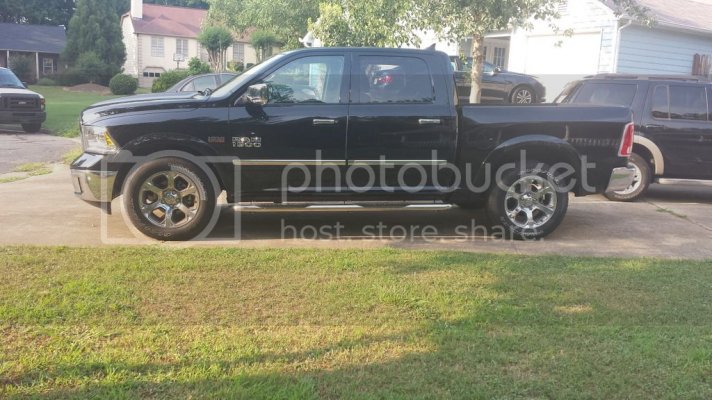
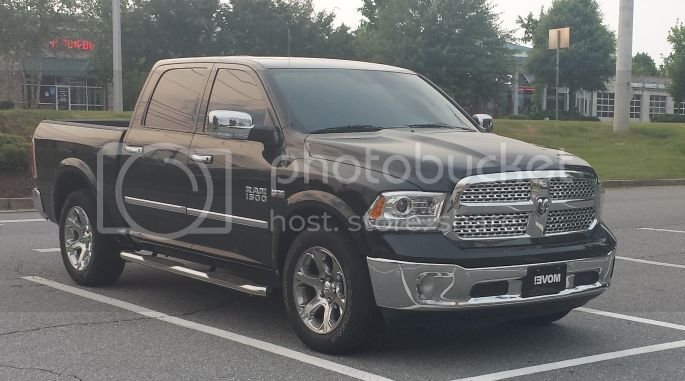
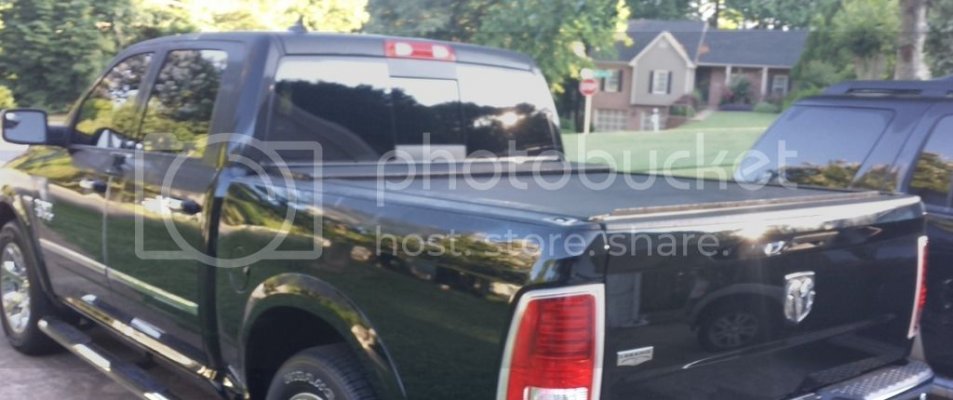
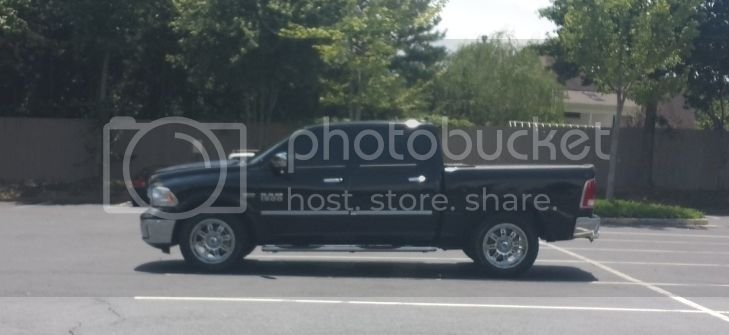
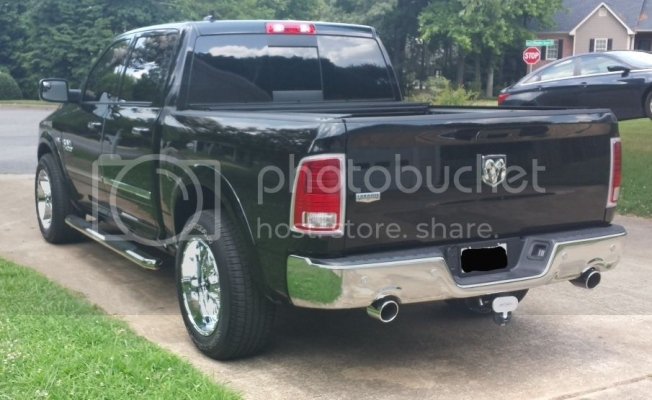
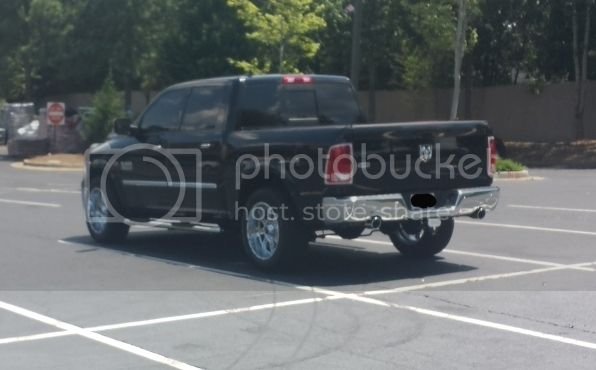
A little bit about my Ram. I bought it new with 33 miles, it is a 2015 Ram 1500 Laramie, Crew Cab, 5.7' Bed, 5.7L Hemi, 3.92 Rearend, 8spd Tranny, 2x4 with the 20 inch clad alum wheels.

WARNING - PIC HEAVY THREAD

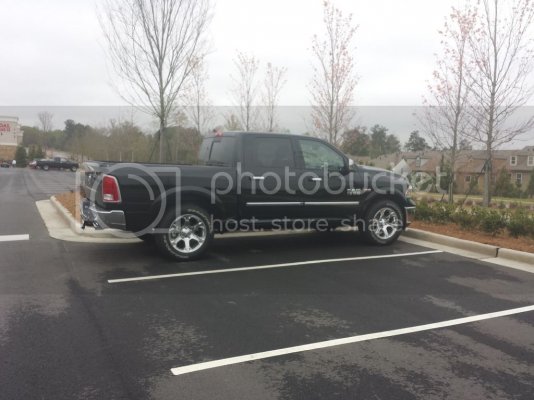
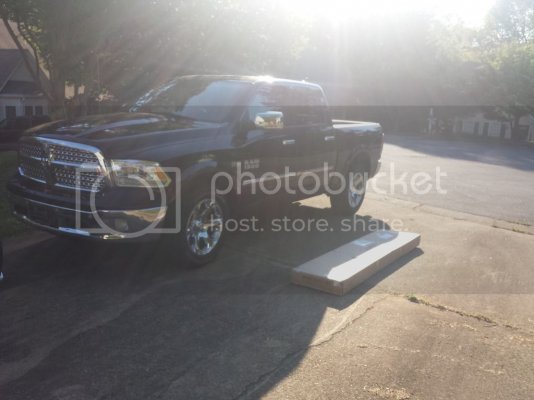
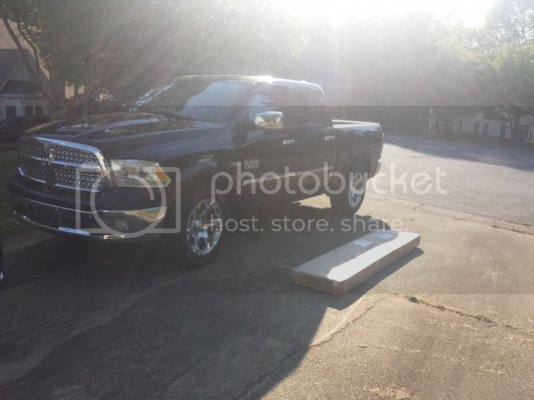
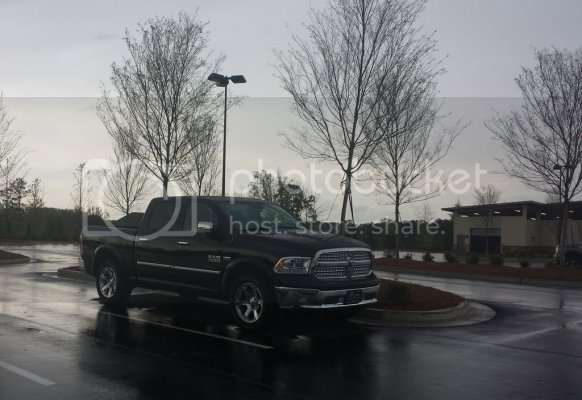
Here are my first pictures I took of the new ride:
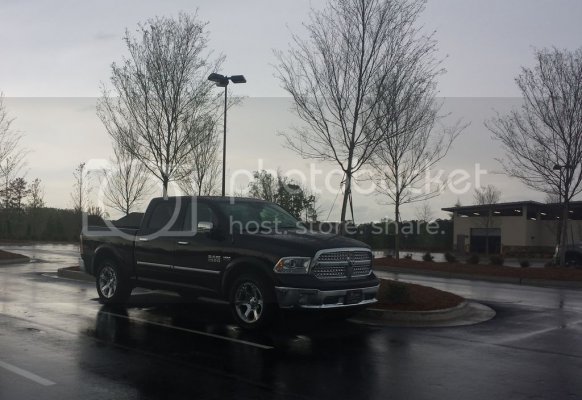
CameraZOOM-20150410174122660_zpsctegqtra.jpg

CameraZOOM-20150406130842470_zpspuyzch7n.jpg

Here's my up to date Mod List:
4" OE Raptor SS Nerf Bars
S&B C.A.I. (Oiled Filter)
Removed Plastic Engine Shroud
Husky X-act Contour Floor Liners
LineX Premium Bedliner Spray
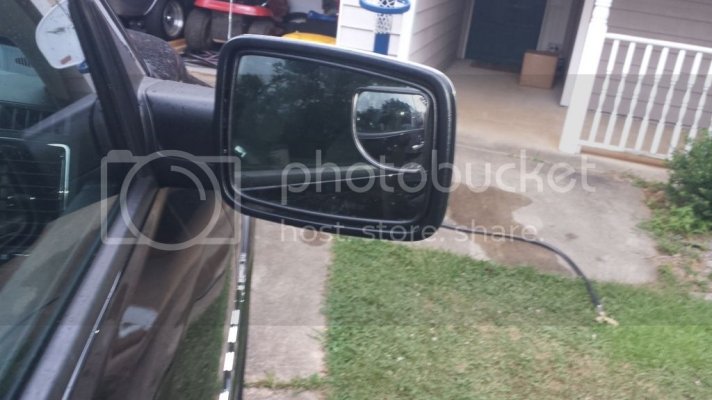
3.25" Wedge Hidden Spot Mirrors
Smittybilt Hitch Step
MasterLock Stainless Steel Receiver Lock
3-Ball Hitch stored in rear seat compartment
License Plate Black Frame
Dee Zee Tailgate Assist
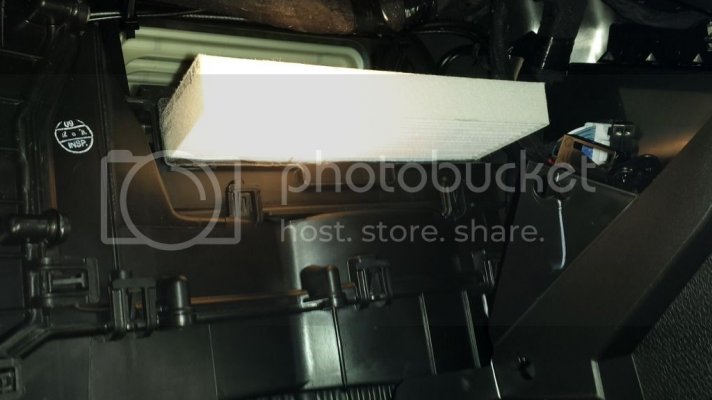
Cabin Air Filter Mod
180 deg Tstat + Redline Water Wetter additive
Moe's Performance 87mm Throttle Body
Billet Technology Catch Can
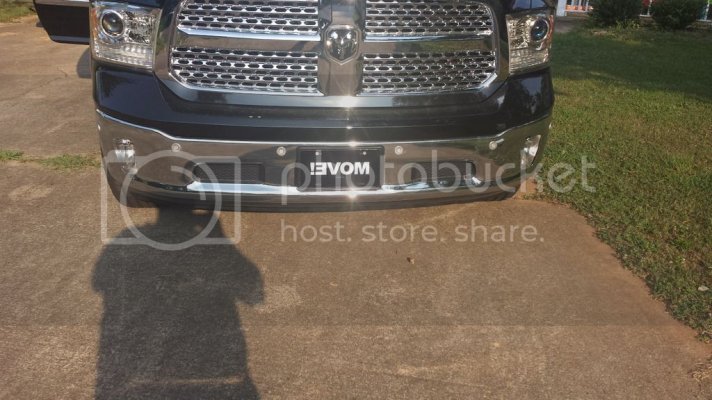
Deco Alum Front Plate, reverse text MOVE!
Window Tint 50% Windshield, 5% Front Windows, 3% Rear
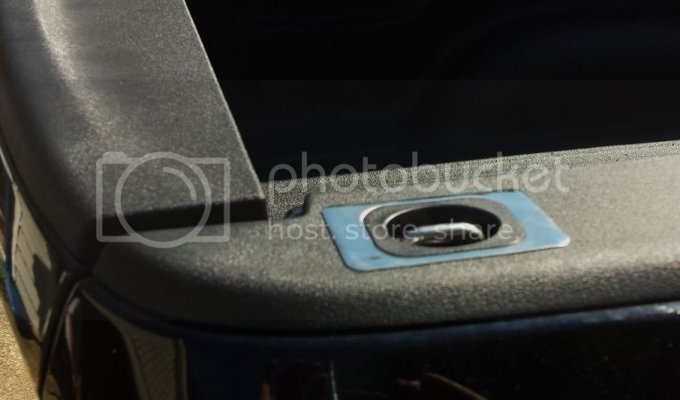
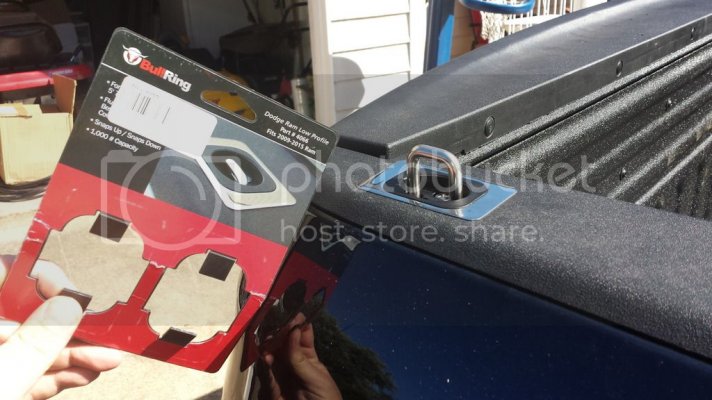
Low Profile Bull Anchor Points
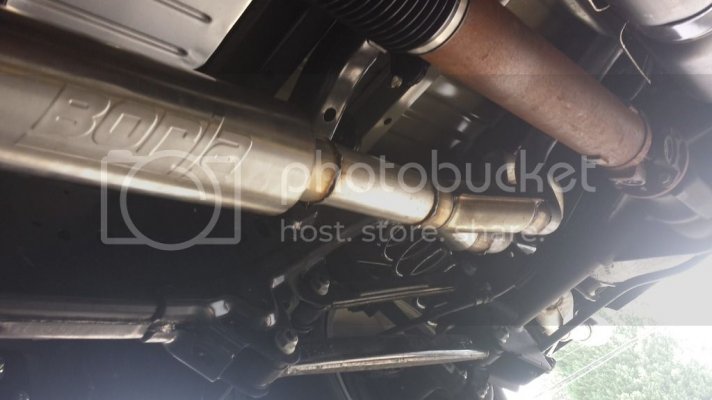
Dual Exhaust with H-Pipe and Borla XR-1 Mufflers
BAK Industries RollBak G2 Tonneau Cover
KMC XD Series Riot #XD809 20x10-24 Chrome Rims
Allsales (AMI) Billet Alluming Racing Style Locking Fuel Door
Diablo Sport PCM running Jay Greene Custom Tune via Trinity Tuner
Airlift 1000 System

Things in the mail or scheduled:
Custom Truck Bed LED lights
Swap over to Full Synthetic Oil

Highly Likely to follow items:
Xeon HID Kit(s)
S&B ram air adapter once available for 2015 Hemi (late summer/early fall)
4.56 Rear End Gears
Torque Converter
Headers
Cams
 
Last edited:
OP
OP
L

LilRamie

Senior Member
Joined
Jun 20, 2015
Posts
237
Reaction score
24
Location
Atlanta GA
Ram Year
2015
Engine
Hemi 5.7L
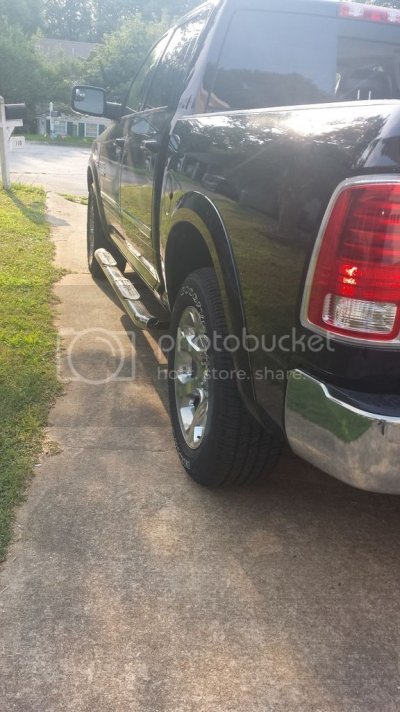
I believe this was my first mod - Nerf bars, specifically Raptor Series 4" OE Style Part #1502-0537. I selected these in favor of the returned 30 degree bends on the end as well as the end-caps being completely stainless steel as opposed to the typical pressed on plastic cap inserts. Also they had a nice 500lb weight rating and a lifetime warranty. My biggest complaint are the 3 support arms while rated to withhold the weight and have visually appear to skinny, I guess they where trying to make them blend away but I'd would have preferred them to embrace the support arms and make them appear beefy and robust. Oh and the instructions were not the best, full of contradictions. In the end I would still recommend them and buy them again.

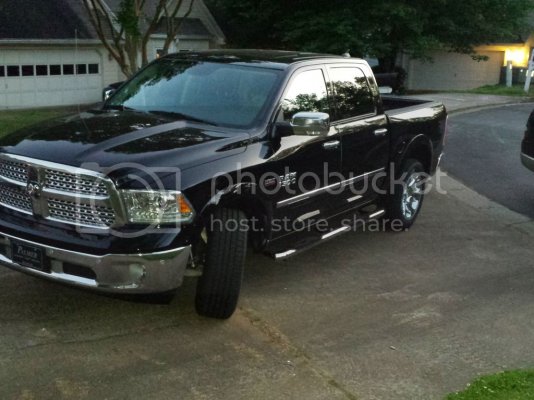
Here's the before and after shot I did before it got dark on me I'll try to get a better photo from straight on and from the side soon to post with along with these.

CameraZOOM-20150502182355362_zpsk76rvirk.jpg"]CameraZOOM-20150502182355362_zpsk76rvirk.jpg[/URL]
CameraZOOM-20150502203549534_zpslpmvs5ox.jpg"]CameraZOOM-20150502203549534_zpslpmvs5ox.jpg[/URL]


Here's the Extra Photos I mentioned (Truck needs a wash :p)


CameraZOOM-20150629184813139_zps7elzbxmt.jpg
nerf%20rotated1_zpsgk9sjkxi.jpg
 
OP
OP
L

LilRamie

Senior Member
Joined
Jun 20, 2015
Posts
237
Reaction score
24
Location
Atlanta GA
Ram Year
2015
Engine
Hemi 5.7L
My Next Mod....

CameraZOOM-20150509202820511_zpsa06il6td.jpg

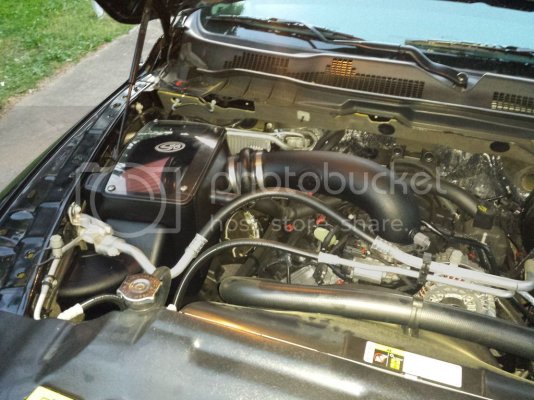
S&B Cold Air Intake. I debated long on this one. At the end I was torn between this unit and the Vararam. If the vararam had smooth ram air tubes instead of the flexible corrugated style intake tubes I probably would have went that route. When I first started looking at new intake options I wasn't really sold so to speak on a pure cold air intake concept while I understand and feel it adds some benefit this alone did justify the costs what I was interested in moreso was a ram air aspect working in conjuction with hopefully cooler air than our stock OEM airbox. What I liked about this one is that it has two inlets for air intake to the airbox. It makes use of the old OEM intake at the sidewall/fender as well as a downtube that goes low facing the bottom of your engine bay for colder fresh air intake. I spoke with S&B and while they don't have a ram air scope adapter for this model yet they intend to add it like the other models, I was told late this year. They have different flavors based on model but look something like this:


as-1002_pic1.jpg


as-1002_pic3_1.jpg


Once they are available I intend to scoop one up :p pun intended. I have found mods where ppl have made there own, so if it never happens I have that option but I prefer to wait for the manufactured matching part.

Aside from that I like that they had both an option for the oiled or dry filter, leaving it up to the user - I opted oiled. And while on that subject the filter is freakin huge! Don't be deceived by the photo most of it is concealed as the filter is turned slightly down into the box, it has Lots of surface area for air flow and it definitely is evident when you push on the gas pedal! I can without hesitation (more pun :p) vouch for the addition to the butt dyno effect on this one.

Lastly I also think it looks cool paired with the ability to do a quick visual check on the filter's cleanliness, of course the Vararam had those points covered too :)

Oh I almost forgot, mod #3 - Plastic engine shroud permanently removed.
 
OP
OP
L

LilRamie

Senior Member
Joined
Jun 20, 2015
Posts
237
Reaction score
24
Location
Atlanta GA
Ram Year
2015
Engine
Hemi 5.7L
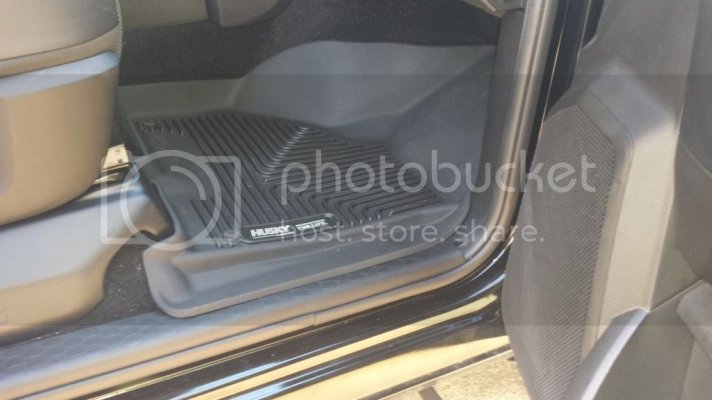
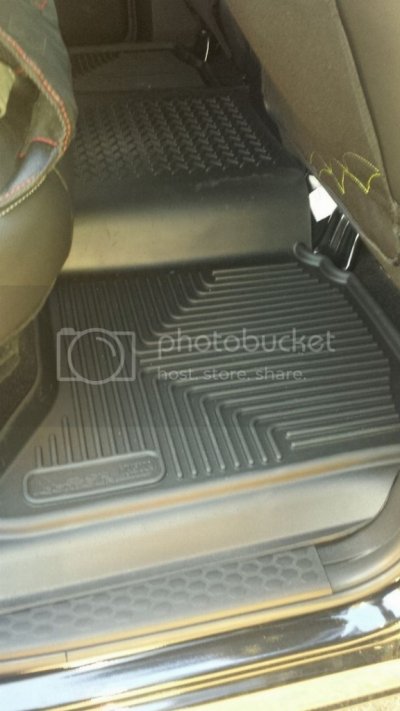
Added New Floor Liners. Well technically this is my second set, the first ones didn't work out so well. The first set I tried was the Aries 3D, if your interested in them or just want to know why they didn't work out for me you read more about them in this thread. So I landed on the Husky X-act Contour Liners. It took me a little bit to wrap my head around what was the difference between them and the weatherbeaters which basically comes down to the appearance but more importantly the undersides design X-act being made for carpeted floors and weather beaters for vinyl floors. I really like there fit, and love the completeness of the protection they provide covering as much floor area as possible and creating a dam like effect. I also like that they were not all stiff to the point of making them diffucult to bend and get out of the truck if they are full of mud or liquid. Ontop of that I really like how they have a concealed slot that allows the trucks floor hooks to snap up into the liners pockets for them locking them into place paired with all the little spikes, it doesn't move a smidge :). Best of all they come with the lifetime warranty :pepper:


Here's a good example of how high they get up on the side of the carpeted area of the center console and lap the door threshold well along with the bathtub effect.
CameraZOOM-20150628192017493_zpscq6ydqpf.jpg

Good general shot accross the rear cab area showing fit and protection
CameraZOOM-20150628192114259_zpskfprath8.jpg

A good example of how they don't block the floor vents like others :devilfinger: do yet still provide the coverage needed.
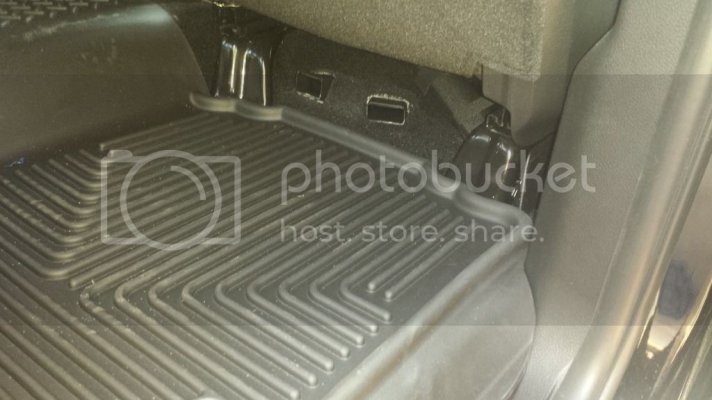
CameraZOOM-20150629190225750_zps53fs0b0m.jpg
 
OP
OP
L

LilRamie

Senior Member
Joined
Jun 20, 2015
Posts
237
Reaction score
24
Location
Atlanta GA
Ram Year
2015
Engine
Hemi 5.7L
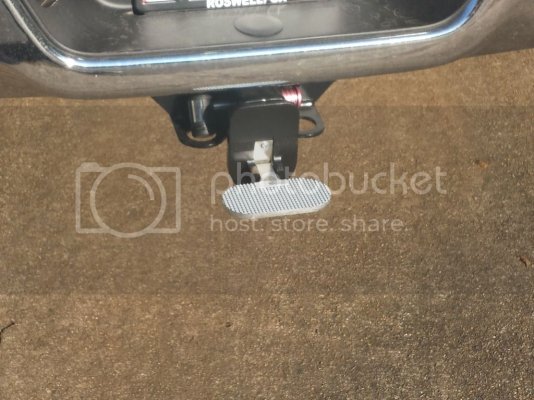
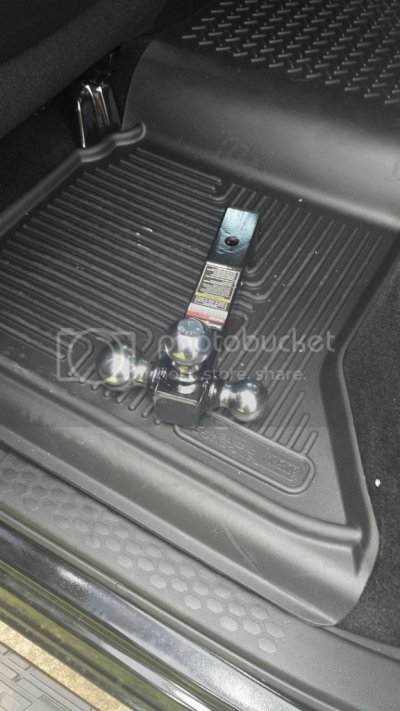
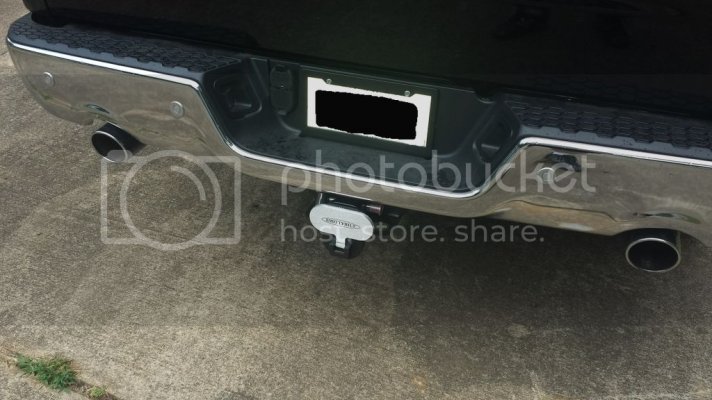
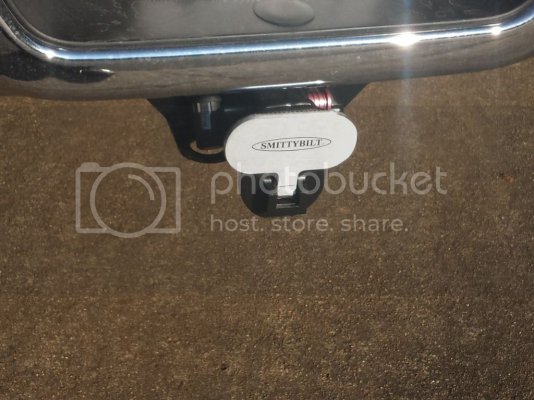
Installed a new SmittyBilt Hitch Step and Masterlock stainless steel receiver Lock. I also picked up a 3 Ball tow Hitch to store in under my rear seats storage bin, well that and some tie down straps :).

CameraZOOM-20150502182626792_zpsb8isqkmm.jpg
CameraZOOM-20150502182616452_zpsofoocifw.jpg
CameraZOOM-20150629183715675_zpssctojyau.jpg
 
OP
OP
L

LilRamie

Senior Member
Joined
Jun 20, 2015
Posts
237
Reaction score
24
Location
Atlanta GA
Ram Year
2015
Engine
Hemi 5.7L
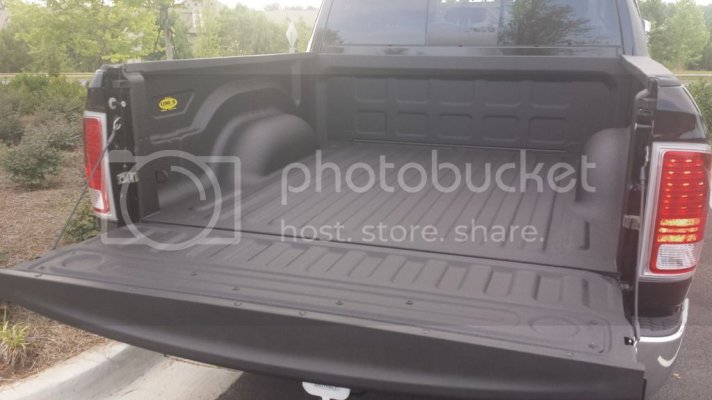
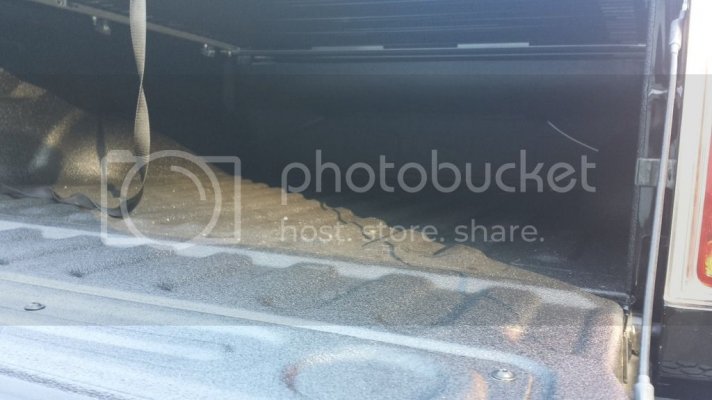
Yanked out the Plastic OEM bedliner that came with mine (Craigslist soon to be - PM me if interested, it's for a 5'7"Bed). I wanted a spayed liner from day one even asked the dealership to take the one on the truck off but they wouldn't. So I opted to go with LineX Premium Sprayed In Bedliner at a local shop. So far so good. The installer went over all the particulars and the end results were as hoped for.

CameraZOOM-20150625184420933_zpshnuhjp8g.jpg
 
OP
OP
L

LilRamie

Senior Member
Joined
Jun 20, 2015
Posts
237
Reaction score
24
Location
Atlanta GA
Ram Year
2015
Engine
Hemi 5.7L
Simple little mod, added a black plastic trim piece around the ole' ugly license plate...

CameraZOOM-20150627175015107_zpsdmzvs11k.jpg
 
OP
OP
L

LilRamie

Senior Member
Joined
Jun 20, 2015
Posts
237
Reaction score
24
Location
Atlanta GA
Ram Year
2015
Engine
Hemi 5.7L
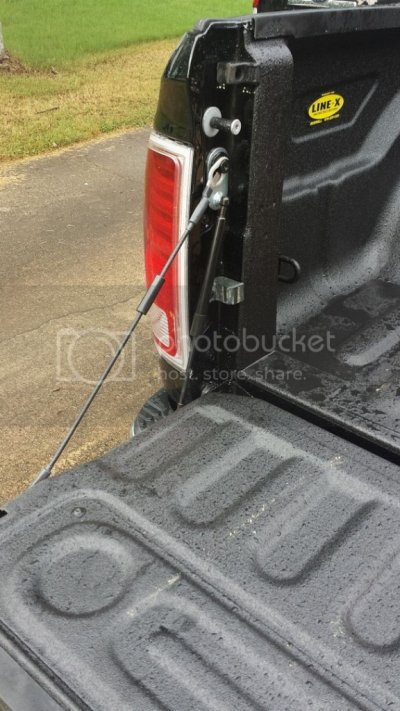
Added Dee Zee EZ Down Tailgate Assist part number DZ-43301 to my tailgate. Something the wife will appreciate. I did run into a little bit of a tough time with its install though. During the first few steps it has you install a brass threaded insert into the tailgate itself with a special tool to make the inside butterfly behind the sheet metal to create a threaded hole for a fastener later. It's very specific about the number of turns so as to not strip it and have a real mess on your hands (my words :p). At any rate once I was ready to put the fastener into it, its threads where not long enough to reach, I had to re-tighten it again in order to pull the threads closer to the inserts shoulder all the while nervous I was going to strip it. In the end slow and steady won the race, it took me several attempts before I could get it to catch the threads, I believe it was about 1 2/3 more revolutions then it said ( I had marked it with some of the wife's fingernail polish). Also the tightening of that fastener made me nervous since I was already afraid about the stripping part now it wanted a very specific ft. lb., I think 9 or maybe it was 8 but thankfully I had a 1/4" inch/lb torque that I was able to convert since my 1/2" ft/lb would have killed it. It just kept spinning never really feeling like it was getting tighter than like 5-6 ft/lbs but i guess the butterfly on the inside finally completely crushed and it did reach the proper torque. Just a very bizarre install that and afraid of stripping off internal concealed parts...

CameraZOOM-20150627190016507_zpsk4jiwxp7.jpg
 
OP
OP
L

LilRamie

Senior Member
Joined
Jun 20, 2015
Posts
237
Reaction score
24
Location
Atlanta GA
Ram Year
2015
Engine
Hemi 5.7L
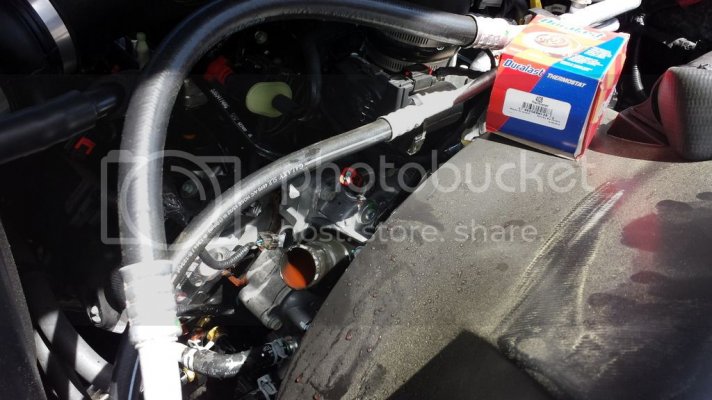
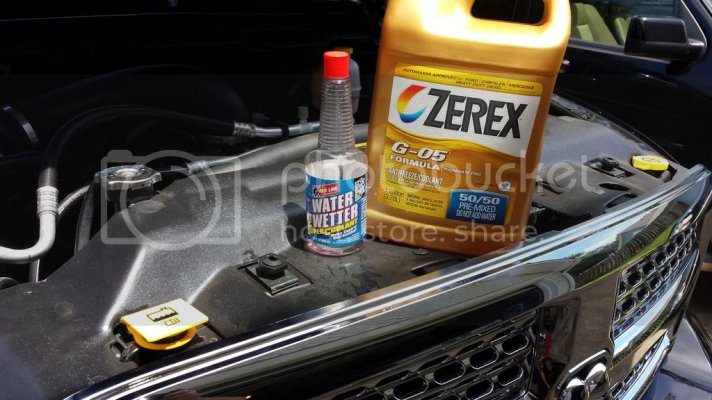
Swapped out the Thermostat for a 180 degree unit. I found this part (Autozone's Duralast Part Number 4128) on another thread elsewhere that is equal to the Jet tstat for about half the cost, same components only it doesn't have the lifetime warranty. I also topped off the coolant with the correct type but not before adding a little Redline Water Wetter Additive to improve temperature control.

CameraZOOM-20150628120512235_zpseyexwgsx.jpg

CameraZOOM-20150628122900099_zpsfsgnurpk.jpg
 
OP
OP
L

LilRamie

Senior Member
Joined
Jun 20, 2015
Posts
237
Reaction score
24
Location
Atlanta GA
Ram Year
2015
Engine
Hemi 5.7L
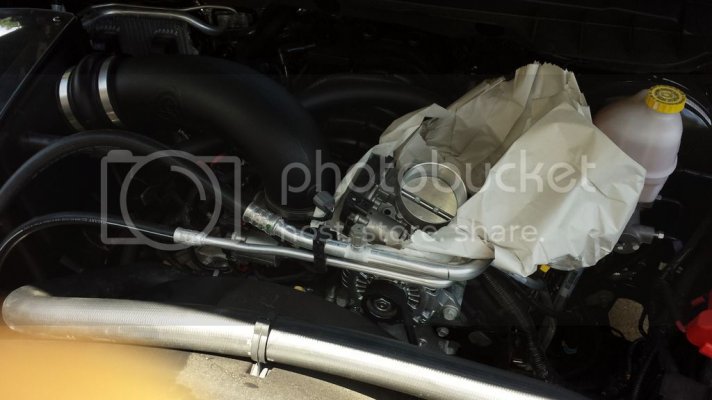
Added a Moe's Performance 87mm ThrottleBody. Hopefully after my warranty's up I have the dough to buy some proper headers to really get everything out of what this little mod has to offer but for now I can already appreciate the added response that this component added.
Right about to install...
CameraZOOM-20150628130043387_zpsouopkhbv.jpg
 
OP
OP
L

LilRamie

Senior Member
Joined
Jun 20, 2015
Posts
237
Reaction score
24
Location
Atlanta GA
Ram Year
2015
Engine
Hemi 5.7L
Finally got my windows tinted. Below is the before and after, sorry I should have taken a better similar angle and light for the before. I ended up with 50% on the windshield, 5% on the front windows and 3% on the Rear.
CameraZOOM-20150410174122660_zpsctegqtra.jpg
CameraZOOM-20150630202105395_zpsfybe9jm6.jpg
 
OP
OP
L

LilRamie

Senior Member
Joined
Jun 20, 2015
Posts
237
Reaction score
24
Location
Atlanta GA
Ram Year
2015
Engine
Hemi 5.7L
Added some spot mirrors on my side mirrors. At first I tried the little round 2 inch dots but they weren't cutting it. I like to find a end spot and hug the curb to mitigate door dings so with these I'm able to easily see my tire and curb without having to adjust the mirror and still have lot's of normal visibility. Plus it has the upside of any surprise little sports cars in the blindspot etc when I go switching lanes quickly.

CameraZOOM-20150627181145201_zpseng0qdu6.jpg
 
OP
OP
L

LilRamie

Senior Member
Joined
Jun 20, 2015
Posts
237
Reaction score
24
Location
Atlanta GA
Ram Year
2015
Engine
Hemi 5.7L
Added Bull Accessories Low Profile Anchor Points, part number BLL4066 to my bed rails. I really like them because they flush out with the top of my rail caps and won't interfere with my tonneau cover once its here. I also like that they have a nice little snap in place feature to keep them from collapsing when you don't want them retracted. And with the 1000lb rating on them I don't believe I'll see an issue with cinching down some taunt straps given I have two sets of these on the truck... If your interested in these watch the install videos and buy the router bit, for the saw bit you can use a dremmel cut wheel if you have one and save the $$.

CameraZOOM-20150628171938302_zpszx4fmwpj.jpg

CameraZOOM-20150628171928108_zpsgsejw0x5.jpg
 
OP
OP
L

LilRamie

Senior Member
Joined
Jun 20, 2015
Posts
237
Reaction score
24
Location
Atlanta GA
Ram Year
2015
Engine
Hemi 5.7L
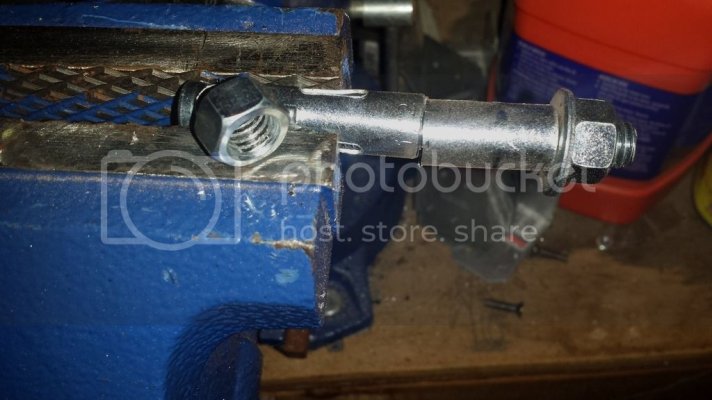
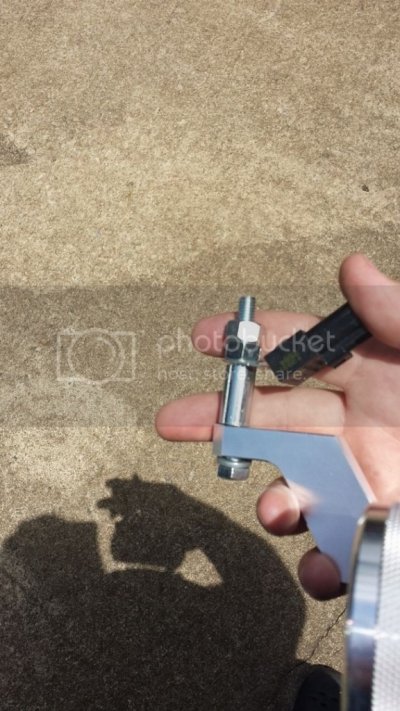
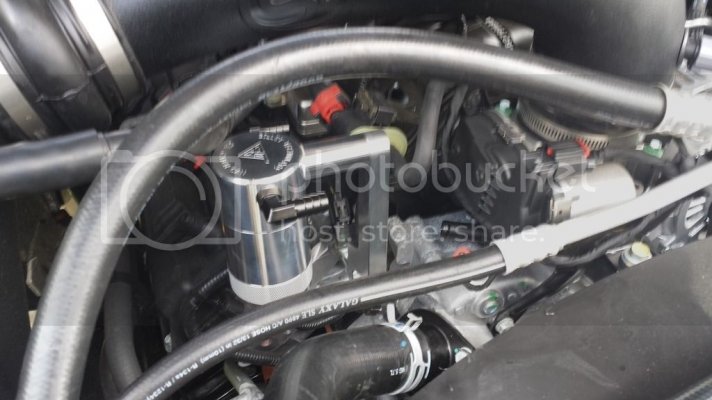
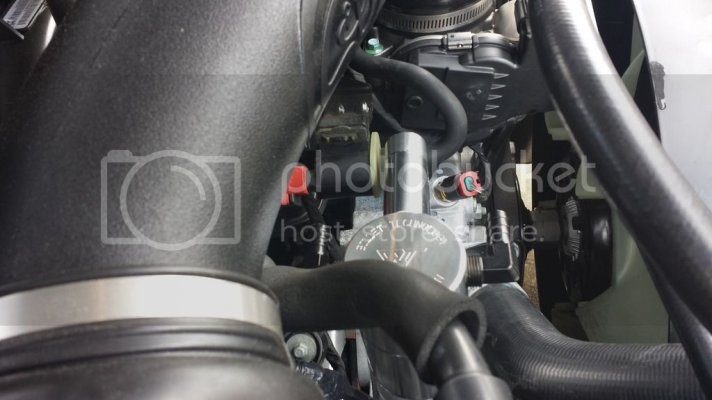
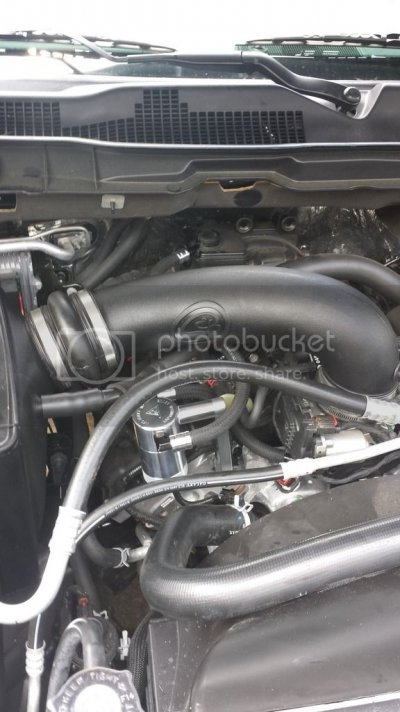
Added Billet Technology Catch Can. While the catchcan itself looks of very nice quality I can't say the same for the rest. I paid for the black coated Inlets and in areas I can still see some of the Brass shining through. The printed instructions where horrible, the graphics where completely not readable but thankfully youtube was the ticket. I was also not impressed that this was not vehicle specific even though in ordering it seems like it was, I had to do a little modifying to get things to work nothing major but enough to make you go hmmm. Also getting the new tubbing on the old valves was a real pain in the you know what - way harder than it should have been. I'm not sure if Ram upsized the barbs on the 2015 or just there hose I.D. was to small but I had to take a pair of ***** and snip the plastic barb inlets so they would give a little to let the hose slide over even with oil and alot of pushing, rotating etc... As for the actual mod referenced above to get it to fit, the "Z Bracket" did not fit in my engine compartment as intended. If I had installed it as supplied the unit would not have been able to installed vertical because of other components in the way. In order to solve the issue I used a longer bolt than what was supplied with a sleeve spacer I made up from a 1/2" zinc sleeve anchor (It's what I had available). That and there was this electrical piece bolted to the block where it was suppose to bolt to. Now I maybe it wasn't being grounded to the block but maybe it was either way I didn't want to leave it loose flopping around. So below are a series of photos of the install...


1/2" Zinc Coated Drop Sleeve anchor and a couple nuts I used. I cut the sleeve at about an inch long and dremmel'd it square and free of burs. I also reamed out the threads on the two nuts with a 5/16" drill bit with a generous amount of excess wobble.
1%20zinc%20sleve%20anchor_zpsvmxx7emv.jpg

New Zinc M8 1.25pitch x (90 I think was the length). The electrical piece I had to also drill out since it was originally mounted with a reduction coupler bolt.

2%20bolt%20with%20sleve_zpsroqk3che.jpg


Image with the new electrical connector reinstalled back in place
W.%20electrical%20connector%20grounded_zpswjfxvpp5.jpg

Clearance with existing components using the longer bolt mentioned above.
3%20clearance%20for%20upright_zpsyjfy9h0p.jpg

All done
0complete%20missing%20one%20hose%20cap_zpsfuwirgg9.jpg
 
OP
OP
L

LilRamie

Senior Member
Joined
Jun 20, 2015
Posts
237
Reaction score
24
Location
Atlanta GA
Ram Year
2015
Engine
Hemi 5.7L
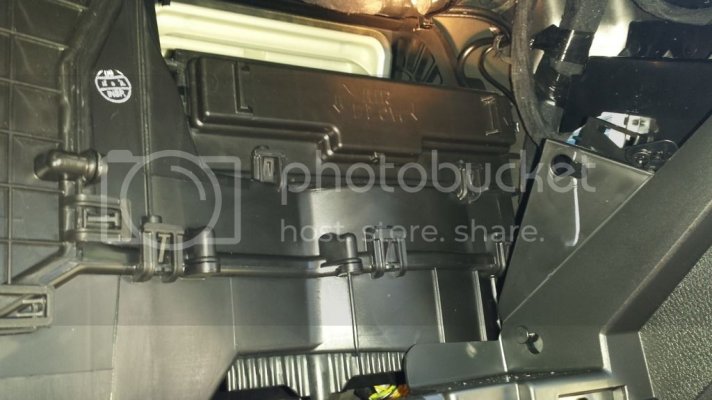
Installed the DIY Cabin Filter Mod which is listed on these forums as well as many other places. A couple tips I picked up on threads as well as figured out myslef after having installed it.

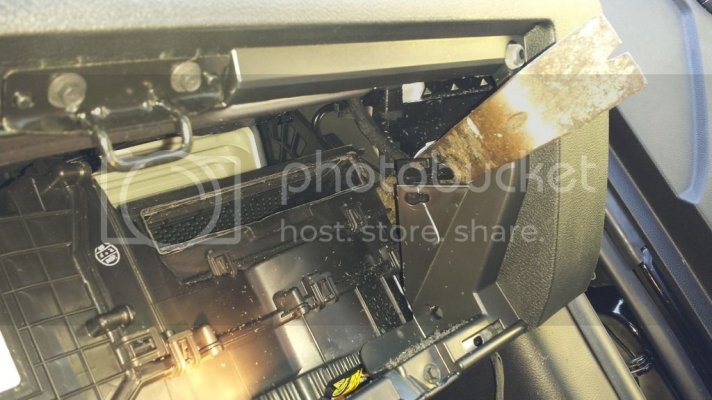
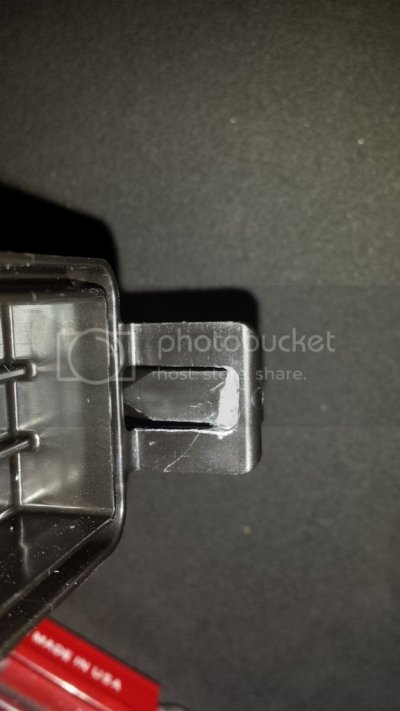
First although not required but recommended somewhere (darn glad I did too) was to remove the blower motor before installing. I used a Dremmel on mine and stuff was everywhere but I was 100% sure nothing fell down in my blower motor that I had previously removed and set aside. The next thing I found was there where some wires next to the far right side that kept wanting to bend in the way while cutting. Not wanting to trace them down and disconnect something else (paired with my luck probably deploying airbags lol) I decided to leave well enough alone. However, I did manage to find a third hand / tool to keep them out of the way - I used a flat bar rested in a particular way that held them back (pic below). Lastly my new air filter cover would not snap into place no matter how much I pushed it onto the clips. So I did a slight mod to each clip on the cover to allow better snapping on/off by making the clip connection a little deeper - it made all the difference (pic below).

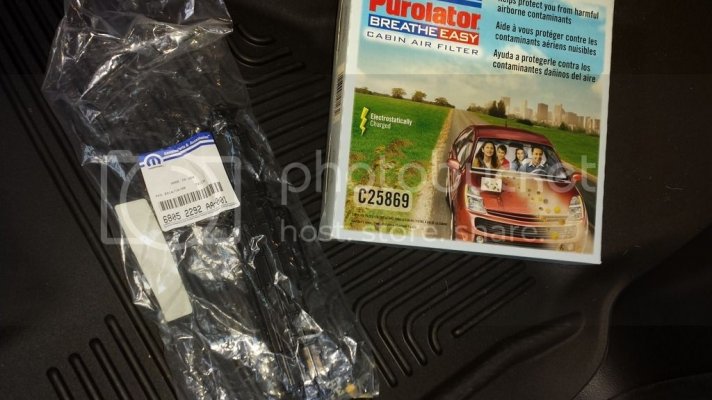
Parts I used/Purchased.
CameraZOOM-20150628090735561_zpsg4iz6sxu.jpg

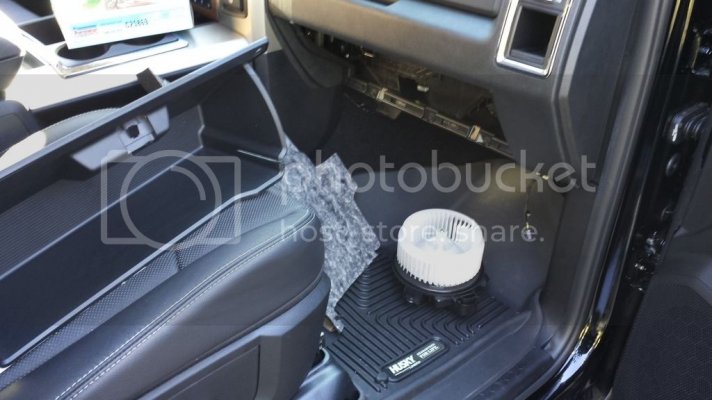
Disconnected Blower Motor. After the glove box removal, pry the three plastic push connectors holding the front of the underside dash free and slide the dash out disconnecting the Light connector. Now you only have to remove the 3 bolts and one electrical connection holding it in place. It drops straight down, simple enough while you have the glove box out and only adds a few minutes to the project.
CameraZOOM-20150628093451555_zpsfsnzdami.jpg


Cutting in progress, albiet messy dremmel just seemed to be the ticket for me. Also, this is how I used a flat pry bar as a third hand resting in place to hold back persistent wires that kept wanting to hang in the way.
CameraZOOM-20150628103324622_zpsfzvhnchz.jpg

Clean Air here we come...
CameraZOOM-20150628104536696_zpsfmaolznv.jpg

How I modified my cover snap connectors. You can see the excessive slot opening I created, I used a rotozip bit in the end of my dremmel on both clips - worked like a champ..
CameraZOOM-20150628110540235_zpsddvz1ou6.jpg


All done / prior to coverup via reinstall of glovebox, blower motor and dash bottom.
CameraZOOM-20150628110628585_zpskmohkch2.jpg
 
OP
OP
L

LilRamie

Senior Member
Joined
Jun 20, 2015
Posts
237
Reaction score
24
Location
Atlanta GA
Ram Year
2015
Engine
Hemi 5.7L
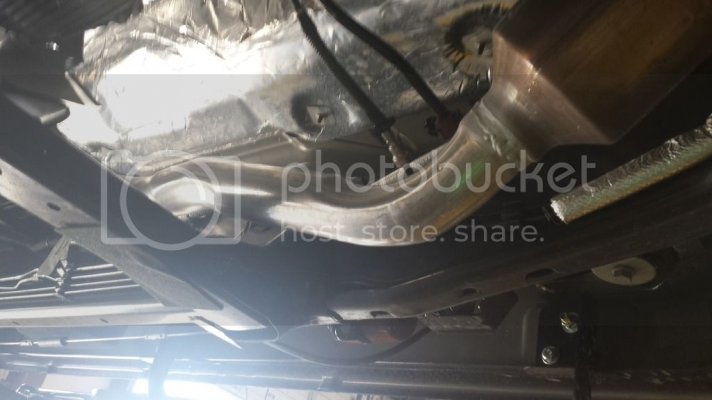
Well, I finally got to my exhaust or should I say round 2 of my exhaust.

Some stock pics for context:

CameraZOOM-20150707162337291_zpsyq8rrsin.jpg

CameraZOOM-20150710072139105_zps8rad3ji1.jpg


CameraZOOM-20150710072234178_zpsslk2vgr5.jpg

CameraZOOM-20150710072340397_zps7olzobxz.jpg

CameraZOOM-20150710072302019_zpswkl2cikg.jpg

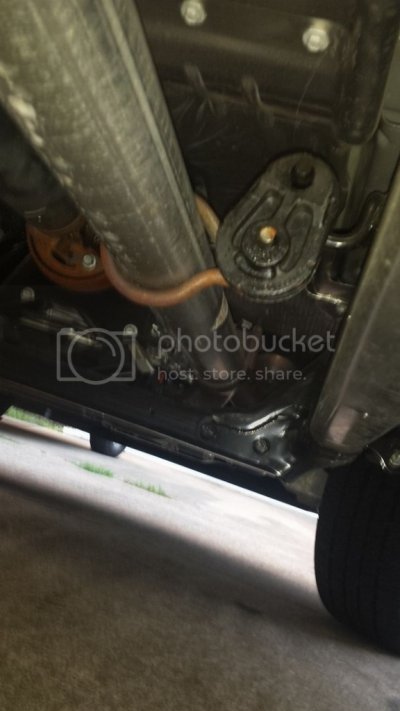
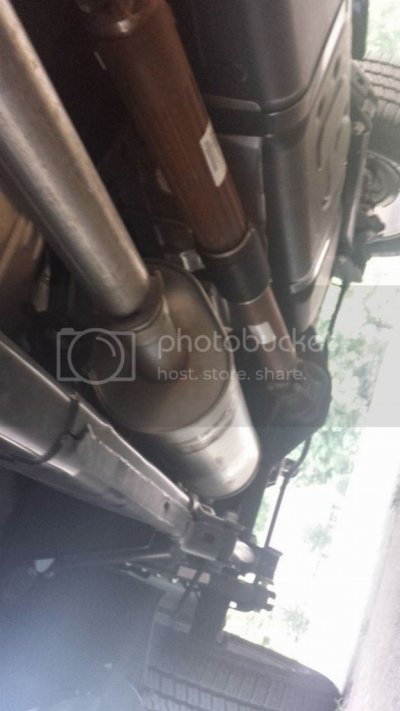
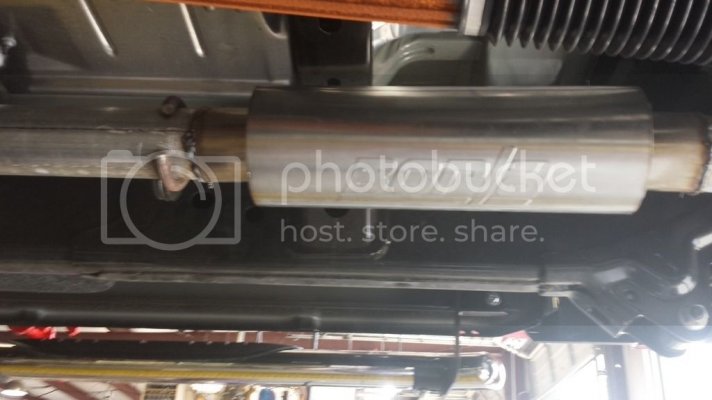
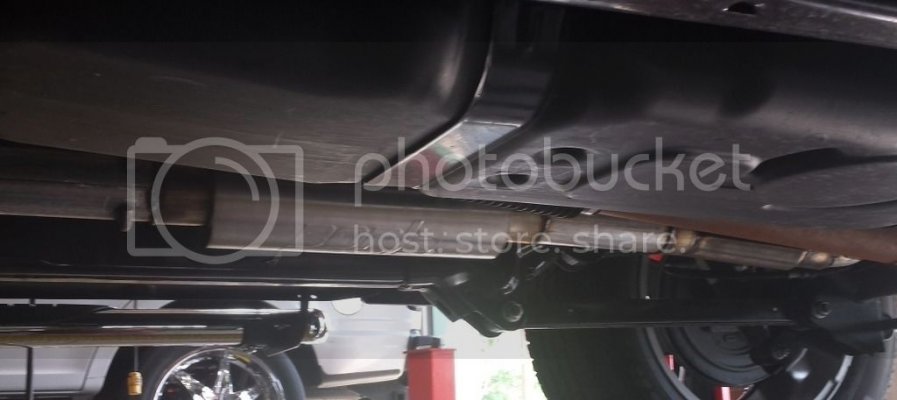
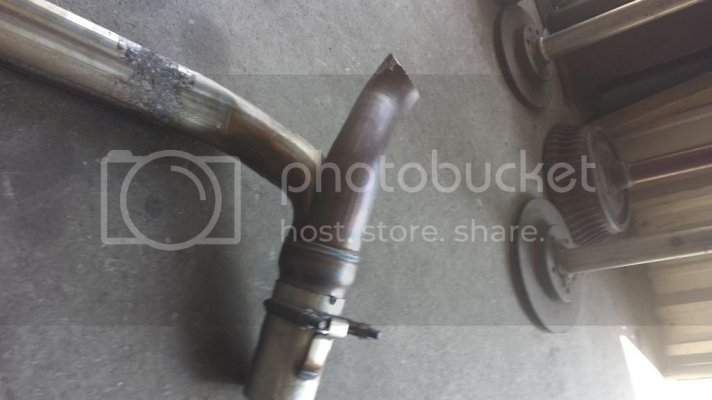
Initially after some deliberation I sought out to do a muffler swap as well as replace the restrictive front stock Y. I visited a lot of shops not finding any I was impressed by nor felt like I wasn't being taken advantage of. After shopping I finally found a local shop that had A guy that would did custom exhaust work for this multipurpose hole in the wall type shop. He talked the talk and gave me what I felt to be a fair price, not great but fair. He quoted me for the muffler swap which I would provide the part including an additional Y since the one I selected was universal single in single out 3” (thinking I could maybe reuse it down the road if I went dual 3” with headers and so on). And he also quoted me a separate price for the front Y swap. So I scheduled an appointment and dropped off the Ram, for the whole day. When I returned to pick it up I was not happy. First he didn't even attempt to do the front Y work that he said he would do. His reason was he spent the whole afternoon he had blocked out for the two jobs on just the muffler/Y combo. He even started to whine about how he kept burning his hand welding, Pfff.... He said he kept having a heck of a time trying to get the alignment correct. basically I don't he had any bending capabilities which makes me wonder how he ever planned on doing the front. When I looked underneath He detached one hanger and didn’t rework it and my tips where not aligned anymore they where both pushed outward. His welds looked like something I could have done If I had just went and picked up a Harbor Freight special and gave it a go. They looked complete and structurally sound but definitely not pretty. Here's some pics of his handy work, I didn't take many because I knew I was going to have it redone but not by him.

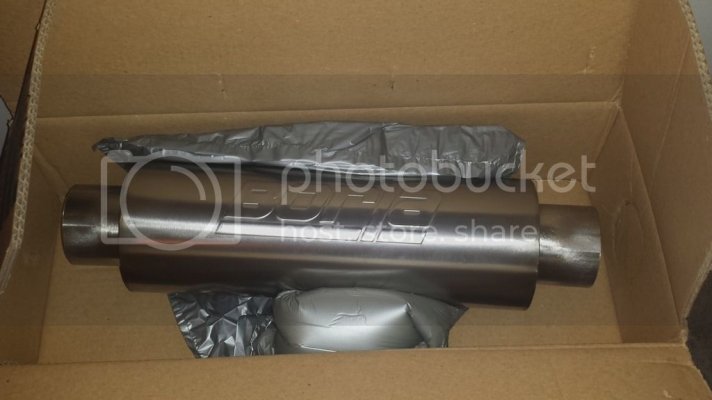
But first Yay! New shinny Borla XR-1 PN 40085

CameraZOOM-20150707162013397_zpsc5jujn6u.jpg

CameraZOOM-20150713125322044_zpswrh6kxda.jpg


CameraZOOM-20150713125001259_zpsrmpnsoaa.jpg


CameraZOOM-20150713125327331_zps91mn3xof.jpg


After the initial start I was very impressed by the new sound coming from my Borla at least but I did determine I had a crap ton of Drone that based on what others stated with the same muffler didn't have this issue. I couldn't help but think perhaps topside he had some exhaust leaks (perhaps where he kept burning his hand struggling to get it done).

So anyway the takeaway from this, don't settle. Find the right person for the right job.

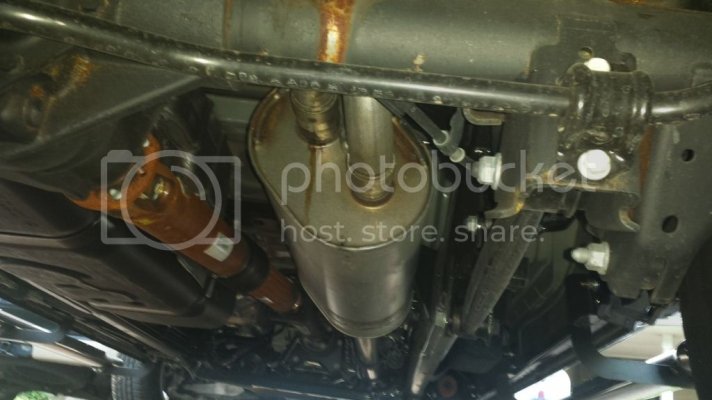
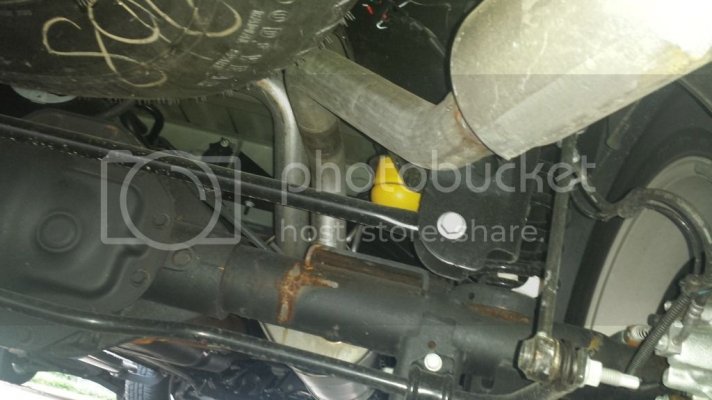
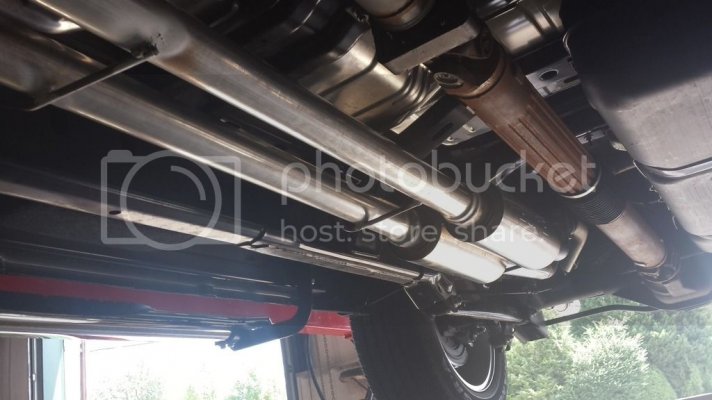
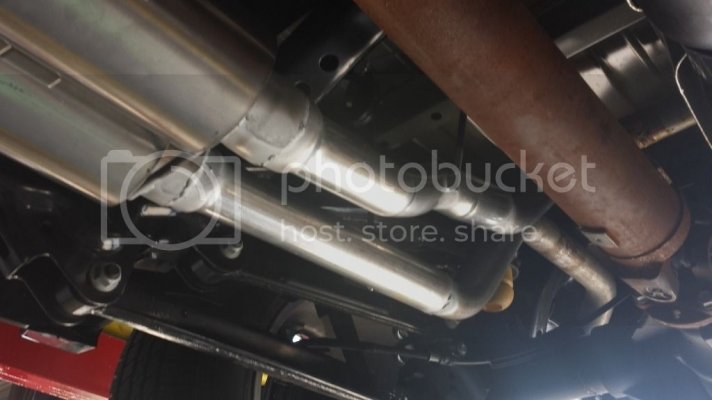
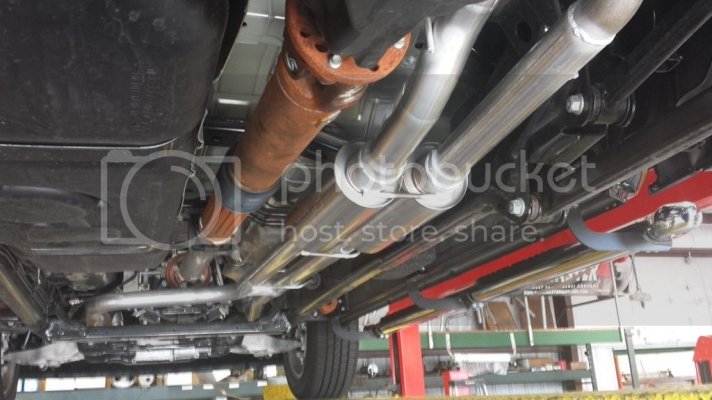
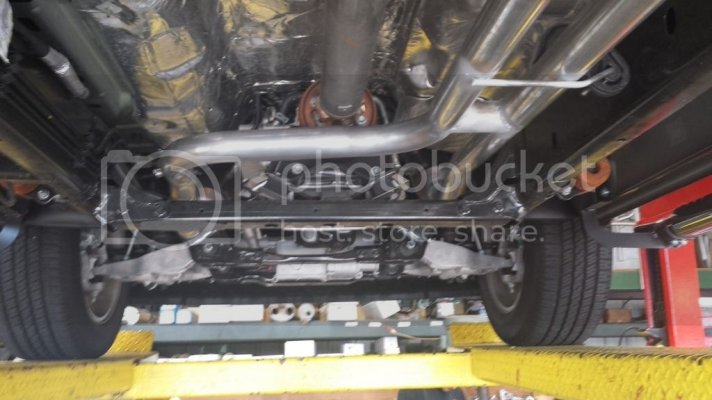
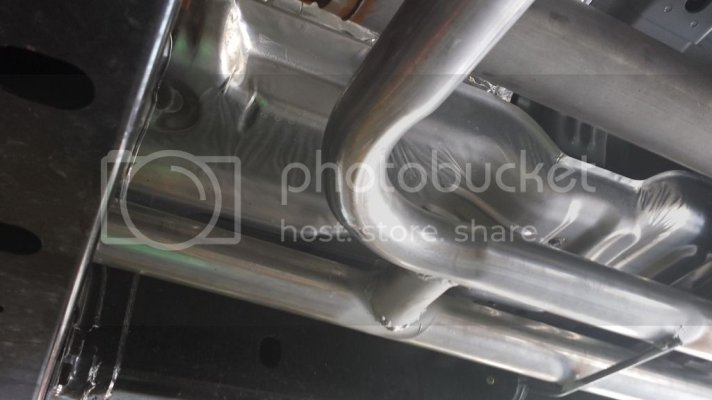
Which leads me to my round 2 of my exhaust mods. I dug deeper much deeper to find a decent exhaust shop and finally found one. It was a little bit of a hike for me and there hours being a typical MF 8-5 gig made it hard on me but I wasn't going to let that get in the way this time around getting the job done right. This new local shop said whats going on and I basically explained the above to the guy at the desk. He said ok let's see what ya got and talk about where to go from there. 5 minutes later he had it up on the rack with him and 3 other curious members from his shop, that was appealing to me. So he basically said he would need to redo 90% of what the other guy did, could do the new front Y and have it done in the next 2hrs if I wanted. So I was thinking ok here it comes not only does he need to do the job but he also has to cut out my new Y and Muffler and clean them up for reuse this is going to be much more, nope he was sooo much more inexpensive I was blown away. So as we are looking at it underneath and now I know his pricing I'm like hmmm okay what about if we skip what we just talked about I order another muffler and we just take the two pipes behind the cat and run new duals all the way instead of these Y's. He says but you really will need an X or H pipe but it will be a much better system than what I first requested, I was like I know, he kicks out a price on that one and its only $20 different than the first quote no matter if I choose X or H mid pipe, I was Like Deal! I'll order the new muffler today and did. It came in yesterday so I went by to drop it off in the morning and he was like lets put it back up on the lift one last time and run through this all again to make sure we get you what you want (again impressed). So while we are underneath I realized the stock pipe crossing under the transmission is in a precarious position. It was right under the drain plug. So I said, hey what about running a whole new line from the cats and bringing it behind the cross bar, putting the H I had decided on right up close to that vicinity, he was like sure, we can do that. He says that’s a bit more labor and pipe, I was like that's fair, I understand and he says okay, 10 bucks (I almost LOL), I said no problem. So when I was ready for heading out on my lunch break I called and they said yup all set come stop by when ready. The work looks so much more professional than the first guy. He fixed my tip issue, gutted what the other guy had done, put in the new pipes just like we had talked about along with adding several additional hanger supports and finishing off all his new welds to protect against corrosion. Here's some new pics of the new setup:


pic1_zpsyfi4tro1.jpg

pic2_zpss62bwfnz.jpg

pic3_zps1d2tivjc.jpg

pic4_zpstllu98sl.jpg

pic5_zps00tdvug3.jpg

pic6_zpsfjsw61z6.jpg

pic7_zpsmnudirku.jpg


All in All I only provided the two mufflers and my bill for all this work install labor, bends and materials was only 260.
 
Last edited:
OP
OP
L

LilRamie

Senior Member
Joined
Jun 20, 2015
Posts
237
Reaction score
24
Location
Atlanta GA
Ram Year
2015
Engine
Hemi 5.7L
Continued....

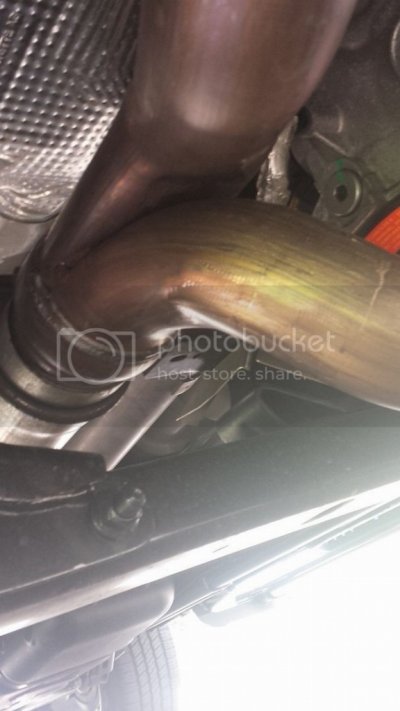
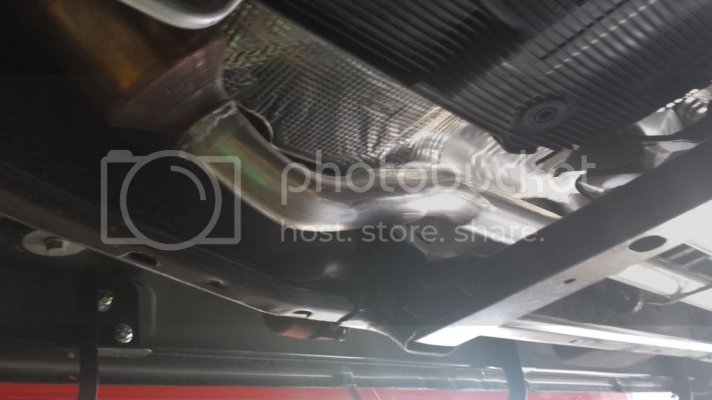
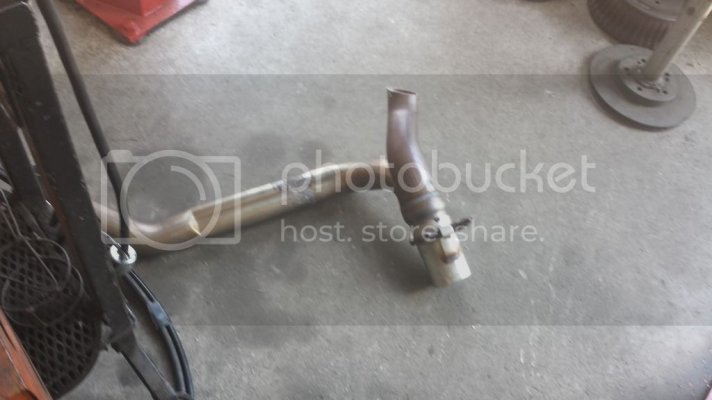
The best part on my way home was guess what, no more drone :). Oh and that extra length of pipe crossing under the transmission to that restrictive Y that everyone complains about it to is factory crushed on the top side, I didn't realize this looking at it initially but with them having it laying on the ground from the removal I was able to see it clearly and took two pics of it as well to share:

CameraZOOM-20150715124656462_zpsgupqg1j0.jpg

CameraZOOM-20150715124700052_zpstgd4ik6h.jpg


Here's a quick Video of My New Exhaust I slapped together:

[yt]Hb1vZSbSGfI&feature=youtu.be[/yt]
 
Last edited:
OP
OP
L

LilRamie

Senior Member
Joined
Jun 20, 2015
Posts
237
Reaction score
24
Location
Atlanta GA
Ram Year
2015
Engine
Hemi 5.7L
Well I finally got my Tonneau Cover all squared away this past week. My initial one that I received from AutoAnything appeared fine until I opened the package to realize it had internal damage (heavy scuff/scratches and bent metal pieces). I worked with them to go through the factory awaiting replacement parts. BAK ended up just simply shipping an entire new unit. The new one arrived package in the same manner but without damage thankfully, a couple good jogs and it too could have just as easily had the same damage. BAK needs to revisit how these are packed given the shipping cost involved with one of these monster packages. Moving on, I did look online at several install videos including those by BAK themselves as well as the provided written instructions. There were several conflicts and a few items not addressed by either. For example I had an extra rubber strip, a bag of washers and two black hard pieces of plastic about 3inches long. I figured out the rubber strip or so I think, I used it at the top of my bed rail right behind the cab to make up the gap for a tight water resistant fit meeting with the canisters lid rubber seal. The extra washers (not sure why so many) I used a few to help shim my lid brackets. Never did figure out the black hard plastic pieces, I think they may also be shims for certain applications or something... Once installed I am pleased with the product, I do wish they had provided the strap with another 6 or 8 inches for slack and provided some buckle or something that you could loop the end or sinch down rather than double knotting to a your bed tie downs. I ultimately used a carabiner on the end for a quick disconnect option if its in the way loading lumber or something similar.

Given the decent chunk of change I would hope BAK does a better job in the future with packaging and instructions but all in all I would still buy again. Here's my install pics:

CameraZOOM-20150716080407054_zpsuuamiedb.jpg

CameraZOOM-20150716080644460_zps9svaihen.jpg
 
Last edited:
OP
OP
L

LilRamie

Senior Member
Joined
Jun 20, 2015
Posts
237
Reaction score
24
Location
Atlanta GA
Ram Year
2015
Engine
Hemi 5.7L
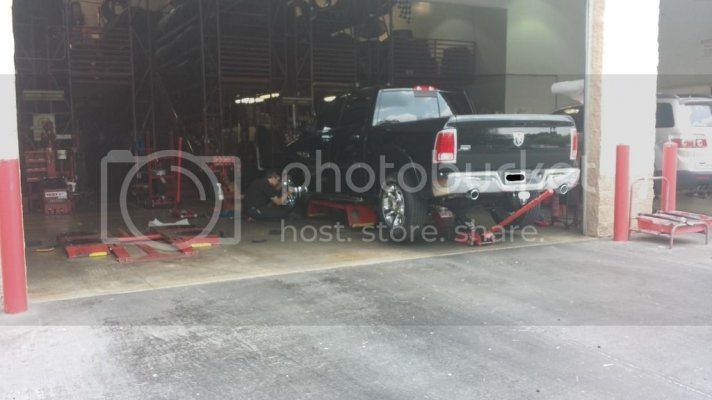
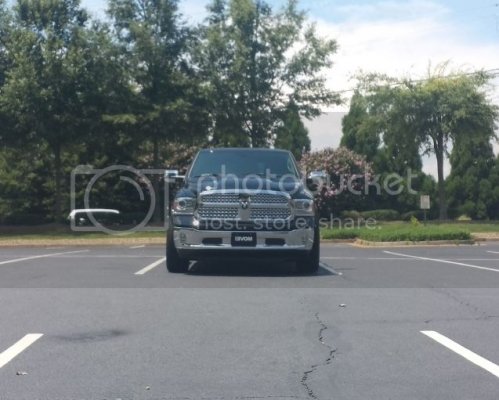
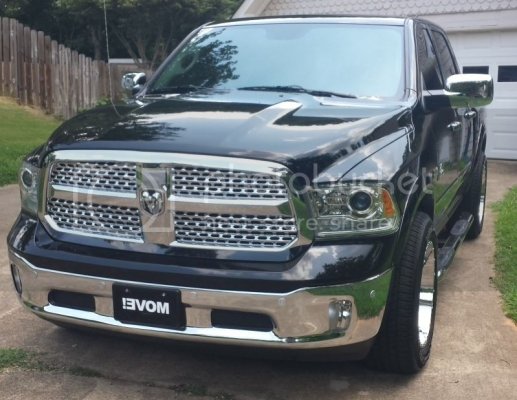
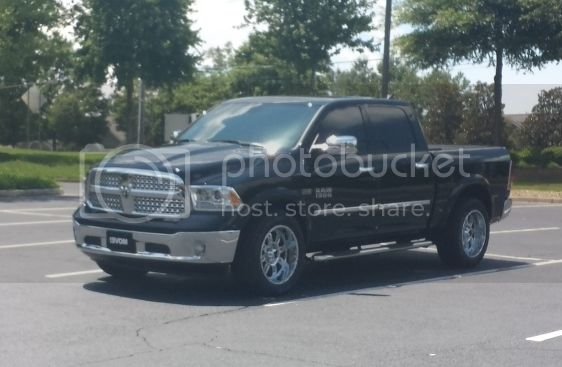
SWEET - Finally got my New Rims put on this weekend!

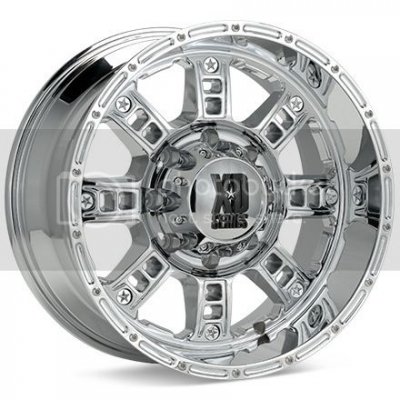
I ended up going with KMC XD series Riots in all Chrome 20x10 with -24 offset (Part # XD809)

I wanted to have that nice wide stance but not the offroad look. I don't care for the leveled look as I prefer the rake on the trucks suspension. So I think, I nailed my goal of having a more street stylized truck look that I was after. Several Pics Below.

P.S. After I churn through these tires I plan to go with a wider width maybe even some 305/55/r20's but for now I'm happy with how the stock tires ported right over and helped the wallet.


The Rim Design:
XD809_zpsrunktfcy.jpg

The Test Fit:
CameraZOOM-20150718123513952_zpsu3iz2yx5.jpg

Straight on Front:
CameraZOOM-20150719142645578_zpsq4guvtt7.jpg

CameraZOOM-20150718134219216_zpstnja3ye0.jpg

CameraZOOM-20150719142623922_zpsnse9bxuv.jpg

Straight on Side:
CameraZOOM-20150719142602317_zps6ua22zmd.jpg

CameraZOOM-20150718134148197_zps1wptrzpn.jpg

CameraZOOM-20150719142543280_zps9wmgrnqe.jpg

Straight on Rear:
CameraZOOM-20150719142523399_zps50k1rerm.jpg
 
Last edited:

Latest posts

Staff online

Forum statistics

Threads
195,697
Posts
2,873,409
Members
156,572
Latest member
Joey93
Top