What did you do with your 4th Gen this week?

Disclaimer: Links on this page pointing to Amazon, eBay and other sites may include affiliate code. If you click them and make a purchase, we may earn a small commission.

Black-Wolf

Senior Member
Supporting Member
Military
Joined
Nov 21, 2018
Posts
254
Reaction score
294
Location
North Carolina
Ram Year
2017
Engine
Hemi 5.7
Saw this mod in another post (or maybe this one?) and decided to order the locking latches for my floor boxes. As posted elsewhere, you need to remove the latch side from the old lock and install it in the new one because the new one's latches are too deep to keep it closed.

Here's the process:

1) Order 2x of these or similar (I went with chrome, but there are black ones too): Amarine Made Chrome 2" Flush Pull Slam Latch for Boat Deck Hatch 1/4" Door - Locking Style
2) Once you have the new ones, remove the two screws that hold them into your floorbox lid. Keep the underside of the latch - you'll need it because the one that comes with the new ones is too deep.
3) Remove the old latch - in the hinge, is a roll pin. Use a small alen wrench, hex wrench, torx wrench to push it out.
4) Once you separate the latching part from the rest of the latch, do the same with the replacement latch.
5) You will need to file down the sides of the old latch so it fits easily into the new latch. If it sticks, it won't do you any good
6) Carefully insert the old latching mechanism into the new latch and reinstall the roll pin - don't forget to put the spring back in with the old latching part - you can use either newer spring (stiffer) or the older one (softer) but they both work.
7) Check function, and then using the old underside, but the new screws that came with the new latch, reinstall in your floor box.
8) Check function again and lock away your minor valuables - keep in mind that this is NOT going to stop anyone who really wants in to your floor box - and anyone can probably break into them in about 30 seconds with a good pry.

I can say that the keys match on mine.
DSC_1140.JPG
DSC_1139.JPG
 

Treburkulosis

Your High End Detailer
TOTM Winner
Joined
Mar 21, 2016
Posts
6,235
Reaction score
8,814
Location
Haslet, TX
Ram Year
2012 Lonestar Edition converted over to a Sport
Engine
5.7 Hemi
I order some switch backs for the front lights. The LED's have had an error for years and I finally am getting sick of the error message. I also ordered a new pair of lights, and I am going to fix some scratches from where my dad scrubbed a tree when he was driving it. I have a Car show for a sick little girl with cancer at the end of the month so I am in full fix mode and customize mode in both the Ram and My Flex. The Ram is done to my liking, but the flex is still a little ways off.
 

Attachments

  • IMG_3678.jpg
    IMG_3678.jpg
    104.6 KB · Views: 14
  • Screen Shot 2022-12-11 at 2.59.35 PM.png
    Screen Shot 2022-12-11 at 2.59.35 PM.png
    1.2 MB · Views: 14
  • 155FF8E3-ADEA-4FAC-A023-B8AF5EACE904_1_201_a.jpeg
    155FF8E3-ADEA-4FAC-A023-B8AF5EACE904_1_201_a.jpeg
    225.4 KB · Views: 14
  • B794BA2F-1BD6-4545-A386-FF1B26F25E1C_1_201_a.jpeg
    B794BA2F-1BD6-4545-A386-FF1B26F25E1C_1_201_a.jpeg
    209.6 KB · Views: 12

co-pilot

Senior Member
Joined
May 21, 2018
Posts
959
Reaction score
847
Location
houston,tx
Ram Year
2018
Engine
5.7
I might have to give it a try. It's pretty cheap on Amazon. Anyone else running this?
I think it's close to the pedal commander ...... that's what I'm running and hate to drive without it!...... probably the same and I just paid too much! LOL!!
 

PA Ram

Senior Member
Military
Joined
Jan 1, 2023
Posts
154
Reaction score
147
Location
Quakertown, PA
Ram Year
2017
Engine
Hemi 5.7
I think it's close to the pedal commander ...... that's what I'm running and hate to drive without it!...... probably the same and I just paid too much! LOL!!
Thanks, it has good reviews and lots of YouTube videos of people installing and testing.
 

RangerWeaver

Senior Member
Joined
Nov 20, 2014
Posts
1,956
Reaction score
650
Location
Lancaster Pennsylvania
Ram Year
2011
Engine
V8 4.7L
On my drive home from the drug store this evening I managed to miss the first deer... But the next two slammed head long into the side of my Ram.View attachment 535269View attachment 535270
I'm planning to attempt to pull the dents tomorrow.
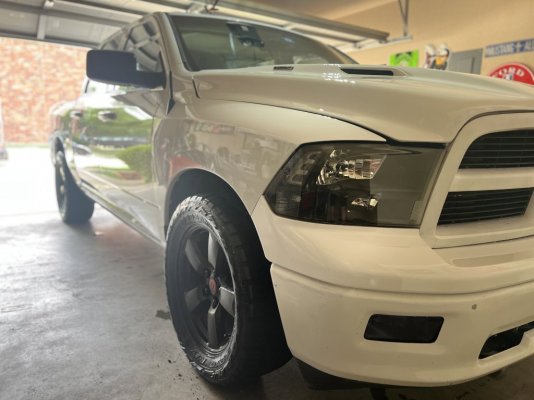
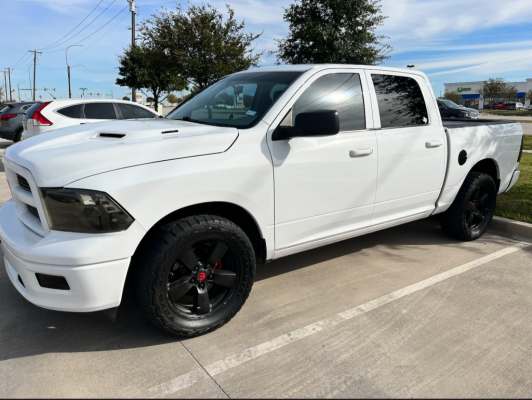
I found a door on a 2013 ram in the same paint color that's being parted off. I'll be making the 4 hour round trip on Saturday to pick it up.
 

PA Ram

Senior Member
Military
Joined
Jan 1, 2023
Posts
154
Reaction score
147
Location
Quakertown, PA
Ram Year
2017
Engine
Hemi 5.7
I think it's close to the pedal commander ...... that's what I'm running and hate to drive without it!...... probably the same and I just paid too much! LOL!!
Put it on today and wow what a difference. Didn't get through all the modes and and levels,but man I gotta be careful not to forget I have this on there or I'll end up sideways in my driveway.
 

Bandit517

That Trials Guy
Supporting Member
Joined
Jan 22, 2021
Posts
850
Reaction score
1,131
Location
Wauseon, OH
Ram Year
2016
Engine
5.7
Did an overdue tire rotation and replaced wiper blades after one froze to the windshield the other day at work. Also cut a small piece of Masonite for a radiator block for the winter. I meant to order a grill blanket before winter but got sidetracked and forgot. So a simple scrap panel will do the job for now.
 

Racer9

Senior Member
Joined
Oct 1, 2023
Posts
210
Reaction score
385
Location
Erie PA
Ram Year
2011
Engine
5.7 Hemi
This is what I did. I also installed the PPE 57% larger spin on filter, and of course the lower 4x4 filter. I put the magnet from the old pan on the bottom of that one since the PPE pan is aluminum. Very little material in the old pan, either the fluid was recently changed or this trans is in good shape.
I'm waiting for Stainless Works to send me another pipe like the one in the background that goes up over the crossmember, for the drivers side. There's no way the pipe and cat would fit under this pan in the way that SW intended. I am converting to a behind the crossmember system. I need to get the s pipe to go up over the crossmember, then I can use the rest of the piping to hook it all up.


20240125_125929.jpg
 

Bandit517

That Trials Guy
Supporting Member
Joined
Jan 22, 2021
Posts
850
Reaction score
1,131
Location
Wauseon, OH
Ram Year
2016
Engine
5.7
This is what I did. I also installed the PPE 57% larger spin on filter, and of course the lower 4x4 filter. I put the magnet from the old pan on the bottom of that one since the PPE pan is aluminum. Very little material in the old pan, either the fluid was recently changed or this trans is in good shape.
I'm waiting for Stainless Works to send me another pipe like the one in the background that goes up over the crossmember, for the drivers side. There's no way the pipe and cat would fit under this pan in the way that SW intended. I am converting to a behind the crossmember system. I need to get the s pipe to go up over the crossmember, then I can use the rest of the piping to hook it all up.


View attachment 536175

That's mostly why I haven't gone to a PPE pan yet. I'm fairly certain it won't clear the JBA Y-pipe. My trans temps have been great since deleting the "heater" hoses so I'm not jumping at the small benefit for the headache of changing exhaust parts (again).
 

Sean J Blackburn

Senior Member
Joined
Dec 1, 2020
Posts
113
Reaction score
141
Location
Arizona
Ram Year
2010
Engine
5.7 Hemi
Did an oil change

installed new front sway bar bushings and front sway bar end links.

Greased the ball joints on my lower control arms, greased the front and rear sway bar links.

Installed new hood struts

Cleaned out my truck bed which I have a habit of letting turn into a disaster zone

Ordered prothane greaseable poly bushings for the rear sway bar.

I've been busy!
 

RangerWeaver

Senior Member
Joined
Nov 20, 2014
Posts
1,956
Reaction score
650
Location
Lancaster Pennsylvania
Ram Year
2011
Engine
V8 4.7L
Did an oil change

installed new front sway bar bushings and front sway bar end links.

Greased the ball joints on my lower control arms, greased the front and rear sway bar links.

Installed new hood struts

Cleaned out my truck bed which I have a habit of letting turn into a disaster zone

Ordered prothane greaseable poly bushings for the rear sway bar.

I've been busy!
Thanks for reminding me to grease my ball joints!
 

tron67j

Senior Member
Joined
Oct 14, 2019
Posts
2,892
Reaction score
2,952
Location
Maryland
Ram Year
2018
Engine
6.4 Hemi
Installed USB power in my rear doors with a little help. Bought the wire harnesses from first link (can't paste actual link, probably because I don't have FB) and made it so easy to do, just plug and play and was about 15 minutes total both doors start to finish. Second link are the power ports I used.

1000008787.png

83W 12 Volt USB Outlet Built-in Boost USB C Laptop Car Charger: Ouffun 65W PD3.0 and 18W QC3.0 Car USB Port Aluminum Socket with Button Switch Smart Voltmeter, Suitable for Car RV Marine Golf Cart https://a.co/d/cV3C8qY
 

Attachments

  • 1000008779.jpg
    1000008779.jpg
    237 KB · Views: 22
Last edited:
Top