Wykdtr0n's Audio Build

Disclaimer: Links on this page pointing to Amazon, eBay and other sites may include affiliate code. If you click them and make a purchase, we may earn a small commission.

adrianp89

Senior Member
Joined
Sep 3, 2015
Posts
3,175
Reaction score
1,273
Location
Tampa Bay, FL
Ram Year
2019
Engine
Hemi 5.7
A lot of the reasons mentioned above are why I am probably going to pay to have my box built.
 

fredansandy

Member
Joined
Feb 5, 2016
Posts
43
Reaction score
15
Ram Year
2015
Engine
Hemi 5.7
I know other guys have done it, but I'm not comfortable running the power wire outside the cabin. That seems like a bad thing waiting to happen, even with well shielded 0 gauge. I plan on running it through the delete plate (hopefully tonight!) and either running it under the driver side kick plates if it will fit, or under the carpet. Pics coming soon!

Thanks for the tip. I took the delete plate off, added a grommet, replaced it, and ran the wires through to the battery. Some silicon seal around the wires finished the job. Very easy access to the battery from there.
 
OP
OP
W

wykdtr0n

Member
Joined
Feb 10, 2016
Posts
39
Reaction score
7
Ram Year
2015
Engine
Ecodiesel
A lot of the reasons mentioned above are why I am probably going to pay to have my box built.
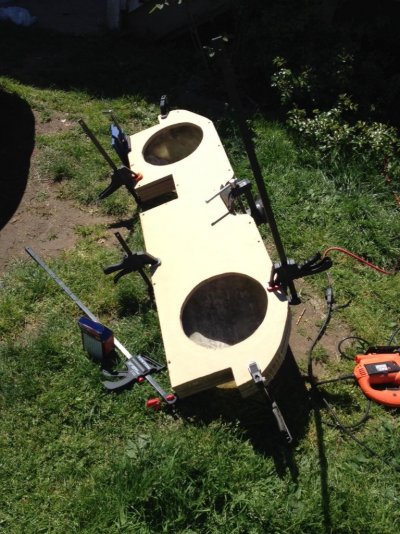
It has definitely been a pain in the ass. I can't even begin to think about how many hours I've put into this, the majority just reading how to get it done. There's no manual for it, so I've spent hours poring over peoples build threads here and on DIYMA, gleaning what clues I can and asking questions to fill in the gaps.

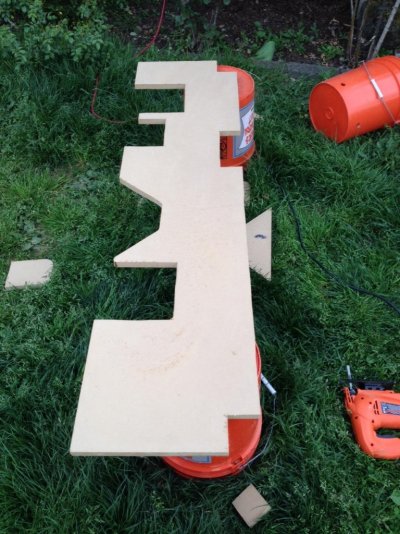
I probably should have redone the entire mdf frame. I tried free-hand routing the bottom piece to tighten up some of the jagged edges instead of just sanding it. Now every piece looks like Michael J Fox cut it. Then, when I glued the pieces, the pieces misaligned because I didn't screw or nail them together. You can actually see how off they are in some of the pics. I went ahead with it as is because I figure the frame isn't doing much in this build other than providing an aesthetic base, and the carpet will cover the flaws.

I didn't go with a Fox Box because I wanted to retain the cupholders, and even though I'm on a tight budget, I wanted the best quality I could get. If income wasn't a factor, I would jump at a NetAudio box in a heartbeat.

All that said--this is a very rewarding process. I'm teaching myself new skills and I love being able to make. Living in the information age gives me the means to teach myself just about anything, and I love seeing shared 0's and 1's turning into something physical with value. If you think about it, this wouldn't really have even been possible just a few decades ago.
 
OP
OP
W

wykdtr0n

Member
Joined
Feb 10, 2016
Posts
39
Reaction score
7
Ram Year
2015
Engine
Ecodiesel
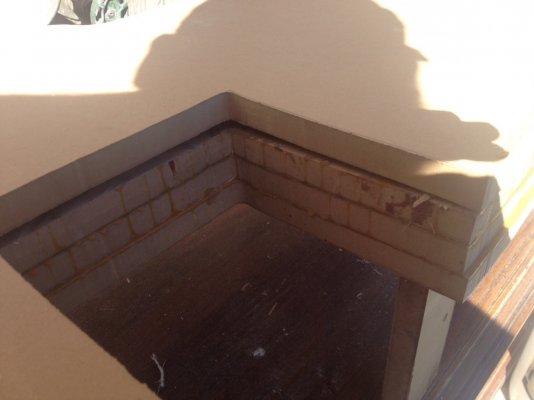
Tiny bit of progress. I used my initial cardboard template to test fit the speaker cutouts and make sure the speakers had clearance in the box. It worked, so I transferred the cutouts to the top piece and glued/screwed it. Only problem--during the fiberglass curing process at some point, the frame warped a little and now one side has a gap. I'm hoping wood filler with some epoxy over the outside will solve the problem.

The gap:

xSoQ2lX.jpg

TssG2E1.jpg
 

John94z

Senior Member
Joined
Jul 22, 2015
Posts
143
Reaction score
31
Ram Year
2015
Engine
Hemi 5.7L
Hmm... I think what may have happened here is due to how the box was supported when you removed it and continued work.
 
OP
OP
W

wykdtr0n

Member
Joined
Feb 10, 2016
Posts
39
Reaction score
7
Ram Year
2015
Engine
Ecodiesel
Hmm... I think what may have happened here is due to how the box was supported when you removed it and continued work.

That's very likely. Unfortunately, this is where experience in fabrication really counts, and my lack of experience really shows. Hopefully I can work-around it. I filled it in with woodfiller and am going to close any gaps with wood glue and mdf-dust, then plan to epoxy around that. I'm crossing my fingers that it will hold up to the pressure from the subs.
 
OP
OP
W

wykdtr0n

Member
Joined
Feb 10, 2016
Posts
39
Reaction score
7
Ram Year
2015
Engine
Ecodiesel
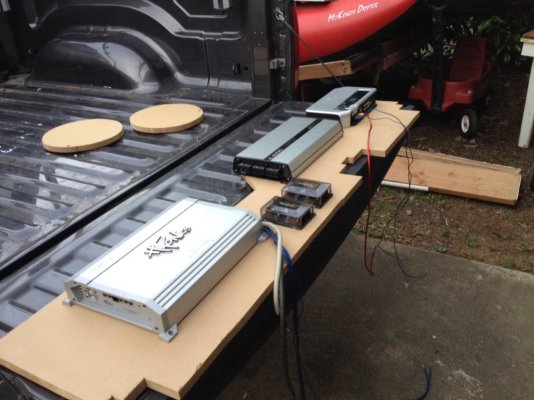
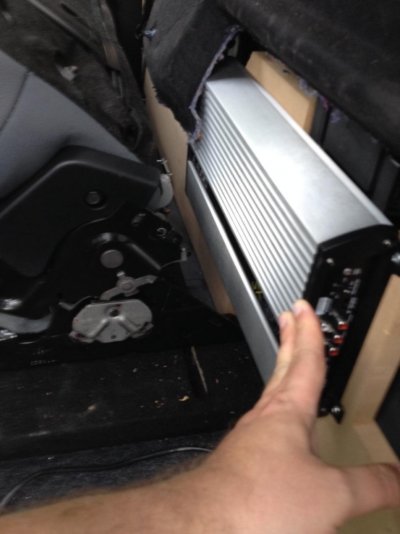
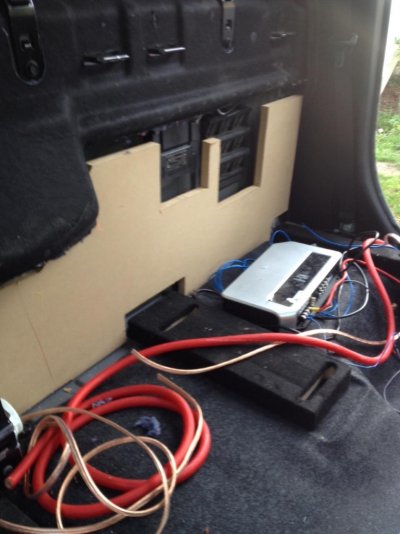
I made some decent progress yesterday on the amp rack.

The challenge I've been facing is the amount of available space behind the seat, even with the spacer, is very limited due to the two cabin vents and the motor for the rear window (and some other thing that I have no idea about).

And of course, all of these things sit right where the amps need to be for maximum clearance behind the seats. I have read that others just stick the amps over the vent locations for airflow, but I worry about humidity. Unfortunately I really have no choice.

Here's the amp rack with everything cut out.

rIQWDXw.jpg

In place but not secured. I will likely angle it forward a tiny bit with some spacers in the top back portion to give a little clearance between the amps and the vents.

vO8cWhp.jpg

My proposed layout. Note the amps are sitting over the vent cutouts.

0Bc9HTf.jpg

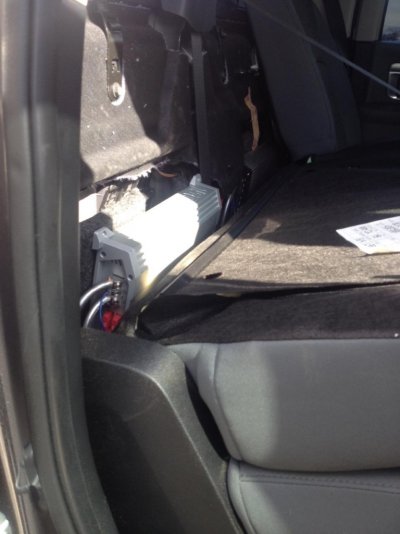
Testing clearance...this is with the seat in the closest position I could get the brackets to the amps. With the seats in their normal position, there's better clearance.

u6XyRj1.jpg

I finally feel like this project is coming to an end. I'm getting tired of the clutter in my rig, and want to clean it badly. I should have time this weekend to seat the amp rack, finish all the wiring and get some speakers installed!
 

countrygunner

Member
Joined
Feb 22, 2016
Posts
54
Reaction score
15
Ram Year
2015
Engine
Hemi 5.7
Best way to,fix that gap is with a mixture of duraglass and resin. It will work a lot better than wood glue.
 
OP
OP
W

wykdtr0n

Member
Joined
Feb 10, 2016
Posts
39
Reaction score
7
Ram Year
2015
Engine
Ecodiesel
Best way to,fix that gap is with a mixture of duraglass and resin. It will work a lot better than wood glue.

Thanks gunner, I've been racking my brain over that.

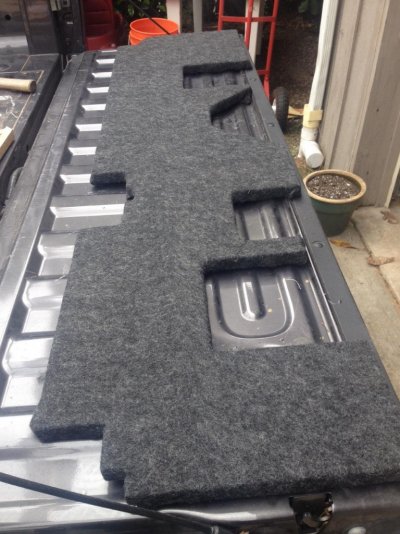
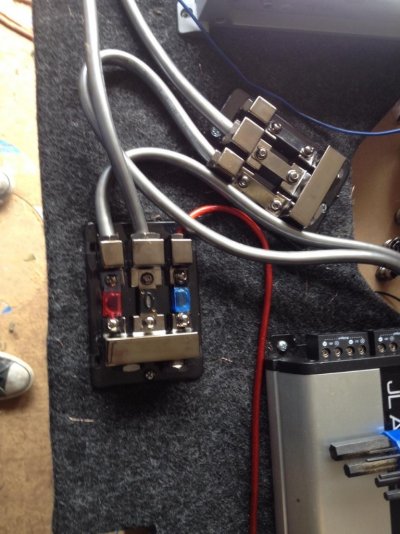
I didn't get as much done this weekend as I wanted, nor did I get the pics I should have because I ran out of light and needed my seats back in. Regardless, the amp rack is all wired and in place; I need to get a permanent mounting solution but it fits and looks good. I attached the main power and ground as well. I'll get better pics when I need to get the seats out to finish running speaker wires.

Here's the rack all carpeted:

CG4GJLd.jpg

This shows the power and ground distribution blocks from Knuconceptz. The power block is fused, ground block has the blanks. I realize these blocks are overkill, but I like how easy they are to use and the range of gauges you can get to fit easily.

nWyiTIP.jpg

Here it is installed. I need a more permanent mounting solution as I couldn't get the heavy duty double sided tape to hold it in place. Now it's just stapled to the felt back-wall liner with some old couch fabric :)

5N0Wiie.jpg
 
OP
OP
W

wykdtr0n

Member
Joined
Feb 10, 2016
Posts
39
Reaction score
7
Ram Year
2015
Engine
Ecodiesel
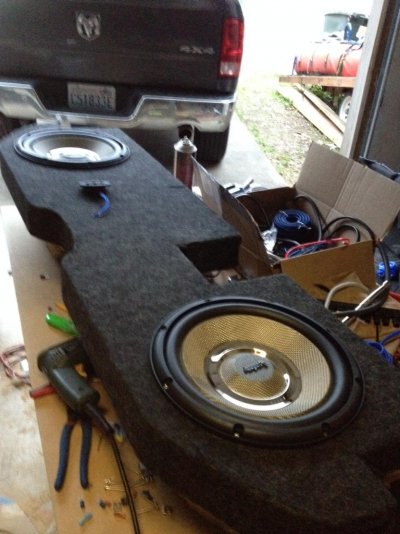
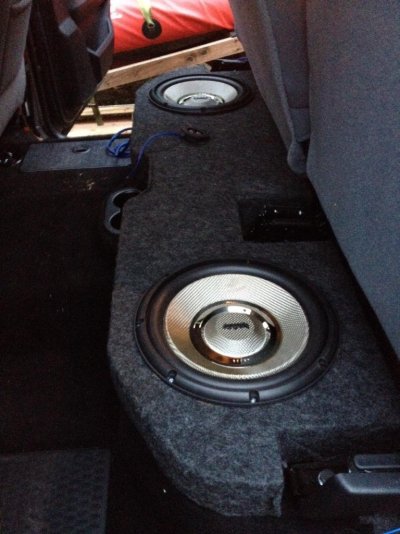
Finally finished the sub box, and I'm stoked!

All carpeted, subs in and wired:

QXEsJUy.jpg

It fits!

BVs09hG.jpg

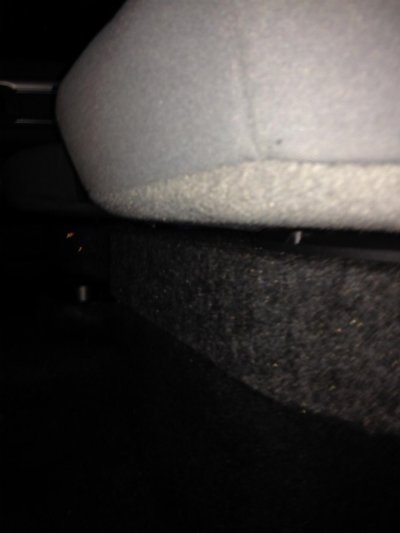
The gap...might need grills for the subs, but there's about a 3/4" gap between the seat and the sub.

ldB5eAm.jpg

I still need to wire in the terminal cup; I shake too much to solder so I need to get some terminals that actually slip over the posts tightly and none of the ones I had would do that. If I could go back, I would have stuck with some basic posts. Lesson learned.
 
OP
OP
W

wykdtr0n

Member
Joined
Feb 10, 2016
Posts
39
Reaction score
7
Ram Year
2015
Engine
Ecodiesel
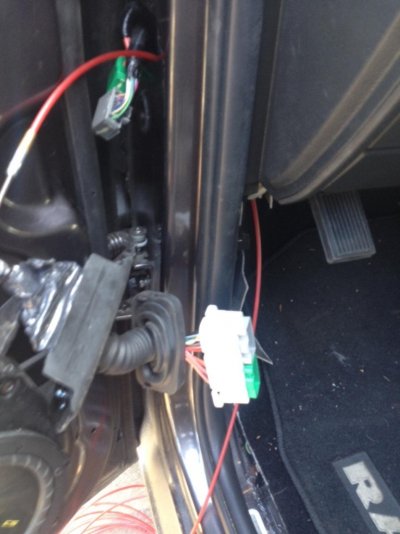
So I just went to run the front driver side speaker wires to the door...ugh. There's about 3" of crap between me and the door grommet. Not even sure where I'm going to begin but, it's definitely going to take longer than I thought.
 

VegasDragger45

Senior Member
Joined
May 24, 2010
Posts
2,080
Reaction score
1,025
Ram Year
2013
Engine
6.7
So I just went to run the front driver side speaker wires to the door...ugh. There's about 3" of crap between me and the door grommet. Not even sure where I'm going to begin but, it's definitely going to take longer than I thought.

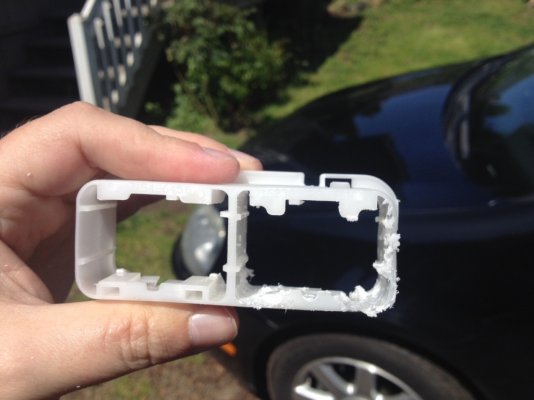
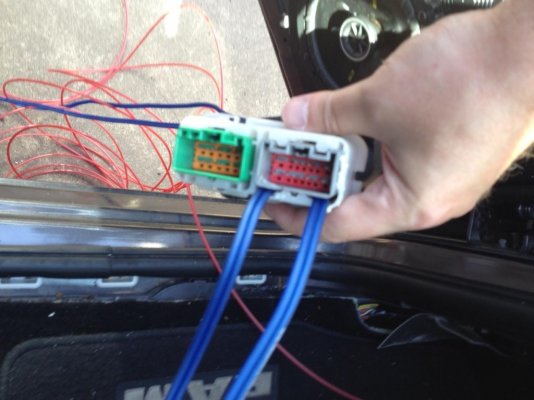
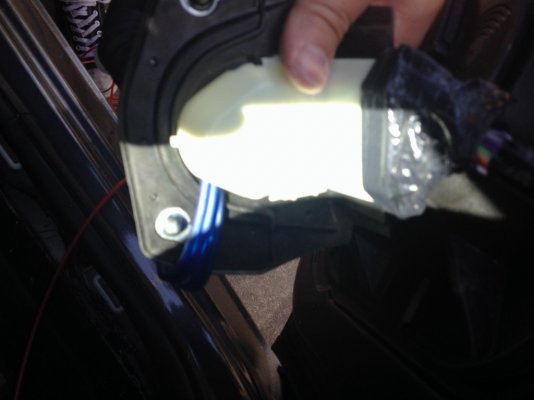
Ya the drivers door was the worse. I unplugged the cables at the can and unbolted the white cable guide from the door and was able to fish a wire through.
 

countrygunner

Member
Joined
Feb 22, 2016
Posts
54
Reaction score
15
Ram Year
2015
Engine
Hemi 5.7
I drilled through on the drivers side. I picked a spot in the moles plug that had the most room and took a 1/4" drill bit and drilled a big enough hole for one run of 16 ga. It fit but barely. The passenger side front was easier. Didn't need to drill it. The back two had room also.
 
OP
OP
W

wykdtr0n

Member
Joined
Feb 10, 2016
Posts
39
Reaction score
7
Ram Year
2015
Engine
Ecodiesel
Final update probably (we all know how that goes. I'm already thinking about switching to a more involved DSP).

After a harrowing weekend trying to get ready for a camping trip, everything is in place and working. It wasn't without hitches; on the way up to Lost Lake at Mount Hood the amp rack broke loose from the back wall and yanked the ground wire from it's terminal, and I was having clipping issues with the components. Once I got it home I quickly narrowed the clipping to a short in the front right tweeter and ten minutes later I was turning things up as loud as I wanted.

Thanks everyone for the front speaker wire tips. Talk about a pain in the ass.

jCKb4iQ.jpg
hW56YBC.jpg
7gEaEKq.jpg
ArFe5VO.jpg

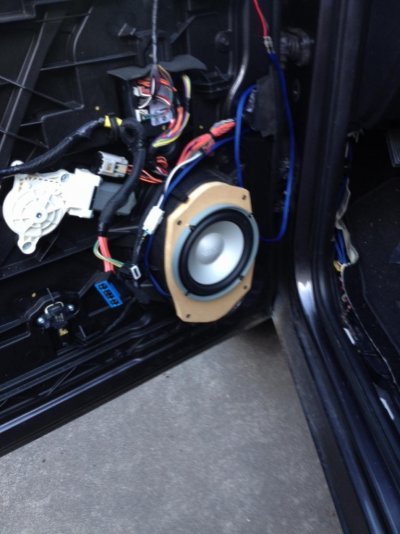
Wires all in and infinity perfect in place. I needed a 1/2" spacer to make it fit; and I can't get the door panel back on entirely, so I'm going to need to fab some door pods or at least chop the door panel and put the grill that came with the speaker over it.

MltijxA.jpg

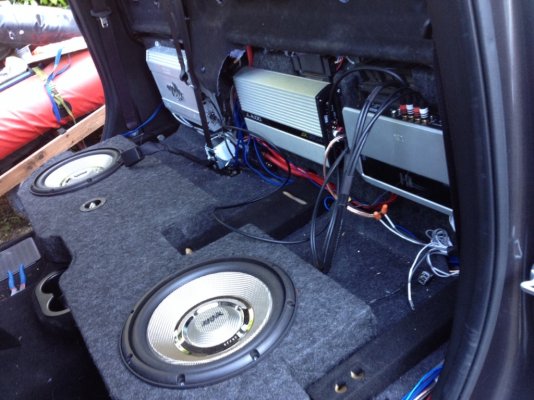
Sub and amp rack in place. Wiring isn't the tidiest, but I'll get some shorter RCA's to run to the component amp. Also, I forgot the amp was in fact a four channel, so I'm running the front components active and setting the filters through the MS8.

a8S3jtM.jpg

I don't have a picture of the remote on tap; troutspinner suggested I look under the front driver seat, and sure enough there were a few accessory on wires there to tap into. Much easier than I thought it would be. I didn't have to take the dash apart once for this build, not even to access the stereo! Tapping into the rear signals made it so easy.

And finally...why we love our trucks:

TPKDeth.jpg
 
OP
OP
W

wykdtr0n

Member
Joined
Feb 10, 2016
Posts
39
Reaction score
7
Ram Year
2015
Engine
Ecodiesel
Also...thanks to everyone who's done a build log before me, and to everyone who helped here. I can't express enough how un-handy I am. Without the pictures and experiences of the people here who have already done all this, I wouldn't have been able to do it myself.
 

adrianp89

Senior Member
Joined
Sep 3, 2015
Posts
3,175
Reaction score
1,273
Location
Tampa Bay, FL
Ram Year
2019
Engine
Hemi 5.7
Curious that it did not fit with the 1/2" spacer. I could of swore I read 1/2" will clear.
 

VegasDragger45

Senior Member
Joined
May 24, 2010
Posts
2,080
Reaction score
1,025
Ram Year
2013
Engine
6.7
I had the same issue with my 1/2" spacers as well. I ended up going with 1/4" and just moved the speaker up 3/4" inch to clear the black plastic behind it. Once I did that the door panel would go on.
 
Top