1989 W150 Forest Service truck resto - nickname "Govt Chz" - Stoffregen Motorsports

Disclaimer: Links on this page pointing to Amazon, eBay and other sites may include affiliate code. If you click them and make a purchase, we may earn a small commission.
OP
OP
Stoffregen Motors

Stoffregen Motors

Senior Member
Joined
Feb 27, 2025
Posts
104
Reaction score
168
Location
Cool, CA
Ram Year
2003
Engine
5.9 Cummins
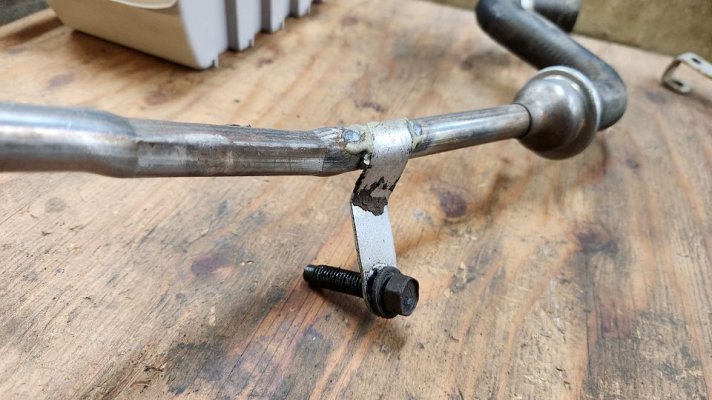
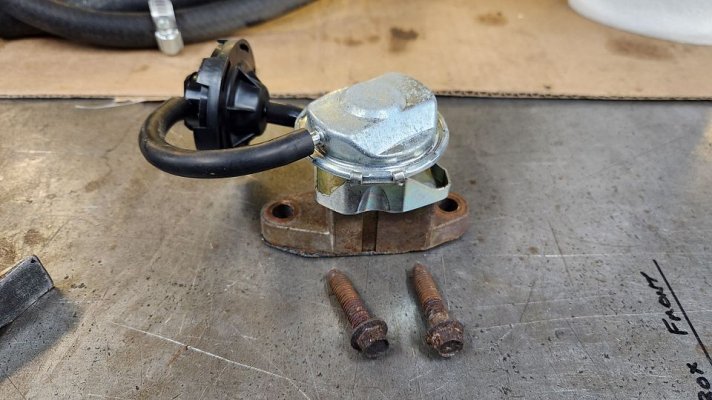
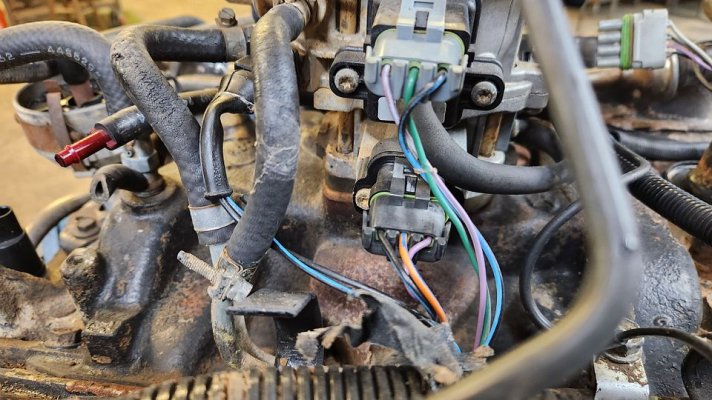
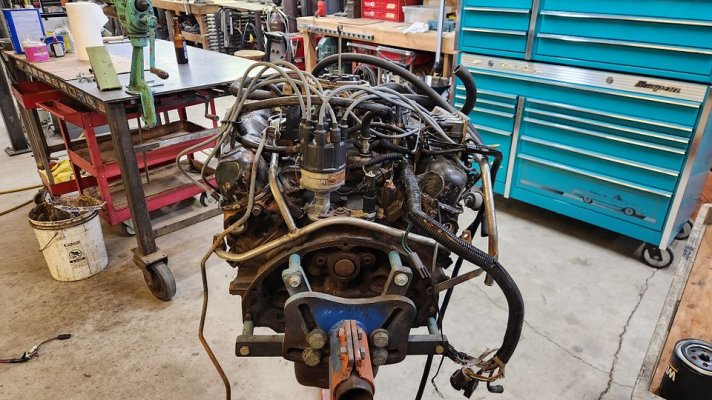
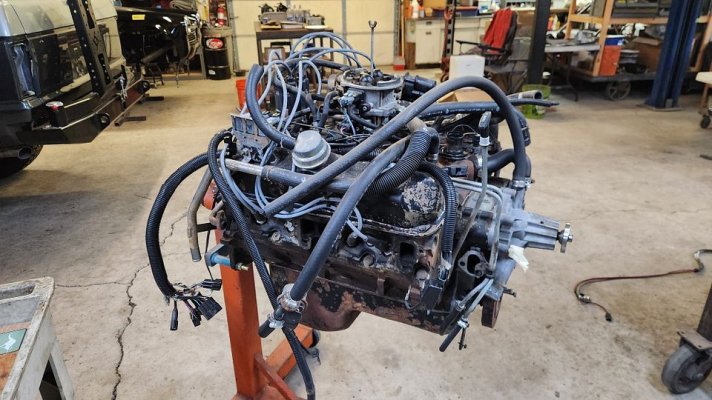
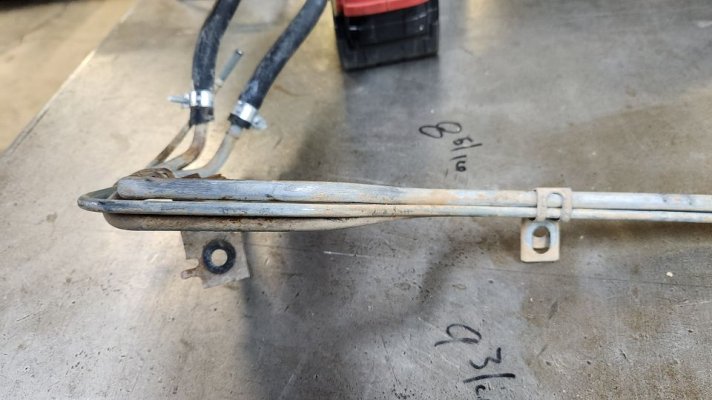
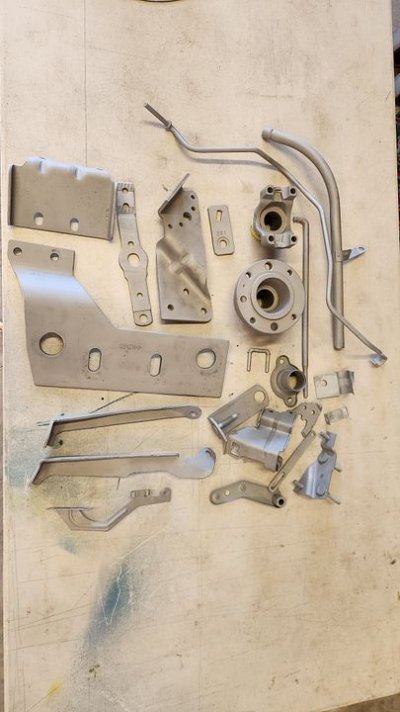
Ok, this is just a photo dump, but you get the point. I take pics of everything. Even things I don't know what I'm seeing. Those come in handy later too. All in, I take 400-500 pics during disassembly.

I'll get to the engine, trans and t-case rebuild soon.

4e18ac7a-b83b-4b6a-b3a8-3457b4d14f65.jpg

528d4249-17db-4152-ae61-285bdd38bbcd.jpg

d1f26672-3865-4e38-ab2e-e7f89b4b36a2.jpg

1dec2b5e-eef8-458a-a6d3-ab651e9443ce.jpg

c9d91329-f659-43cb-ab20-76069a4569ac.jpg

27b8ccb0-2cc4-4d6c-ba70-d213939c0eee.jpg

da9186ad-b6f8-4519-acb9-bb585478b665.jpg

ee9644c8-b9bf-4f00-a649-70d5657cfc33.jpg

3674a852-6862-426e-9ff0-0f17d71f1697.jpg
 
OP
OP
Stoffregen Motors

Stoffregen Motors

Senior Member
Joined
Feb 27, 2025
Posts
104
Reaction score
168
Location
Cool, CA
Ram Year
2003
Engine
5.9 Cummins
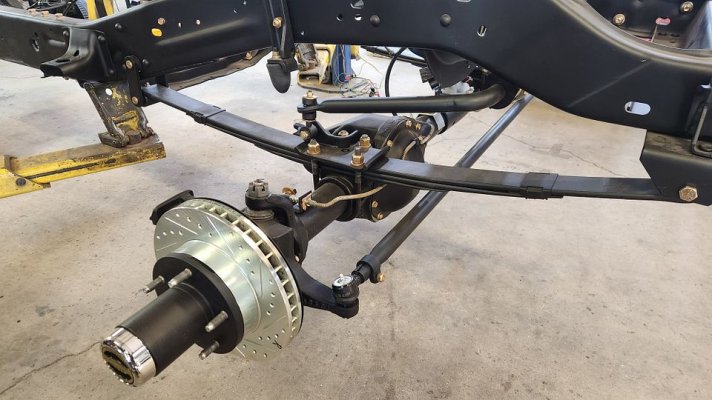
While waiting for powertrain parts, I went back to work on the chassis.

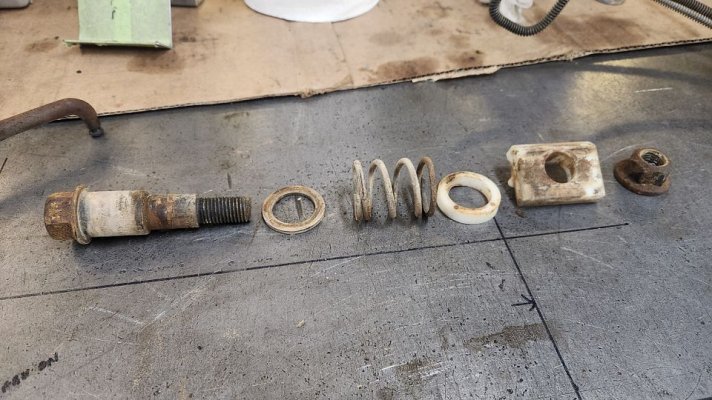
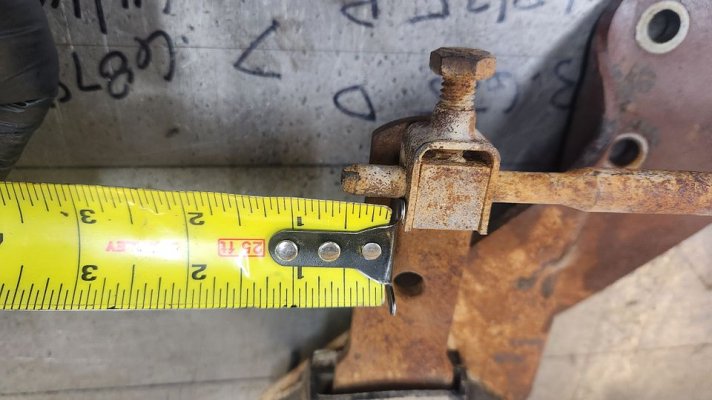
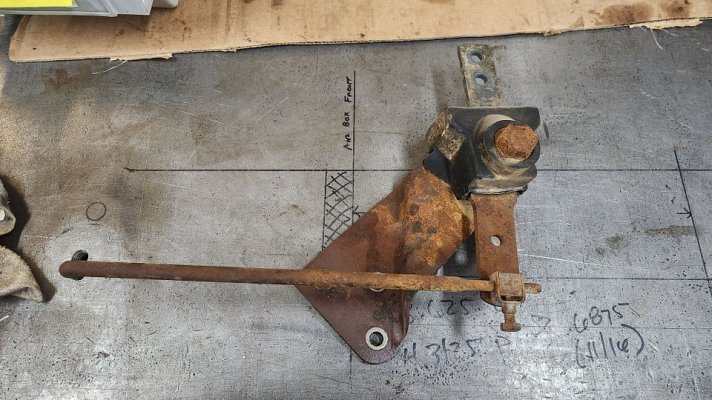
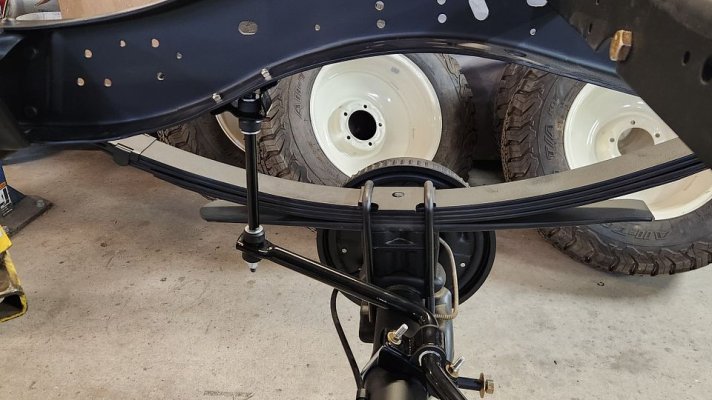
Some parts were not available new, like the front sway bar end links. The old ones were in good enough shape to re-use, but I installed them with some washers on each side to help with misalignment. The factory fit was so tight that they would bind badly and possibly even break if the front suspension were flexed up enough.

The frame needed to be drilled for the rear sway bar end link brackets. I don't measure for that. It just needs to be positioned so the end link is not under any kind of side load.


85663f40-b31c-4297-b32f-6d7daa9bb806.jpg

cad1e723-61ba-465f-8ce7-5995689c3924.jpg

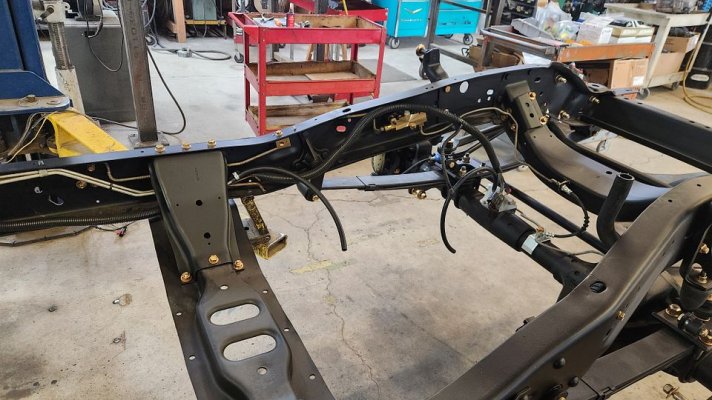
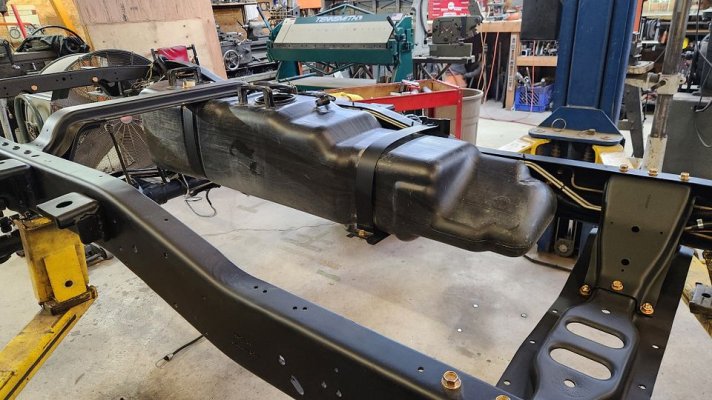
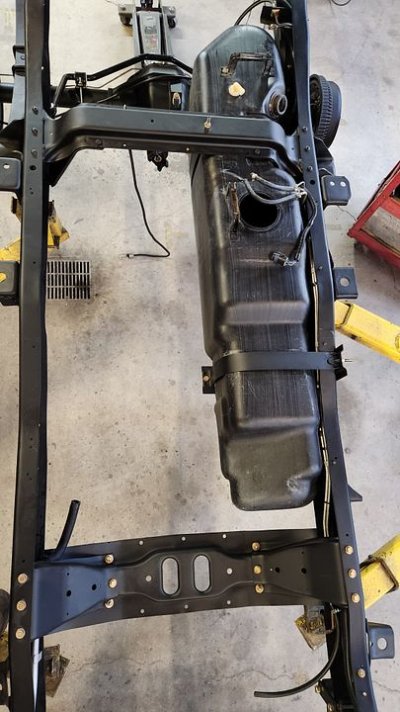
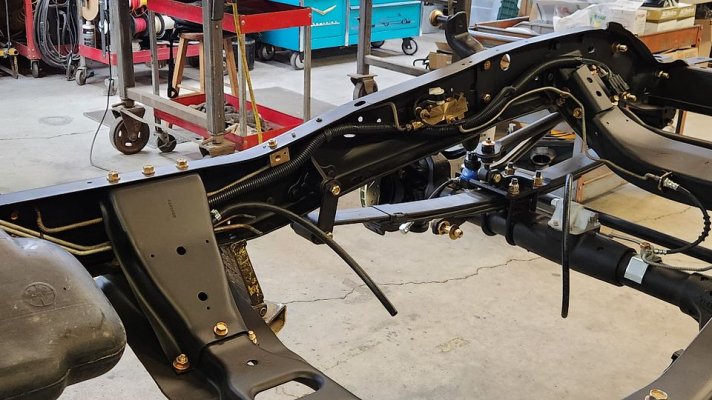
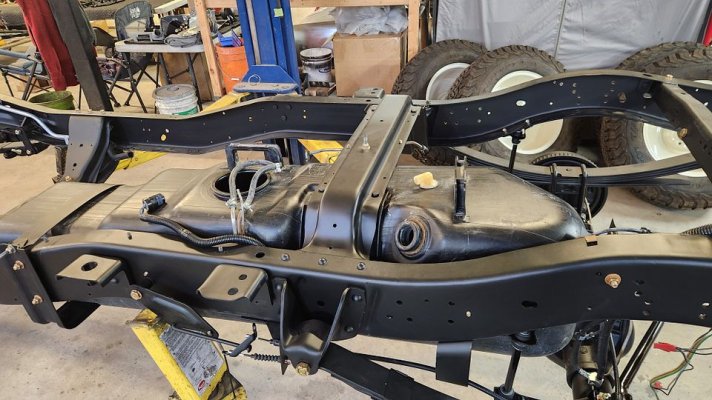
Plumbing the chassis and running the rear wiring harness was done before I installed the fuel tank. We re-used the factory brake lines but cleaned them up. All new fuel hoses and clamps were installed as well as a new three way filter.

04f26e7f-51d4-41e2-aacb-d72359109fa5.jpg

94795a07-c613-4436-b82f-dd2d1d299e5f.jpg

be728979-aab8-4a5a-ac67-be498be31442.jpg
f43c4eac-a890-4da8-ba7a-1efc1f0db06c.jpg

8f1b0121-9814-4f5f-88ba-b886fceab851.jpg
 
OP
OP
Stoffregen Motors

Stoffregen Motors

Senior Member
Joined
Feb 27, 2025
Posts
104
Reaction score
168
Location
Cool, CA
Ram Year
2003
Engine
5.9 Cummins
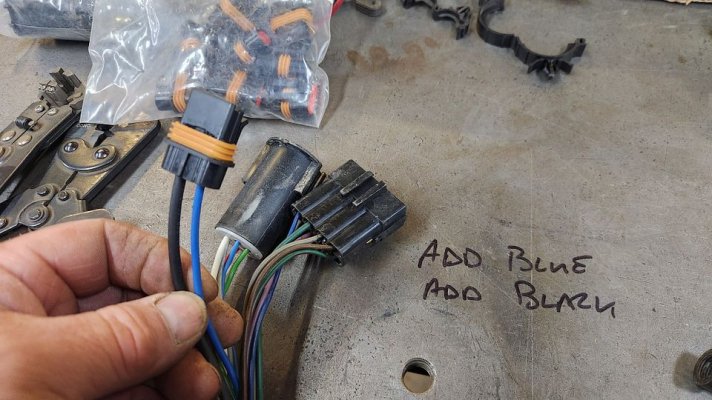
Another item we planned on adding is a trailer brake controller. Having seen so many bad install jobs on trailer light wiring, I have learned over the years to add that wiring to the main harness beforehand. Here you can see the two new wires added into the rear frame harness. The one is for trailer brakes and the other is in case the owner wanted to connect the trailer power to the truck's battery. Both of them are terminated in a Packard 630 series connector, which can handle up to 45 amps.

f32e19cc-6c11-4195-ac64-6c26bbbd2da7.jpg
 
OP
OP
Stoffregen Motors

Stoffregen Motors

Senior Member
Joined
Feb 27, 2025
Posts
104
Reaction score
168
Location
Cool, CA
Ram Year
2003
Engine
5.9 Cummins
Engine time!

The engine ran fine before we took the truck apart. It didn't smoke, sounded good, no clunks or major leaks. The plan was to open it up and have a look but focus on a simple re-seal. Upon further inspection, I found two of those glued on dots that rebuild shops use. This, in my experience could go either way. Just because it has been rebuilt, doesn't mean they did a good job. In a past life I was a racing engine builder, and the one thing I learned during that time is that the most reliable engine is a stock one. Sure, there are mods that work well for each and every engine, but in the big picture, a well running stock engine is really what most people want. Another thing I learned as an engine builder, nothing sounds better than the crisp sound of a tight motor.

One thing to consider is the life of the vehicle. In this case, it was government owned since day one. Which again, can be good or bad. At least we know that gov't vehicles are maintained on schedule, so we had that going for us.

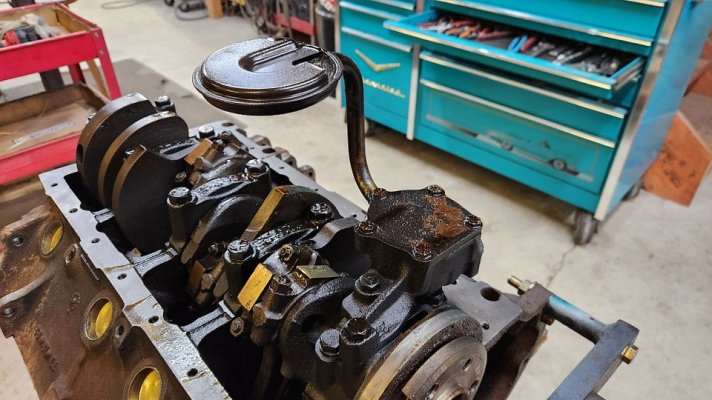
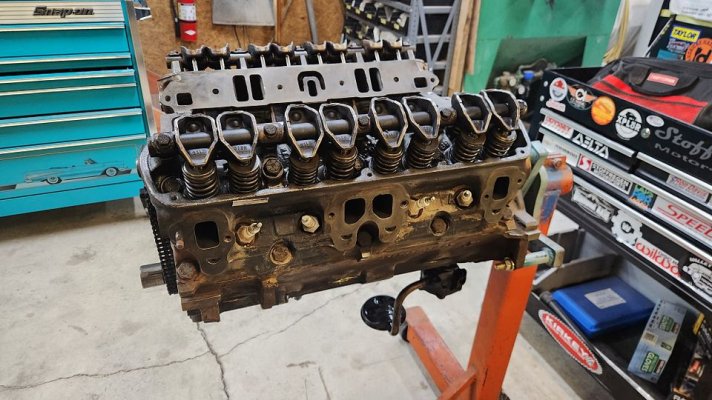
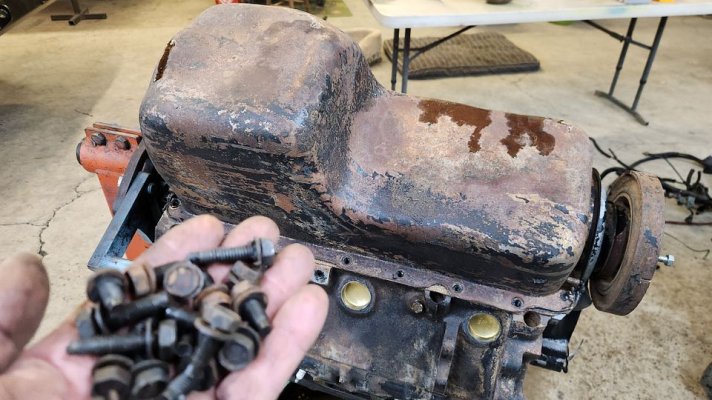
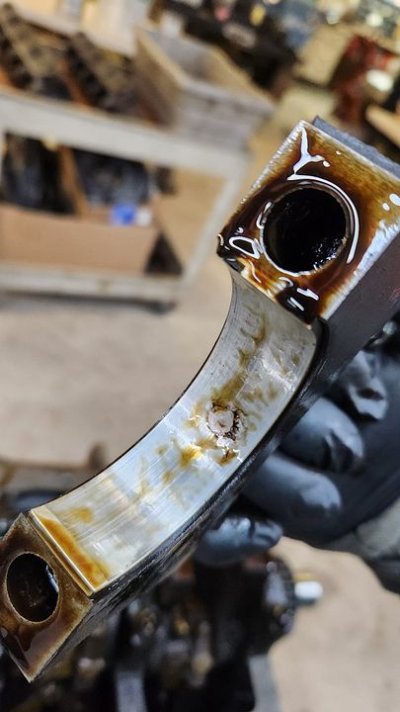
Step 1 - tear down and inspect. What am I looking for? Any tell-tale signs of damage or poor maintenance. Remove valve covers and oil pan. How does it look? Is there an abundance of sludge or buildup? This one looked pretty good for its age.

b9ca8b97-ec31-4ad6-b11e-1ce4dd78c3ae.jpg

833d8a34-bc66-4d3e-b197-ddab9dc67add.jpg
 
OP
OP
Stoffregen Motors

Stoffregen Motors

Senior Member
Joined
Feb 27, 2025
Posts
104
Reaction score
168
Location
Cool, CA
Ram Year
2003
Engine
5.9 Cummins
Next up - cylinder head removal.

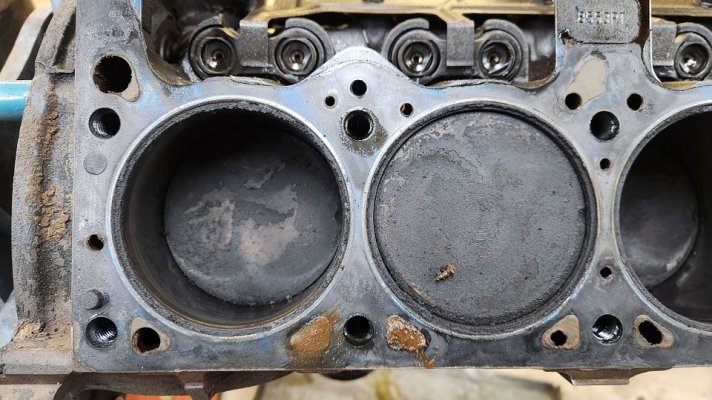
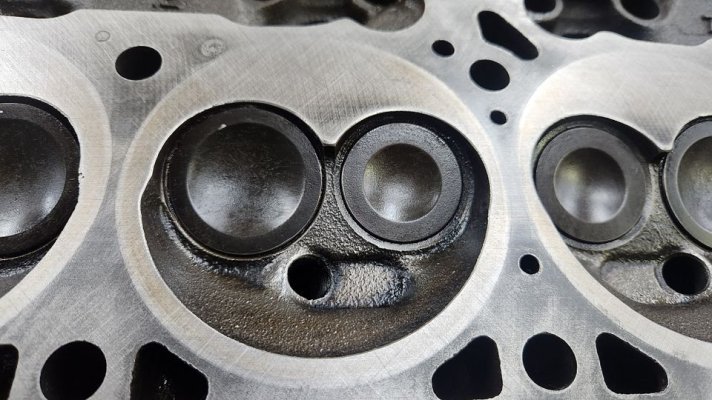
How do the head gaskets look? Any signs of deterioration in the fire rings of the head gaskets? If yes, this indicates ignition timing or spark problems. Any dark colored spots between cylinders or between water passages? Dark spots indicate a head or block surface that is not flat and has allowed leakage of cylinder pressure or coolant. How do the bores look? Any scratches or signs of metal transfer between the aluminum pistons and the iron cylinders? If there are scratches or metal transfer, this indicates an engine that has overheated. Are the tops of the pistons clean? If so, that's a sign of coolant leaking into the cylinders and cleaning the piston domes. If they are not clean, is the buildup oil related? Or is it carbon?

Again, everything here looked good. And as a bonus, I was able to read ".030" on the pistons, meaning the block has been bored.

dc1d0d2e-3441-4864-a7ff-2e5197cbfbe5.jpg

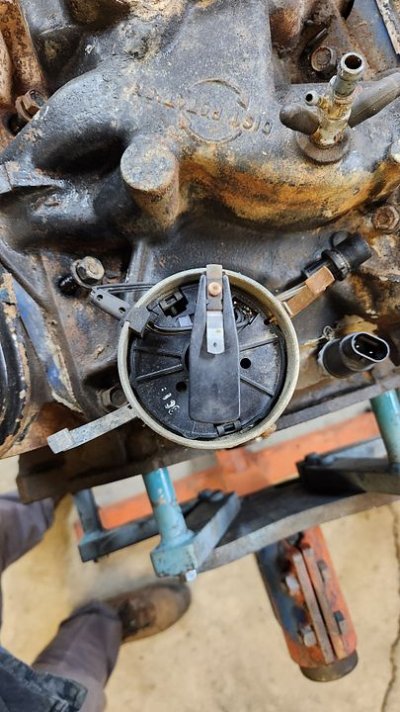
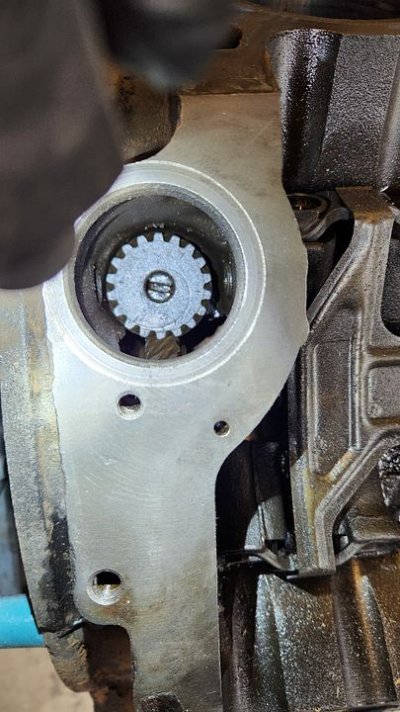
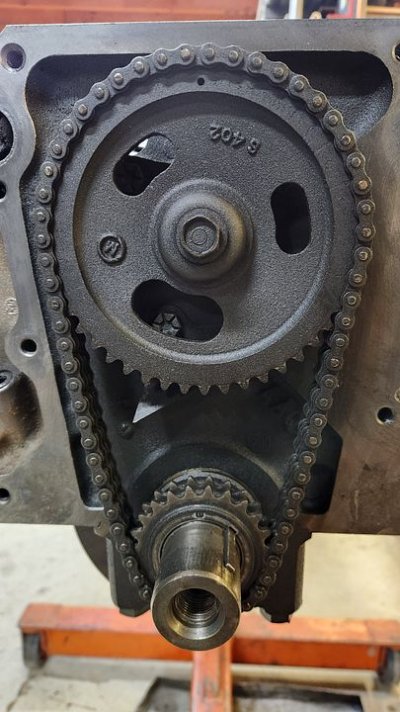
More pics. Note the position of the distributor drive spindle and inspect the timing chain/gears. If the chain is stretched, it will retard the cam timing, causing the power curve to be higher in the RPM range and causing lack of torque and throttle response at lower RPMs. This chain was definitely stretched. And that's a good thing, because it means when we get it back together, it will run better. One point for the home team!

256d55be-f161-4afa-a18e-222906cd5fac.jpg

eb347eaf-a63f-4407-9647-98e880a5c38a.jpg
 
Last edited:
OP
OP
Stoffregen Motors

Stoffregen Motors

Senior Member
Joined
Feb 27, 2025
Posts
104
Reaction score
168
Location
Cool, CA
Ram Year
2003
Engine
5.9 Cummins
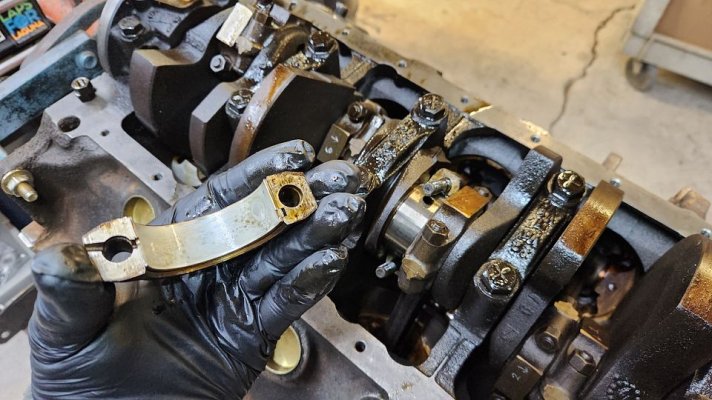
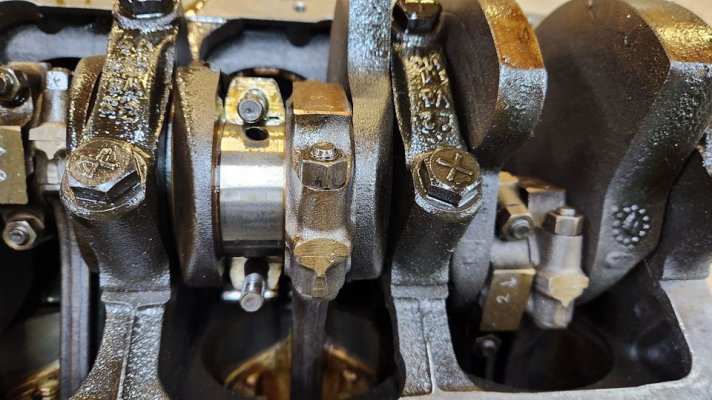
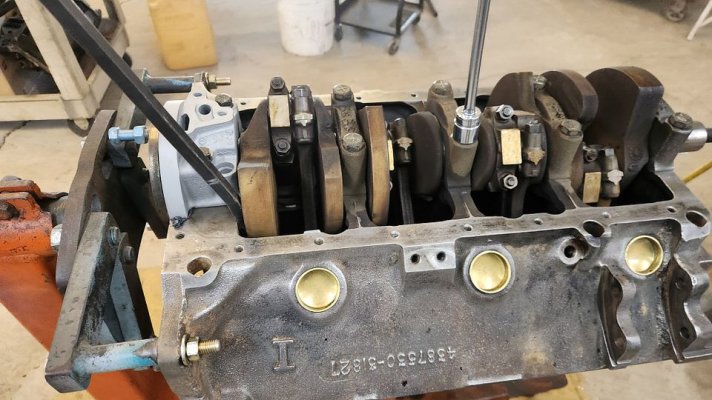
As I said, our intention was to not rebuild the engine, to save a few bucks. So far everything looked great. The lifters and cam were visible through the valley, so I did not need to remove them, and removal of one rod cap and one main bearing cap will give us the final word. This engine was in great shape.

dbe4bdc5-8cca-4b4d-9b1b-97bba7b062f3.jpg

7b97fbfc-8310-4b26-8872-c2c36463dee4.jpg

50011aaf-371e-4a4a-b64c-c1480907cc9f.jpg
 
OP
OP
Stoffregen Motors

Stoffregen Motors

Senior Member
Joined
Feb 27, 2025
Posts
104
Reaction score
168
Location
Cool, CA
Ram Year
2003
Engine
5.9 Cummins
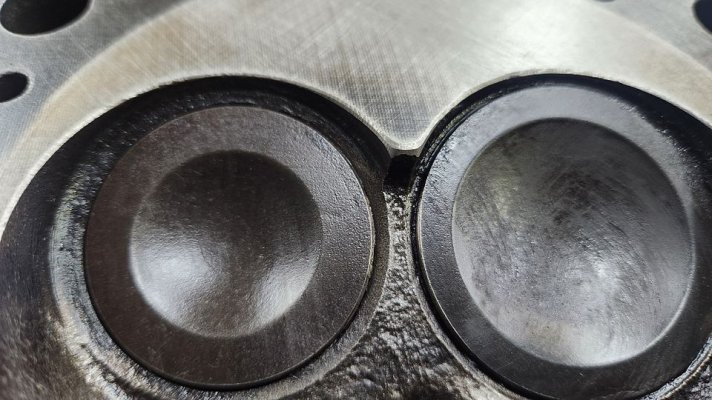
The cylinder heads needed only stem seals, but one tiny thing I like to do is to grind all of the sharp edges out of the combustion chambers. The sharp edges attract carbon, and carbon buildup leads to detonation, which is most commonly called "pinging". Anything you can do to massage the sharp edges away will help.


fd8bef64-bff4-48f7-8daf-4f2d396048b6.jpg

26f6ae7c-f61b-454f-b1ba-ef8c3141b566.jpg
 
OP
OP
Stoffregen Motors

Stoffregen Motors

Senior Member
Joined
Feb 27, 2025
Posts
104
Reaction score
168
Location
Cool, CA
Ram Year
2003
Engine
5.9 Cummins
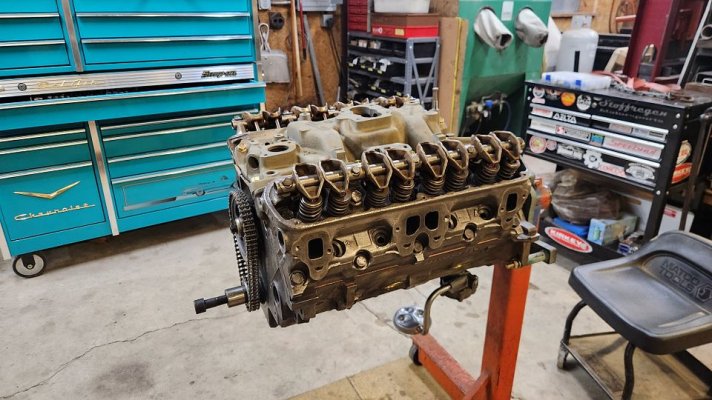
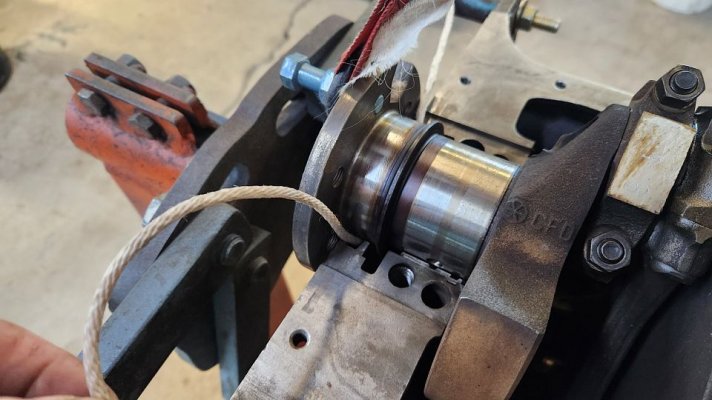
As mentioned earlier, our goal was to re-seal the engine, meaning all new gaskets and seals. I am no Mopar expert, as a matter of fact, this is the second time I've ever had one on an engine stand. Had I known that the rear main seal was a rope seal, I would have left it alone. By the time I realized it was a rope seal, I had already been poking and picking at it to get it out, and there was no going back. Replacing a rope seal with the crank in place is not doable, and even cleaning the groove in which it sits is problematic. So I devised a method to clean it out...with a rope. Once the groove was all cleaned up, I applied a liberal amount of The Right Stuff RTV and worked the new two piece lip seal into place.

Why not remove the crank, right? It's just time. We were saving time.

3dceac99-5d85-465d-98e3-9e8586775b41.jpg

Don't forget to set the thrust.

c30e974a-2a5a-4615-9424-5d5732ae53a8.jpg

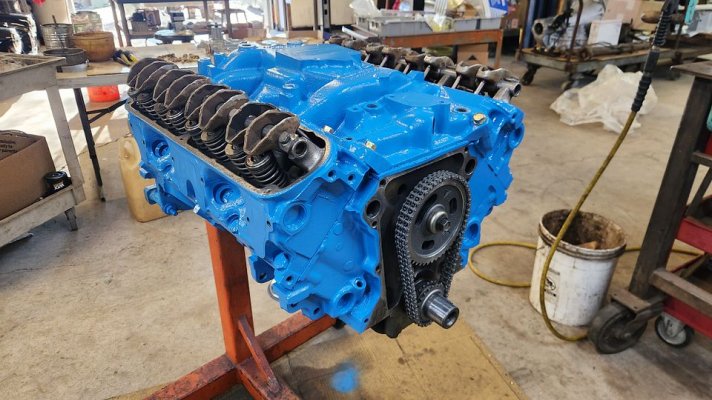
With the heads installed, the assembly was cleaned up to take a coat of paint.

6345fc92-9d3d-42d1-9d2f-4b58c3cc13c2.jpg
 
OP
OP
Stoffregen Motors

Stoffregen Motors

Senior Member
Joined
Feb 27, 2025
Posts
104
Reaction score
168
Location
Cool, CA
Ram Year
2003
Engine
5.9 Cummins
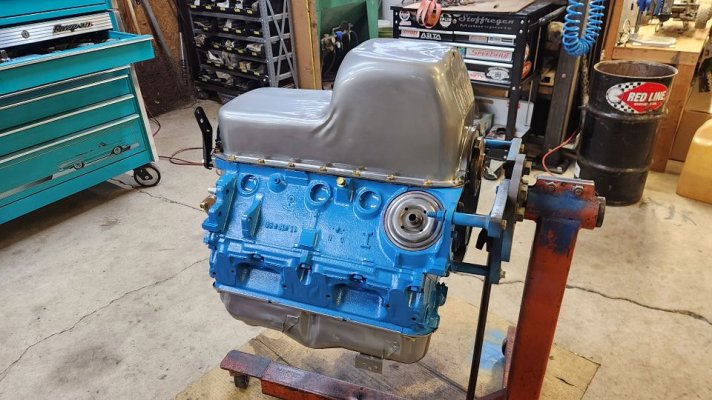
Throwing originality out the window, the owners opted to back date the look and chose standard Chrysler blue for the engine. The silver bits are powder coated in a Porsche silver which is the color of the steel Porsche wheels back in the '60s.

50d35486-98bf-4a38-b7e1-c7e79fc98aef.jpg

c9371651-0004-46d4-b130-f771103eac8e.jpg

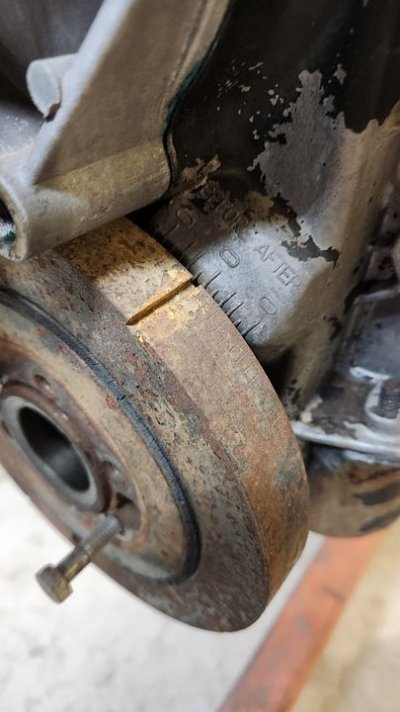
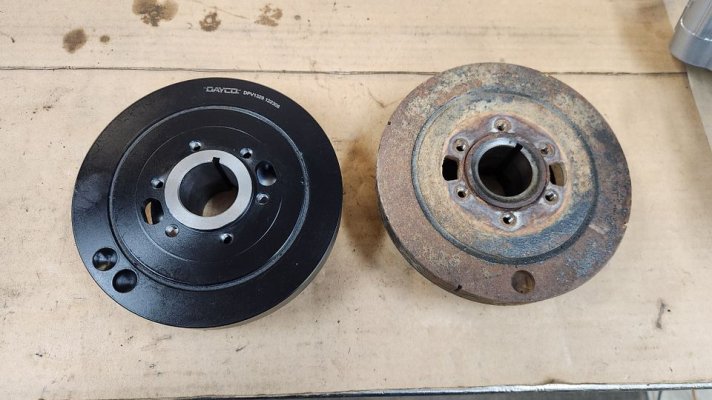
New Harmonic balancer ready to go on. Side by side comparison to make sure they are the identical. Sometimes the bolt holes are clocked differently, or the TDC mark is not in the right place.

644ac74d-62c0-463e-bae1-ebc0715c5f2c.jpg

Here it is all buttoned up.

01d1e28a-66fa-4319-8a9c-575109012e7f.jpg
 
OP
OP
Stoffregen Motors

Stoffregen Motors

Senior Member
Joined
Feb 27, 2025
Posts
104
Reaction score
168
Location
Cool, CA
Ram Year
2003
Engine
5.9 Cummins
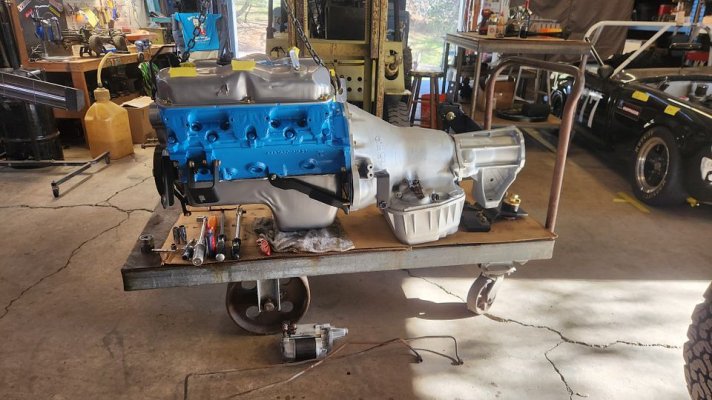
The transmission was back from the rebuild shop and ready for install. We had the shop go through the trans, as usual, but we also had them do a couple tiny mods to hold gear longer and for ever so slightly firmer shifts. We also had them install a deep aluminum oil pan from PPE. I use the same oil pan on my 2003 Cummins equipped Dodge, and the extra fluid capacity helped solve a fluid overheating problem, so installing one here was a no brainer.

5c14637f-9cfa-4db8-b3c5-2a8c74943ec1.jpg

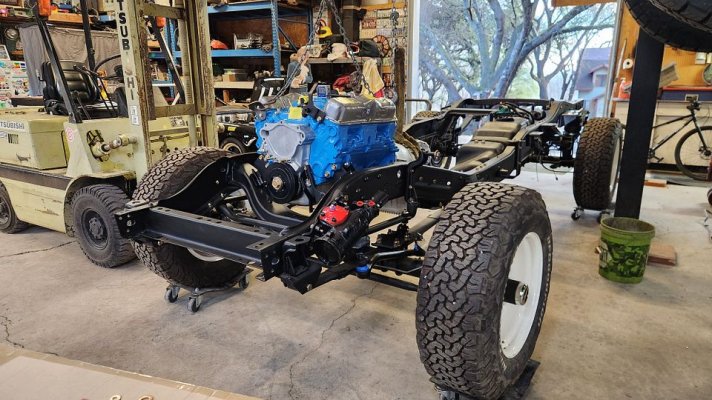
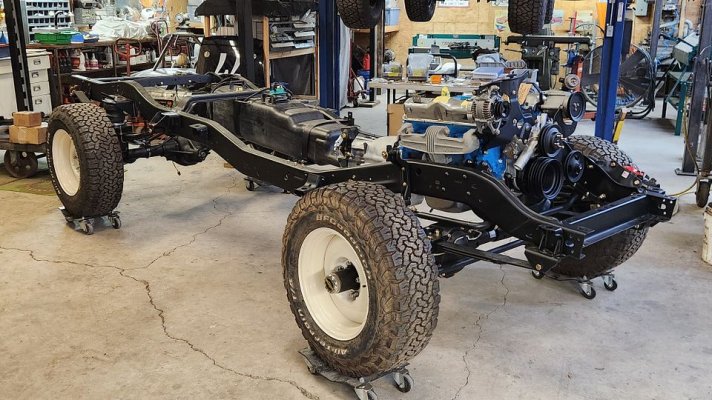
With the motor and trans torqued together, in the chassis it goes.

3e14a3bf-7a3d-429c-8990-dc45e72caef4.jpg
 
OP
OP
Stoffregen Motors

Stoffregen Motors

Senior Member
Joined
Feb 27, 2025
Posts
104
Reaction score
168
Location
Cool, CA
Ram Year
2003
Engine
5.9 Cummins
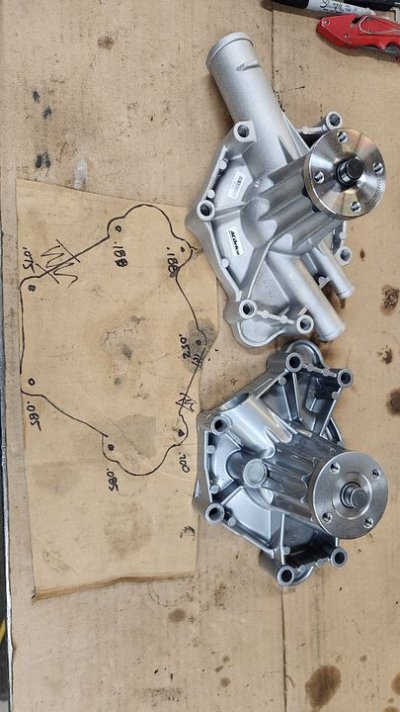
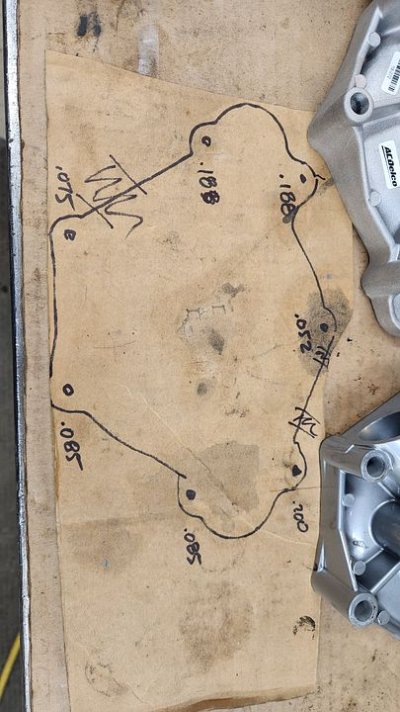
One major issue that came up was the accessory drive fit. Nothing seemed to line up properly. Ok, these old multi-belt accessory drive systems are clunky with all the pieces that bolt together, so I figured I was doing something wrong, but I then noticed something was off with the water pump. Luckily I had not "installed" the water pump yet. It was just held on with a couple bolts and no gasket, so I took it back off and started taking some measurements, using the old pump for comparison. Sure enough, every single one of the bolt holes in the new water pump was thicker (from the rear mounting face to the front of the hole). I had to mount the new pump up in the mill to spot face every single bolt location.
Here's a couple pics of the measurements I took off the old pump.

If you're wondering why the pump on the right looks funny, it's because I cut the inlet and outlets off to use as a blanking plate when we powder coated the front timing cover. The numbers written on the cardboard are the amounts that we needed to remove.

6052b098-e35b-4057-afd8-d825a26b43e2.jpg

f95d5e07-8eff-431d-932a-45093a4a4911.jpg
 
OP
OP
Stoffregen Motors

Stoffregen Motors

Senior Member
Joined
Feb 27, 2025
Posts
104
Reaction score
168
Location
Cool, CA
Ram Year
2003
Engine
5.9 Cummins
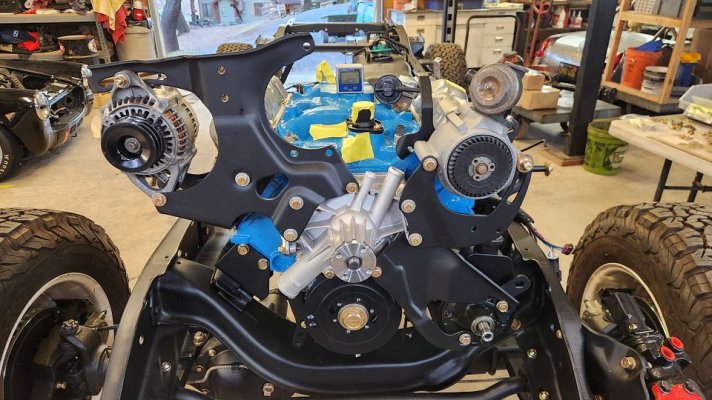
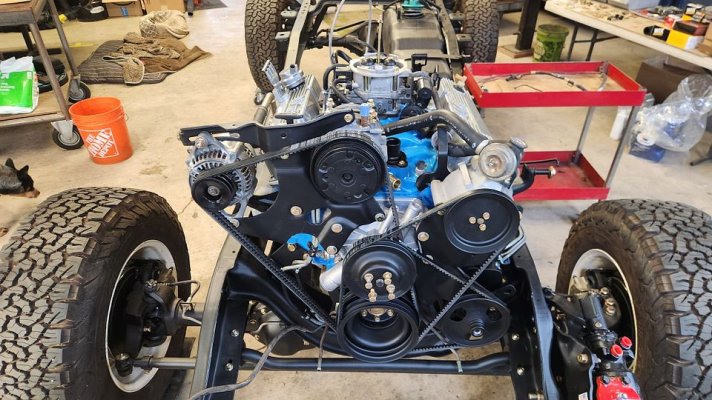
Ok, where were we? Accessory drive. There are a lot of pieces to this puzzle. My dad has a saying "no wonder they went out of business!" Well, Dodge did not go out of business, but their trucks are not called Dodge anymore, so...

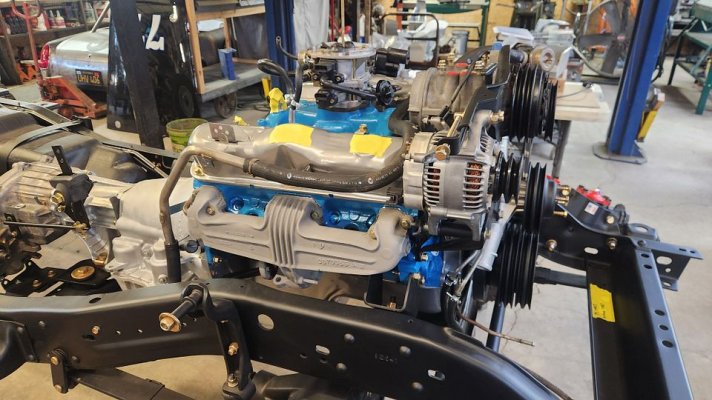
Pics. You'll notice the hardware, which is gold zinc, not rust red. You'll also see the exhaust manifolds, which were covered in Cerakote Titanium.

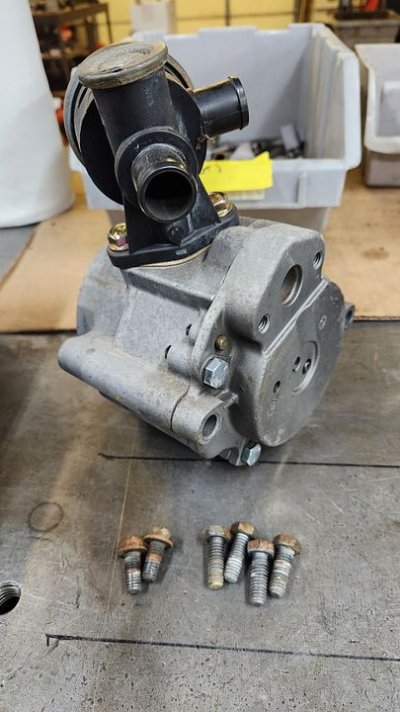
One other thing worthy of note is the mix of metric and SAE hardware. The air injection and power steering pumps use metric hardware, as does the A/C compressor, while everything else (mostly) is SAE.


c0886722-e36b-41f9-abdd-b8349c3ae101.jpg

d5978129-2654-49ad-8434-ff73e9b5dc2c.jpg
 

markabby

Senior Member
Joined
Feb 16, 2020
Posts
1,142
Reaction score
1,679
Location
Monticello, Kentucky
Ram Year
2020 Limited
Engine
5.7
in your earlier pics of the crack in the front spindle...could that not have been welded since it was so slight?

i'm totally impressed by the work you're doing! I looked at every picture. Nothing beats a meticulous frame off restoration.
 
OP
OP
Stoffregen Motors

Stoffregen Motors

Senior Member
Joined
Feb 27, 2025
Posts
104
Reaction score
168
Location
Cool, CA
Ram Year
2003
Engine
5.9 Cummins
in your earlier pics of the crack in the front spindle...could that not have been welded since it was so slight?

i'm totally impressed by the work you're doing! I looked at every picture. Nothing beats a meticulous frame off restoration.
Thank you. You're right. Frame off is the only way to get clean work done.
Re, the spindle - If it were an obsolete part, I still wouldn't have welded it because welding would destroy the heat treating. Luckily for us, it's a Dana 44 part, and relatively easy to find, once I knew what to look for. If it were for a 1929 Rolls Royce, yeah, we would have been in trouble.
 
OP
OP
Stoffregen Motors

Stoffregen Motors

Senior Member
Joined
Feb 27, 2025
Posts
104
Reaction score
168
Location
Cool, CA
Ram Year
2003
Engine
5.9 Cummins
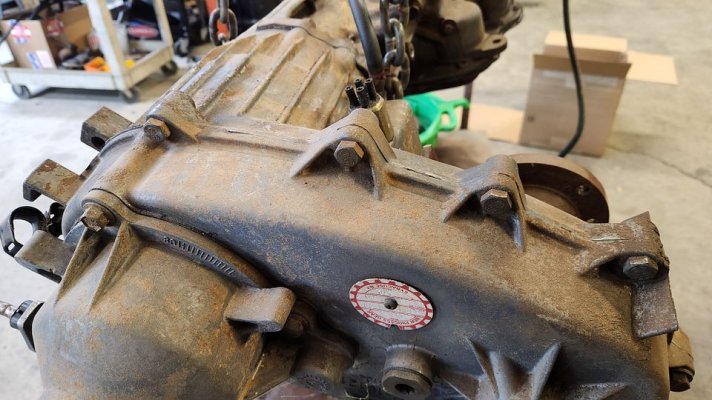
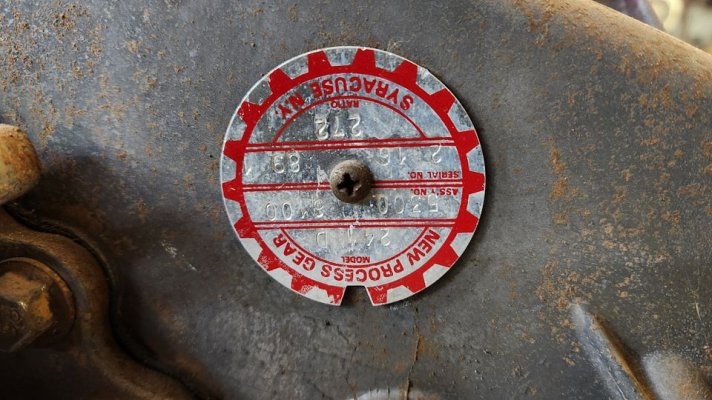
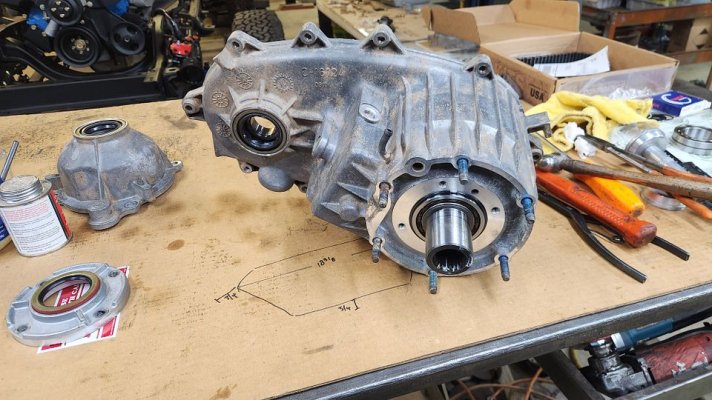
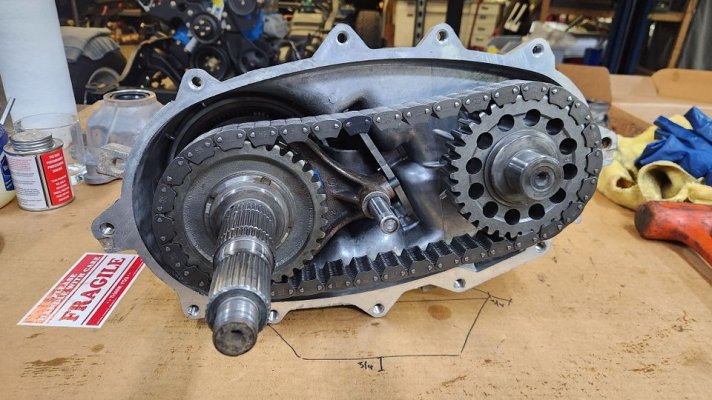
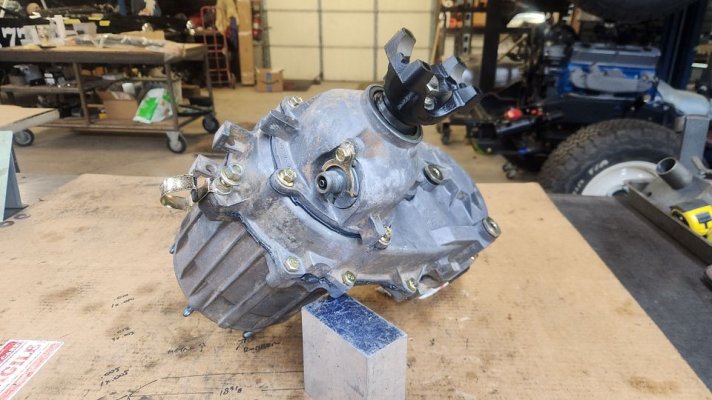
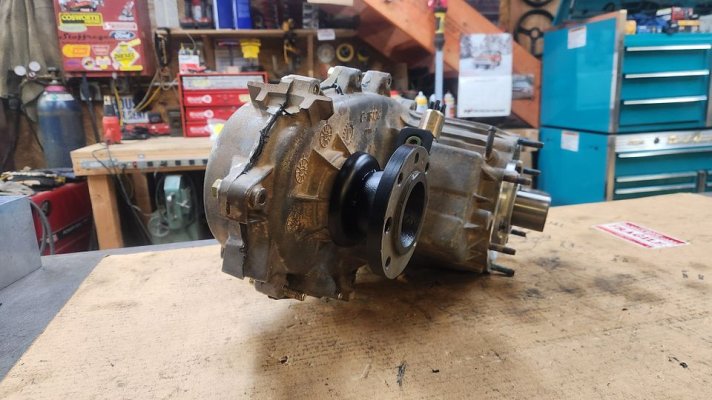
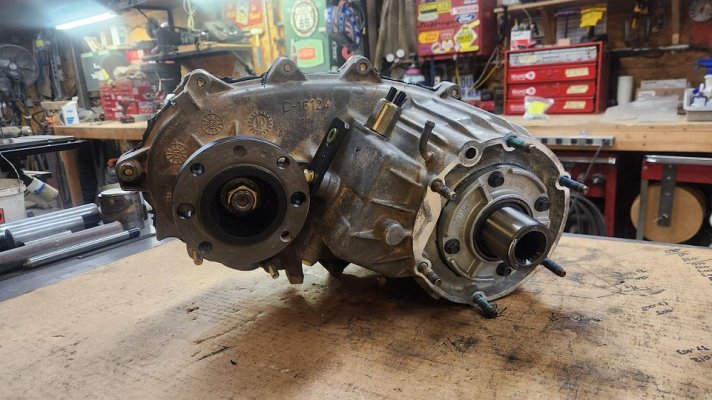
Rebuilding a chain drive transfer case is not very difficult. My 12 year old son could probably handle that job, but finding parts is not always easy. After three attempts at getting a full rebuild kit, I ditched that plan and sourced the rebuild parts individually. Really all this case needed was a chain and seals, but I replaced a couple of the bearings while I had it apart.

1b12f6a2-7574-4e81-a800-cd53b1e6fc3d.jpg

a61cbcb4-b6f5-41da-921c-3e34617143ff.jpg

411f4c10-ca99-451d-b75f-66e9a1be55f0.jpg

a559e1b4-249e-4362-80a6-739863eb76db.jpg

c442ffdc-f214-4c47-861d-1fb7084f96d6.jpg

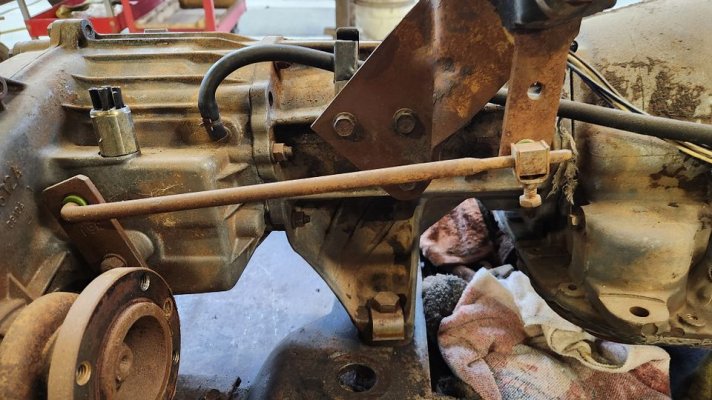
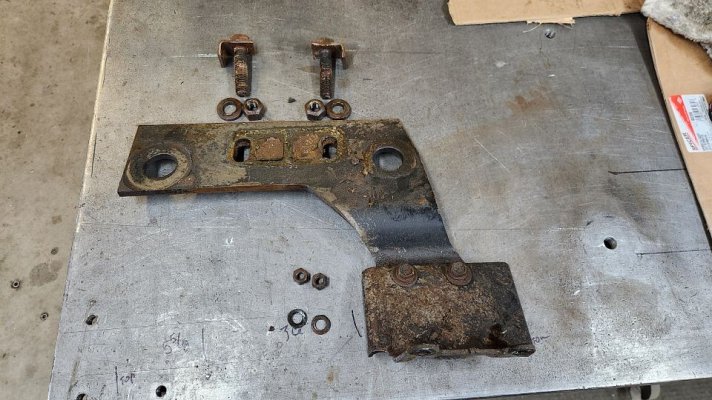
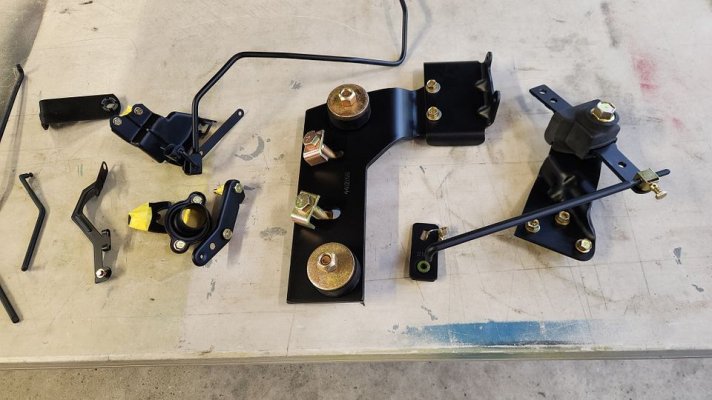
The trans mount system is again, pretty archaic, but the thick steel is one way Detroit made sure these vehicles will last forever.

8afcb081-4852-40c8-b001-99a0dc297c3c.jpg
 
OP
OP
Stoffregen Motors

Stoffregen Motors

Senior Member
Joined
Feb 27, 2025
Posts
104
Reaction score
168
Location
Cool, CA
Ram Year
2003
Engine
5.9 Cummins
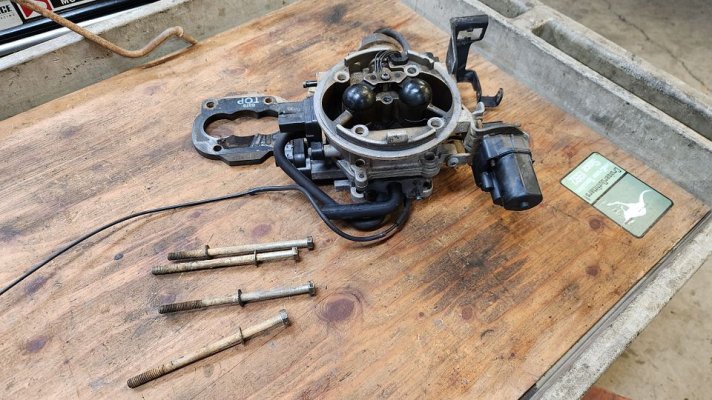
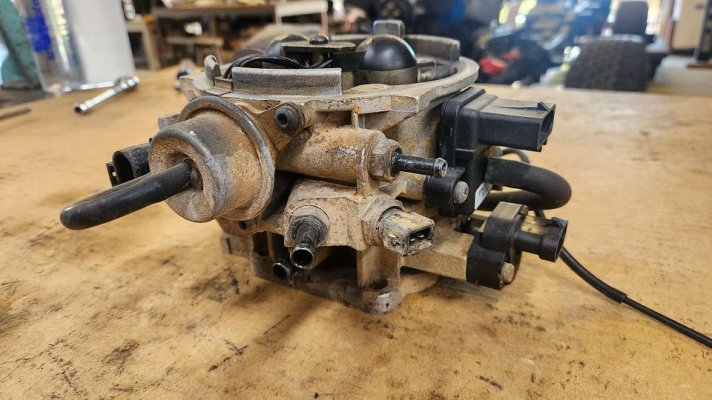
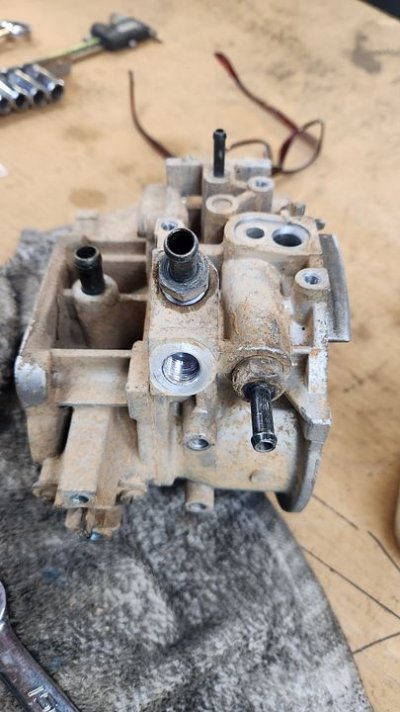
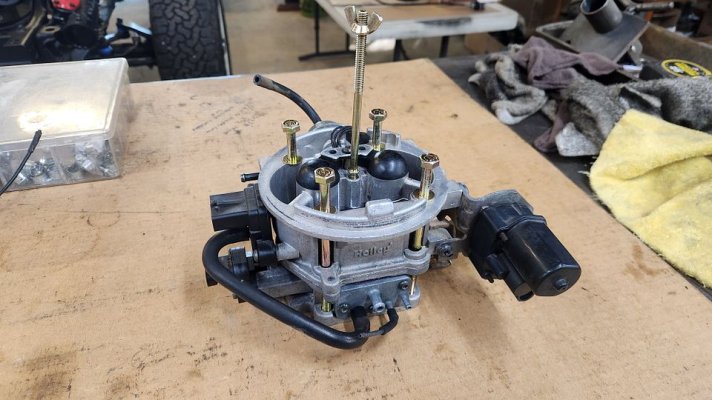
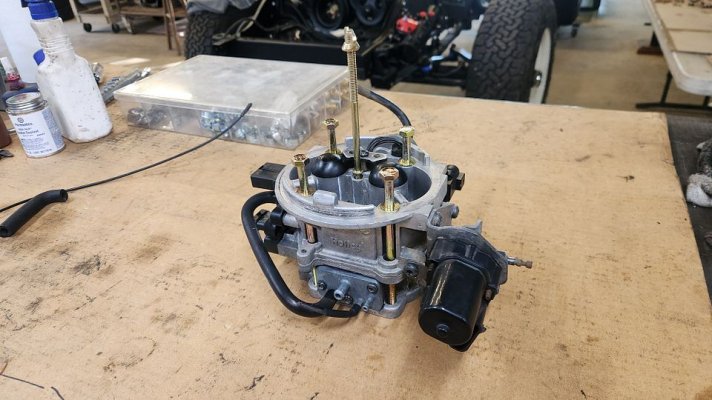
TBI fuel injection is basically just a fancy way of saying electric carburetor. I've never loved TBI, I mean, why replace an 830 CFM spread bore carb with a puny two barrel throttle body? Well, because it was mandated. I'd rather have a big four barrel carb...

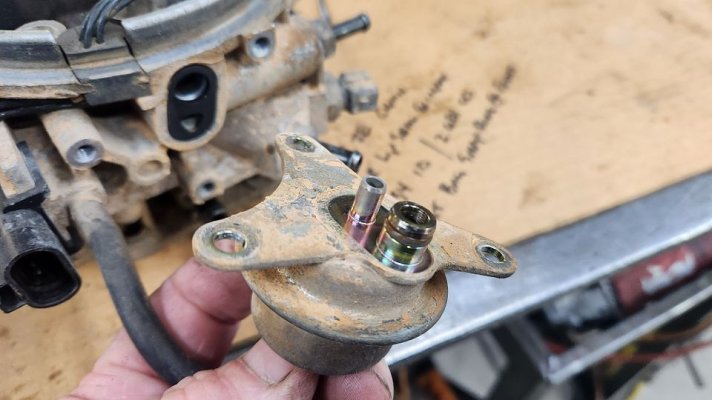
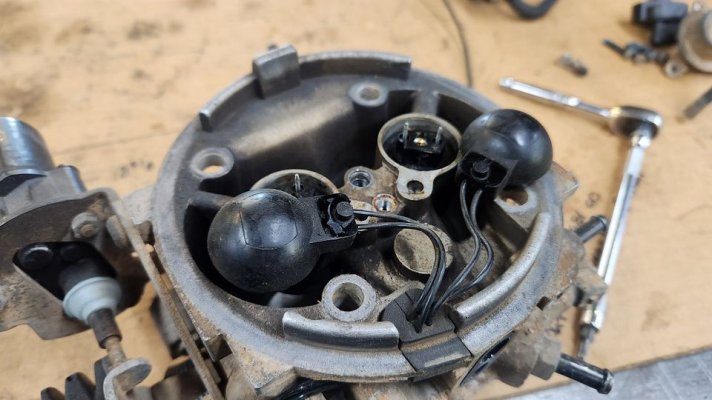
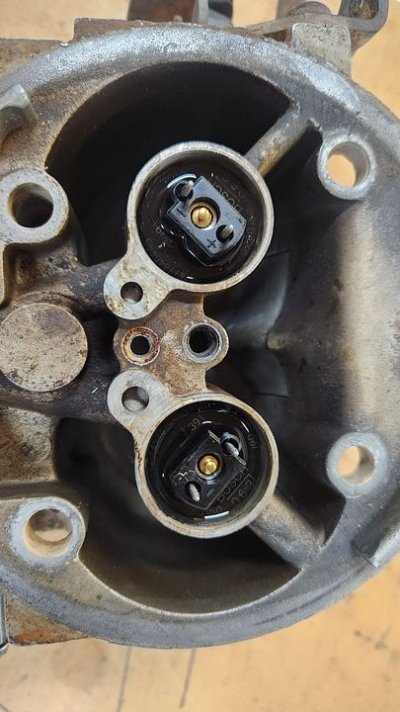
But here it is. The TBI, before and after. Not much to do here except a quick cleaning.

bf5ff25c-09d0-4f6c-9dfa-d68d83fb3189.jpg

492edee2-e3b3-4632-821d-7fde84bd94db.jpg

9f58e2b5-b97c-450c-bc67-de42c4efd9e4.jpg

d27a4208-9cca-4020-8223-91b4d79ace91.jpg

6165dcbc-cca7-482a-90de-4cc066dbede4.jpg

047da0e7-ca9d-4f04-b802-16c58a2c8e7d.jpg

ffe49e95-2f84-4eb9-a0dc-725174a3867a.jpg
 
OP
OP
Stoffregen Motors

Stoffregen Motors

Senior Member
Joined
Feb 27, 2025
Posts
104
Reaction score
168
Location
Cool, CA
Ram Year
2003
Engine
5.9 Cummins
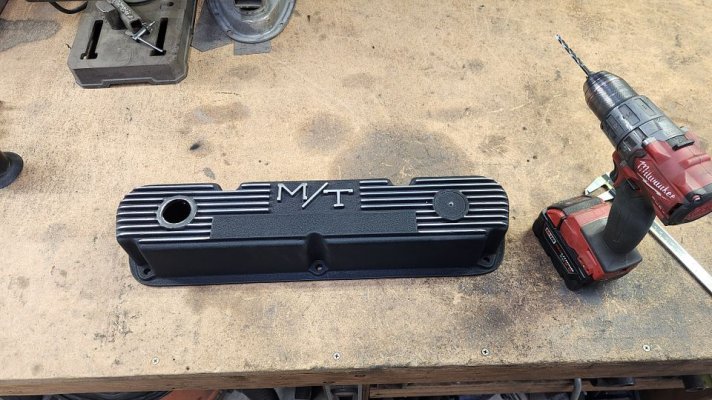
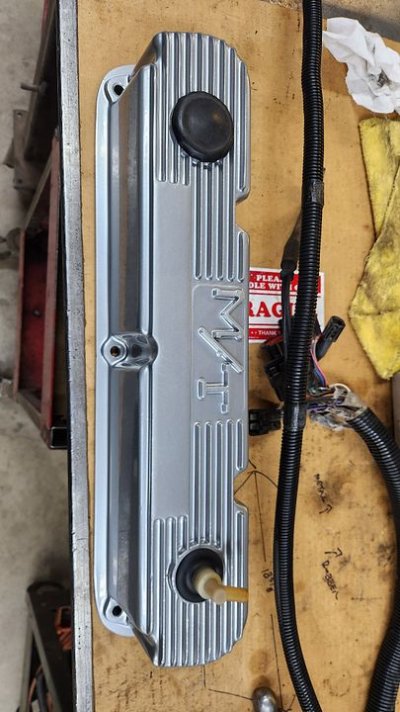
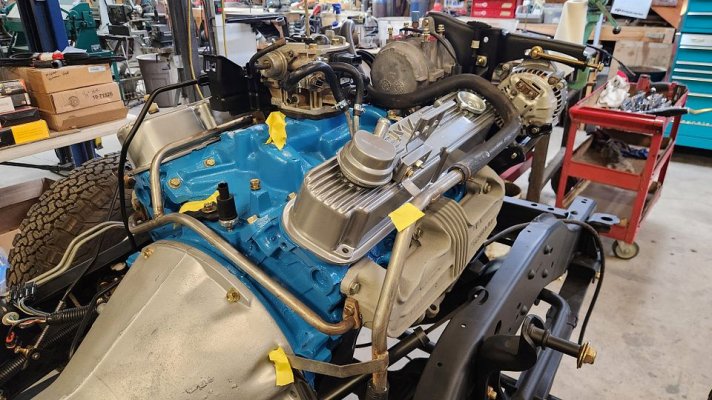
One mod the owners wanted to make was a simple one. Aluminum valve covers were sent to me from the father in law of the person who will be driving this truck as a surprise. The owners initials are MT and so is the script on the valve covers. It was a thoughtful gesture and meant to be a surprise, so I kept these pics to myself until given the all-clear.

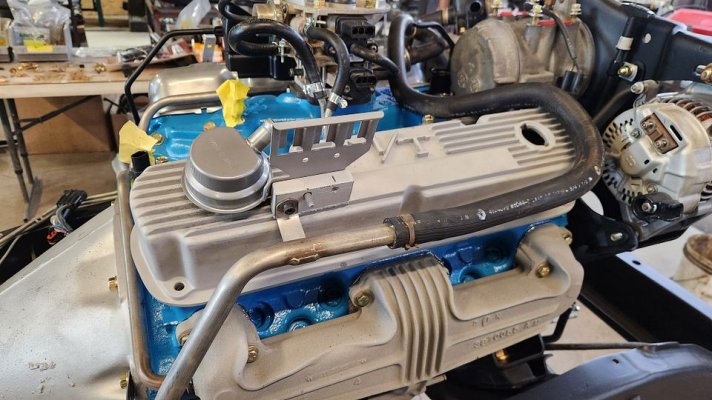
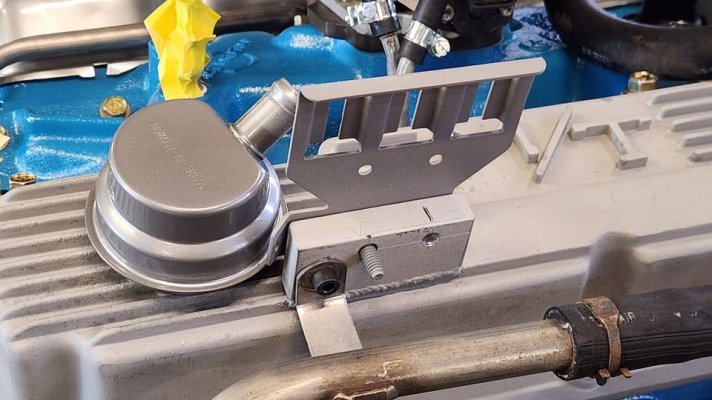
Steel valve covers are the one glaring black mark on the US domestic automotive industry. One word describes them. Leaky. Even with good gaskets, they need constant attention to keep the oil on the inside. Aluminum, on the other hand, is nice and rigid, and will hold the gaskets torqued more evenly. I did want to make a couple changes first to make them fit like the original steel covers. I machined a quick block of aluminum to mount the vacuum solenoids on the passenger side cover, which I then TIG welded in place. Then on the driver side cover, I cut a hole for the PVC, to relocate it to the back of the cover, where the original valve was located.

The grommets were solid without tears, but hard as rocks. Here's a quick tip that I hope you all pay attention to. When you have old rubber that's hard as a rock, let it soak overnight in a mixture of equal parts acetone and ATF. The acetone helps open the pores to allow the ATF to penetrate the rubber. The results are unbelievable. I literally didn't believe it the first time I tried it, but it does work.

With a new coat of Porsche silver and soft rubber grommets installed, so went the covers. I think it looks nice. And I hope the owner does too.

2a6e663f-26a9-4a3d-910b-06e04ada23a0.jpg

b1cc4cd4-adb2-4087-b38f-dc099500834c.jpg

35822291-67a1-4406-8e2b-894dd16dbaab.jpg

5314826f-6f6e-4349-9d09-2138fef646bd.jpg

be3fe5d5-8045-45b0-86cc-05a9acf75353.jpg

424f94a2-c875-4235-8d64-1cabc5ab6349.jpg

35df142f-d7f7-46ab-8668-87897c90972e.jpg
 
OP
OP
Stoffregen Motors

Stoffregen Motors

Senior Member
Joined
Feb 27, 2025
Posts
104
Reaction score
168
Location
Cool, CA
Ram Year
2003
Engine
5.9 Cummins
Ok, sorry for the delay. I've been busy in the shop building a Land Cruiser that I need to sell. Anybody want an LS3 powered FJ62?

Here's a small update while I compile more pics.

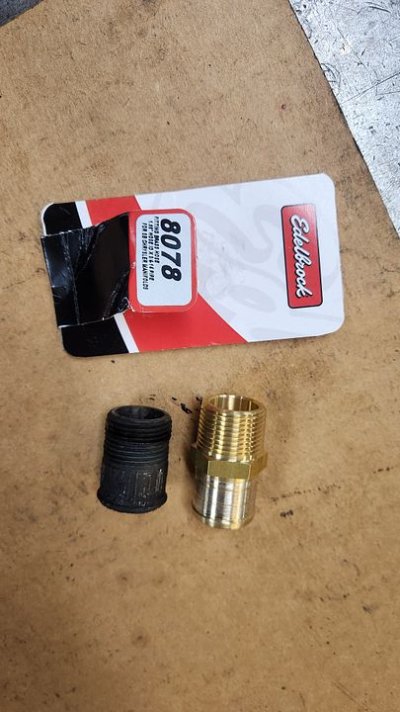
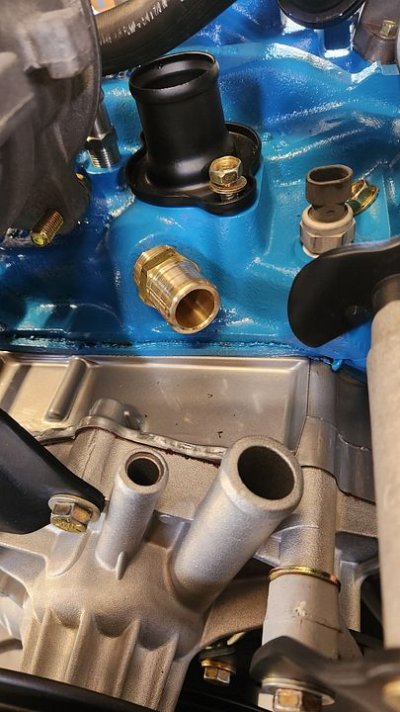
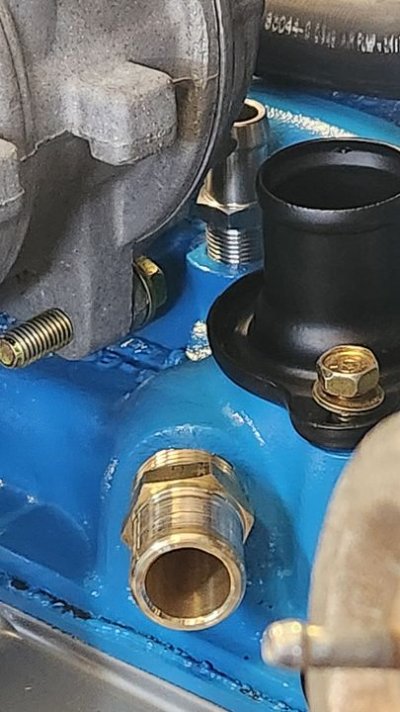
On the intake manifold, there are a couple of hose nipples that are pretty low quality, and tend to rot over the years. They are made of cast iron, so it's no wonder they wear out. After scouring the net for suitable replacements, I found the large one in brass, and the small one in stainless. Removal of the large nipple could have gone badly, but knowing that ahead of time, I applied a bit of heat to the area around the threads and I got lucky. It came right out. Then I made sure to chase the threads so the new one fit nicely, then secured it in place with some Threebond 1211 sealant.

Oh, I forgot to mention - the large brass nipple in the pic was quite long, and had too many barbs on it, so I chucked it up in the lathe and shortened it a bit and smoothed off all but the last barb. Barbed nipples make hose replacements a pain in the tuchus.

298c56d1-c63d-4a2b-9f71-f0c774220def.jpg

3096c316-2338-47cd-94a8-9f7f8f2fc8d8.jpg

11ff47e2-f846-4f6a-85ea-31a79322539e.jpg

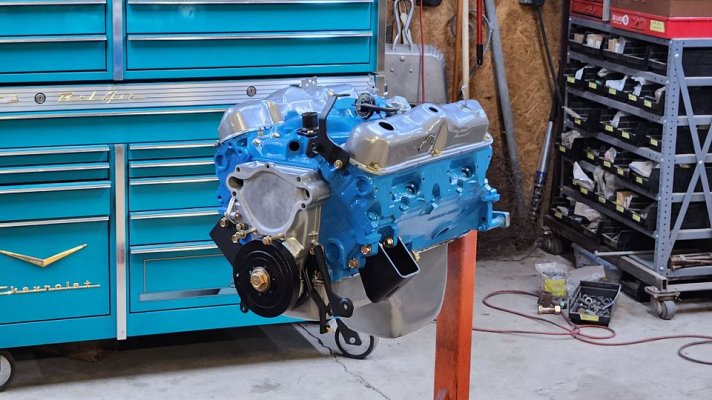
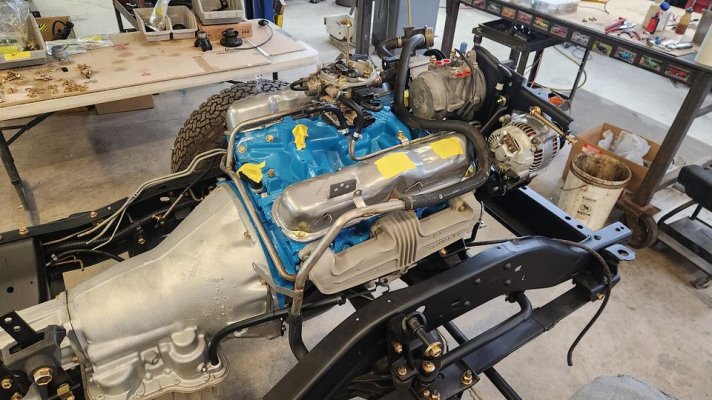
And here's a pic of the accessory drive, all done. It took a while to get it just right.

88a3241e-d512-4b7e-b75c-33203efa6757.jpg
 
Back
Top