BobSacomano
Senior Member
I was looking through my hard drive today and realized I took these pics last summer when I replaced the backup camera on my truck. I thought I'd share them for anybody who wants to take on the job in the future.
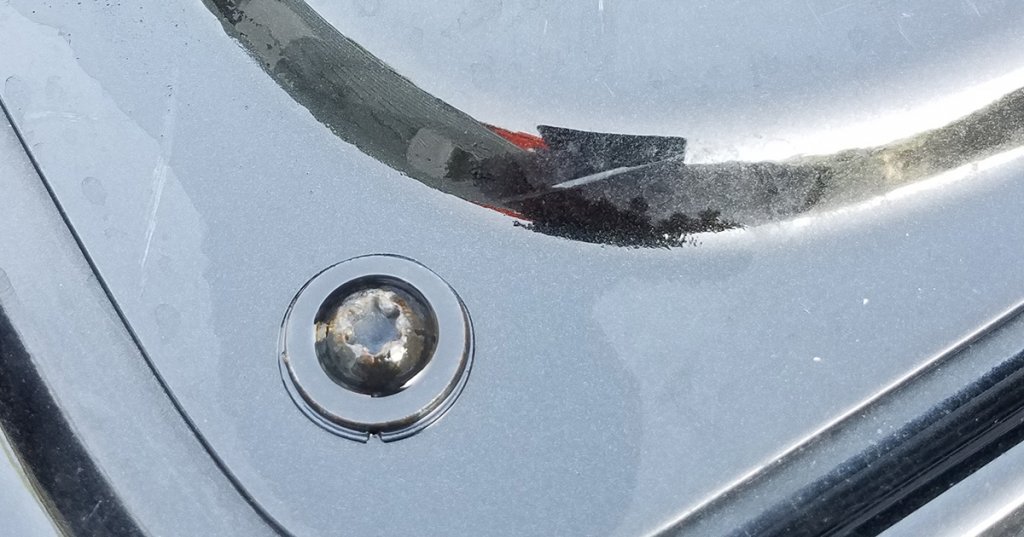
The view from the stock camera after five years of existence

Remove the tailgate access panel. Mine has Torx nuts.
This is the tailgate latch and handle assembly
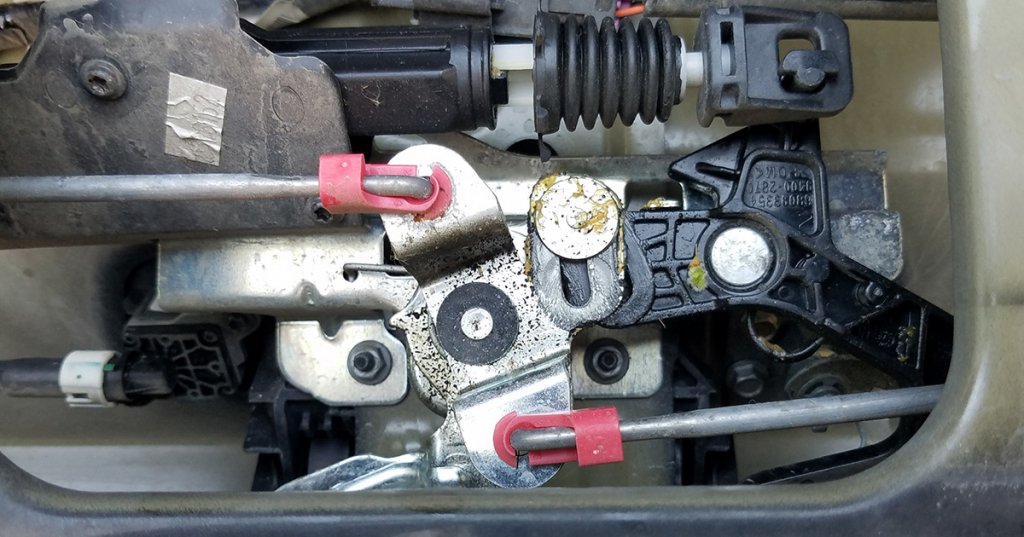
You need to remove the two 10mm nuts to allow the latch assembly to be lifted out of the way and the handle assembly to drop out.

I used a 10mm socket with an extension to reach them.
NOTE: You'll unclip the backup camera next, when you remove it from the handle (I don't have a picture of this). Make sure you familiarize yourself with how to release the clip, so you don't break it (like I did).
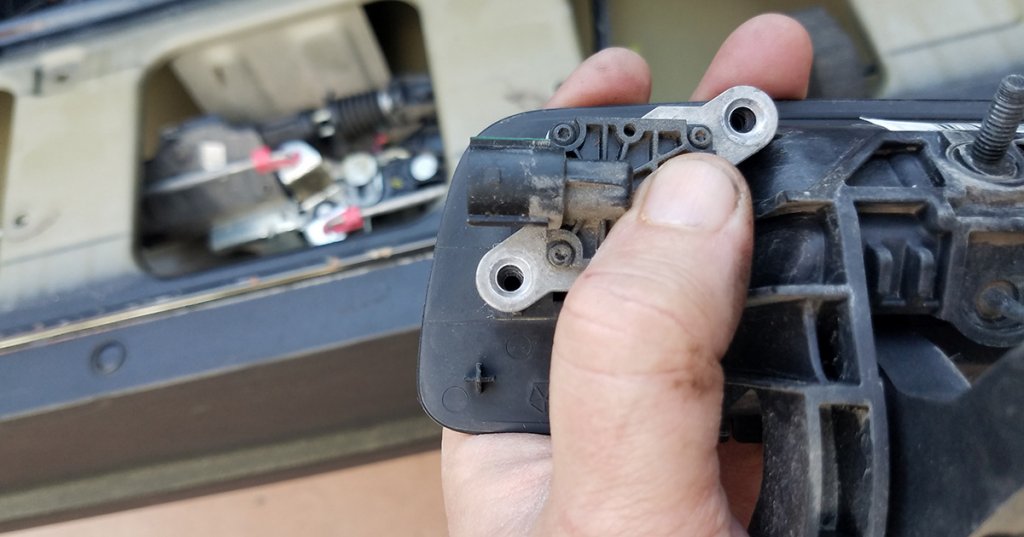
Once you've unclipped the old camera and removed it, it'll look like this.
A look at the old camera lens. Yes it was bad news.
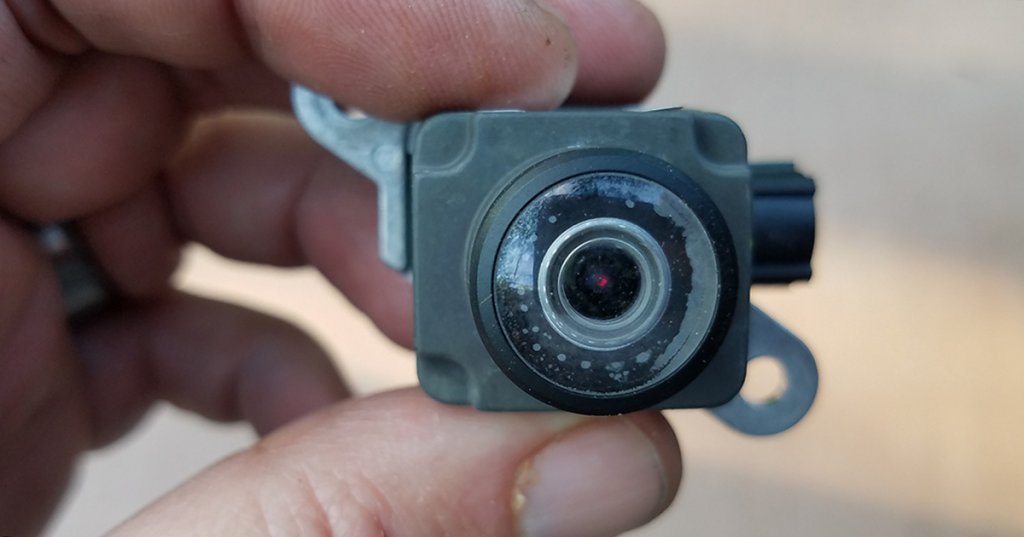
New Camera. I think it was $110 iirc

A better look at the new camera

Install the new camera in the handle assembly and connect the clip. Replace the handle assembly, the latch assembly, replace the two 10mm nuts, and close the tailgate access panel.
DONE
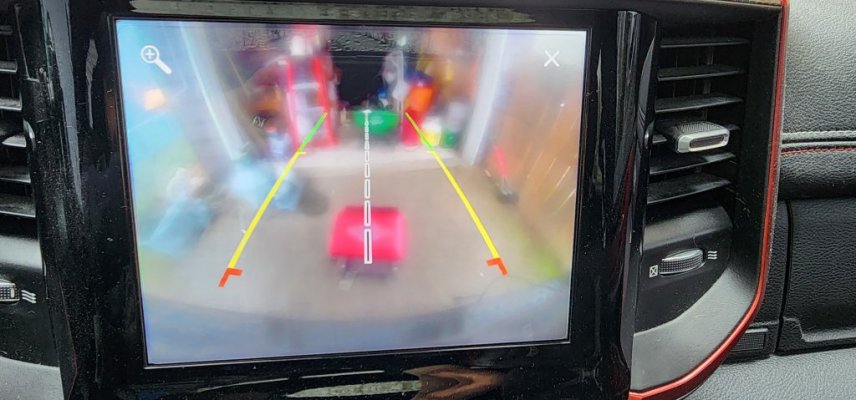
The New View. The picture doesn't do it justice. It's beautiful now.

SPECIAL NOTE: I had a problem getting the truck to recognize the new camera when I installed it. I got the dreaded BSOD, the blue screen of death. At the suggestion of someone here, I unclipped the camera, used some dielectric grease on the connection and replaced the camera. Problem solved.
The view from the stock camera after five years of existence
Remove the tailgate access panel. Mine has Torx nuts.
Access Panel
Remove the torx bolts all the way around your tailgate's access panel and remove.
This is the tailgate latch and handle assembly
The tailgate handle assembly
The tailgate mechanical latch assembly needs to be disconnected to access the handle and camera.
You need to remove the two 10mm nuts to allow the latch assembly to be lifted out of the way and the handle assembly to drop out.
Two Nuts
I used a socket wrench with an extension to get to the two 10mm nuts that allow the lathcing...
I used a 10mm socket with an extension to reach them.
NOTE: You'll unclip the backup camera next, when you remove it from the handle (I don't have a picture of this). Make sure you familiarize yourself with how to release the clip, so you don't break it (like I did).
Once you've unclipped the old camera and removed it, it'll look like this.
A look at the old camera lens. Yes it was bad news.
New Camera. I think it was $110 iirc
A better look at the new camera
Shiny new camera
I installed the new camera, reassembled the latch, and replaced the access panel cover in the...
Install the new camera in the handle assembly and connect the clip. Replace the handle assembly, the latch assembly, replace the two 10mm nuts, and close the tailgate access panel.
DONE
The New View. The picture doesn't do it justice. It's beautiful now.
SPECIAL NOTE: I had a problem getting the truck to recognize the new camera when I installed it. I got the dreaded BSOD, the blue screen of death. At the suggestion of someone here, I unclipped the camera, used some dielectric grease on the connection and replaced the camera. Problem solved.