Interior Mods, Post em up!

Disclaimer: Links on this page pointing to Amazon, eBay and other sites may include affiliate code. If you click them and make a purchase, we may earn a small commission.

gofishn

Senior Member
Joined
Sep 12, 2014
Posts
5,082
Reaction score
10,143
Location
Iowa
Ram Year
2022 Ram 1500 5th Gen, Big Horn, 4X4, Crew Cab, 6'4" Box
Engine
hemi 5.7L, 345 cu in
Covercraft UVS100, from amazon.
https://www.amazon.com/Covercraft-UV...eat+shield+ram


3A%2F%2Fwww.midwestshutterbug.com%2FRAM%2FDSCN0355.png


Edge to edge coverage and just a bit of a gap, right at the top.
My only Complaint is the visor is rather thick, so it shows indentations readily & easily.

That, and because it is so thick, it's hard to store.
Simply too thick to fit between fold flat floor and a lowered rear seat.
However, I found that if I unfold it, at the very center, just once, then it fits perfectly under my seat.


See the Fold Line, dead center, just under my Rear view Mirror?
Yeah. that's the one fold I leave open.
It is just about 18 inches wide, and slides under the seat, without getting any impression on the thing.


3A%2F%2Fwww.midwestshutterbug.com%2FRAM%2FDSCN0356.png
 

Hemi395

Senior Member
Joined
Mar 18, 2013
Posts
8,989
Reaction score
15,671
Location
Cape Cod MA
Ram Year
2013
Engine
5.7 Hemi

gofishn

Senior Member
Joined
Sep 12, 2014
Posts
5,082
Reaction score
10,143
Location
Iowa
Ram Year
2022 Ram 1500 5th Gen, Big Horn, 4X4, Crew Cab, 6'4" Box
Engine
hemi 5.7L, 345 cu in
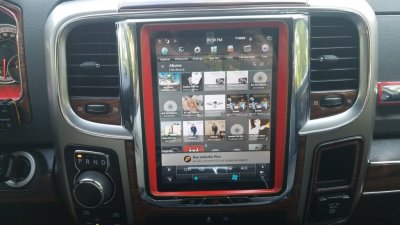
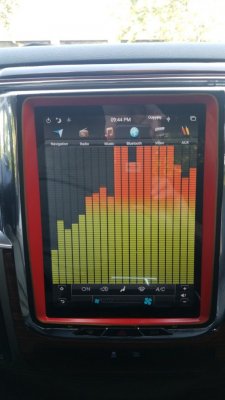
How did you get that huge radio, in a 2014?

Can't believe I got Radio Envy.... then again,never met anyone with a bigger one.
 

bruce219

Senior Member
Joined
Apr 28, 2016
Posts
529
Reaction score
285
Location
ca
Ram Year
2015
Engine
pentastar

DarthMegaHD

Senior Member
Military
Joined
Feb 24, 2016
Posts
895
Reaction score
1,038
Location
Henderson, NV
Ram Year
2016
Engine
Hemi 6.4 MegaCab 4x4 Black Edition
On my 2018 2500 CTD: First was adding an overhead console with the homelink buttons and a rear window slider switch:

medium800.jpg


Then added a leather steering wheel with the stereo controls:
medium800.jpg


Then a Z-Automotive Security bypass module so I could program the truck with AlfaOBD:
medium800.jpg


Then upgraded to a UAQ stereo:
medium800.jpg


And last but not least, added the storage drawer since RAM didn't want to on trucks with floor shifters:
medium800.jpg
How much were your upgrades?
 

Midnight Storm

One Badass Ram
Joined
Apr 27, 2019
Posts
1,184
Reaction score
1,251
Location
Victoria, B.C Canada
Ram Year
2016
Engine
Hemi 5.7
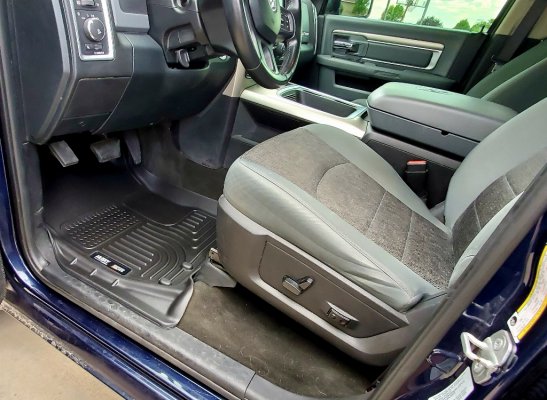
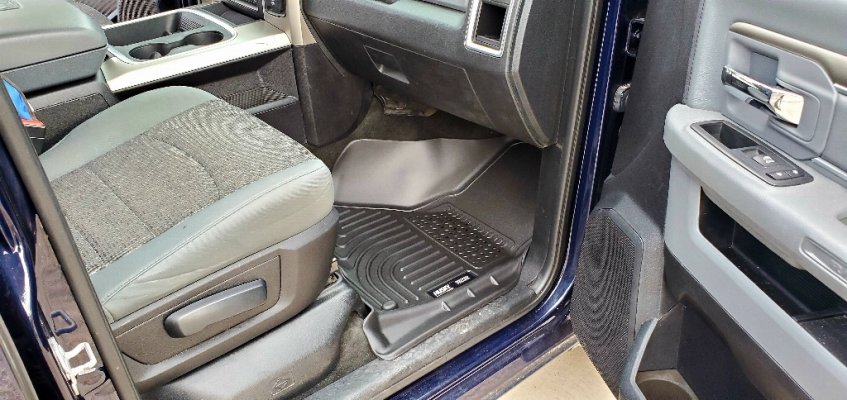
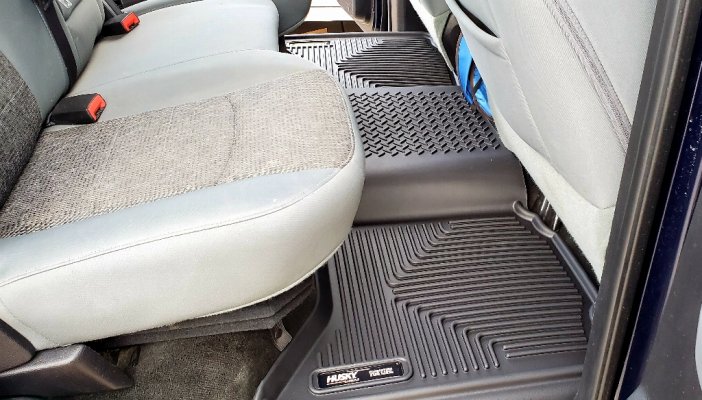
Husky X-act Contour Floor Mats


Grab the mat, fold it over the rear floor hump and open the floor storage lid .

Another great thing about these mats is how I do not slide around, when my boots are covered in whatever. They grip much better than my buddy's Weathertechs.

NOTE: my black mats are pretty black, just slightly less dark than my black carpet.
The pics have been highlighted, so everyone can see the mats, better.
Color is not accurate.

p%3A%2F%2Fwww.midwestshutterbug.com%2FZ%2FIMG_2148.png


Now, take another look at the above image.
Notice that lifted edge, on the left side of the mat?
Runs across the open door sill?

That edge allows the mats to hold a ton of water and gunk.
If anything should get over it, which has not happened yet, the liquid just goes out the door,

Here is a closer look. that notch by the gas pedal is perfect for my foot.


p%3A%2F%2Fwww.midwestshutterbug.com%2FZ%2FIMG_2149.png


FYI, I am a Railroad Engineer. You can't begin imagine the stuff I haul in, on the bottom of my Industrial work boots.


p%3A%2F%2Fwww.midwestshutterbug.com%2FZ%2FIMG_2151.png


the rear floor mat is one piece. Notice how it too has a high edge, along the side, to hold in liquids?


p%3A%2F%2Fwww.midwestshutterbug.com%2FZ%2FIMG_2152.png


These are called the X-Act Contours and they meant it!
Notice how well it fits.


p%3A%2F%2Fwww.midwestshutterbug.com%2FZ%2FIMG_2153.png


Front passenger side Mat


p%3A%2F%2Fwww.midwestshutterbug.com%2FZ%2FIMG_2157.png

See how the floor Hooks go underneath the mat?
No Holes for anything to drain through, onto the carpet.
Real important, for me. Could be gunk on the ground, year round, where I work, not to mention, all the darn Snow.

Best thing about these Mats? There are pretty pliable, for being so thick and I can easily take out a Mat, full of watery Goo and dump it on the ground. Not my Carpet.


--------------------------------------------------------------


MOPAR OEM Part # CEC1MO71AA Under Hood Light Kit -$20


Seems this was a recall parts 'kit" , not a for retail sale kit, Chrysler whipped up for 2011-2013 Sport trucks that did NOT come with the under hood & glove box lights, but should have.

tp%3A%2F%2Fwww.midwestshutterbug.com%2FZ%2Fimg_222.png


The kit includes the under hood light assembly, with bulb. One push pin, to mount the light to the hood itself, 2 replacement retaining clips, for the under hood mat, the wiring harness AND one glove box light assembly.


Just pop off the two clover leaf looking clips holding the under hood mat to the bottom of the hood. ( I got by with just popping of the one but the kit comes with two new clips).

Slide the mat from underneath the retaining thingy.


p%3A%2F%2Fwww.midwestshutterbug.com%2FZ%2FDSCN0208.png


Remove the bulb from the light assembly.

Mount the light assembly, with the included push pin.
When mounting the light, have the "plug in" End of the light assembly pointing up.

You can't mess it up, there is a hole and a slot, on the hood, that matches up with the back of the light itself.

Plug in the wire harness. It has two ends but only one end of it will fit the light assembly itself. It's Gofishn Proof.

Wrap from top, down the side of the mounted light assembly.


You will notice clips, on the wiring harness.

Those clips match up perfectly with holes in the hood.
Just follow them along to the hood support.

Took me about 5 minutes to do it.
Getting the bulb out of the light, so I could mount the assembly to the hood,
took me longer than anything. Was worried I would break it.

Remove the Blank Filler plug, from the electrical connector you will need.
Plug in your new light.


p%3A%2F%2Fwww.midwestshutterbug.com%2FZ%2FDSCN0204.png


I was not really that impressed with the amount of light the OEM bulb gave me.
Even at night, it was Weak, Whimpy, Whambly, Whombly. So I replaced it with this one.


oads%2F578-led-can-bus-bulb-1-smd-led-festoon-44mm.png


Got it here.

https://www.superbrightleds.com/mor...us-bulb-1-smd-led-festoon-44mm-car/1264/2937/


--------------------------------------------------------------------------------------
With that underhood bulb, you could start a “best mods under $1.00” thread.
 

Bennyrok

Senior Member
Joined
Apr 11, 2019
Posts
164
Reaction score
222
Location
Tewksbury mass.
Ram Year
2014
Engine
5.7L HEMI
What did you use for this? I've been looking for something to do with the upper glove box...
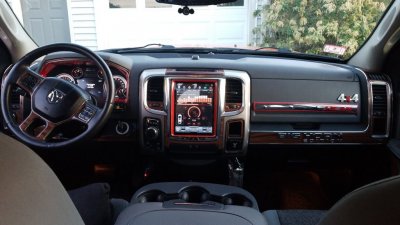
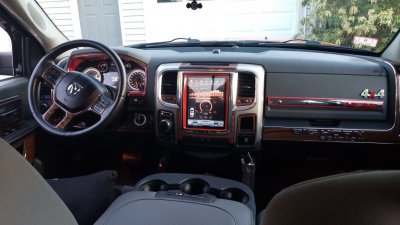
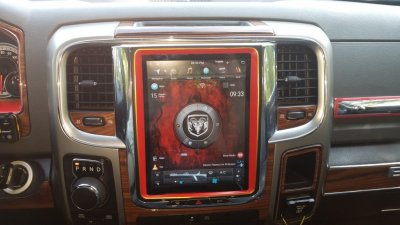
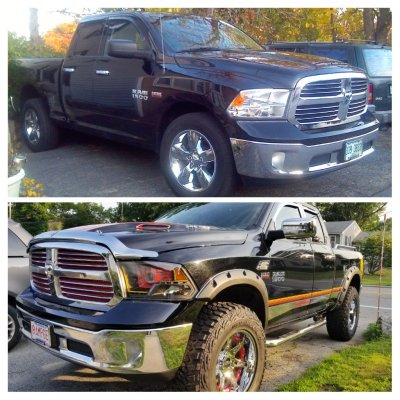
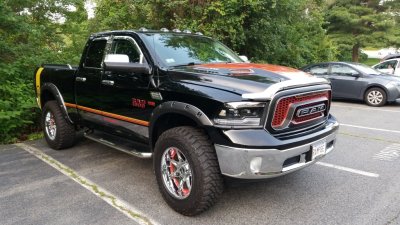
Thanks guys! Yea it takes a lot of patience and crazy ideas, including failures but I still take the chance anyway, reason being you can pretty much change almost anything out on these trucks. I did the glove box with wide chrome strip I bought at autozone, and I traced the outside of it with red pinstripe, and inside the red pinstripe I stuck in a little red hemi logo I bought from ebay or amazon. Above that I used a 4X4 emblem I also bought at autozone or wallmart and taped off the #4s and sprayed the X red. The radio or head unit is a tesla style aftermarket job, I hate to say it but its not worth all the trouble to make it look like that. I've got days worth of work into it witch includes the programing and the look of the bezel surrounding it.
What did you use for this? I've been looking for something to do with the upper glove box...
Hi guys! thanks for the compliment! The answer is, I bought some chrome wide stripping, red pinstripe, and a 4X4 emblem from Autozone/ Wallmart, I cut the stripping to size, traced it with a single pinstripe and painted the X symbol red with spray-paint. It all stuck on with double sided auto tape. As for the Tesla style head unit? It looks really cool! but its a real pain to operate while driving. I also added all the programs to it from friends on this board, witch was also real pain in the ass, if you've got the time, and patience, it really makes the interior look great. the tesla allowes you to load videos, pic slideshows, music live concerts and so on. BUT the drawback is its in you're best interest to make sure everything is set before you start driving. Ben :)1 dash.jpg 2 truck.jpg 3 truck.jpg
 

Steve Cloud

Senior Member
Joined
Aug 8, 2019
Posts
409
Reaction score
261
Location
Louisiana
Ram Year
2016
Engine
5.7 Hemi
I never understood that. What is the point of a mat like that with holes ? That’s why I like my husky liners. Maybe people that don’t experience snow a lot or salt 6-7 months a year they don’t see that being a problem lol. But boots full of slush and salt equates to a lot of salt water in that area. I’m careful and even with my mats salt gets on the carpets but these would not work. They seem to cover more area but those holes make them useless IMO. Like putting in a boat plug then drilling holes in the bottom lol


Sent from my iPhone using Tapatalk

I agree. Part of the reason I've gone with Husky mats in our vehicles. What good does it do to have something to catch water, dirt, etc., when there's a hole there to let it drain or fall into the carpet?
 

Steve Cloud

Senior Member
Joined
Aug 8, 2019
Posts
409
Reaction score
261
Location
Louisiana
Ram Year
2016
Engine
5.7 Hemi
So far, only interior mods have been replacing one of the vents that had broken fins, and then adding these floormats

kjIzMDa.jpg

GUs99aN.jpg


coxaEKg.jpg
 

kp4243

Senior Member
Joined
Sep 18, 2018
Posts
197
Reaction score
85
Location
NC
Ram Year
2017
Engine
3.6
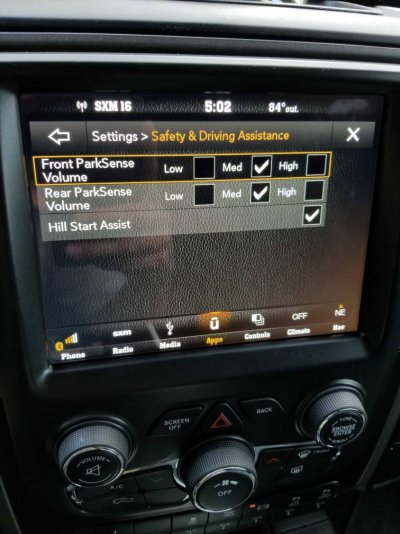
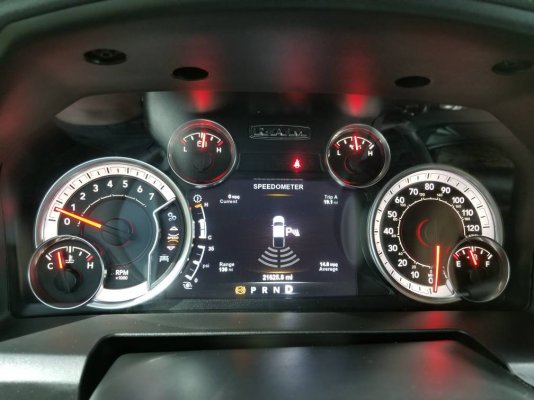
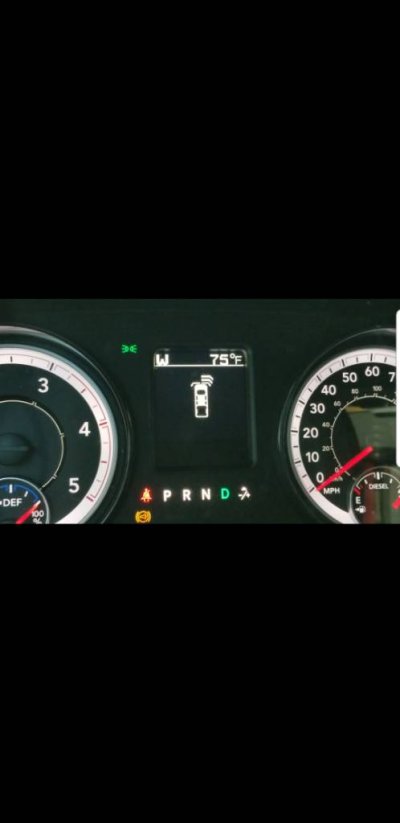
I added OEM front Parksense and installed the entire front system over a month ago working complete as if factory even with my 3.5" basic dash cluster. My truck came factory with rear Parksense and it is a 2017 Ram 2500 6.7 Tradesman. Everything works flawlessly but I just installed a gas 7" MY18 EVIC gauge cluster today and the front sensors will give the audible tone and it will show the rear sensors while approaching something in front of the vehicle but it does not show the front 'distance' lines for the front park sense. Only the rear. Again right before I swapped the cluster my factory MY17 3.5" EVIC would display both front and rear sensors distance lines. Before I enabled the front Parksense and only had rear Parksense I was able to choose if I wanted rear sensors displayed or just the tone and now that I have the front Parksense I cannot choose to display or not to display but with the 3.5 it always displayed both. Odd to me that just with the install of the premium evic it will not display front. Anyone have any ideas? 630bf1698d6024806db366bdff6a8c20.jpg02ba07f64e59dcec62fba08e1da7acaf.jpgf523e8799e8a2ab0739cfdae764a4c51.jpg

Did you purchase a new bumper with the holes for the sensors? Or did you drill the holes and add them? Chrome bumper or painted? What was involved in the wiring?
 

kp4243

Senior Member
Joined
Sep 18, 2018
Posts
197
Reaction score
85
Location
NC
Ram Year
2017
Engine
3.6
The module makes it come on automatically when truck is moving forward and under 10mph. And there’s a toggle switch I can view either camera whenever I want

View attachment 169683

The toggle is just switching between views correct? Wonder if there is a way to access the cameras any point other than just ten mile an hour or less?
 

22hemi13

Senior Member
Military
Joined
Mar 20, 2013
Posts
3,805
Reaction score
5,795
Location
Tucson AZ
Ram Year
2014 2500 4x4
Engine
5.7
The toggle is just switching between views correct? Wonder if there is a way to access the cameras any point other than just ten mile an hour or less?
Yeah. I can view either camera at anytime. I can turn front on and it’ll stay on. Which is on always once I’m on dirt. Or I can manually turn it to rear. If toggle is in off position front comes on under 10mph automatically and rear comes on in reverse like normal.
 

Bennyrok

Senior Member
Joined
Apr 11, 2019
Posts
164
Reaction score
222
Location
Tewksbury mass.
Ram Year
2014
Engine
5.7L HEMI
Their are a lot of vids out their to help install the head unit and get it to work, It's pretty much plug and play. Its all the added extras that get somewhat complicated. like finding the right launcher to help aid in the overall look of the unit, how to change some of the settings. I found Big Daddys House on u tube to be extremely helpful, in fact he's the one that helped me get it to do everything it's doing. Definitely look that up and you should be a pro at getting it to do what you want it to do. Of course you may like the way it looks right out of the box. to each their own. Good luck with the endeavor.
 

bruce219

Senior Member
Joined
Apr 28, 2016
Posts
529
Reaction score
285
Location
ca
Ram Year
2015
Engine
pentastar
dash 1.jpg

dash 2.jpg

dash 3.jpg

dash 4.jpg

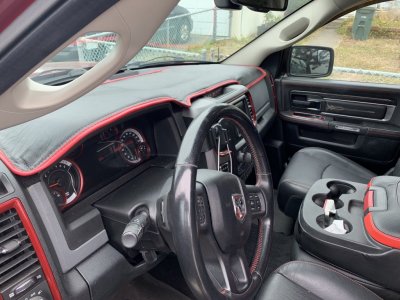
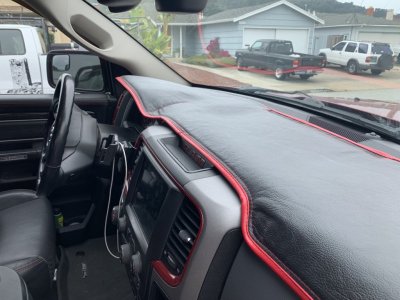
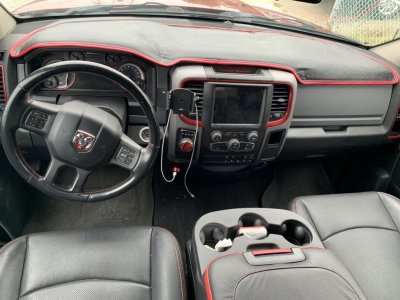
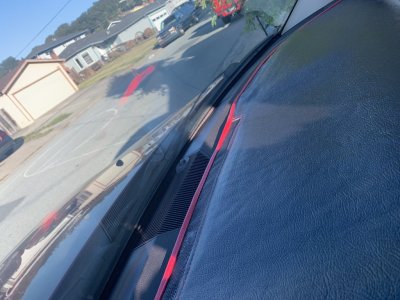
Got a guy to make me a leather dash mat which is velcro'd down.Truck also is an express with a lot done.Also installed amp and swapped out all speakers this week and used the 4ohm resistors on front dash speakers to balance them with rest.
 
Last edited:
Top