- Joined
- Mar 30, 2014
- Posts
- 6,588
- Reaction score
- 5,202
- Location
- SC
- Ram Year
- 2022 Ram 1500 (5th Gen)
- Engine
- 5.7L
DISCLAIMER: I am not a coder, developer, software guru, electrical engineer, etc. but I did sleep at a Holiday Inn Express once!
With that said, all vehicle/electrical mods are at your own risk. Now have fun!
First I want to thank @1500ram12 and many others for their initial work:
- 1500Ram12's: Adding foglights to 2013+ tradesman/slt (2500 bumper parts listed here)
. . . . . and 2013-15 fog lights
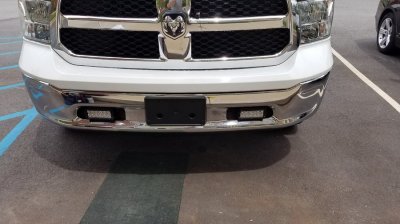
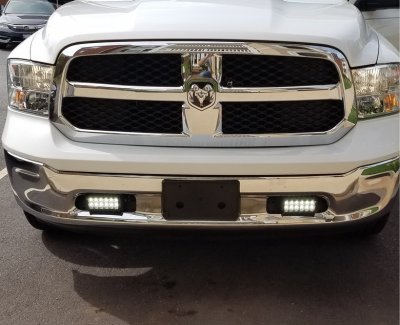
- Swine's: LED light bars in bumper (tow hook Location)
I've gotten more than a few requests for a harness to work with the OEM Mopar Foglight Jumper harness in the bumper for 2013-2017 trucks so after a few test installs and 20+ hours of picture and instruction edits here it is:
--------------------- Required Parts (2013-18/Classic) --------------------------
** 19+ Classic Warlock owners see POST 147 for Warlock specific parts, (H11 bulb harness) & AlfaOBD programming steps
01. Foglight Extension Harness (Year and Model specific)
Contact M2 Mods
02. Mopar Foglight Jumper Harness (Year and Model specific)
Contact Preferred Vendor Benny at AllMoparParts.com (or similar online parts store).
- 68154309AA : 13-18/Classic Ram 1500’s with 1pc bumper
(“Vertical” 9006 Foglight bulbs with Sgl Keyed/1 groove connector)
. . . or
- 68197065AA : 13-18/Classic Ram 1500’s with 2pc bumper
(“Vertical” 9006 Foglight bulbs with Sgl Keyed/1 groove connector)
. . . or
- 68046303AC : 10-18 Ram 2500/3500's with 2pc bumper (ALL)
(“Horizontal” 9145/9005 Foglight bulbs with Dbl Keyed/2 groove connector)
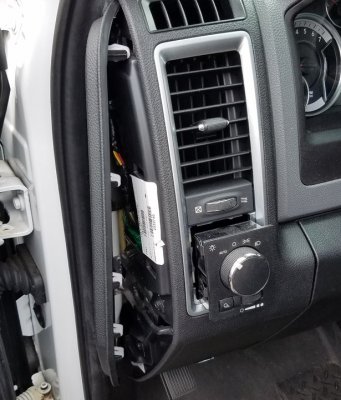
03. Mopar Headlight/Foglight Switch
Contact Preferred Vendor Benny at AllMoparParts.com (or similar online parts store).
- 68269912AA : 13-18/Classic Ram 1500/2500/3500
(Replaces: 68189154AA, 68146507AA)
04. Extra “Fir Tree” style zip ties (Recommended - 2 included with M2 MODS harness)
- eBay Link
------------------------- THREAD LINKS ----------------------------------
- Post 2-6: 13-17 Ram 2500/3500 & 14-17 Ram 1500 Foglight Wiring Install
- Post 7-11: 2013 Ram 1500 (ONLY) Foglight Wiring Install
- Post 14-15: AlfaOBD & AE Tool Programming notes (vs Dealer Activation)
** DeereGuy (M2 MODS/KaodTech): In case anyone with a 2018+ RAM would like to make changes to their truck, we have a security bypass harness that will let alfaOBD and other tools work with the 2018s & up. SEE HERE.
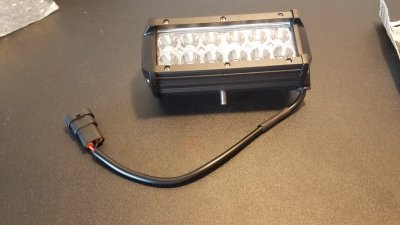
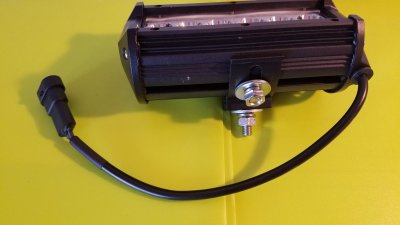
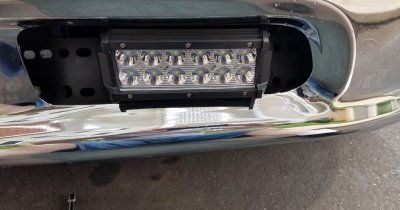
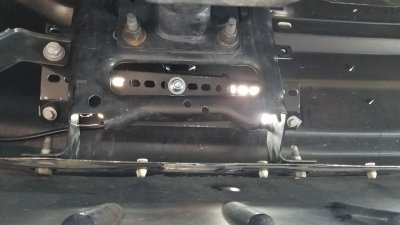
- Post 18-21: Mpgrimm2's aftermarket LED Foglight Pod tow hook location install
- Post 23: Troubleshooting Notes
- POST 90-95: 2009-2012 Foglight TIPM/Install Notes from others!


With that said, all vehicle/electrical mods are at your own risk. Now have fun!
First I want to thank @1500ram12 and many others for their initial work:
- 1500Ram12's: Adding foglights to 2013+ tradesman/slt (2500 bumper parts listed here)
. . . . . and 2013-15 fog lights
- Swine's: LED light bars in bumper (tow hook Location)
I've gotten more than a few requests for a harness to work with the OEM Mopar Foglight Jumper harness in the bumper for 2013-2017 trucks so after a few test installs and 20+ hours of picture and instruction edits here it is:
--------------------- Required Parts (2013-18/Classic) --------------------------
** 19+ Classic Warlock owners see POST 147 for Warlock specific parts, (H11 bulb harness) & AlfaOBD programming steps
01. Foglight Extension Harness (Year and Model specific)
Contact M2 Mods
02. Mopar Foglight Jumper Harness (Year and Model specific)
Contact Preferred Vendor Benny at AllMoparParts.com (or similar online parts store).
- 68154309AA : 13-18/Classic Ram 1500’s with 1pc bumper
(“Vertical” 9006 Foglight bulbs with Sgl Keyed/1 groove connector)
. . . or
- 68197065AA : 13-18/Classic Ram 1500’s with 2pc bumper
(“Vertical” 9006 Foglight bulbs with Sgl Keyed/1 groove connector)
. . . or
- 68046303AC : 10-18 Ram 2500/3500's with 2pc bumper (ALL)
(“Horizontal” 9145/9005 Foglight bulbs with Dbl Keyed/2 groove connector)
03. Mopar Headlight/Foglight Switch
Contact Preferred Vendor Benny at AllMoparParts.com (or similar online parts store).
- 68269912AA : 13-18/Classic Ram 1500/2500/3500
(Replaces: 68189154AA, 68146507AA)
04. Extra “Fir Tree” style zip ties (Recommended - 2 included with M2 MODS harness)
- eBay Link
------------------------- THREAD LINKS ----------------------------------
- Post 2-6: 13-17 Ram 2500/3500 & 14-17 Ram 1500 Foglight Wiring Install
- Post 7-11: 2013 Ram 1500 (ONLY) Foglight Wiring Install
- Post 14-15: AlfaOBD & AE Tool Programming notes (vs Dealer Activation)
** DeereGuy (M2 MODS/KaodTech): In case anyone with a 2018+ RAM would like to make changes to their truck, we have a security bypass harness that will let alfaOBD and other tools work with the 2018s & up. SEE HERE.
- Post 18-21: Mpgrimm2's aftermarket LED Foglight Pod tow hook location install
- Post 23: Troubleshooting Notes
- POST 90-95: 2009-2012 Foglight TIPM/Install Notes from others!
Last edited: