umbighouse Build Thread

Disclaimer: Links on this page pointing to Amazon, eBay and other sites may include affiliate code. If you click them and make a purchase, we may earn a small commission.

umbighouse

Senior Member
Joined
Feb 14, 2016
Posts
251
Reaction score
125
Location
Oklahoma
Ram Year
2020
Engine
5.7L Hemi
OP
OP
umbighouse

umbighouse

Senior Member
Joined
Feb 14, 2016
Posts
251
Reaction score
125
Location
Oklahoma
Ram Year
2020
Engine
5.7L Hemi
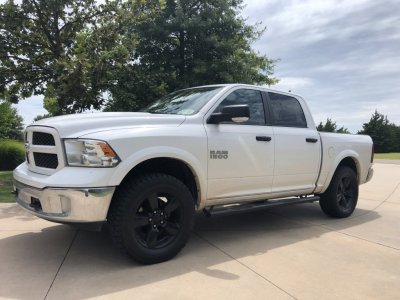
2.5" Front end level
One of the first things I did when I bought my truck was get the front end leveled. I went with a ~2.5" coil spacer kit. I can't remember the brand (not sure if Daystar or a different one). A 4x4 shop did the job for me.
Cost: $210 (installed)

IMG_6249.JPG
 
Last edited:
OP
OP
umbighouse

umbighouse

Senior Member
Joined
Feb 14, 2016
Posts
251
Reaction score
125
Location
Oklahoma
Ram Year
2020
Engine
5.7L Hemi
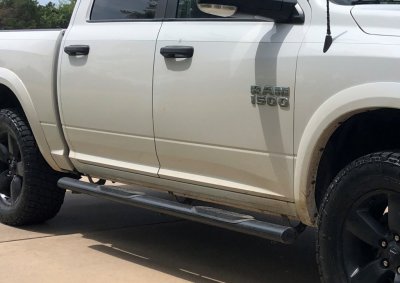
Oval 4" Step rail
Next step (literally) was to add a step rail to make it easier for in & out
Cost: $315 (installed)

IMG_6253.JPG
 
Last edited:
OP
OP
umbighouse

umbighouse

Senior Member
Joined
Feb 14, 2016
Posts
251
Reaction score
125
Location
Oklahoma
Ram Year
2020
Engine
5.7L Hemi
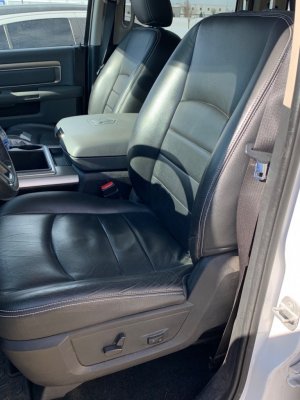
Leather seat covers
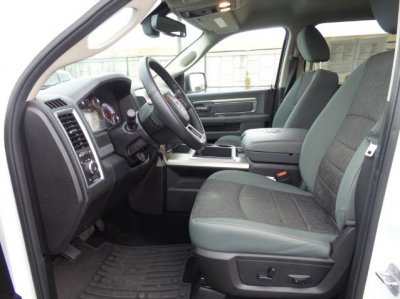
When looking for my truck, I had a tough time finding a match for all of the features I wanted. Once I widened my search to include cloth/upholstery seats, I found what I was looking for. I added leather seat covers, and you'd never know they didn't come from the factory. There was a book of different colors for the leather and the stitching.
Cost: $1,000 (installed)

For some reason, I didn't take any pix when these were first installed. This photo is 4 years later, and they're still doing great!

Before & After...
10.jpg Leather seat covers.jpg
 
Last edited:
OP
OP
umbighouse

umbighouse

Senior Member
Joined
Feb 14, 2016
Posts
251
Reaction score
125
Location
Oklahoma
Ram Year
2020
Engine
5.7L Hemi
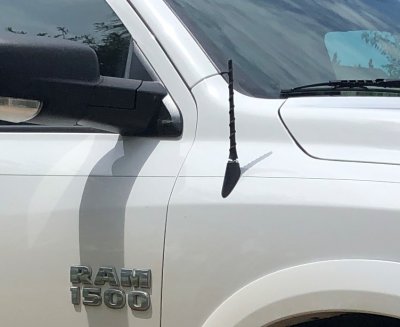
Stubby antenna
The stock radio antenna actually hit the top of my garage when I pulled in. I like the look of the rubberized stubby ones. This one came from O'Reillys Auto.
Cost: $20

IMG_6253.jpg
 
Last edited:
OP
OP
umbighouse

umbighouse

Senior Member
Joined
Feb 14, 2016
Posts
251
Reaction score
125
Location
Oklahoma
Ram Year
2020
Engine
5.7L Hemi
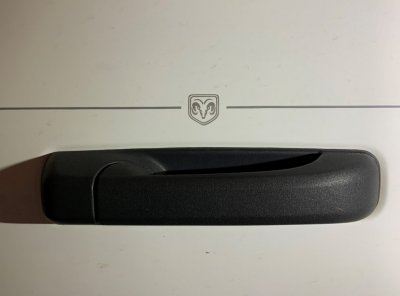
Pinstriping & Ram logo
My truck came to me as a blank slate- literally pure white! I added a single thin pinstripe with a Ram logo above the front door handles.
Cost:
Pinstripe- $12
Ram logo- $14

IMG_6766.JPG
 
Last edited:
OP
OP
umbighouse

umbighouse

Senior Member
Joined
Feb 14, 2016
Posts
251
Reaction score
125
Location
Oklahoma
Ram Year
2020
Engine
5.7L Hemi
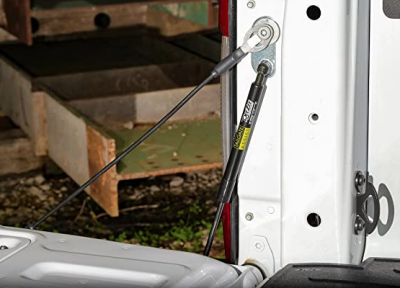
Tailgate assist
Such an easy & cheap way to save your tailgate. Easy to install- not sure why I didn't do this sooner.
Cost: $28

Screenshot 2020-12-13 071729.png
(Stock photo)
 
Last edited:
OP
OP
umbighouse

umbighouse

Senior Member
Joined
Feb 14, 2016
Posts
251
Reaction score
125
Location
Oklahoma
Ram Year
2020
Engine
5.7L Hemi
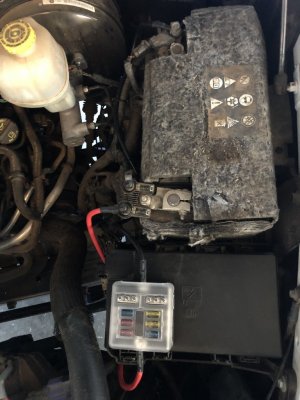
12V power distribution block
To avoid wiring all of my accessories directly to the battery, I installed this power block. I like this one because it has both positive & negative terminals included, a fuse for each circuit, and it will light up if a fuse goes bad (I tested this). Easy to install.

Parts:
6AWG red & black power cables
6 Way Fuse Block Blade Fuse Box Holder
Cost: $26

IMG_6734.JPG
 
Last edited:
OP
OP
umbighouse

umbighouse

Senior Member
Joined
Feb 14, 2016
Posts
251
Reaction score
125
Location
Oklahoma
Ram Year
2020
Engine
5.7L Hemi
12V accessory switch
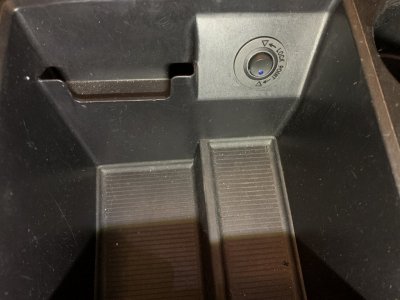
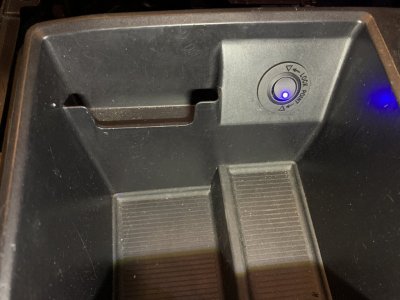
I wanted a switch inside the cab to control exterior grille lights. Things I had to consider were the power source and the location. For the power source, I decided to hijack the cigar lighter outlet inside my center console. This also played into the location, because by removing this outlet, it left a 1 1/8" diameter hole, which was perfect to fit in my round rocker/toggle switch. I decided to cap off the harness plug for the lighter, since I wasn't planning to use it. Rather than cut & splice those power wires, I wanted to keep it intact in case I ever changed my mind, so instead, I used some Positap connectors to tap the wires.

The power switch triggers a relay under the hood. This relay wire was the only one I had to route from inside to outside, but it was still a project in itself. I had to find a way through the firewall.

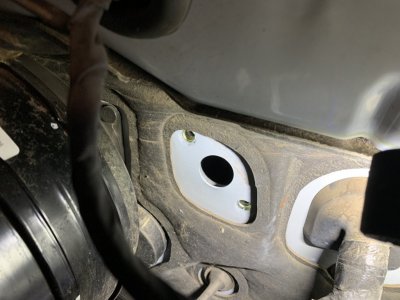
I used the (unused) plate lots of folks here recommend.
IMG_6743.JPG

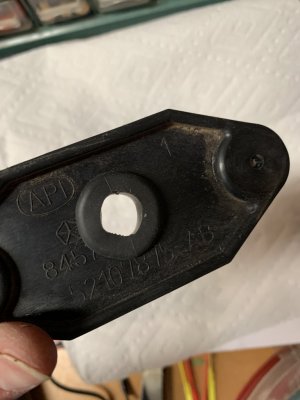
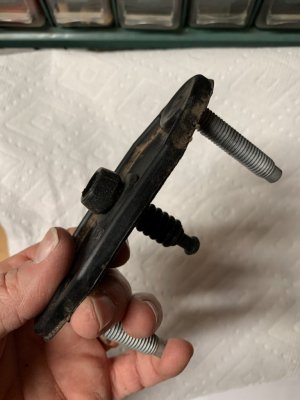
Removing it involved 2 nuts, and once out, I drilled a hole in it, added a rubber gromment, and then slid a rubber firewall boot into that to feed my relay wire through.
IMG_6745.JPG IMG_6746.JPG

Final results
IMG_6750.JPG IMG_6751.JPG

ps- if you don't have a trim removal kit, I recommend one for this kind of work.
https://www.amazon.com/gp/product/B01L8GHB7O

Parts:
Cllena Car Truck Rocker Toggle LED Switch Shell 3 Pins On-Off Control 12V (Blue Light)
Firewall boot
Rubber grommets
12AWG wire

Cost: $20
 
Last edited:
OP
OP
umbighouse

umbighouse

Senior Member
Joined
Feb 14, 2016
Posts
251
Reaction score
125
Location
Oklahoma
Ram Year
2020
Engine
5.7L Hemi
Rebel-style replacement grille
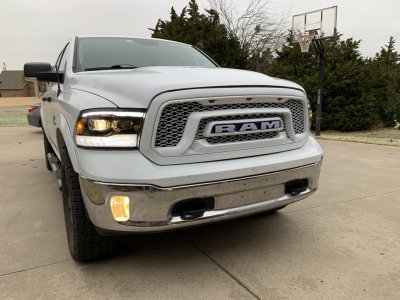
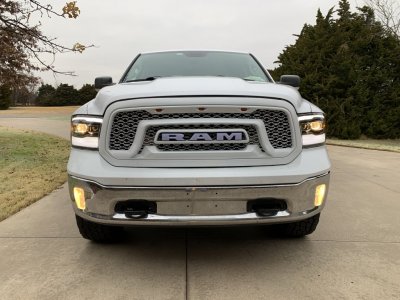
I like the more rugged look of the Rebel-style grilles. This one was easy to install. It came with 3 amber lgihts at top, and a lit R-A-M set of lights in the center. Those lights shine red, which I'm not crazy about, but the LEDs aren't replaceable, and I haven't been able to find other letter lights small enough to fit this space. Most of them are too big.

Cost: $169 (eBay)

IMG_6763.JPG IMG_6765.JPG
 
Last edited:
OP
OP
umbighouse

umbighouse

Senior Member
Joined
Feb 14, 2016
Posts
251
Reaction score
125
Location
Oklahoma
Ram Year
2020
Engine
5.7L Hemi
ModifyStreet Alpharex G2 Pro headlights
Plug & play replacement. These were pretty easy to swap out from my original quad-style headlights. Do your research- watch YouTube, read the instructions (which don't come with the set!), and you should be good.

Installation Guide for 09-18 Ram Headlights
https://alpharexusa.com/09-ram-headlights-installation-guide/?v=f24485ae434a

Cost: $279 [Amazon (sold under the name ModifyStreet)]
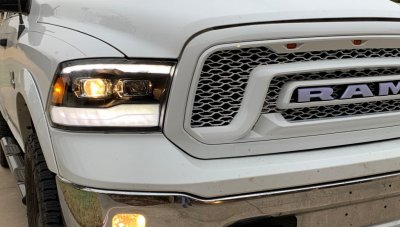
IMG_6763.JPG

Daytime Running Lights (DRLs)
The set comes with a wiring harness which connects the DRL feature (a red wire on each headlight) to a fuse tap on fuse F66. The power for this fuse is enabled when the ignition is turned on. This means that whenever the engine is running, the DRLs will be on, not just when the truck is in gear, like traditional DRLs work.

Optional wiring harness
If you prefer to have the DRLs run only when the truck is in gear, you can order a set of wires built by forum member @Mpgrimm2 (M2Mods). These wires will connect between the wire connector located under your trunk fuse box and the red wire on each headlight. Be sure that your trunk fuse box connector is pre-wired to accept these additional wire connections.

In my case, I chose to use the wiring harness included with the set and then connect the custom wires to it with a 2-wire connector plug (available at any auto parts store), which happened to mate up perfectly with the OEM harness. This me do a couple of things. 1- it let me use the nice wiring harness supplied by the manufacturer, and 2- it saved me from having to run the custom wires to each of the headlights, since I already had the original wire harness running to them. All I needed to do was connect the original harness to the custom wires.
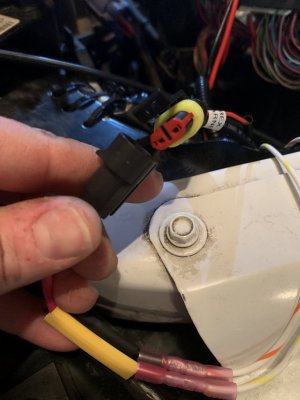
IMG_6816.JPG
(The original wire harness connector (male end) is shown at the top and the custom wire harness connector (female end) is shown at the bottom. NOTE: the wiring connections aren't heat shrunk yet in this photo)

AlphaOBD
If you decide to use the custom wires, you can program you truck's computer with AlphaOBD to enable the DRL feature, including seeing the option on your UConnect screen. It took me a bit to figure this out (with A TON of help from RamForum members), but I've got it running now like it came from the factory.

Here are the AlphaOBD settings I used. They may not ALL be needed, but this is what's working for me. The ones in green are definitely needed.

CBC Features:
DRL Configuration.......................................Optional DRL
DRL Lamp Location.......................................Dedicated

LED Dedicated DRL Present...............................Yes
ECUConfig3: DRL Customer Settings Option Present........Yes

Cust.Set.Menu 1:
Daytime running lights CSM Present......................Yes

CBC Config I/O:
Right Dedicated DRL Lamp/Right Signature LED Present/Right Front Turn Signal #2/Headlamp Leveling Output Present...Yes
Left Dedicated DRL Lamp/Left Signature LED Present/Left Front Turn Signal #2/Headlamp Leveling Output Present......Yes

(For more info about AlphaOBD, see this thread)

Testing

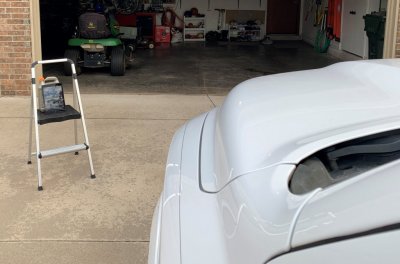
Since the DRLs only work with the truck running and in gear (brake on is ok), testing them alone can be tough! Here's something I rigged up to make this easier. It's an iPad sitting on a stool, in video mode (camera turned around, facing me).
IMG_6817.JPG

Demo video
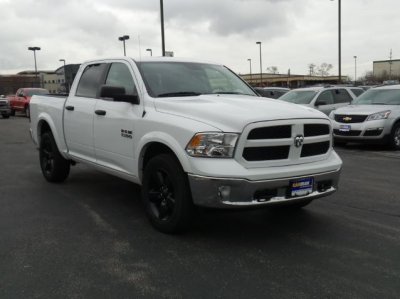
Some folks have asked to see what these look like in action, so here's a video showing them running through some different cycles.

Alpharex G2 Pro headlights on a 2014 Ram 1500
 
Last edited:

Mpgrimm2

Senior Member
Preferred Vendor
Military
Joined
Mar 30, 2014
Posts
6,095
Reaction score
4,174
Location
SC
Ram Year
2022 Ram 1500 (5th Gen)
Engine
5.7L
In my case, I chose to use the wiring harness included with the set and then connect the custom wires to it with a 2-wire connector plug (available at any auto parts store), which happened to mate up perfectly with the OEM harness. This me do a couple of things. 1- it let me use the nice wiring harness supplied by the manufacturer, and 2- it saved me from having to run the custom wires to each of the headlights, since I already had the original wire harness running to them. All I needed to do was connect the original harness to the custom wires.


Demo video
Some folks have asked to see what these look like in action, so here's a video showing them running through some different cycles.

Alpharex G2 Pro headlights on a 2014 Ram 1500

Thanks for the video! Now I see the appeal.
2 or 3 questions:

- Does the DRL feed wire control both the top and bottom DRL strips or just one, ie top?

- Have you tried setting the DRL Dropout to 'Disabled' to see how they function?

- Do you have any additional info on that matching 2 pin (male) connector for the alpharex DRL harness?
If I can source them, others may prefer to do the same.

M² Mods.
 
OP
OP
umbighouse

umbighouse

Senior Member
Joined
Feb 14, 2016
Posts
251
Reaction score
125
Location
Oklahoma
Ram Year
2020
Engine
5.7L Hemi
Thanks for the video! Now I see the appeal.
2 or 3 questions:

- Does the DRL feed wire control both the top and bottom DRL strips or just one, ie top?

- Have you tried setting the DRL Dropout to 'Disabled' to see how they function?

- Do you have any additional info on that matching 2 pin (male) connector for the alpharex DRL harness?
If I can source them, others may prefer to do the same.

M² Mods.
Yes, the one wire controls both top and bottom lights.
I can't answer your question about the dropout- I didn't check that.
The wires connectors is this one. I've seen them at both Advance Auto and O'Reillys.
 

Mpgrimm2

Senior Member
Preferred Vendor
Military
Joined
Mar 30, 2014
Posts
6,095
Reaction score
4,174
Location
SC
Ram Year
2022 Ram 1500 (5th Gen)
Engine
5.7L
Just be clear which end of it plugs into the Alpharex DRL connector? male or female?

M² Mods.
 
Top