ChrisWhaaaat
Junior Member
- Joined
- Dec 31, 2019
- Posts
- 4
- Reaction score
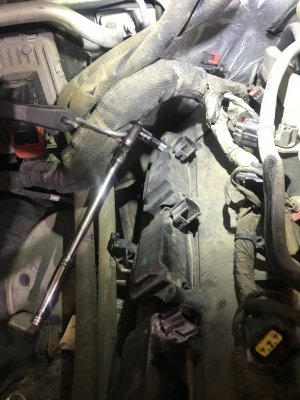
- 7
- Location
- Alberta, Canada
- Ram Year
- 2013
- Engine
- 5.7L Hemi
Hey Folks,
I recently performed this maintenance item on my truck as I prepare to sell it. It was certainly long overdue at 220 000km (137K miles). I know that seems ridiculous, but the truck always ran wonderfully and got excellent mileage.
This tutorial has been repeated many times, but I wanted to do this to highlight some tips/tricks/annoying things I noted while doing it myself and to clarify (or continue to mystify) some points about the replacement. Also, adding another thread like this on a different forum will make it easier for people to find and confirm information others have noted, and more pics.
On many of the older 4th gen trucks, the service spec for spark plugs is higher. Before 2013 (I cant recall, will edit once I find out), the spec changed to a 48 000km maintenance interval, these were for a basic copper plug. Around mid-2013, Ram starting installing new coil packs that could support platinum plugs, and the service interval was moved to 160 000km. This occurred early to mid 2013. As I understand, these newer coil packs can tolerate the installation of any spark plug, but the older coil packs (early or pre 2013) CANNOT. This is important to note, and I recommend you pull a plug to check what is in there and also contact your local ram dealer with your VIN to confirm what you have if your truck is around the 2013 model year.
(YES, the 4th gen Hemis have 2 spark plugs per cylinder, or a total of 16 spark plugs for this 8 cylinder engine)
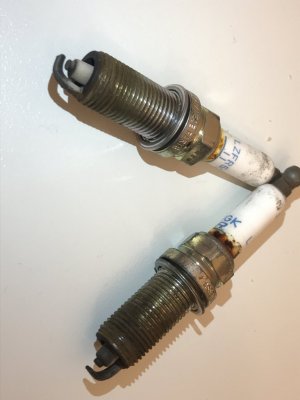
My truck has a build date of march 2013. It was also issued with an amended/extra service manual stating it has the severe service package with a 160 000km (100k mile) spark-plug change interval. So i thought how excellent, i haven't gone THAT far over... So i pulled a couple plugs to have a look... turns out I had the basic copper spark plugs. They are definitely stock as I bought the truck new and have performed any maintenance myself. Seems strange.
I was doing the work on a sunday, and did not have the time nor luxury to talk to the dealer, so I just bought the basic spark plugs which are fine in any case, and proceeded with the repair as follows:
Steps/Procedures:
***Do not attempt repair if you are not confident with your skills, knowledge or the vehicle and do not assume my comments are the right or only way. Please consult a qualified mechanic for ultimate recommendations.
- There are a couple ways to get in to do this repair, you can work from the top or remove the tires and wheel well interiors. Apparently its easier but I didnt feel the access was better and Im lazy and I think it works better with a hoist. So I worked from the top.
Tools:
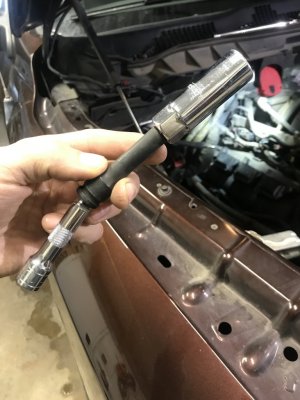
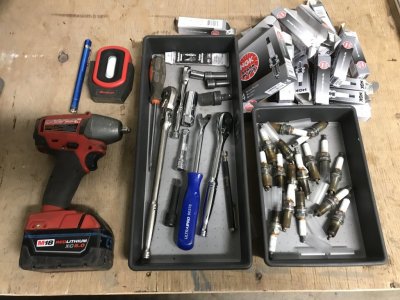
I used 2x 3" extensions (3/8" ratchet), a normal, non-magnetic spark plug socket, extendable magnetic pen, flathead screwdriver and 10mm socket. Some people recommend a wobble spark plug socket. Might be good but can also be hard to fit in a couple holes, and I didnt want to buy one.
1. Park truck safely in a good and comfortable place to work, wear PPE, and get some really good light. Magnetic flashlights or floodlights are helpful even in a well-lit garage.
2. Remove the fancy plastic cover that says 5.7L HEMI. Its just a couple compression-fitted nobs, pull up and off firmly.
3. Remove your air intake hose and the airbox. Be careful when removing the Mass Airflow Sensor from the intake tube. The box should only be a couple bolts and comes right out. It will make your life easier. Remember to cover/plug the throttle body opening after removing the intake. Keep the dust out of your engine.
4. Get out your compressor and blow all the dirt and dust out from around the engine, particularly in the areas you'll be working in. (if you feel comfortable washing your engine before this, do so.. A clean engine and work area will make the procedure much nicer and less likely to contaminate engine).
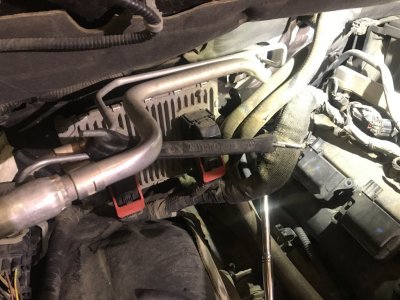
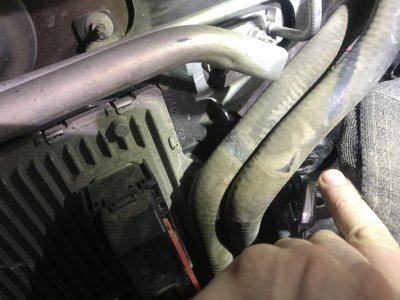
5. There are 2 heater hoses and a main wiring harness on the passenger side. These are going to be in the way when doing the two rearmost spark plugs... but you can move them around a bit to make your life... 'easier', lol. You're still going to hate them. Take the two heater hoses out of the clip along the firewall and the clips along the engine running towards the front. This will make them easier to move around. Also, remove the harness cable from the clip holding it near the firewall by the rear plugs. I will amend this with marked-up photos.
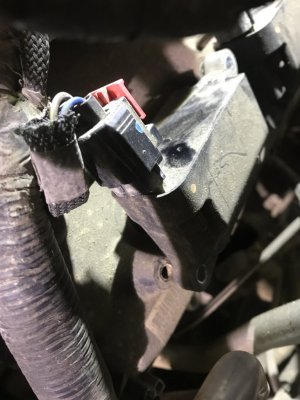
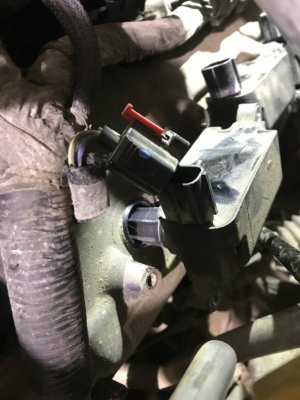
6. Disconnect the wiring from the ignition coil packs. This means lifting the little red tab up (it 'slides up' on each connector to lock the black tab) and then pressing in on the black part underneath that to release them. I used a flathead screwdriver to help press on the tab.
7. If you have a universal joint, impact driver and extensions, you can undo several/most of the bolts securing the coil packs without too much trouble (I think i got 5 out of 8 on passenger side). I had to finish winding them out by hand since they seem to loosely rattle around in the coil packs without backing out, its just tight enough the threads sort of grab.
8. Undo the back coil packs by hand with your ratchet and fingers. Yes, it going to be a pain.
9. Pull the first coil pack out. The rearward ones are worse but you might as well get a feel for what you're working with. Just pull straight up and out, it will pop right out.
10. Blow out the holes where the spark plugs are and have a peek with your light, again to see what you're working with.
11. Install socket and your choice of extensions as required and start seat the socket by hand on the plug. Start undoing the plugs. You could do this with an impact gun if you'd like. I dont mind starting them by hand. I give my socket/extension a bit of a wack downward with a small hammer once its on, the vibration/shock can sometimes help reduce the stress on the way out. It mostly makes me feel like im being cautious.
12. Since my socket isn't magnetic, I used a magnetic extendable pen thing. Stick it down in there and the plug will pop right out once it's fully unwound.
13. Drop the new plugs in right away to reduce the time the cylinders are exposed to contamination.
14. Thread these in by hand at first (better safe than sorry). Spin backwards to start, you'll feel it drop when the threads line up. Torque to (I dont know the spec).
15. When replacing the coil pack, blow the ends out first, then put some dielectric grease in the end of the coil packs to help keep things clean and prevent corrosion.
16. You can leave them bolted or unbolted till all the plugs are changed. Your choice. But start all the bolts for both sides of each pack before tightening either one or else starting the second could be a pain.
17. For the rearmost plugs, fortunately the coil pack tubes are flexible; you will be able to pull these out at an angle to get them out. I have attached a photo of the hoses and wiring harness moved/tied out of the way to improve access. You may find it helpful to have a wobble extension or assemble each extension separately when putting the socket into the plug hole. Its quite awkward but the tools will fit if you have the hoses and harness out of the way. Follow the same procedures as above.
18. Follow the steps above to complete the passenger and driver side. The driver side is more challenging as there are more lines, hoses, wires, and brake booster in the way.
19. Be sure to run through all the steps you took and replace/reinstall anything you removed during disassembly.
Notes:
1. Forward most coil pack wire on driver side - the connector was a pain in the ass for me to remove because the harness was lined up and secured VERY tight against the coil pack. I found it easiest to undo the coil pack first, pull it partway out, then remove the connector.
2. Most of the plugs/coil packs on the driver side needed significant hand-threading or only offered a short throw for the ratcheting motion on the wrench. Take your time.
3. Get yourself a thick crappy blanket or if you have it, a foam shop pad you can lay over the front end of the engine bay. I was lucky that my legs could rest on a table out behind me, in front of the truck, which made it more comfortable to lay over the truck.
4. I had to insert each component (plug socket, 3" extension with or without wobble, and next 3" extension with or without wobble, then ratchet) individually to access the last couple cylinders on the driver side. I also found that at one point, i think the brake booster was so close that I couldn't fit both extensions (when the spark plug was partway out) and had to remove an extension and run the ratchet flush against the head to keep winding. You'll have to play with what works for you, and it will depend on the shape, design, and choice of your tools.
5. You may find it easier to reach under or over or around some of the components to access them. Don't be afraid to try different things. If its frustrating, take a step back, breathe and ask what your other options are. Also, don/t be afraid to jump on a forum and ask for help.
(I will continue to amend this section as I remember stuff/after I upload photos as this is the section I wanted to contribute more to. I need a photo hosting account first, sorry).
Im out of time for the moment but wanted to get this post started. I will update it with more photos and information later and check back to reply to questions.
Best of luck,
Chris


