Electrical rear window upgrade

Disclaimer: Links on this page pointing to Amazon, eBay and other sites may include affiliate code. If you click them and make a purchase, we may earn a small commission.

OP
OP
bellaireroad

bellaireroad

Senior Member
Joined
Dec 5, 2016
Posts
695
Reaction score
625
Location
Fort Worth
Ram Year
2017
Engine
Hemi 5.7
So this project is moving along. I had the rear window glass installed in a shop yesterday . It took about 1 1/2 hours .

I bought the new sliding glass from a guy on eBay. It is original Mopar, and was $400. After I bought the glass I got worried that my standard cab would not have the correct mounting location for the motor, but luckily after taking the rear trim panel down, everything was there . It essentially looked just like the picture Rick posted earlier.

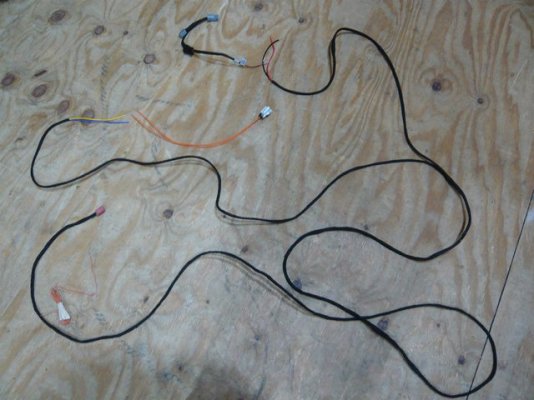
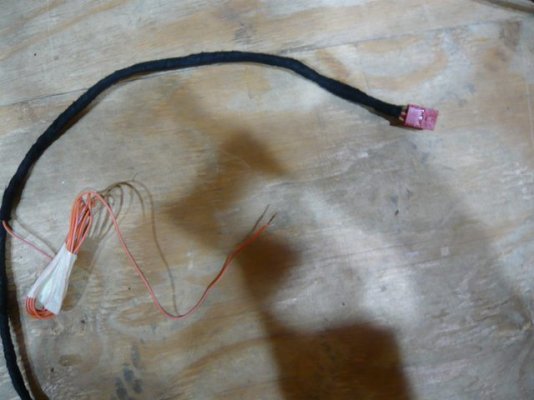
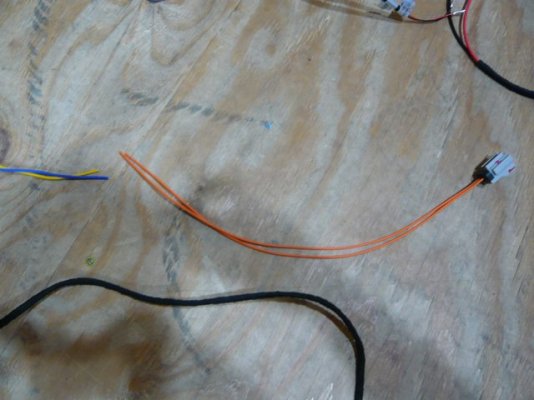
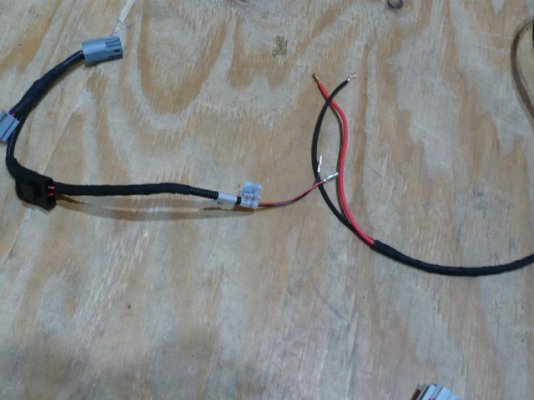
There was no wiring present under the overhead console in my standard cab. With Rick’s help, I found an overhead console on eBay that had the appropriate wiring, connector, and switch. I have routed the wiring for the motor the rear of the truck, and found switched power with ground in the cigarette lighter in the front floor console.

The switch is also lit when the panel lights are turned on, and there is a panel light connection on the headlight switch I am going to tap into.

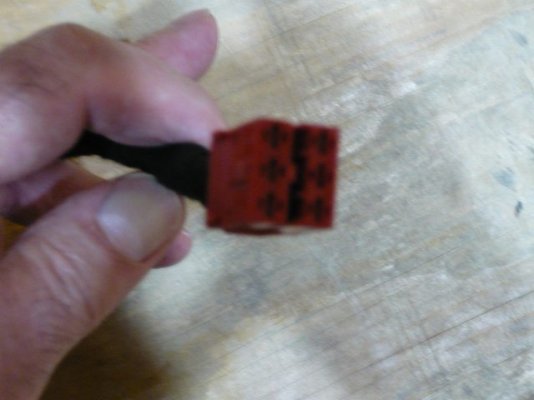
Waiting on the repair kit that has the connector for the motor before I get everything running. Will try to post pictures showing locations,when I get the wiring done.

This project has grown into another project, as projects sometimes do. I’m going to lay down some dynamat below the back window, and on the B columns. Might as well while I have everything off

Big shout out to Rick for all the help and guidance he has provided. He has basically walked me through all the steps, and I wouldn’t have been able to do it without his help


Sent from my iPhone using Tapatalk Pro
 
Last edited:
OP
OP
bellaireroad

bellaireroad

Senior Member
Joined
Dec 5, 2016
Posts
695
Reaction score
625
Location
Fort Worth
Ram Year
2017
Engine
Hemi 5.7
So here’s a couple pictures where taps were made .The switch has five wires. All five get routed along the headliner to the A column.
Then the power, ground, and panel light wires get routed down the A column and the open\close wires get routed along the headliner to the B column. When at the bottom of the A column, the ground and power get routed behind the dash down into the console

This is the headlight switch connector. The wire dangling runs up the A column and into the window switch. It is for the switch light. The wire separated out of the headlight connector is for the panel lights. I Tapped into it

60c92b3c2a74905aa9f9d99f94cbbdc5.jpg

b5b3c0e38c22c8b486ad1c99e1989513.jpg


This is the cigar lighter connector in the console. It is on switched power. I pulled two wires from the switch, through the back of the dashboard. The wires from the window switch were not long enough and I had to splice two wires to the switch wires, white and black.. They then got spliced into the cigar lighter. I will get labeled to show what they are for future work.1d08d5e8bd2574448f4cb9b4ee958d97.jpg

These connectors are on a short leash, I was worried if I cut the wires and spliced it would shorten the connector and be difficult to plug back in. So on the connector wires, I stripped some of the insulation off, and teased the wire open. I then put the splice wire through the opening and wrapped it around the connector wire. Then everything gets soldered and wrapped. This lets your connector harness stay the same length so it will be guaranteed to plug-in

Still waiting on the connector for the motor. The switch does light up when the headlights are turned on, as it should


Sent from my iPhone using Tapatalk Probably
 
Last edited:

big daddys house

Senior Member
Joined
Apr 9, 2019
Posts
860
Reaction score
1,005
Location
Hill Valley
Ram Year
2014
Engine
Hemi 5.7
So here’s a couple pictures where taps were made .The switch has five wires. All five get routed along the headliner to the A column.
Then the power, ground, and panel light wires get routed down the A column and the open\close wires get routed along the headliner to the B column. When at the bottom of the A column, the ground and power get routed behind the dash down into the console

This is the headlight switch connector. The wire dangling runs up the A column and into the window switch. It is for the switch light. The wire separated out of the headlight connector is for the panel lights. I Tapped into it

60c92b3c2a74905aa9f9d99f94cbbdc5.jpg

b5b3c0e38c22c8b486ad1c99e1989513.jpg


This is the cigar lighter connector in the console. It is on switched power. I pulled two wires from the switch, through the back of the dashboard. The wires from the window switch were not long enough and I had to splice two wires to the switch wires, white and black.. They then got spliced into the cigar lighter. I will get labeled to show what they are for future work.1d08d5e8bd2574448f4cb9b4ee958d97.jpg

These connectors are on a short leash, I was worried if I cut the wires and spliced it would shorten the connector and be difficult to plug back in. So on the connector wires, I stripped some of the insulation off, and teased the wire open. I then put the splice wire through the opening and wrapped it around the connector wire. Then everything gets soldered and wrapped. This lets your connector harness stay the same length so it will be guaranteed to plug-in

Still waiting on the connector for the motor. The switch does light up when the headlights are turned on, as it should


Sent from my iPhone using Tapatalk Probably
Super nice! Thanks for the pics. How much time do you think you have in this at this point?

Sent from my LG-LS995 using Tapatalk
 
OP
OP
bellaireroad

bellaireroad

Senior Member
Joined
Dec 5, 2016
Posts
695
Reaction score
625
Location
Fort Worth
Ram Year
2017
Engine
Hemi 5.7
Haha .... It’s all about the journey.

No seriously, probably 5 -6 hours, But I work slow, and my first time to take off the trim ....etcetera.... so learning as I go. The subscription at Alldatadiy helped tremendously to show how to disassemble without tearing stuff up

Also, make sure your AC is working before attempting this. [emoji6]I am doing a automatic temperature control modification at the same time. I sent the bezel off to Mike so my AC isn’t working.
When they put the rear window in, you have to have all windows rolled up for two days to keep the cabin pressure low. Not fun when it’s 106° outside[emoji15]


Sent from my iPhone using Tapatalk Pro
 
Last edited:
OP
OP
bellaireroad

bellaireroad

Senior Member
Joined
Dec 5, 2016
Posts
695
Reaction score
625
Location
Fort Worth
Ram Year
2017
Engine
Hemi 5.7
This is the worst part of the whole projecteea23abffb3ad192b7aac3a7a6f4330a.jpg


Sent from my iPhone using Tapatalk Pro
 
OP
OP
bellaireroad

bellaireroad

Senior Member
Joined
Dec 5, 2016
Posts
695
Reaction score
625
Location
Fort Worth
Ram Year
2017
Engine
Hemi 5.7
So did you get her all done?

Sent from my SM-G960U using Tapatalk

Hey Rick, all done and working perfectly! Laying down some Dynamat before I button it up. Thanks for all your help, especially helping me source the wiring....would still be thinking of doing it if not for you[emoji1303]


Sent from my iPhone using Tapatalk Pro
 

Ricks Ram

Senior Member
Joined
May 1, 2015
Posts
4,411
Reaction score
3,388
Ram Year
2014
Engine
Hemi 5.7
Hey Rick, all done and working perfectly! Laying down some Dynamat before I button it up. Thanks for all your help, especially helping me source the wiring....would still be thinking of doing it if not for you[emoji1303]


Sent from my iPhone using Tapatalk Pro
No problem glad to help and glad you got it done! You now probably have the only Ram R/T around with a power slider.

Sent from my SM-G960U using Tapatalk
 
OP
OP
bellaireroad

bellaireroad

Senior Member
Joined
Dec 5, 2016
Posts
695
Reaction score
625
Location
Fort Worth
Ram Year
2017
Engine
Hemi 5.7
The Dynamat is almost impossible to work with when it is over 100 degrees outside. It is like flypaper and sticks to everything when trying to manipulate into position. I thought I’d try putting in the freezer for 15 minutes after cutting the shape needed....works great[emoji1303]


Sent from my iPhone using Tapatalk Pro
 

mjf6175

Senior Member
Joined
Nov 13, 2017
Posts
433
Reaction score
370
Location
NJ
Ram Year
2017
Engine
cummins
No problem glad to help and glad you got it done! You now probably have the only Ram R/T around with a power slider.

Sent from my SM-G960U using Tapatalk

Well I finally took the plunge. After more than several PM's with RicksRam, Bellaireroad and MGrimm, I installed a power slider in my 2017 regular cab (SLT) 2500. A power slider is an option that you CANNOT get in an RC heavy duty. The ********* basically told me "Stop being a P***Y and install the damn thing.".....lol. Not easy to do when you have a severe case of OCD. Taking out a perfectly sealed manual sliding window and dropping the headliner without borking it up was not an easy decision for me. So with their encouragement, as well as several shots of Jack Daniels, I went ahead. While this thread already has pics and photos of how to add a power slider I thought I just add some more info and pics, in this way if there is somebody else who needs a push (like I did) to do this they have a good thread to reference.

I obtained a used overhead cab harness ( out of a wreck) that had a power slider. My main goal in getting this harness was to get the connector ( its red in the photos ) that goes to the power slider switch as well as a nice starting point of making up my own harness. After separating the power slider wires out of the cab harness I extended all the wires long enough to route through the cab. After dropping the headliner a couple of inches I snaked my harness from the overhead console to the rear driver's side "B" pillar (for those who have a CC or QC it would be your "C" pillar). Then down the inside of the cab, then over to the middle of the cab where the harness I made split into a "Y". One leg of the Y went into the console for power and ground (the switched 12V outlet that is in the console and I used a pass through harness to connect to it). The other leg of the Y ( the yellow and blue wires ) continued on and went to the power slider electric motor. That makes four wires out of the 5 needed. The fifth wire needed is for illumination of the power slider switch ( orange wire that can be seen in the second pic along with the red connector for the power slider switch ). As luck would have it, my HD has the exterior cab lights on the roof. The harness for those cab lights is immediately above the overhead console and was simple to tap the power lead ( white wire with green tracer) for the cab lights.

Since I am an older guy with an annoying rotator cuff the power slider is a welcomed addition. You may think a power slider is not needed in a RC, but you have to be doubled jointed with arms like an orangutan to open a manual slider while driving.

The power slider itself was installed by Safelite.

The harness I made up...
434740[/ATTACH]']GvQj9ROl.jpg

Power Slider Switch Connector and Illumination wire...
434742[/ATTACH]']XvSfMW1l.jpg

Closeup of that red connector.....
434744[/ATTACH]']OyoGhC8l.jpg

The 2 orange wires with the gray connector are from the repair kit (5161926AA) needed and mentioned above in one of RickRams posts. I eventually connected those 2 orange wires to the yellow and blue wires of my harness....
434746[/ATTACH]']WYfdun0l.jpg

The power and ground leg of my harness that I connected to the 12V outlet in the console using the pass through adapter on the left....
434748[/ATTACH]']voD7OJJl.jpg

Finished.....
LICyTkol.jpg
https://i.imgur.com/LICyTkol.jpg[/img]']https://i.imgur.com/LICyTkol.jpg[/img]']https://i.imgur.com/LICyTkol.jpg[/img]']https://i.imgur.com/LICyTkol.jpg[/img]']https://i.imgur.com/cBYNYgOl.jpg[/img]']cBYNYgOl.jpg
 

Attachments

  • GvQj9ROl.jpg
    GvQj9ROl.jpg
    56 KB · Views: 6
  • XvSfMW1l.jpg
    XvSfMW1l.jpg
    44.7 KB · Views: 9
  • OyoGhC8l.jpg
    OyoGhC8l.jpg
    35.7 KB · Views: 4
  • WYfdun0l.jpg
    WYfdun0l.jpg
    48 KB · Views: 3
  • voD7OJJl.jpg
    voD7OJJl.jpg
    45.1 KB · Views: 5
Last edited:

Rado

US NAVY VETERAN
Military
Joined
Nov 5, 2016
Posts
6,912
Reaction score
19,021
Location
Maine
Ram Year
2015
Engine
Pentastar 3.6 V6
Thanks for the update !
 

Veritas726

Member
Joined
Apr 17, 2017
Posts
48
Reaction score
24
Ram Year
2014
Engine
Hemi 5.7
What gauge wire did you all use to make the harness?
 

misfit77

Senior Member
Joined
Nov 23, 2016
Posts
1,031
Reaction score
669
Ram Year
2014
Engine
Hemi 5.7
So are you guys tapping into the cigarette lighter as a power source?

I figured these motors can draw a lot of current. i didnt think cigarette lighters were fused for a lot of amps.
 

Ricks Ram

Senior Member
Joined
May 1, 2015
Posts
4,411
Reaction score
3,388
Ram Year
2014
Engine
Hemi 5.7
So are you guys tapping into the cigarette lighter as a power source?

I figured these motors can draw a lot of current. i didnt think cigarette lighters were fused for a lot of amps.
If you have a Quad or Crew Cab usually the power wire for the power sliding window is behind the trim panel on the drivers side C pillar. Its pink with a yellow stripe. Check it with a multimeter before you start your install. The wire should only have power only when the key is in the "Run" position.

Sent from my SM-G960U using Tapatalk
 

misfit77

Senior Member
Joined
Nov 23, 2016
Posts
1,031
Reaction score
669
Ram Year
2014
Engine
Hemi 5.7
I have an express. So everyone is saying no harness.

Still trying figuring where to spend 500 amazon gift card. Its this or tesla radio.

Sent from my moto g(6) using Tapatalk
 

Veritas726

Member
Joined
Apr 17, 2017
Posts
48
Reaction score
24
Ram Year
2014
Engine
Hemi 5.7
Just wired mine up yesterday. Had the pillar power wire in my crew but opted for the center console cigarette lighter for power and ground as it was less length of wire to run. To answer my own question from a few posts up, I used 18 gauge wire.


Sent from my iPhone using Tapatalk
 

Ricks Ram

Senior Member
Joined
May 1, 2015
Posts
4,411
Reaction score
3,388
Ram Year
2014
Engine
Hemi 5.7
I have an express. So everyone is saying no harness.

Still trying figuring where to spend 500 amazon gift card. Its this or tesla radio.

Sent from my moto g(6) using Tapatalk
My truck is also an Express. It had the correct pink/yellow wire behind drivers side C pillar cover.

Sent from my SM-G960U using Tapatalk
 
OP
OP
bellaireroad

bellaireroad

Senior Member
Joined
Dec 5, 2016
Posts
695
Reaction score
625
Location
Fort Worth
Ram Year
2017
Engine
Hemi 5.7
So are you guys tapping into the cigarette lighter as a power source?

I figured these motors can draw a lot of current. i didnt think cigarette lighters were fused for a lot of amps.

No problems or blown fuses here


Sent from my iPhone using Tapatalk Pro
 

DoughRat19

Senior Member
Joined
Oct 6, 2020
Posts
321
Reaction score
186
Location
Massachusetts
Ram Year
2019 Classic
Engine
Hemi 5.7
The wiring is not present on the Express and Tradesman. It doesn't matter what options it has. The harness is actually part of the headliner and not available separately. It is standard equipment in the SLT/Bighorn and higher trim level trucks. The heated rear window wiring is also not present on the Express/Tradesman.

Sent from my SM-G960U using Tapatalk

@Ricks Ram, is this the wiring? If so, looks like it is available in my Express. I just gotta check the overhead console now.

256A0ECC-AE8A-4DEA-B0DE-1935E267F90C.jpeg

6697F0B5-F081-4396-98BD-7DC2B595E517.jpeg
 

Latest posts

Members online

Forum statistics

Threads
195,624
Posts
2,872,661
Members
156,454
Latest member
Goodie1990
Top