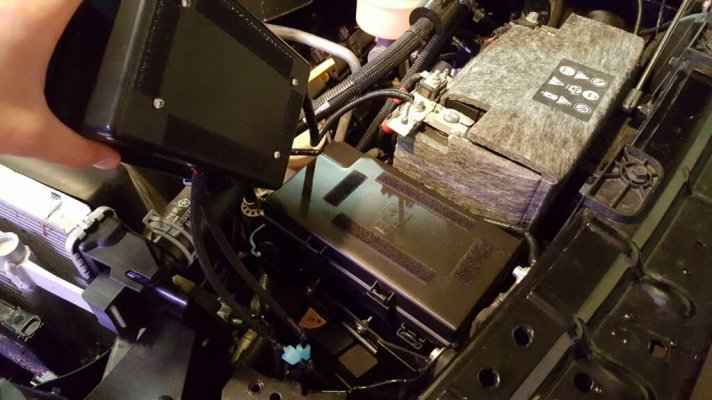
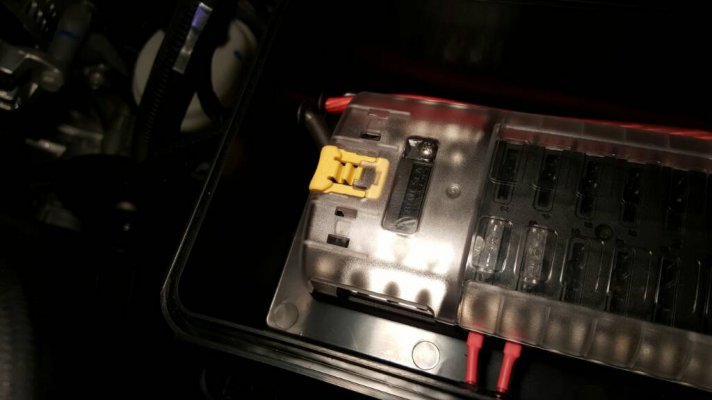
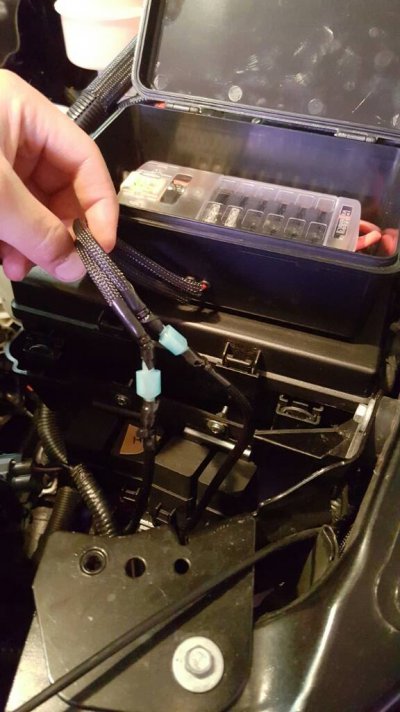
Bed lights, puddle lights, flush mount reverse light install (PIC heavy)

Disclaimer: Links on this page pointing to Amazon, eBay and other sites may include affiliate code. If you click them and make a purchase, we may earn a small commission.

Mr.Asmith9

Senior Member
Joined
Feb 8, 2014
Posts
485
Reaction score
145
Location
Fairbanks, AK
Ram Year
2015 Ram 2500 Mega Cab
Engine
6.4L V8 Hemi
So I was looking at the pictures of the fuse box and noticed the main power appears to have been ran underneath the box. Am I correct?

What size ring terminals did you buy? I believe they are the blue ones, and what about the two you used for the hub?

Id also like to note you did a really good job heat shrinking all those wires.

How would I determine the proper size fuse for each application? Let's take my fog let's. One light is 1.3amps. So if I ran a set that would be 2.6amps. Would I just run a 5 amp and call it a day or should I go with 7.5amps or even a 10 amp? If so, why. I know the longer the wire the more strain to get the power, how does that Effect the equation. If you know of a good online resources for this question I'll happily find my own answer I just haven't been able to find anything just yet.

Also one last question... For now... Where can I get some relay harnesses? I just want the relay and some basic wire for it. I don't need some fancy switch that comes with it I just need the little relay. Any recommendations?


Sent from my Galaxy S6 Active with horrible auto correct ... Using Tapatalk
 
OP
OP
sbarron

sbarron

Senior Member
Joined
Feb 28, 2015
Posts
3,362
Reaction score
2,277
Location
Wasilla, Alaska
Ram Year
2013
Engine
5.7 HEMI
I was mistaken... I just went and looked at my left over wire. I had sized the load for 8awg, but ended up using 6awg and these ring connectors for the main power wires. I did have to slightly enlarge the lug to mount the battery terminals:
Shop IDEAL 2-Count Ring Wire Connectors at Lowes.com

I crimped, soldered and shrink wrapped all the connectors. Yes the smaller ones are the blues. The large lugs were a challenge to bend and I actually had to notch the plastic of the fuse panel with a dremel a bit for proper fit. It would have been easier if the box were just a bit bigger.

As for the fuses, I used the smallest I could that covered the draw, so in your example @ 2.6amps, i used a 3 amp fuse. I figured that if there was an inrush that blew the fuse, I could go to the next larger size, but no issues so far.

If you can see in the picture I have:
D2 Low power - [email protected] amps=1.2 amps - 3 amp fuse
D2 Hyperspots - [email protected]=2.9ams - 5 amp fuse
SR amber - 2 @2.6amps=5.2amps - 7.5 amp fuse
D2 High Power - [email protected]=5amps - 7.5 amp fuse
E2 Combo - [email protected]=11.3amps - 15 amp fuse
reverse, bed, and puddle lights = 5.3amps=7.5 amp fuse
 
Last edited:

Mr.Asmith9

Senior Member
Joined
Feb 8, 2014
Posts
485
Reaction score
145
Location
Fairbanks, AK
Ram Year
2015 Ram 2500 Mega Cab
Engine
6.4L V8 Hemi
Good point about the fuse sizes. What about the relays, where might I find a good selection of those?


Sent from my Galaxy S6 Active with horrible auto correct ... Using Tapatalk
 

Mr.Asmith9

Senior Member
Joined
Feb 8, 2014
Posts
485
Reaction score
145
Location
Fairbanks, AK
Ram Year
2015 Ram 2500 Mega Cab
Engine
6.4L V8 Hemi
That was exactly what I was looking for! Man your a life saver. My Rigid lights didn't even come with a relay just a switch.


Sent from my Galaxy S6 Active with horrible auto correct ... Using Tapatalk
 
Last edited:

Mr.Asmith9

Senior Member
Joined
Feb 8, 2014
Posts
485
Reaction score
145
Location
Fairbanks, AK
Ram Year
2015 Ram 2500 Mega Cab
Engine
6.4L V8 Hemi
So I just finished reading through this whole thread, and your initial build thread of the front lights. I was afraid that all these questions I've been asking where already answered and luckily most weren't. I didn't want to be that one guy in most every thread who if he only had looked could of gotten 98% of his answers haha.

I noticed you had wired your OTRATTW switches to the vehicles dimmer and was surprised. I didn't think you could dim those LEDs. How are they holding up, Do they flicker while dimmed? I did look at the pictures and could tell they weren't as bright while dimmed but couldn't really tell if it is worth wiring into the dimmer switch.

I'd also like to give you praise on your Bed lights, Puddle Lights, and Reverse lights. I thoroughly examined your wiring diagram and loved its simplicity yet effectiveness. While looking at it I had thought of a more complex ways to wire it using a handful of diodes but an old mechanic of mine once told me K.I.S. which stands for Keep It Simple. For obvious reasons I need not explain you can see the effectiveness of that acronym in just about anything mechanical or electrical or heck life in general.

You had also mentioned you had mounted the front light relays to a bracket on the fuse box. I take it you pre-drilled some holes to put a bolt in or did you use a self drilling screw? Obviously there was enough space for you to get a power drill in there?

Unfortunately as I've stated before I won't have my truck until the 6th of July and won't be home in Alaska until the 11th or 12th, which makes it hard for me to open up the hood and look at everything. Not to mention I'll have the 2500 so I'll have no idea how much space there will be under the hood.

You have a fair set of tools under your belt that's plain to see, if you don't mind me asking what do you do for a living.
 
OP
OP
sbarron

sbarron

Senior Member
Joined
Feb 28, 2015
Posts
3,362
Reaction score
2,277
Location
Wasilla, Alaska
Ram Year
2013
Engine
5.7 HEMI
No problem, that's why I put the thread up there to begin with, both to help someone with less experience, and to learn when someone who has more, asked why didn't i do it another way. The lighting mods all started by having crappy headlights and snowballed from there. I also wanted the ability to pull this stuff out of the truck with little to no sign it had ever been there.

When I started this project, I had heard about all the horror stories about people trying to dim their switch LED's as well. I decided WTH, I'd power my switch LED's, from the same dim-able LED circuit as the OEM dash LED's. It's worked like a charm. They don't go as dim as the factory lights, but they are a bit brighter on the high end as well. No noticeable flickering, and no issues with them to this point. It did mean running an extra wire, (from the back of the headlight switch to the AUX switches), but I think it was worth the dimming ability.

I mounted the relays to the front of the plastic tub that contains the PDC (fuse box) with short bolts (not self tapping). I unclipped the 4 tabs that hold the PDC in place and that allowed me enough room to get behind and tighten the nuts. I also used as large a washer as i could to keep the pressure on the plastic to a minimum. I used a right angle drill, (one of the best "specialty" tools I own), and a sawed off drill bit to drill the holes. A standard cordless was too big for everything but one of the center holes. I don't really know, but I don't think you'll have any more room with the 2500, the dimensions would be that same, no?

I work as a project manager in the oil industry, so am used to coming up with creative solutions to operational issues, and yes, K.I.S.S. is always the best advice.
 

Mr.Asmith9

Senior Member
Joined
Feb 8, 2014
Posts
485
Reaction score
145
Location
Fairbanks, AK
Ram Year
2015 Ram 2500 Mega Cab
Engine
6.4L V8 Hemi
Haha, I was going to put down the extra 'S' in K.I.S.S but felt it was to hard to explain to someone who hasn't heard it before. I'm on OTRATTW's site right now trying to pick out rockers. The switches themselves are out of stock so I'm SOL until they get more in.

I'm not sure if the 2500 would have more/less or the same. It's possible with the 6.4l HEMI that some stuff was moved around but we shall see I guess. What size wire sleeves did you end up getting?
 
OP
OP
sbarron

sbarron

Senior Member
Joined
Feb 28, 2015
Posts
3,362
Reaction score
2,277
Location
Wasilla, Alaska
Ram Year
2013
Engine
5.7 HEMI
The loom? Some 1/2" some 3/8". i added it up at the end of the project and I figure al told, I have added about 120' of loom, (all containing multiple wire runs), to the truck. If I had planned on the two projects from the beginning I could have run less, but not much less.
 

Mr.Asmith9

Senior Member
Joined
Feb 8, 2014
Posts
485
Reaction score
145
Location
Fairbanks, AK
Ram Year
2015 Ram 2500 Mega Cab
Engine
6.4L V8 Hemi
Wow... That's a quite a bit by you did a lot too.


Sent from my Galaxy S6 Active with horrible auto correct ... Using Tapatalk
 

Mr.Asmith9

Senior Member
Joined
Feb 8, 2014
Posts
485
Reaction score
145
Location
Fairbanks, AK
Ram Year
2015 Ram 2500 Mega Cab
Engine
6.4L V8 Hemi
I use a right angle drill, (one of the best "specialty" tools I own)
Any recommendations on brand and location to purchase one? I've managed to get by without using one one before but I know with this install I'll need one. Do you think I could get away with a Right angle Attachment or should I just spend the money and get the right tool for the job. That's how I've got the collection I have so far. I'm just not sure I want to drop $200 for a tool I won't use very often... Like most my others haha.
 

Mr.Asmith9

Senior Member
Joined
Feb 8, 2014
Posts
485
Reaction score
145
Location
Fairbanks, AK
Ram Year
2015 Ram 2500 Mega Cab
Engine
6.4L V8 Hemi
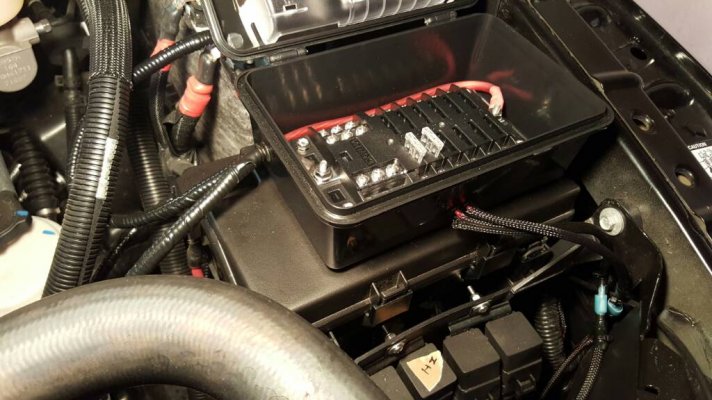
Well my good sir. I can't thank you enough for that idea it turned out great. Just got done with that part of my project. Only thing plugged into it is my HIDs atm but my reverse and moose lights will join it soon.

8d507a1b8310a2bd99b8d3b493f348f5.jpg

I also made a few improvements (in my opinion anyway haha)

First, I got velcro to work. I washed the top of the fuse box with dawn dish soap then used rubbing alcohol. I then adhered the velcro and put a weight on it for at least an hour. I went with the velcro mostly because I didn't want any interference from the magnets incase I add a small audio upgrade later.

7b9b166ccae21ac2aed192b8e15b21b5.jpg

Second, the box is 'water tight' or at least practically sealed. I used a few rubber grommets haha. Every time I shut the lid I hear the air rush out of the top and it makes me happy.

ea596acf7455dd43e200a7b540bd9792.jpg

Unfortunately by using these grommets I can't remove any wire without cutting it. So have and will continue to add a short lead attached to a quick disconnect just incase I need to remove the box for any reason. The exception being the 8ga positive and negative wires, these you either have to cut or unbolt. I did. Leave plenty of room to move the box and get into the fuse panel as you yourself did.

5a0881b2c68280e3076f949c35dca9fe.jpg

However I am disappointed that my HID relays took up so much space. I'll have to find room some where nearby for the two others I have to wire later. Either way thanks for sharing your ideas and helping us mimic your epic awesomeness!


Sent from my Galaxy S6 Active with horrible auto correct ... Using Tapatalk
 
OP
OP
sbarron

sbarron

Senior Member
Joined
Feb 28, 2015
Posts
3,362
Reaction score
2,277
Location
Wasilla, Alaska
Ram Year
2013
Engine
5.7 HEMI
Damn! That looks good! and familiar, lol!!! You took the box sealing a little further than I for sure, yours looks like it's ready for submarine duty.

On a funny side story, I too went back to Velcro. I hit a pothole hard enough to break a belt in my tire, (but not damage the rim thankfully), and noticed afterward that the hardened epoxy had failed on fully half the magnets.

As far as "mimicking my epic awesomeness", that's just crazy-talk... i just hope I can help someone avoid learning the same painful lessons in the same painful way that I did.
 

Midnite-CTD

Member
Joined
Oct 21, 2012
Posts
82
Reaction score
47
Location
Alberta, Canada
Ram Year
2011
Engine
6.7L CTD
Very nicely done guys!! I will be referring back to this post, hopefully in the near future!

Thank you both for all the pictures and info of your installs!!
 

ufokillerz

Member
Joined
Aug 20, 2015
Posts
64
Reaction score
9
Ram Year
2015
Engine
5.7
Looks like its white/orange...


hi are you referring to the 3rd wire on the left that says trailer tow backup lamp feed?
Trying to locate that cargo light tap at the trailer tow, but i don't think there is one?
 
OP
OP
sbarron

sbarron

Senior Member
Joined
Feb 28, 2015
Posts
3,362
Reaction score
2,277
Location
Wasilla, Alaska
Ram Year
2013
Engine
5.7 HEMI
hi are you referring to the 3rd wire on the left that says trailer tow backup lamp feed?
Trying to locate that cargo light tap at the trailer tow, but i don't think there is one?

that would be for a reverse light circuit. The cargo light circuit needs to be tapped into in the cab (either behind the cargo light itself, behind the switch, or in the drivers rear door harness)
 

ufokillerz

Member
Joined
Aug 20, 2015
Posts
64
Reaction score
9
Ram Year
2015
Engine
5.7
that would be for a reverse light circuit. The cargo light circuit needs to be tapped into in the cab (either behind the cargo light itself, behind the switch, or in the drivers rear door harness)

thanks for clarifying! I must have misread somewhere. Your post has been very inspiring and informative! i plan to get a lot of this done too.
Actually have a pair of SRQs i'm trying to find courage to grind into my ram rebel bumper to install hah.
 
OP
OP
sbarron

sbarron

Senior Member
Joined
Feb 28, 2015
Posts
3,362
Reaction score
2,277
Location
Wasilla, Alaska
Ram Year
2013
Engine
5.7 HEMI
thanks for clarifying! I must have misread somewhere. Your post has been very inspiring and informative! i plan to get a lot of this done too.
Actually have a pair of SRQs i'm trying to find courage to grind into my ram rebel bumper to install hah.

Yeah, the first cut is pretty nerve-wracking. Good luck, post some pics when you get them installed. They are great lights.
 
Top