- Joined
- Nov 9, 2016
- Posts
- 623
- Reaction score
- 577
- Location
- Pittsburgh, PA
- Ram Year
- 2016
- Engine
- 6.7 Cummins
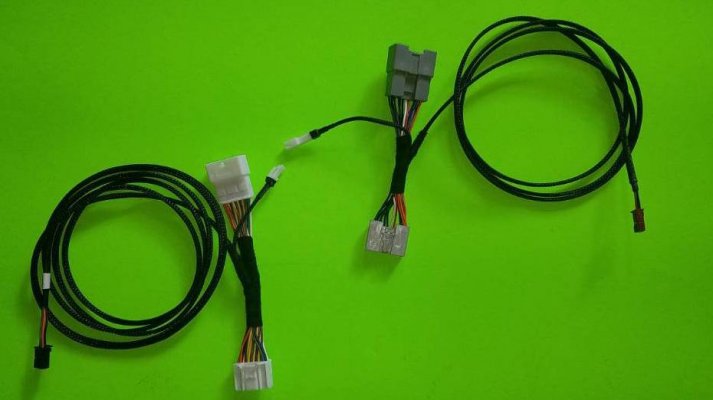
MPGrimm and I have been working on figuring out how to convert our trucks from manual temperature control to automatic temperature control. We have made enough progress to prove that it can be done and want to share what we have learned with everyone.
This is a pretty easy and inexpensive mod in terms of parts. You basically need to buy a cabin temperature sensor, a connector, and some terminals and put it all together using an existing 8.4 conversion harness. The trouble with this mod, is that the feature has to be activated in the BCM. I used my AutoEngenuity tool to activate the feature, but unlike activating some other features where it was a smooth process, this caused corruption of my trucks “vehicle brand” which caused the 8.4 Radio to loose it logo and themes. I have not found a way to correctly reset the brand. If you have the AE tool, and want to try this mod, please be aware of this issue. I have not encountered any other problems with the truck due to this issue, but proceed at your own risk.
Anyways onto the mod:
Parts Needed:
(1) 55111178AC – CABIN AIR TEMPERATURE SENSOR
(1) 1-929170-4 – 4 WAY Connector Shell for Temperature Sensor
(4) 963715-1 – Female Terminals for 1-929170-4 (Temperature Sensor Connector)
(2) 1123343-1 – Female Terminals for 1318917 (HVAC Module Connector
Conversion Harness Modification
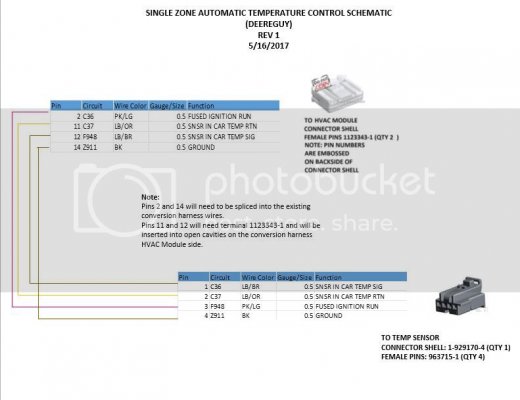
You will need to pin two new wires into pins 11 and 12 of the HVAC module side conector of the conversion harness. These wires will run from the HVAC module to behind the drivers side kick panel where the Cabing Air Temperature Sensor will be located (more on that below). I made my wires 80" in length. You will also need to splice wire # 2 for fused ignition power and wire #14 for ground. These will run to a new connector for the temperature sensor (1-929170-4). The following schematic shows how to wire it up.
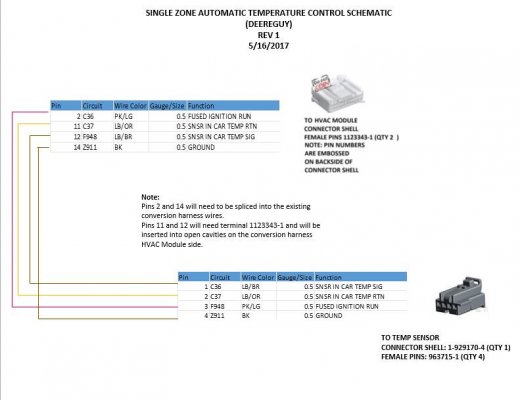 IMG_0083 by Deere Guy, on Flickr
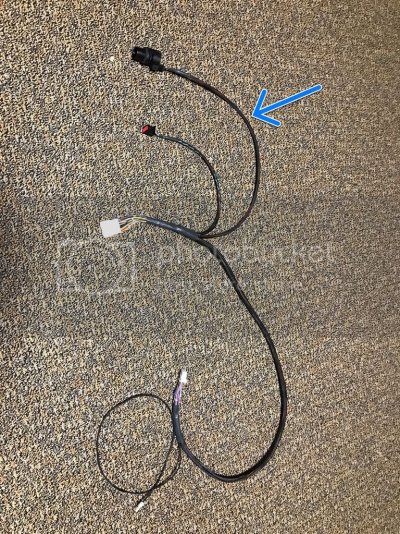
Here's what my conversion harness looked ike after adding the temperature sensor wiring. Notice the new leg off of the harness. It is shown with the sensor attached.
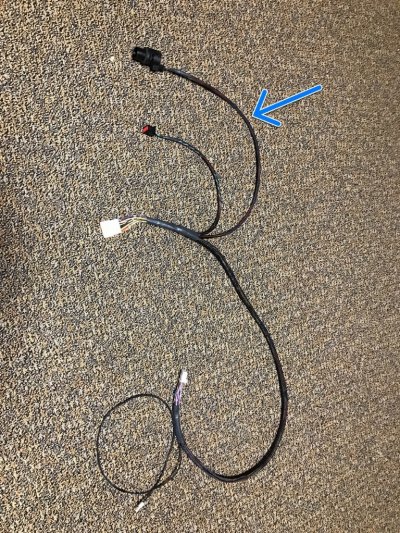 IMG_0812 by Deere Guy, on Flickr
Installing the Temperature Sensor
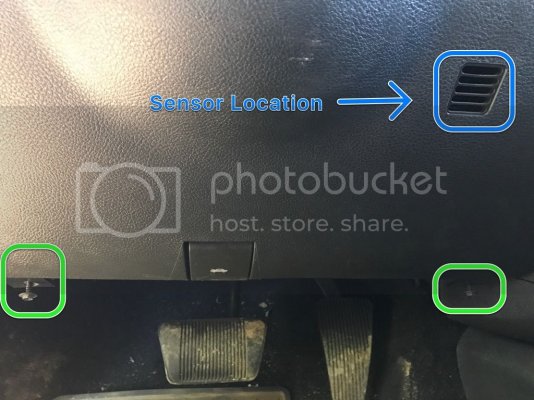
The temperature sensor is located behind the driver side knee kick panel. You will need to remove the panel and install the sensor.
1. Remove the two screws at the bottom of the panel and then pull the panel off.
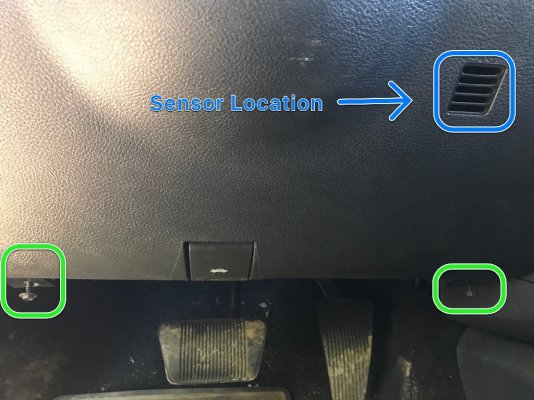 IMG_0809 by Deere Guy, on Flickr
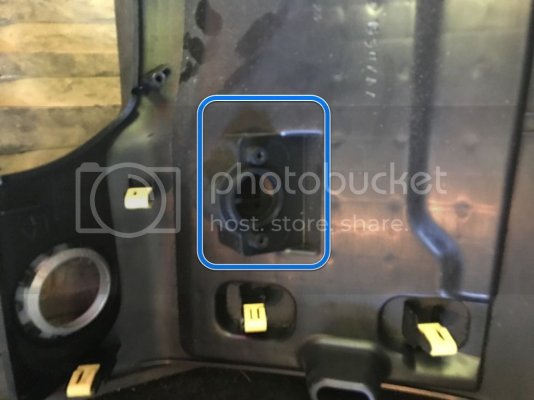
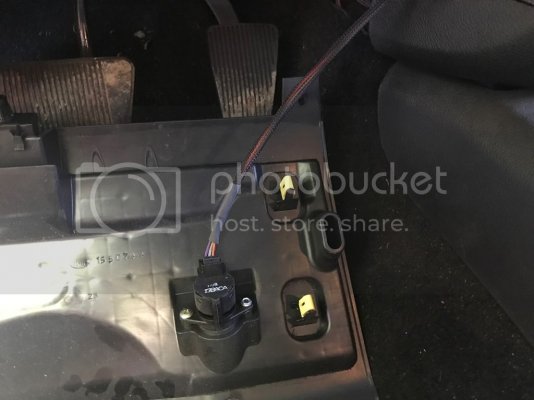
2. Install the sensor.
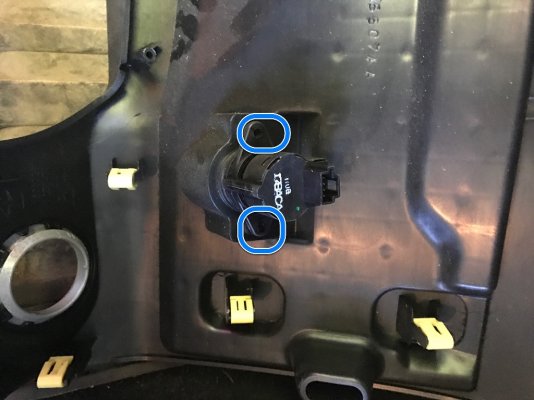 IMG_0811 by Deere Guy, on Flickr
3. Route the new leg of the conversion harness over to the sensor and plug it in.
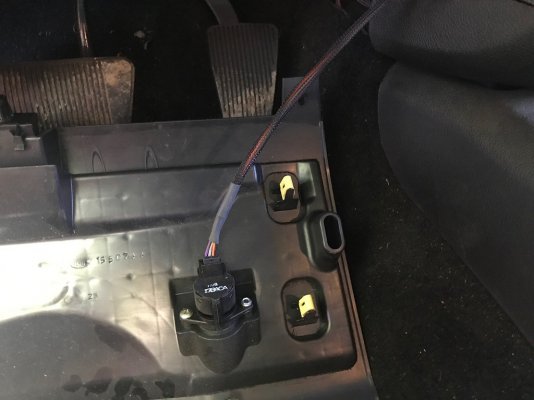 IMG_0084 by Deere Guy, on Flickr
4. Reinstall the knee kick panel.
Activating with AutoEngenuity
Note: Do this at your own risk. I am not responsible for anything that may happen to your truck as a result from performing this modification.
1. Connect the AE tool to the truck.
2. After selecting the truck, connect to the Body Control Module.
3. Select the "Test Onboard Systems" tab
4. Select Module Configuration from the drop down.
5 . Select "Initiate"
6. Accept the warning message.
7. Using the arrows on each side of the done button, scroll down to "vehicle config 3".
8. Press Done.
9. Using the arrow buttons select" HVAC Config" press Done.
10. Using the arrow buttons select "Dual Zone ATC" and select Done.
11. Wait for the write to complete.
12. Reboot the radio by pressing both knobs simultaneously for a few seconds.
13. Repeat the above process but this time select "Single Zone ATC"
14. Reboot the radio again.
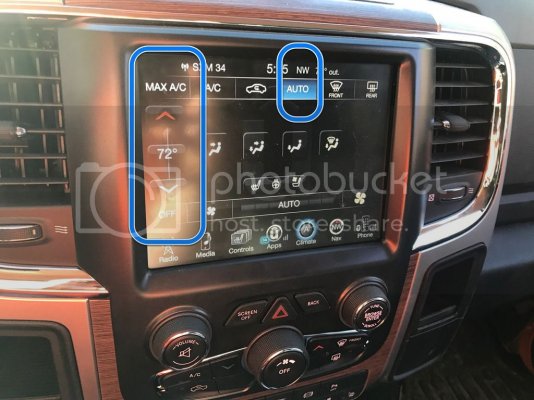
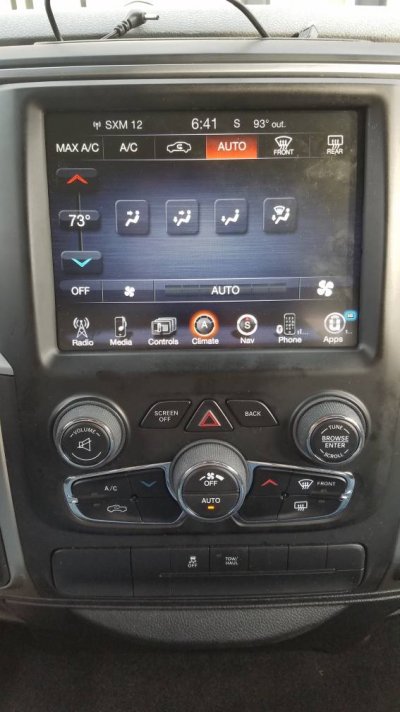
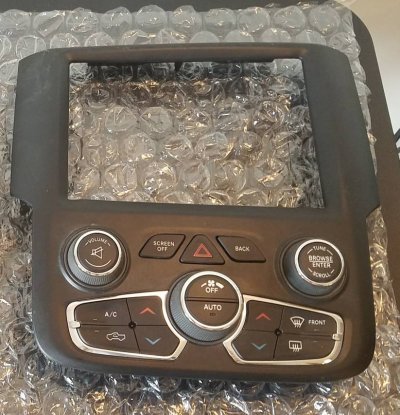
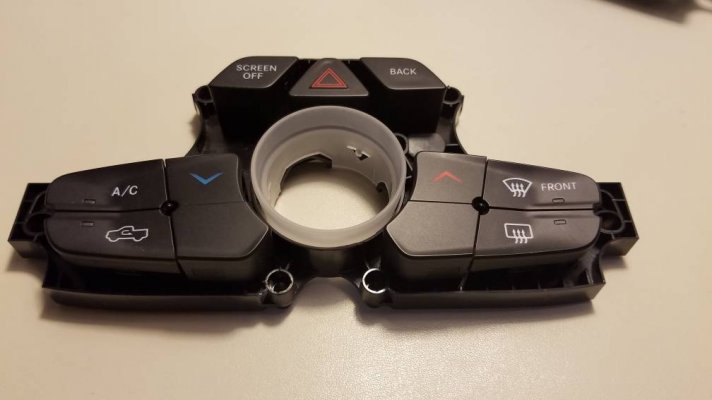
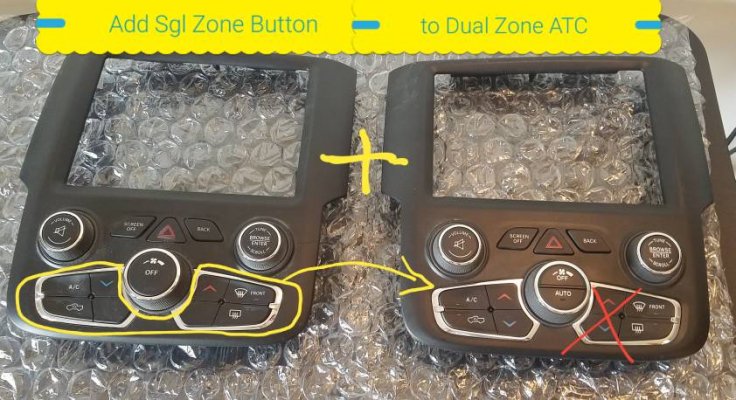
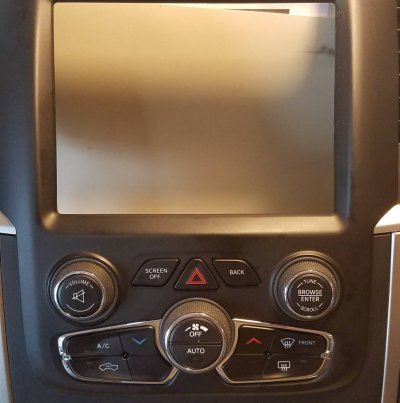
As you can see in the picture below, I have mine set for a single zone automatic temperature control. I am using a standard MTC bezel, and just using the "Auto" button on the radio to switch it into Automatic mode.
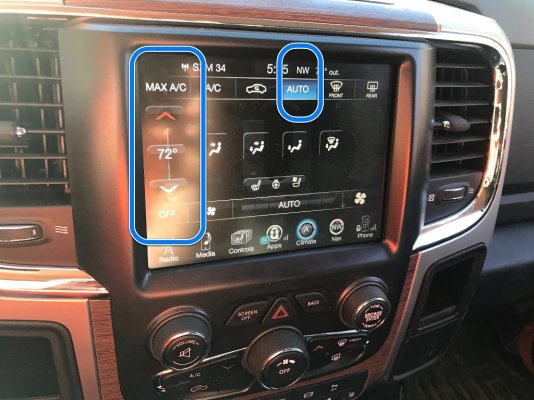 IMG_0813 by Deere Guy, on Flickr
This is a pretty easy and inexpensive mod in terms of parts. You basically need to buy a cabin temperature sensor, a connector, and some terminals and put it all together using an existing 8.4 conversion harness. The trouble with this mod, is that the feature has to be activated in the BCM. I used my AutoEngenuity tool to activate the feature, but unlike activating some other features where it was a smooth process, this caused corruption of my trucks “vehicle brand” which caused the 8.4 Radio to loose it logo and themes. I have not found a way to correctly reset the brand. If you have the AE tool, and want to try this mod, please be aware of this issue. I have not encountered any other problems with the truck due to this issue, but proceed at your own risk.
Anyways onto the mod:
Parts Needed:
(1) 55111178AC – CABIN AIR TEMPERATURE SENSOR
(1) 1-929170-4 – 4 WAY Connector Shell for Temperature Sensor
(4) 963715-1 – Female Terminals for 1-929170-4 (Temperature Sensor Connector)
(2) 1123343-1 – Female Terminals for 1318917 (HVAC Module Connector
Conversion Harness Modification
You will need to pin two new wires into pins 11 and 12 of the HVAC module side conector of the conversion harness. These wires will run from the HVAC module to behind the drivers side kick panel where the Cabing Air Temperature Sensor will be located (more on that below). I made my wires 80" in length. You will also need to splice wire # 2 for fused ignition power and wire #14 for ground. These will run to a new connector for the temperature sensor (1-929170-4). The following schematic shows how to wire it up.
 IMG_0083 by Deere Guy, on Flickr
Here's what my conversion harness looked ike after adding the temperature sensor wiring. Notice the new leg off of the harness. It is shown with the sensor attached.
 IMG_0812 by Deere Guy, on Flickr
Installing the Temperature Sensor
The temperature sensor is located behind the driver side knee kick panel. You will need to remove the panel and install the sensor.
1. Remove the two screws at the bottom of the panel and then pull the panel off.
 IMG_0809 by Deere Guy, on Flickr
2. Install the sensor.
 IMG_0811 by Deere Guy, on Flickr
3. Route the new leg of the conversion harness over to the sensor and plug it in.
 IMG_0084 by Deere Guy, on Flickr
4. Reinstall the knee kick panel.
Activating with AutoEngenuity
Note: Do this at your own risk. I am not responsible for anything that may happen to your truck as a result from performing this modification.
1. Connect the AE tool to the truck.
2. After selecting the truck, connect to the Body Control Module.
3. Select the "Test Onboard Systems" tab
4. Select Module Configuration from the drop down.
5 . Select "Initiate"
6. Accept the warning message.
7. Using the arrows on each side of the done button, scroll down to "vehicle config 3".
8. Press Done.
9. Using the arrow buttons select" HVAC Config" press Done.
10. Using the arrow buttons select "Dual Zone ATC" and select Done.
11. Wait for the write to complete.
12. Reboot the radio by pressing both knobs simultaneously for a few seconds.
13. Repeat the above process but this time select "Single Zone ATC"
14. Reboot the radio again.
As you can see in the picture below, I have mine set for a single zone automatic temperature control. I am using a standard MTC bezel, and just using the "Auto" button on the radio to switch it into Automatic mode.
 IMG_0813 by Deere Guy, on Flickr
Last edited:



 to have my 8.4 radio and heated/ cooled seats working
