Turn Signal Camera Install

Disclaimer: Links on this page pointing to Amazon, eBay and other sites may include affiliate code. If you click them and make a purchase, we may earn a small commission.

mcheath

Member
Joined
Jan 28, 2015
Posts
42
Reaction score
36
Location
Central California
Ram Year
2014
Engine
3.6
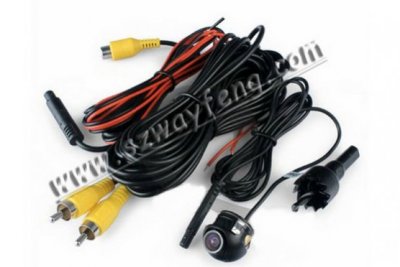
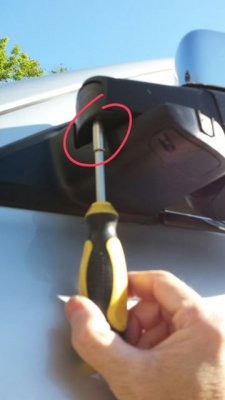
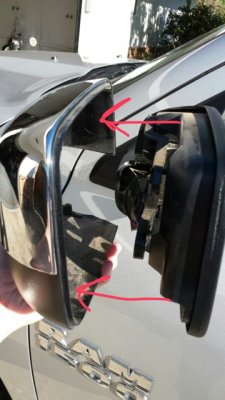
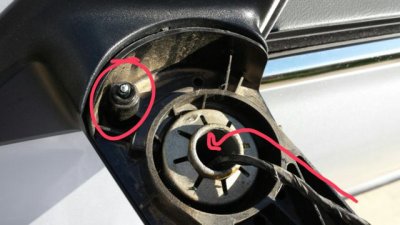
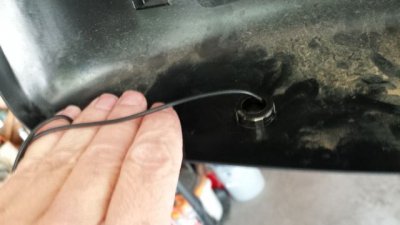
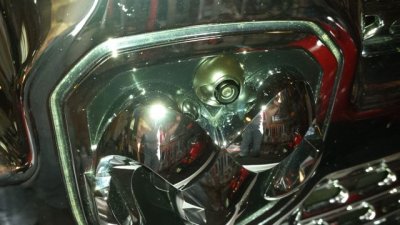
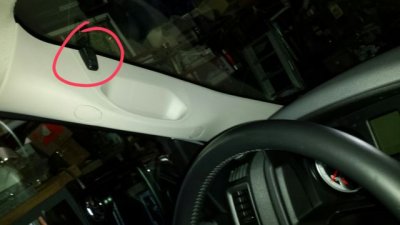
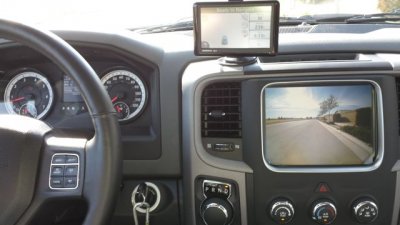
Here's how I installed turn signal cameras on my Ram pickup today.

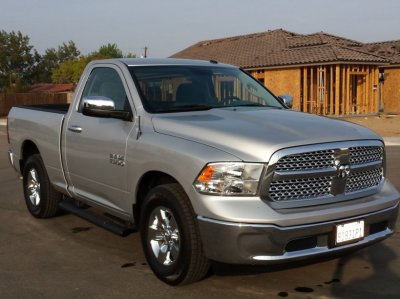
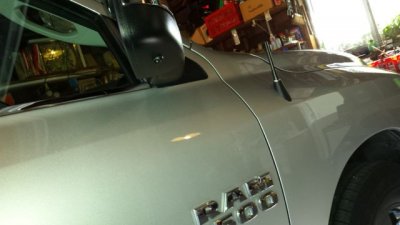
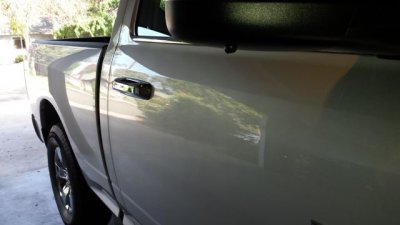
The truck, 2014 Tradesman single cab short bed. 3.6L, 8 speed, most of the interior options like PW and carpet.
47702d1427606522-turn_signal_camera_install-now.jpg

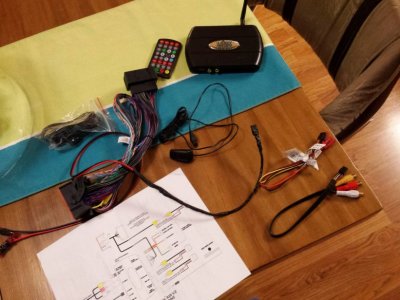
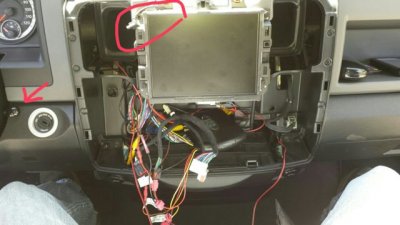
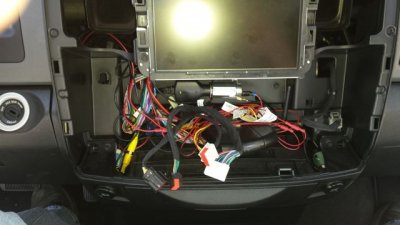
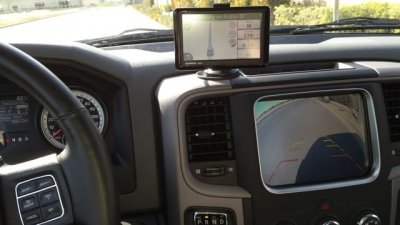
Came with the Uconnect 3.0 radio, RA1. I replaced it with a Uconnect RA3. Paid $166 for the radio. Did not go with the RA4 because I use a Garmin nav unit.

Also replaced the original steering wheel with one with leather and the audio controls.
 

Attachments

  • Now.jpg
    Now.jpg
    93.5 KB · Views: 5,934
OP
OP
M

mcheath

Member
Joined
Jan 28, 2015
Posts
42
Reaction score
36
Location
Central California
Ram Year
2014
Engine
3.6
To enable the cameras I bought the OEM Autopartsco Uconnect Lockpick Air Wifi V2. I went with this over the Customtronix option because it's not software based, which seems like nothing but trouble to me.

I had them add a microphone into the harness so I could use all the Bluetooth features.

Total cost was $525. Crazy amount of money.
47703d1427606562-turn_signal_camera_install-20150309_191818.jpg
 

Attachments

  • 20150309_191818.jpg
    20150309_191818.jpg
    92.7 KB · Views: 5,827
OP
OP
M

mcheath

Member
Joined
Jan 28, 2015
Posts
42
Reaction score
36
Location
Central California
Ram Year
2014
Engine
3.6
Tools used. You'll need a Torx 25 and 15 as well.
47704d1427606610-turn_signal_camera_install-20150328_151813.jpg

Bought the cameras from China. 20 bucks each. They rotate 360 degrees in the housing so you can place them at any angle, and have aluminum housings. Bought 3 cameras, one for the front as well.
47705d1427606610-turn_signal_camera_install-cameras1.jpg
 

Attachments

  • 20150328_151813.jpg
    20150328_151813.jpg
    61.1 KB · Views: 5,710
  • cameras1.jpg
    cameras1.jpg
    31.4 KB · Views: 5,776
OP
OP
M

mcheath

Member
Joined
Jan 28, 2015
Posts
42
Reaction score
36
Location
Central California
Ram Year
2014
Engine
3.6
Start by pulling the mirrors off, angle them open at the top, spray WD40 onto the upper clip holders, and insert both your hands as far as possible and slowly tug them off. They pop right off.
47706d1427606686-turn_signal_camera_install-20150328_092609.jpg

I've circled in red the spots you soak with WD40.
47707d1427606686-turn_signal_camera_install-2015-03-28_18.04.08.jpg

Here I've circled where these clips are and where they attach.
47708d1427606686-turn_signal_camera_install-2015-03-28_18.04.55.jpg
 

Attachments

  • 20150328_092609.jpg
    20150328_092609.jpg
    36.2 KB · Views: 5,790
  • 2015-03-28+18.04.08.jpg
    2015-03-28+18.04.08.jpg
    48.8 KB · Views: 5,787
  • 2015-03-28+18.04.55.jpg
    2015-03-28+18.04.55.jpg
    41.7 KB · Views: 5,777
OP
OP
M

mcheath

Member
Joined
Jan 28, 2015
Posts
42
Reaction score
36
Location
Central California
Ram Year
2014
Engine
3.6
Now dismantle the mirror. There are three T25 screws to undo inside the housing.
attachment.php

There is also a T15 under the mirror as seen here. I didn't know about it and broke it off on my first one.
attachment.php

The housings then snap off.
attachment.php

attachment.php
 

Attachments

  • 20150328_092950.jpg
    20150328_092950.jpg
    48.3 KB · Views: 5,607
  • 2015-03-28+18.03.31.jpg
    2015-03-28+18.03.31.jpg
    29.5 KB · Views: 5,637
  • 2015-03-28+18.07.23.jpg
    2015-03-28+18.07.23.jpg
    47.4 KB · Views: 5,648
  • 20150328_093311.jpg
    20150328_093311.jpg
    48.4 KB · Views: 5,662
OP
OP
M

mcheath

Member
Joined
Jan 28, 2015
Posts
42
Reaction score
36
Location
Central California
Ram Year
2014
Engine
3.6
You have to thread the camera wire through the mirror joint following the wires for heating the mirror and the power controls. (circled is where I broke the T15 screw off)
attachment.php

Now drill the holes for the cameras in the bottom of the housing. My cameras came with an 18.5mm hole saw. I used a bench press to drill the holes, measured 4 inches in from the outer tip and 1.5 inches in. (EDIT: I'd move them closer to the tip if I was doing it again. Maybe 3 inches in instead of 4)
attachment.php

attachment.php

attachment.php
 

Attachments

  • 2015-03-28+18.08.12.jpg
    2015-03-28+18.08.12.jpg
    46.6 KB · Views: 5,819
  • 20150328_093426.jpg
    20150328_093426.jpg
    41.7 KB · Views: 5,549
  • 20150328_094058.jpg
    20150328_094058.jpg
    42.4 KB · Views: 5,517
  • 20150328_094233.jpg
    20150328_094233.jpg
    40.4 KB · Views: 5,517
OP
OP
M

mcheath

Member
Joined
Jan 28, 2015
Posts
42
Reaction score
36
Location
Central California
Ram Year
2014
Engine
3.6
Insert the camera. You have to push pretty hard, I was careful to back up the housing with my knee while pressing the unit in. I tilted them outward to what seemed like an appropriate angle.
attachment.php

attachment.php
 

Attachments

  • 20150328_094523.jpg
    20150328_094523.jpg
    37 KB · Views: 5,517
  • 20150328_094528.jpg
    20150328_094528.jpg
    34.1 KB · Views: 5,544
OP
OP
M

mcheath

Member
Joined
Jan 28, 2015
Posts
42
Reaction score
36
Location
Central California
Ram Year
2014
Engine
3.6
Now to fish the wire through the mirror joint and to the inside of the door. Snap the plastic covers off the inside of the door where the mirror attaches. Then I inserted a heavy wire into the mirror joint and pulled it up.
attachment.php

Taped the camera end to the heavy wire and gently pulled it through.
attachment.php

The camera wire is now inside the door.
attachment.php
 

Attachments

  • 2015-03-28+18.02.07.jpg
    2015-03-28+18.02.07.jpg
    42.5 KB · Views: 5,450
  • 2015-03-28+18.10.50.jpg
    2015-03-28+18.10.50.jpg
    35.6 KB · Views: 5,417
  • 2015-03-28+18.01.27.jpg
    2015-03-28+18.01.27.jpg
    47.4 KB · Views: 5,417
OP
OP
M

mcheath

Member
Joined
Jan 28, 2015
Posts
42
Reaction score
36
Location
Central California
Ram Year
2014
Engine
3.6
GO TO PAGE 4 OF THIS WRITEUP, I'VE CHANGED THE ROUTE FOR GETTING THE WIRE INTO THE CAB

To do this right I should have pulled the entire door panel off and routed through the factory rubber accordion connector between the door and cab.

But I did the easy way out. My route is in red. Merely undid the one connector screw for the side door panel to allow me to hide the wire under it.
attachment.php

Hide the wire under the rubber accordions large flange.
attachment.php

Then zip tied it to the rubber accordion and routed it inside the cab behind the access panel on each side of the dash by merely running it behind the door seal.
attachment.php

This is not the best solution, and I will probably think about it and try to do something more durable.
 

Attachments

  • 2015-03-28+18.02.39.jpg
    2015-03-28+18.02.39.jpg
    45.2 KB · Views: 5,466
  • 2015-03-28+18.00.27.jpg
    2015-03-28+18.00.27.jpg
    48.5 KB · Views: 5,413
  • 2015-03-28+18.12.20.jpg
    2015-03-28+18.12.20.jpg
    33.1 KB · Views: 5,361
OP
OP
M

mcheath

Member
Joined
Jan 28, 2015
Posts
42
Reaction score
36
Location
Central California
Ram Year
2014
Engine
3.6
On the passenger side I had to route behind the glove box. Easy to do by pulling the box door off and the side panel for the dash off.
attachment.php

Zip tied the camera cable behind the glove box door.
attachment.php

And that brings us to the rats nest of wires that is the Lockpick Air.
attachment.php

The arrow is pointing at where I mounted the IR receiver for the Lockpicks remote control. The circle is around the Garmin Nav units power feed which comes from a 12v power adapter I installed under the radio head.
 

Attachments

  • 2015-03-28+18.13.09.jpg
    2015-03-28+18.13.09.jpg
    45.1 KB · Views: 5,420
  • 2015-03-28+18.13.45.jpg
    2015-03-28+18.13.45.jpg
    51.3 KB · Views: 5,427
  • 2015-03-28+18.19.11.jpg
    2015-03-28+18.19.11.jpg
    44.3 KB · Views: 5,444
OP
OP
M

mcheath

Member
Joined
Jan 28, 2015
Posts
42
Reaction score
36
Location
Central California
Ram Year
2014
Engine
3.6
Wire the Lockpick up as per the directions. It was pretty easy really. Here it is all tucked in and ready to be buttoned up.
attachment.php

Before putting the mirrors back on I put some silicone in the tops of the cameras to keep water out, and then spread some Goop glue around the camera bases to help hold them in tight.
attachment.php

Mirrors simply snap back on, press gently.
 

Attachments

  • 20150328_150321.jpg
    20150328_150321.jpg
    43.1 KB · Views: 3,883
  • 2015-03-28+18.00.55.jpg
    2015-03-28+18.00.55.jpg
    47 KB · Views: 4,091
OP
OP
M

mcheath

Member
Joined
Jan 28, 2015
Posts
42
Reaction score
36
Location
Central California
Ram Year
2014
Engine
3.6
While I was at it I installed a front camera as well. It's in the top of the Ram logo in the grill.
attachment.php

The write up for that is another story...
attachment.php
 

Attachments

  • 20150328_163541.jpg
    20150328_163541.jpg
    55.1 KB · Views: 3,753
  • 20150328_163604.jpg
    20150328_163604.jpg
    62.2 KB · Views: 3,660
OP
OP
M

mcheath

Member
Joined
Jan 28, 2015
Posts
42
Reaction score
36
Location
Central California
Ram Year
2014
Engine
3.6
Also installed the microphone for the Lockpick on the driver's side A pillar trim.
attachment.php

Here's how the cameras look on the mirrors installed.
attachment.php

attachment.php

Noticeable if you are observant, but they are pretty small.
 

Attachments

  • getPart.jpg
    getPart.jpg
    34.5 KB · Views: 3,757
  • 20150328_163632.jpg
    20150328_163632.jpg
    37.4 KB · Views: 3,696
  • 20150328_163658.jpg
    20150328_163658.jpg
    37.9 KB · Views: 3,687
OP
OP
M

mcheath

Member
Joined
Jan 28, 2015
Posts
42
Reaction score
36
Location
Central California
Ram Year
2014
Engine
3.6
And here's how they work. I had previously installed a tailgate handle back up camera a couple of weeks ago. The nice thing about the Lockpick is that you don't have to have the dealer program anything.

Here's the tailgate cam.
attachment.php


Front Cam.
attachment.php


Driver's side cam.
attachment.php


Passenger side cam.
attachment.php
 

Attachments

  • 20150328_161943.jpg
    20150328_161943.jpg
    43.5 KB · Views: 3,803
  • 20150328_161819.jpg
    20150328_161819.jpg
    46.9 KB · Views: 3,797
  • 20150328_161836.jpg
    20150328_161836.jpg
    43.4 KB · Views: 3,778
  • 20150328_161846.jpg
    20150328_161846.jpg
    41.7 KB · Views: 3,768
OP
OP
M

mcheath

Member
Joined
Jan 28, 2015
Posts
42
Reaction score
36
Location
Central California
Ram Year
2014
Engine
3.6
I think I need to adjust the drivers side cam up a little bit. They are adjustable with an allen wrench on the set screw at the back.

Drove around and tried them out, the turn signal cams very nicely show the blind spots and the front cam is great for parking spots with trees and fences and such.

Also the Lockpick allows you to stream your smartphone over the RA3 unit. Here's an original Star Trek episode playing off Netflix. Sound routes through the truck speakers and it plays quite smooth.
attachment.php

Bad idea when driving of course.

All the cams are set to activate automatically, and they function very well. The resolution on the screen is not the greatest, probably from the cheaper cams i bought.

Total costs: $125 for the tailgate cam, $166 for the RA3, $125 for the steering wheel, $525 for the Lockpick Air, $60 for the cams. Grand total of $1,001 dollars, plus a couple of trips to O'Reillys for misc parts. Say $1,050 more or less.

Probably silly to spend that kind of money on all this, but I wanted to go all high tech on this as I've never had anything like it before.

20150315_170001.jpg
 

Jmhm17

Senior Member
Joined
Feb 17, 2014
Posts
1,402
Reaction score
495
Location
Massachusetts
Ram Year
2014
Engine
5.7L HEMI
Nice detailed write up. you don't see many like this anymore. Very neat.
 

rablwo

Junior Member
Joined
Mar 30, 2014
Posts
29
Reaction score
1
Ram Year
2014 1500 Sport CC 4X4
Engine
5.7 Hemi
I appreciate the write up. I am looking at doing the same project. How are you liking the v2 air so far? I want the blind spot cameras but have heard some not great reviews of the coastaltech solution.
 

Bigdaddy

Senior Member
Military
Joined
Dec 13, 2011
Posts
2,422
Reaction score
480
Ram Year
2022 3500 Laramie CCLB
Engine
6.7L Diesel Cummins
Wow, man you got game, so what made you wanted to tackle this?
 
Top